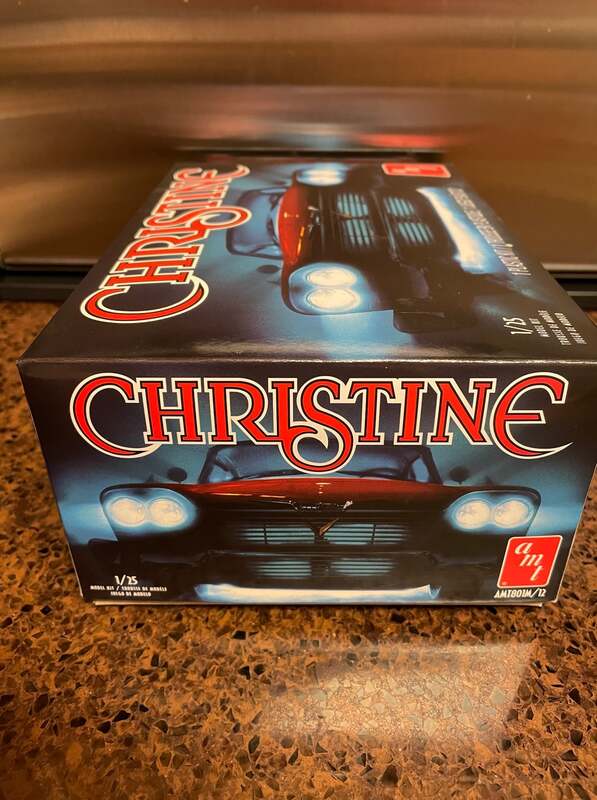
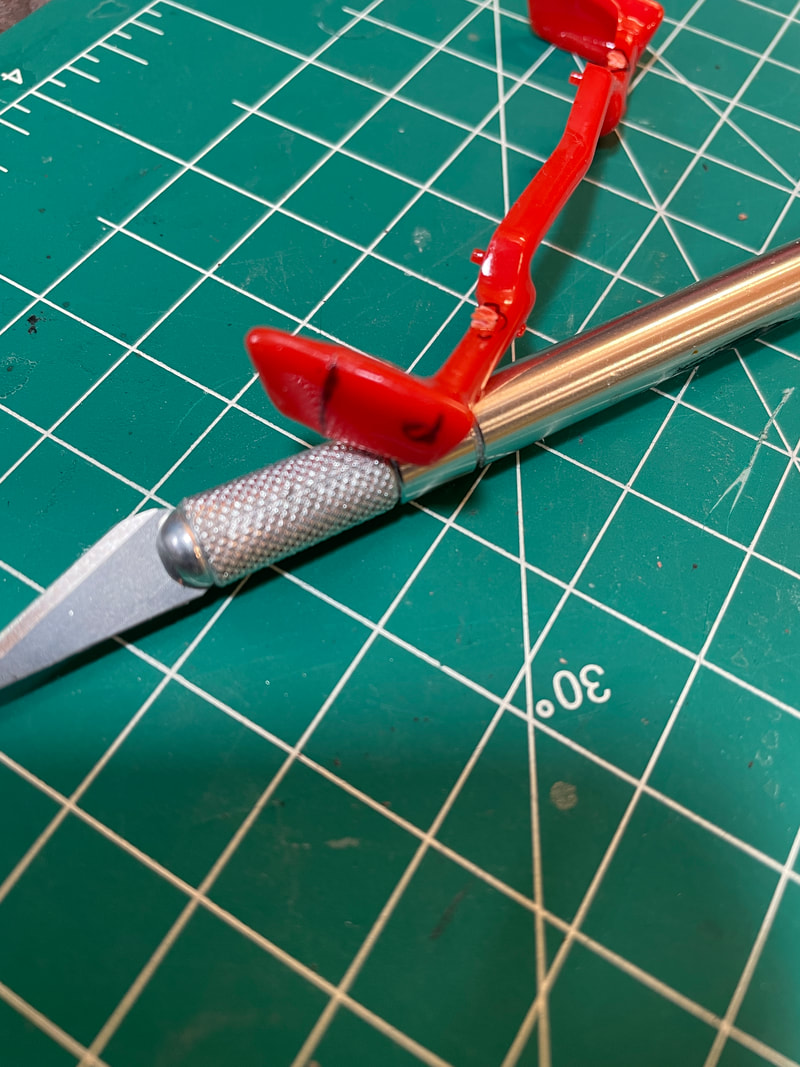
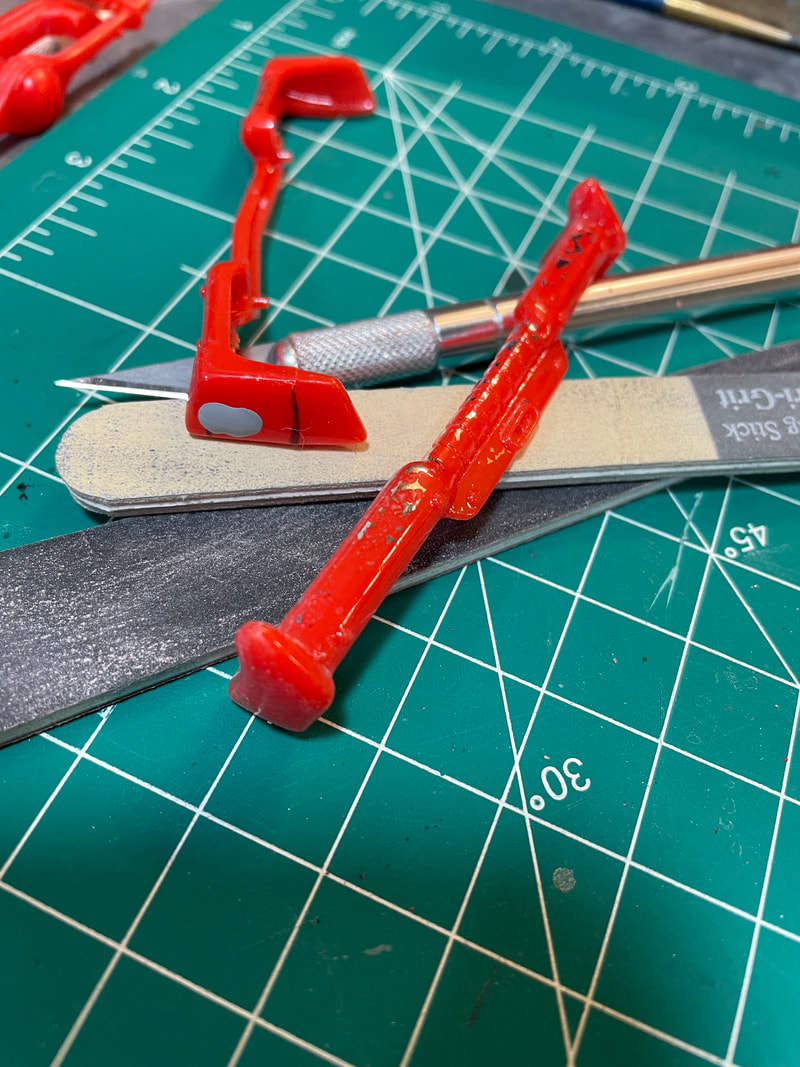
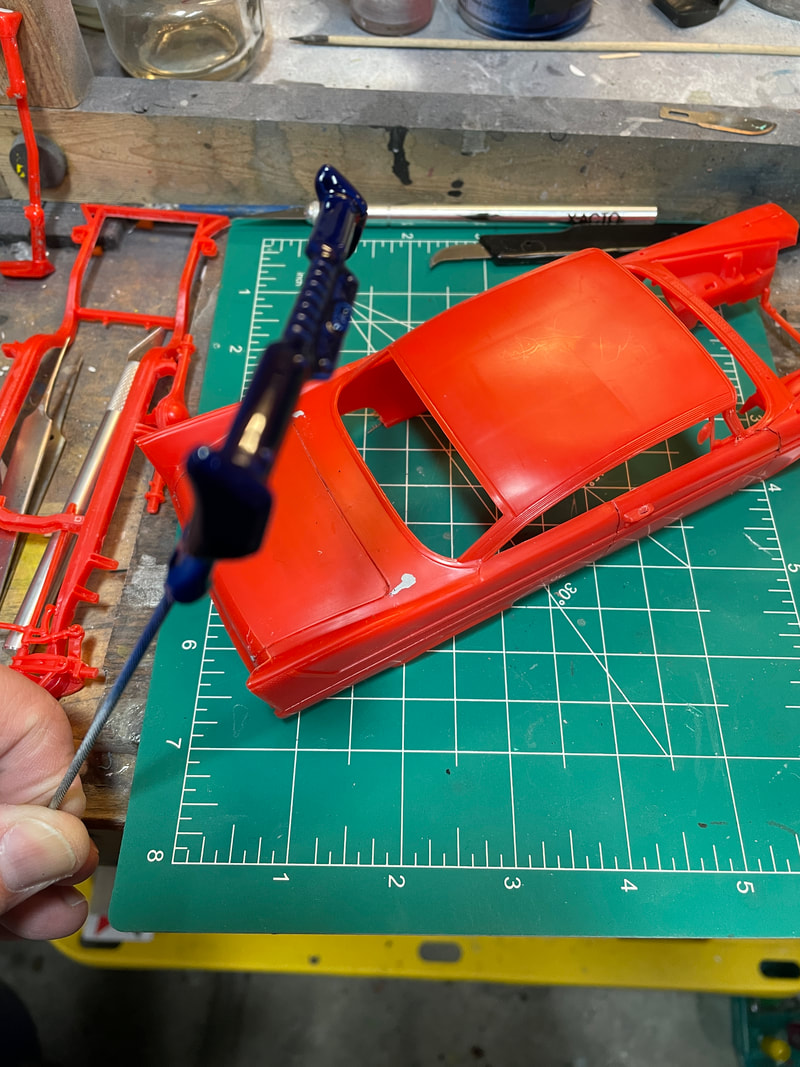
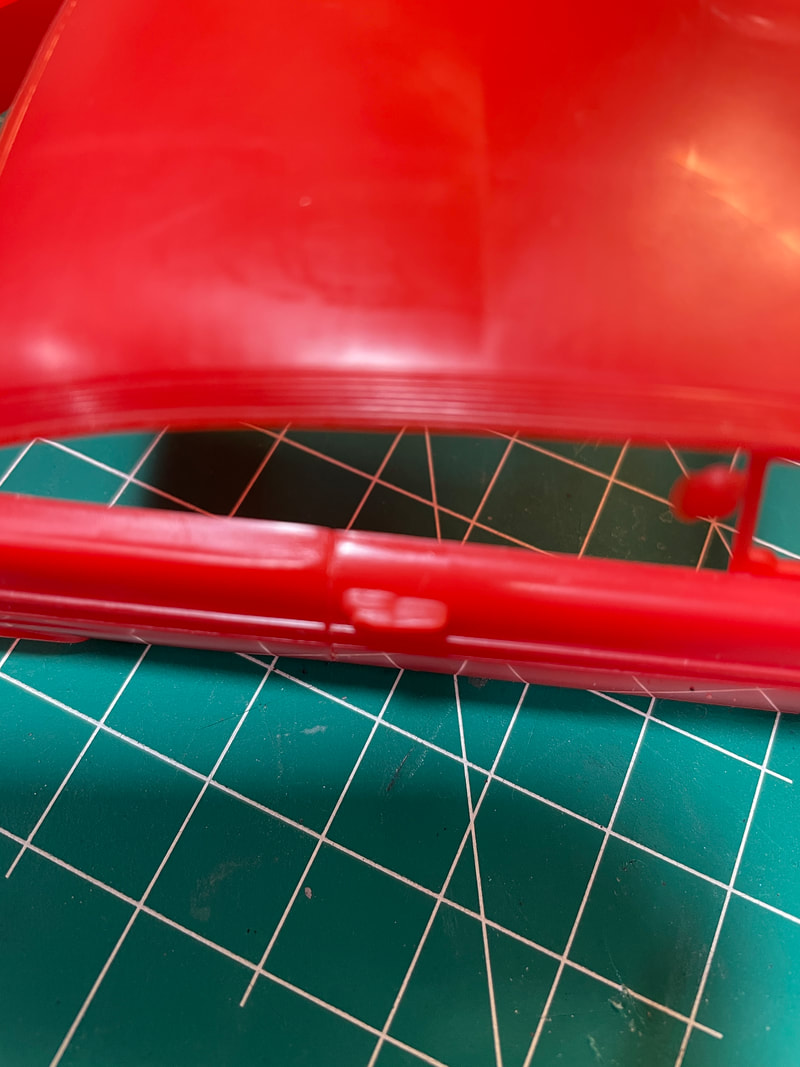
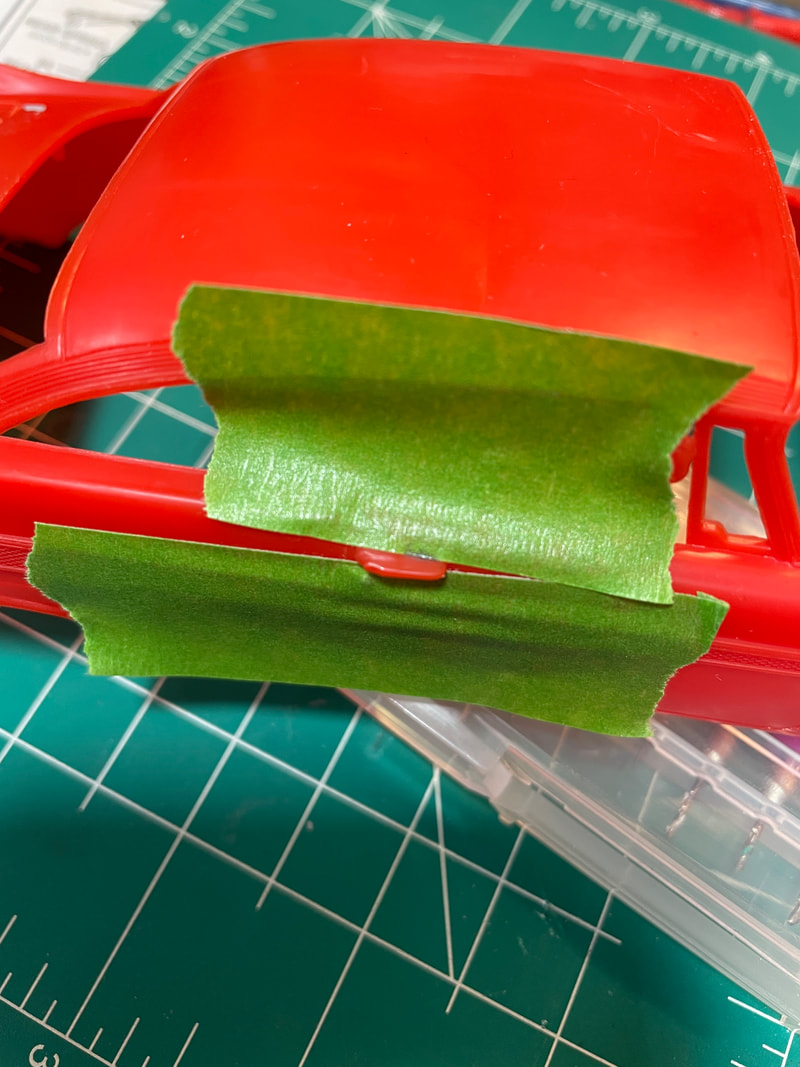
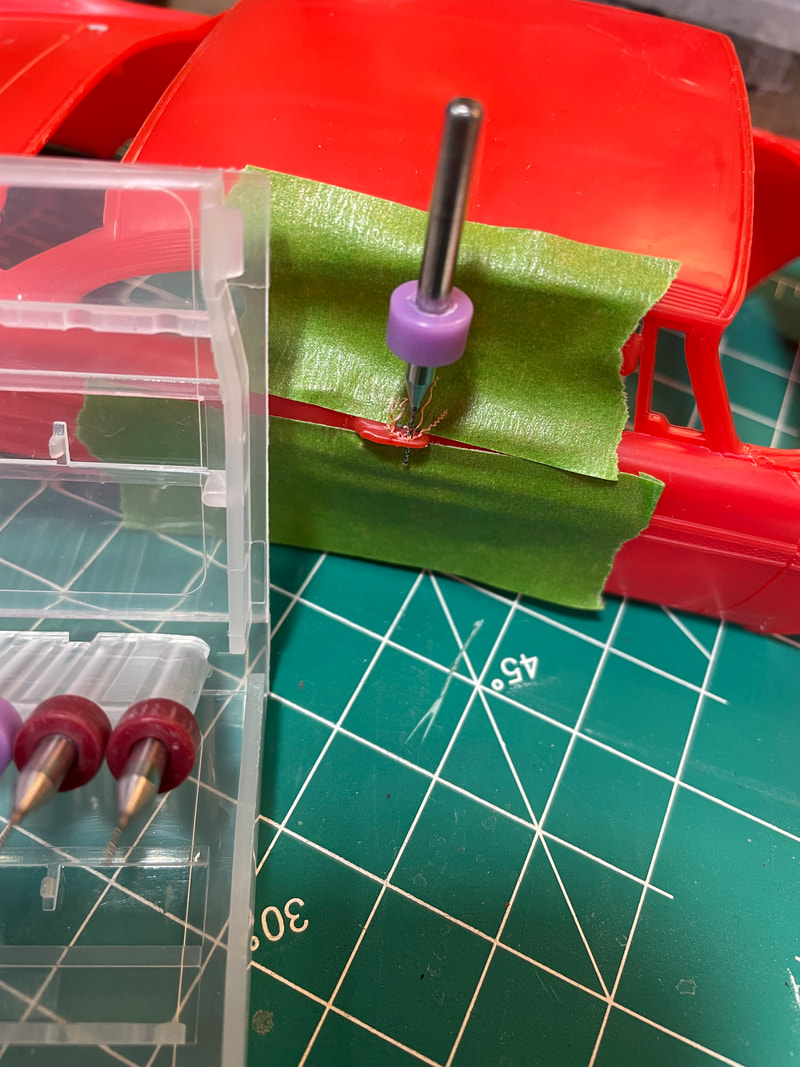
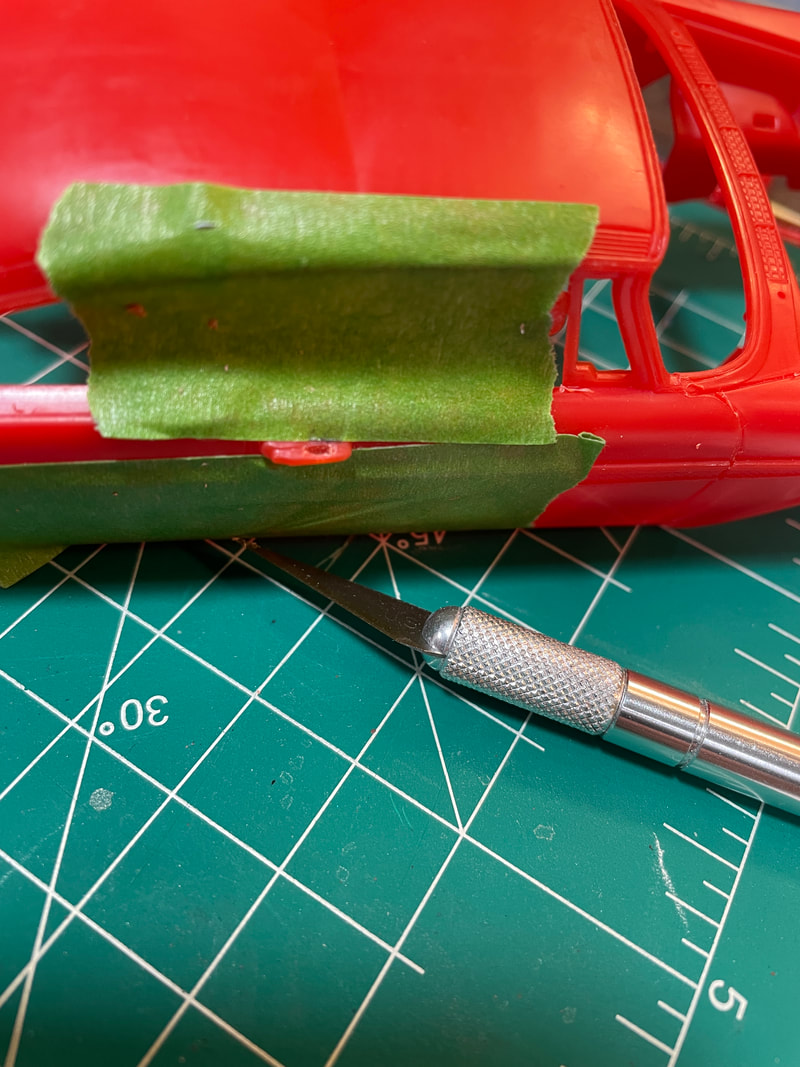
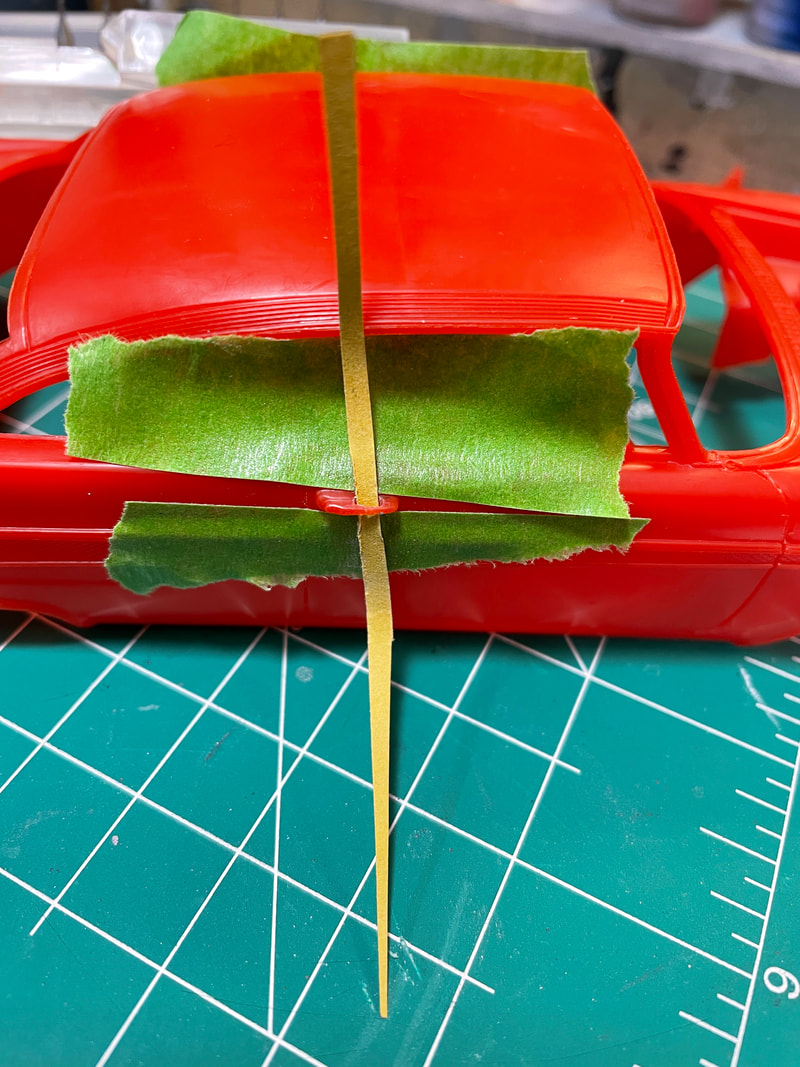
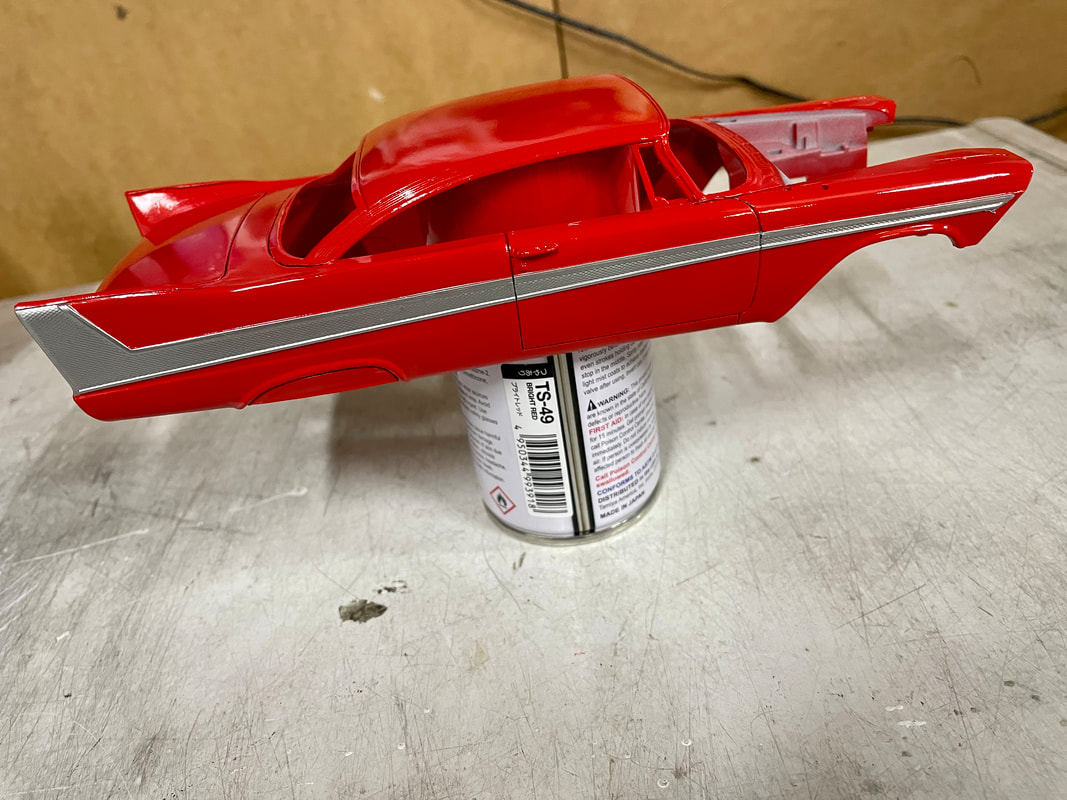
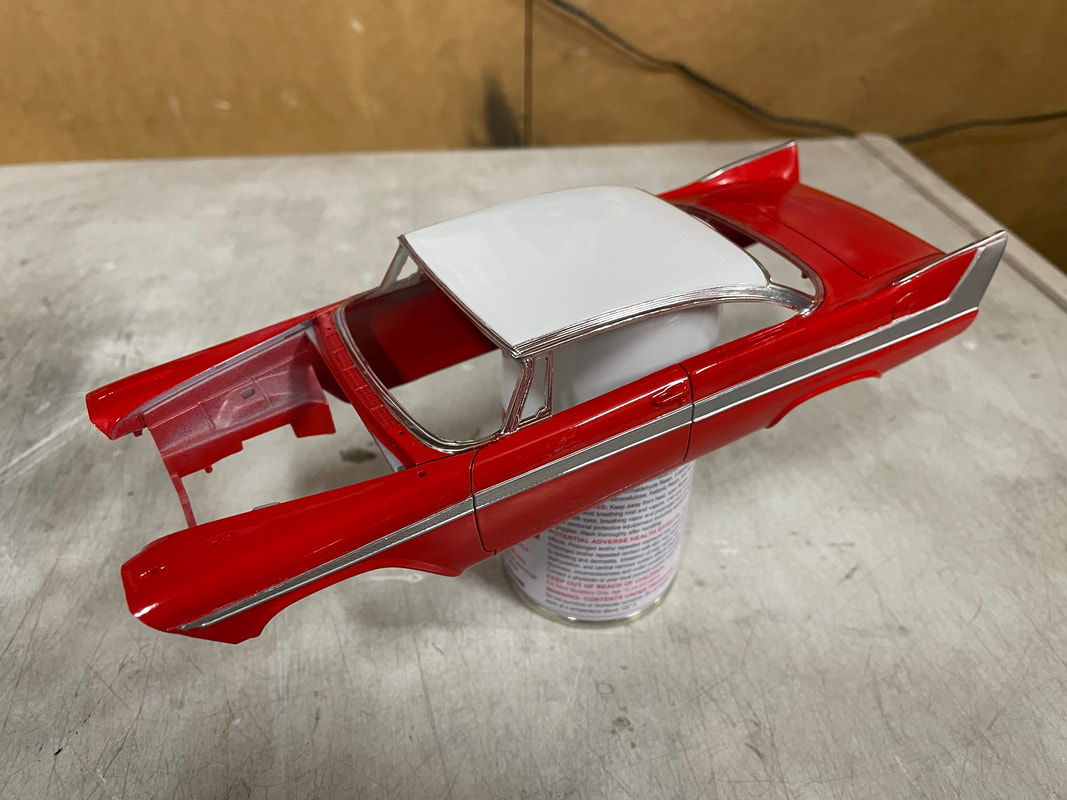
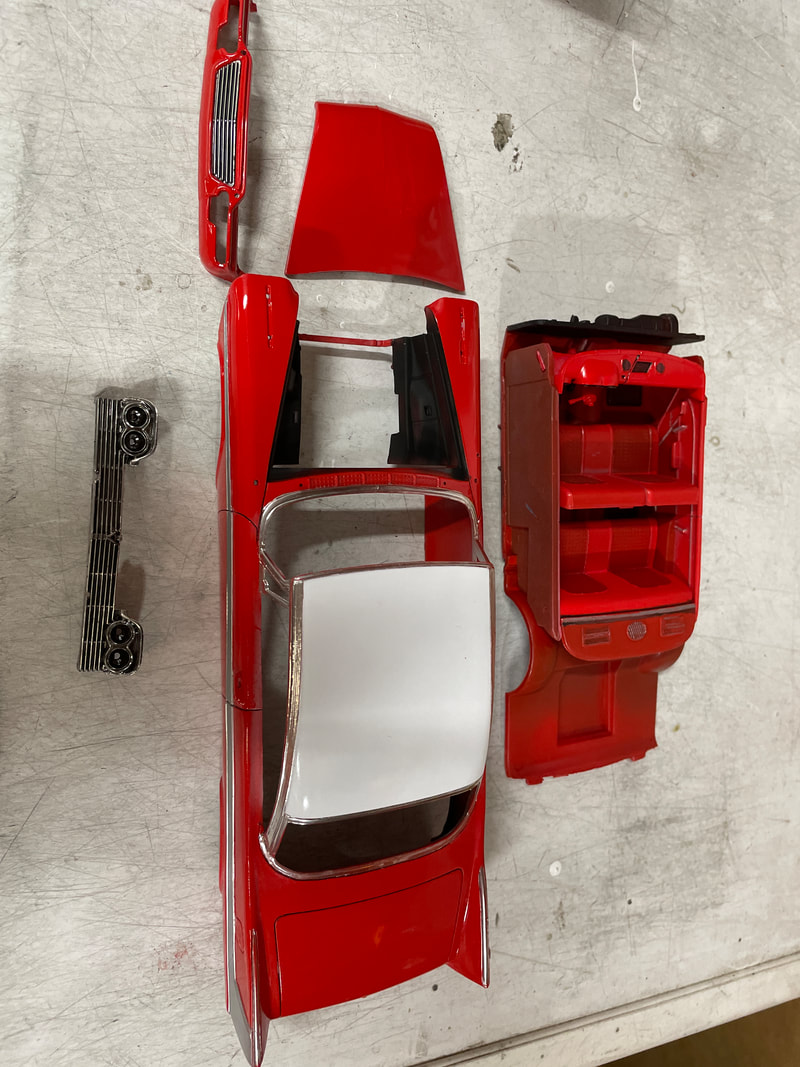
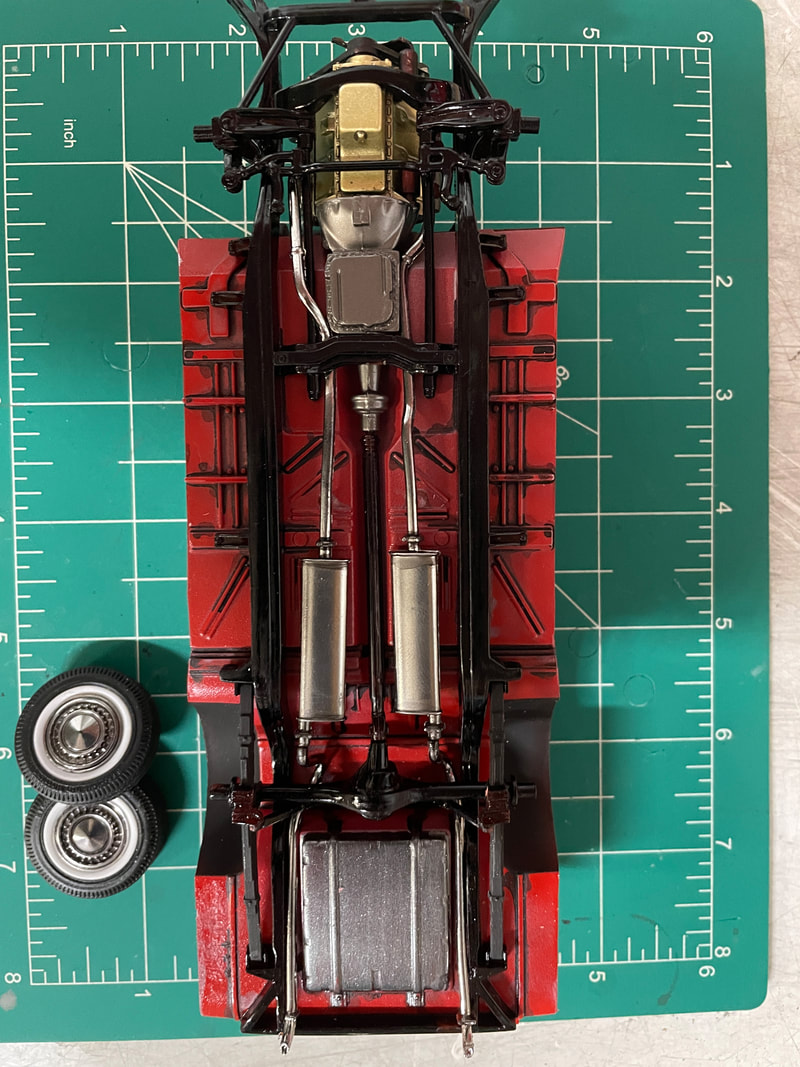
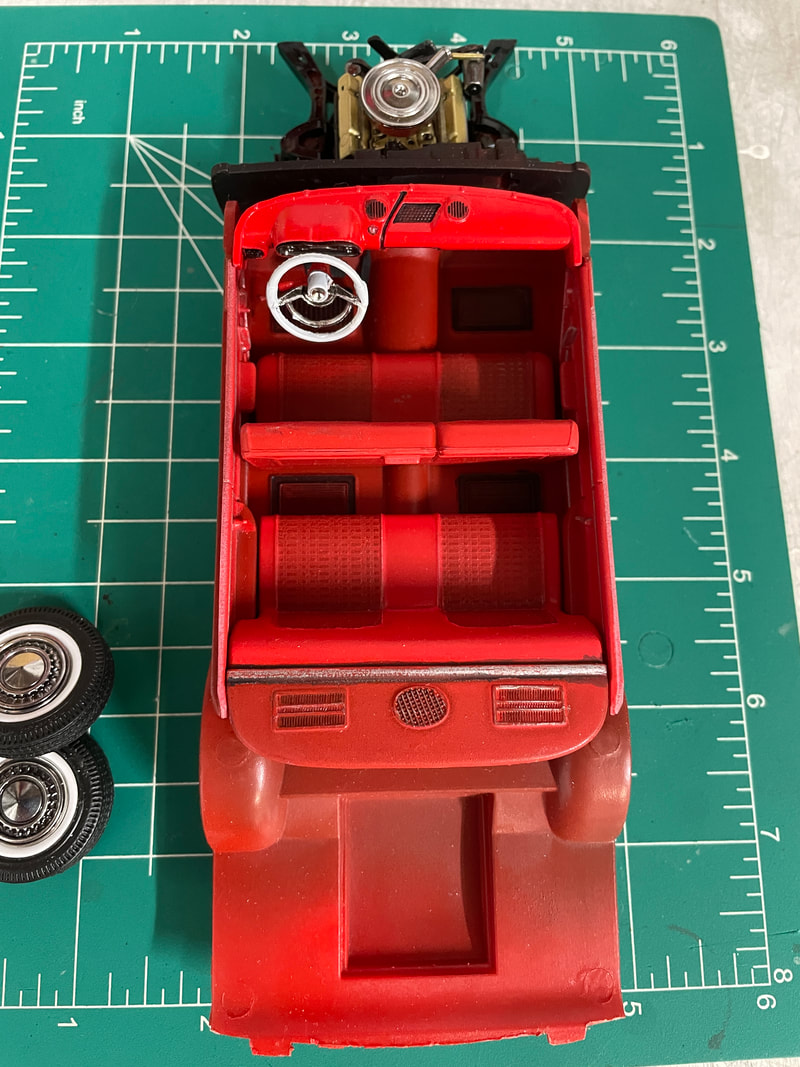
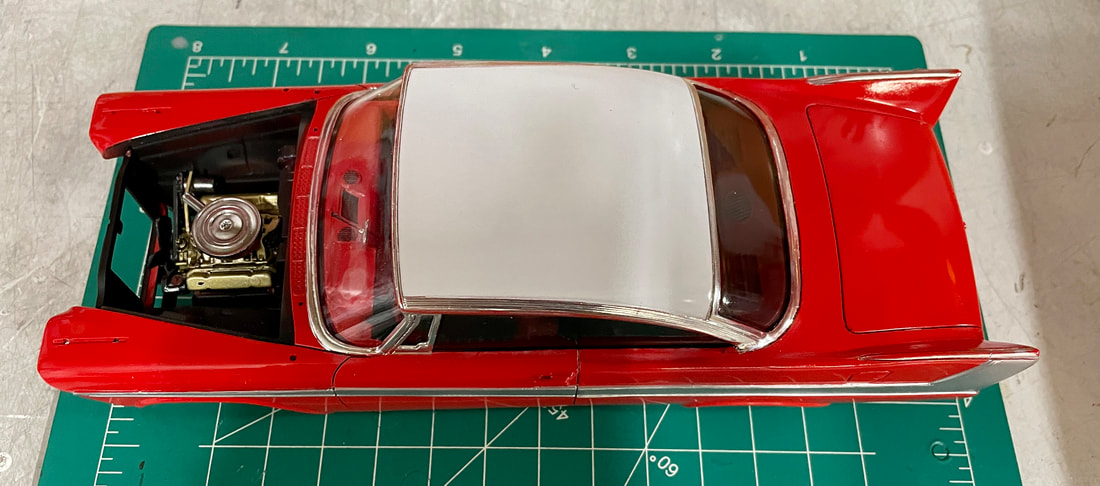
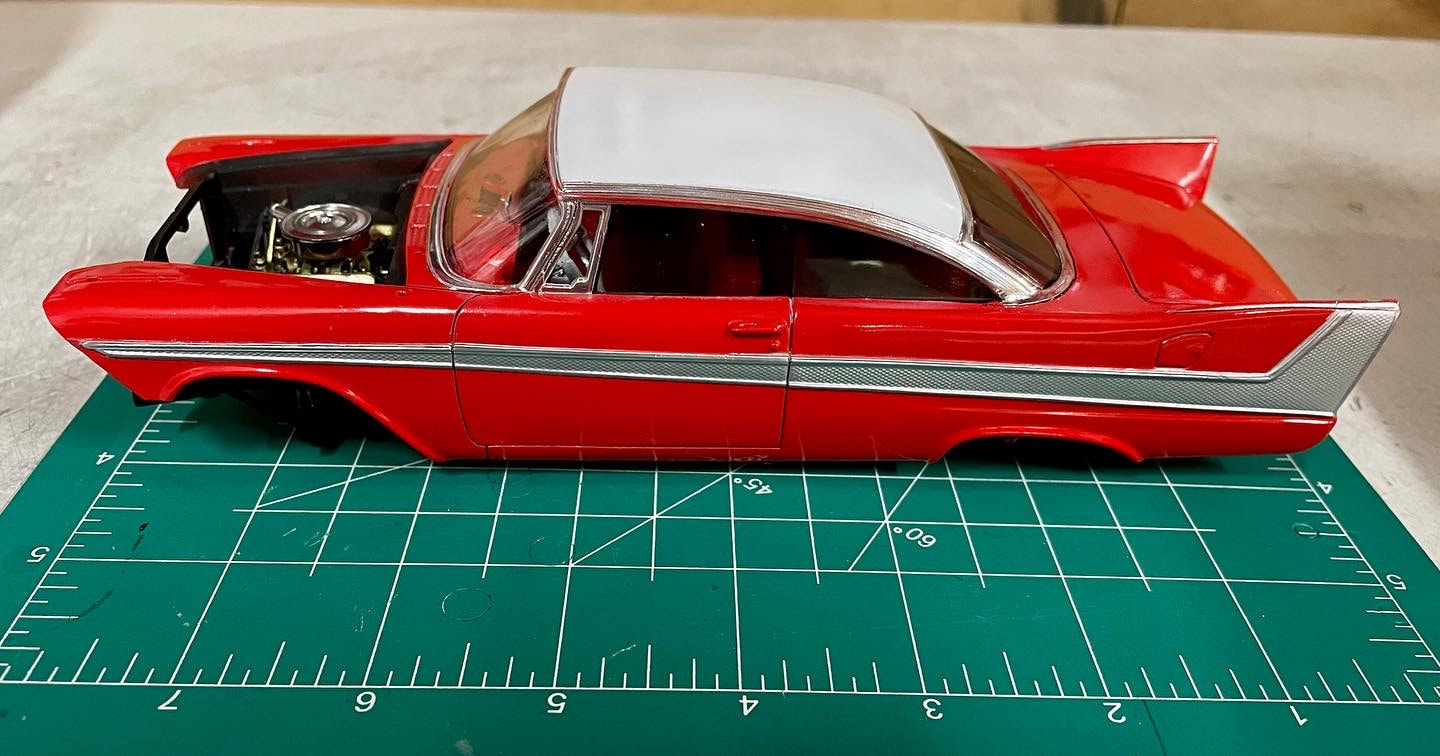
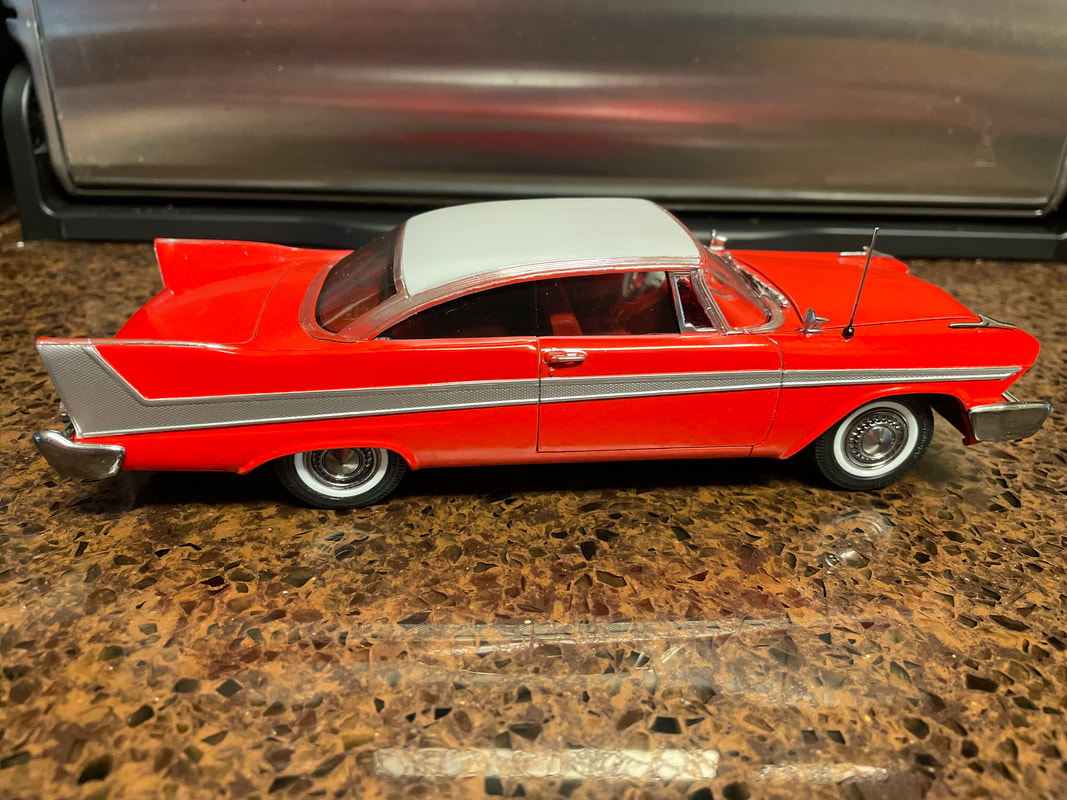
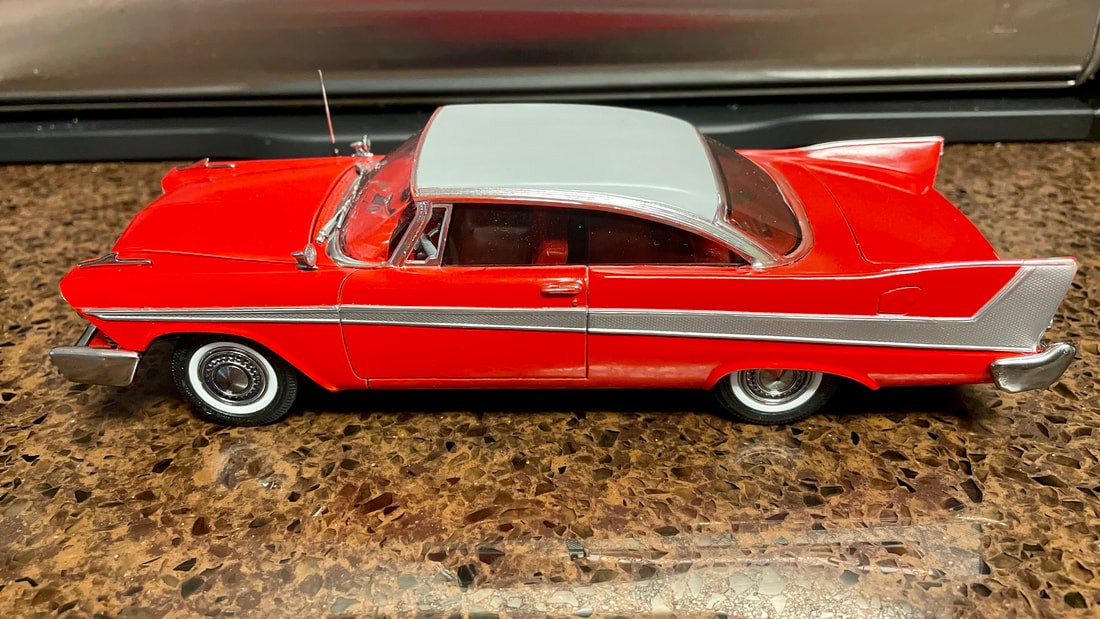
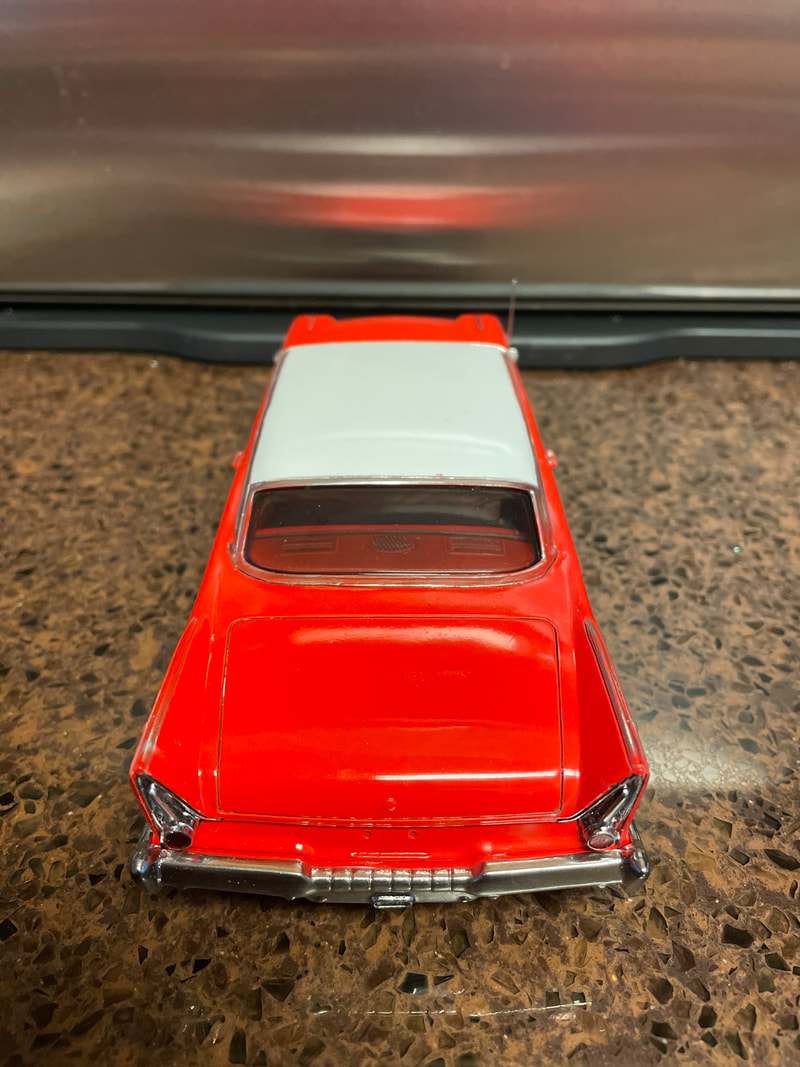
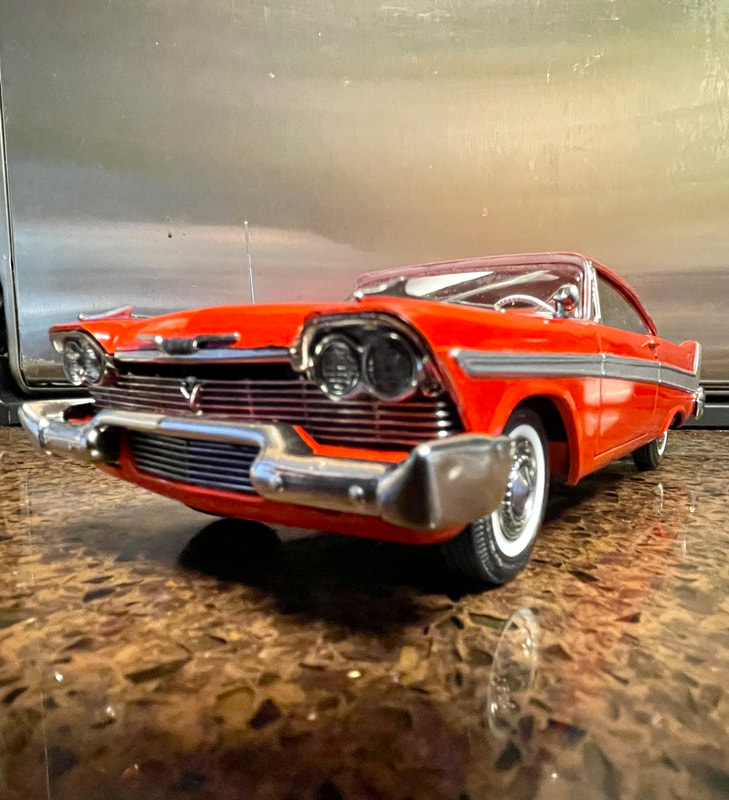
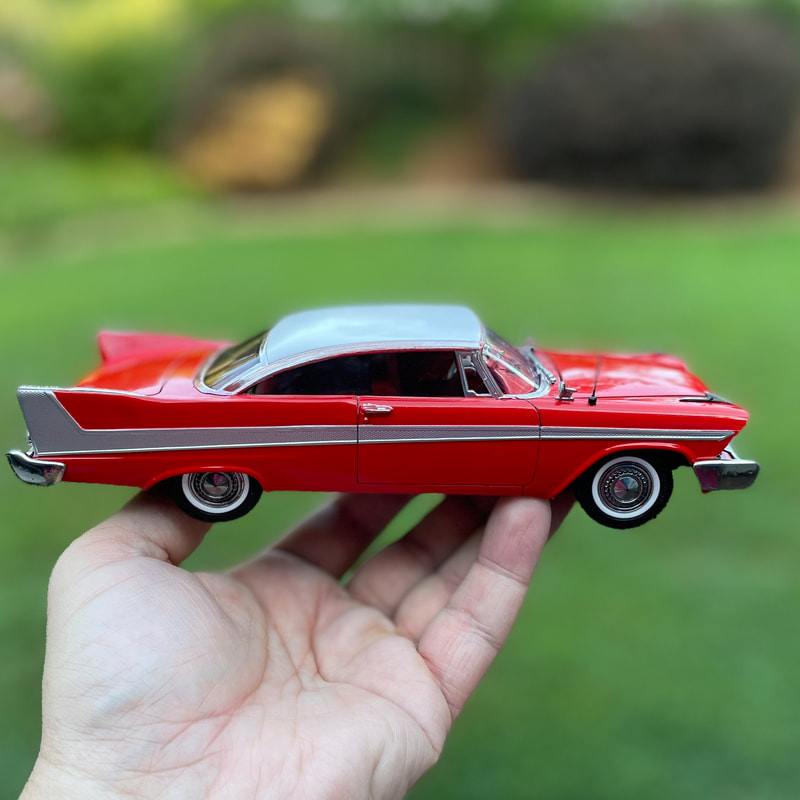
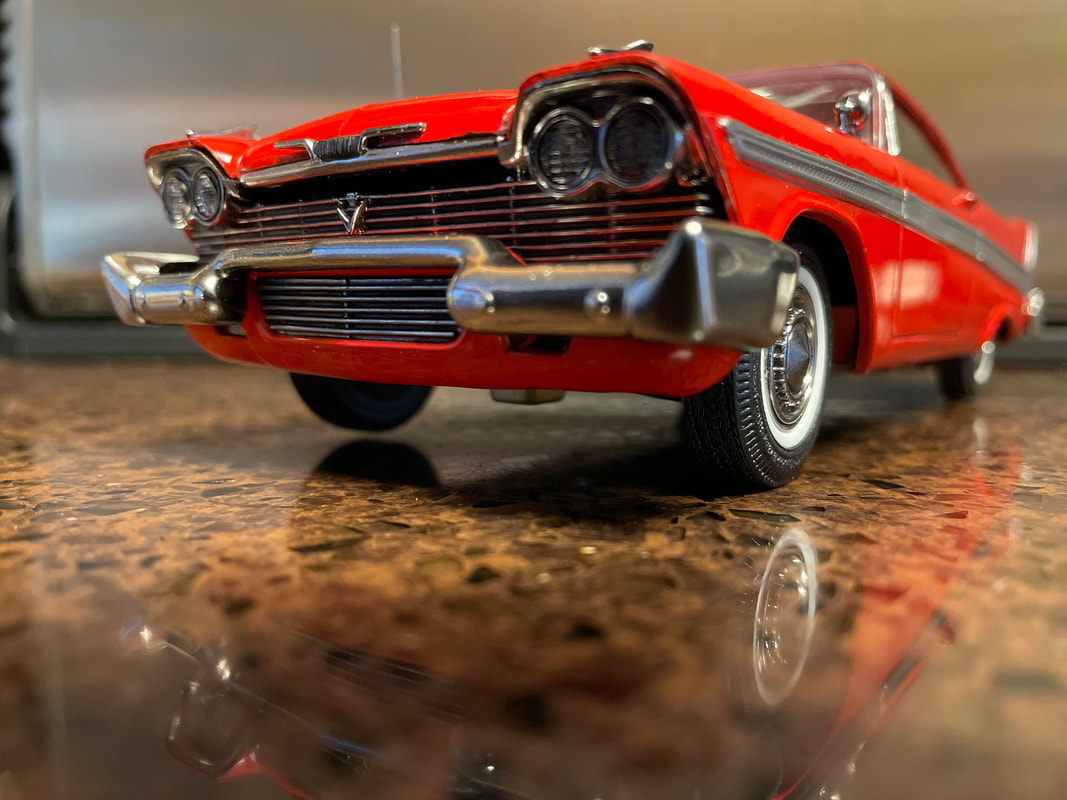
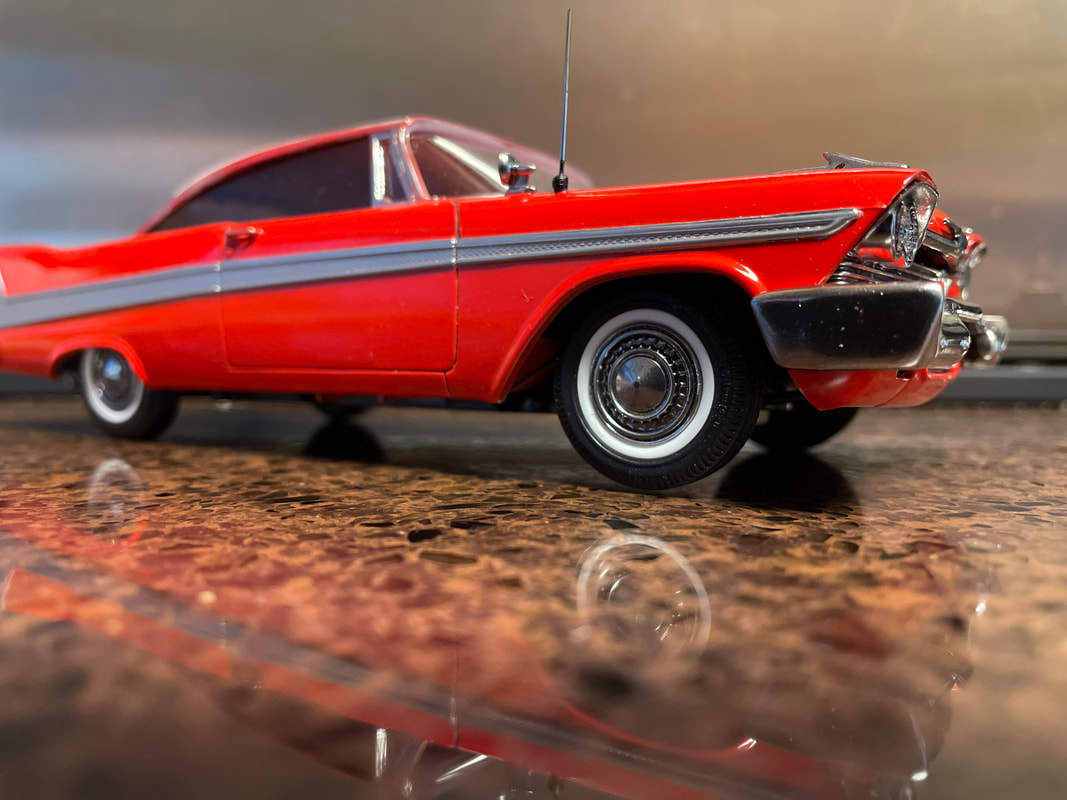
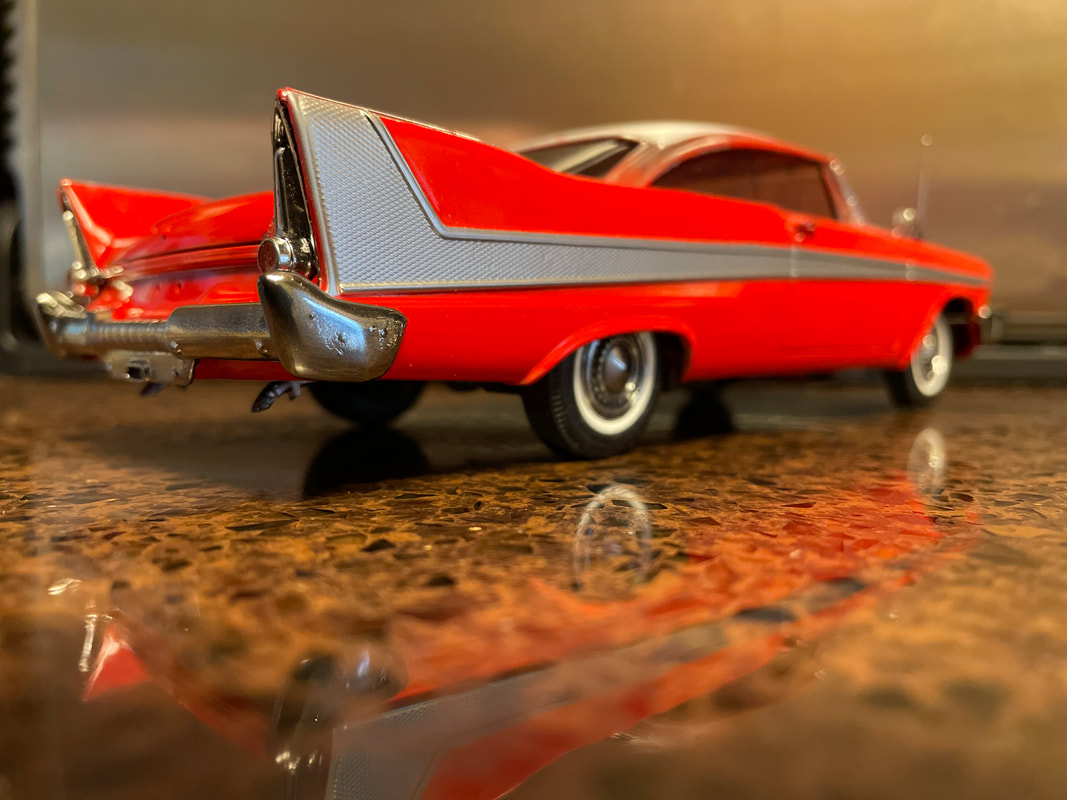
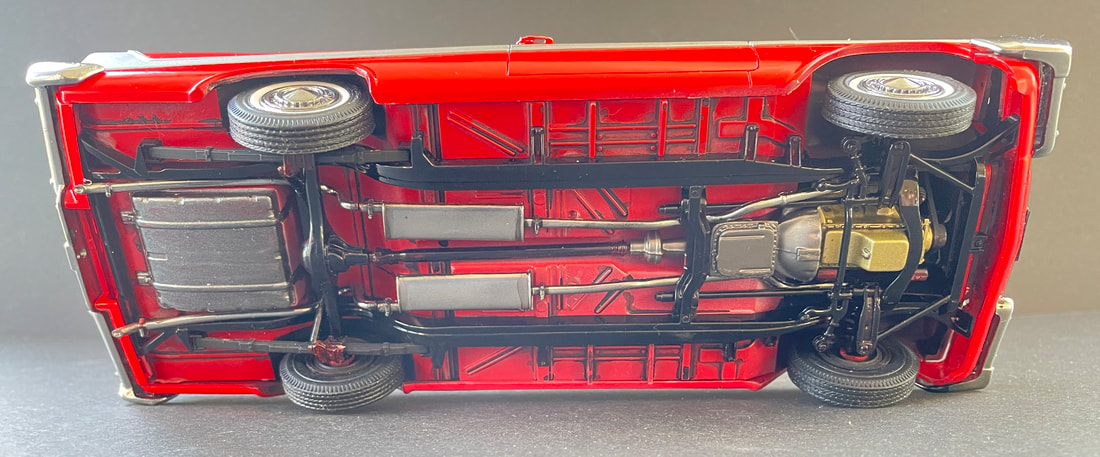
AMT 1/25 Plymouth Fury "Christine"


This kit was gifted to me by my excellent Brother-in-law, who typically gives me something '80's to build as a Christmas gift. I always look forward to it!
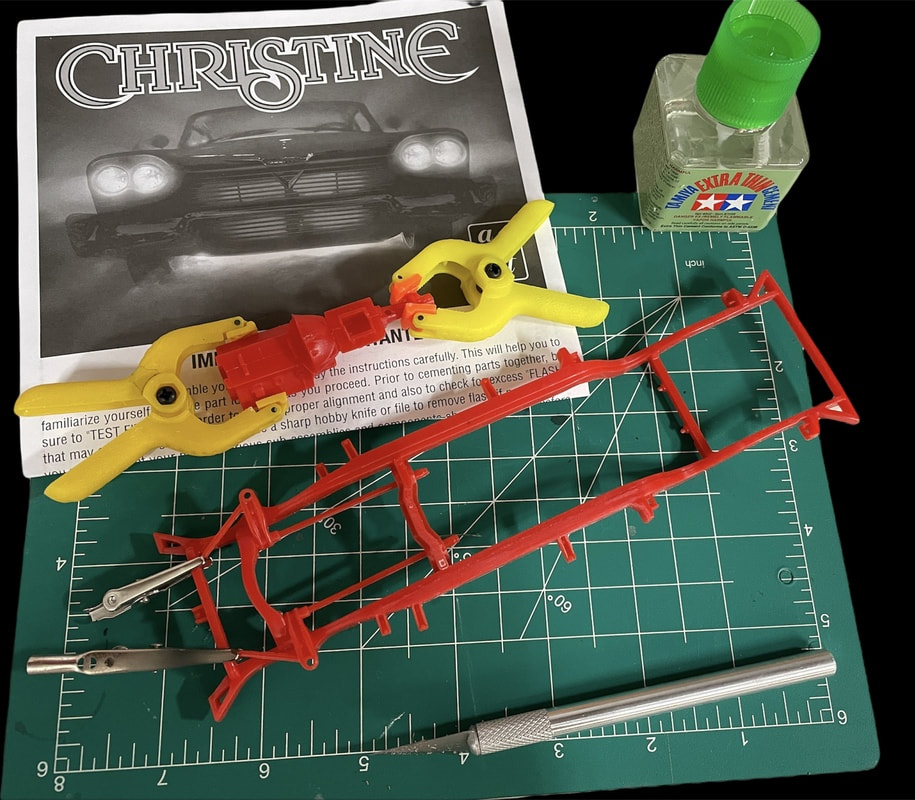
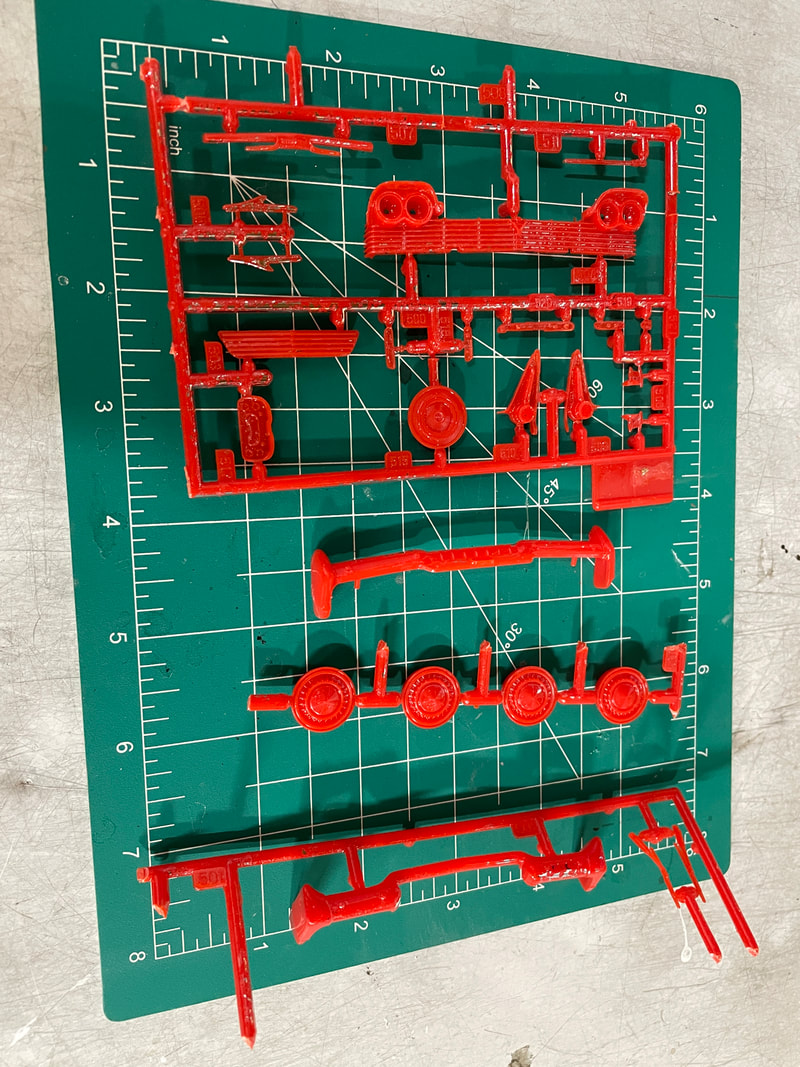
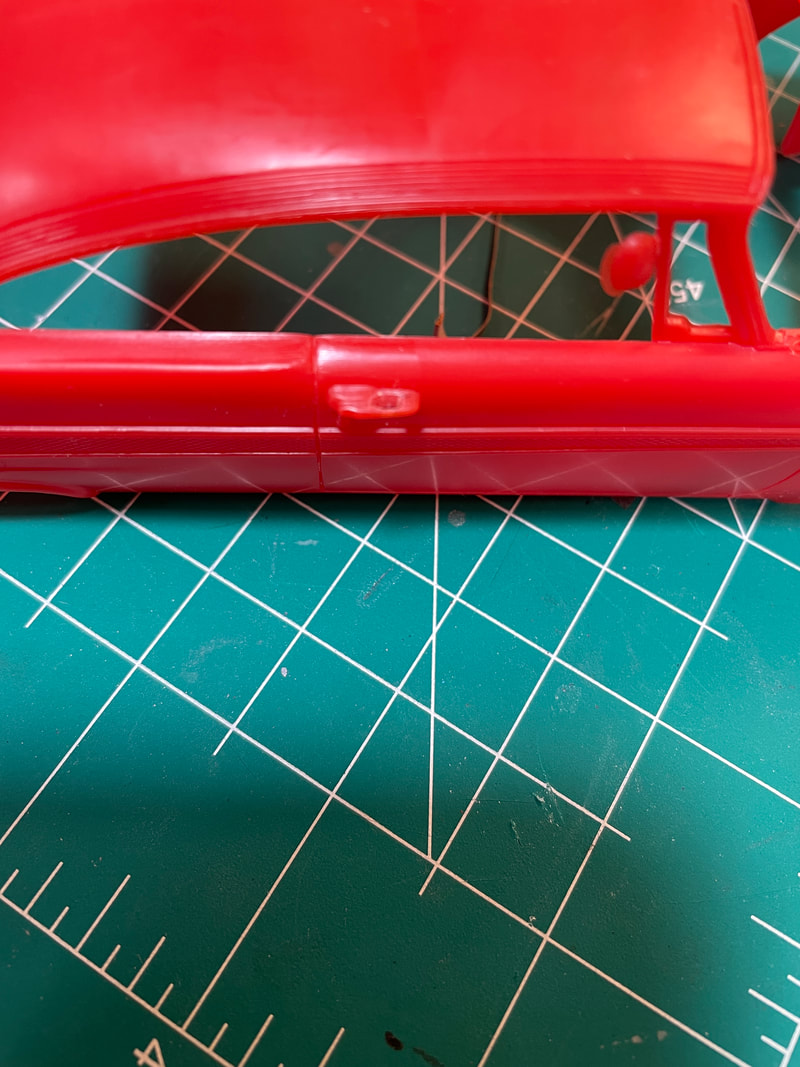
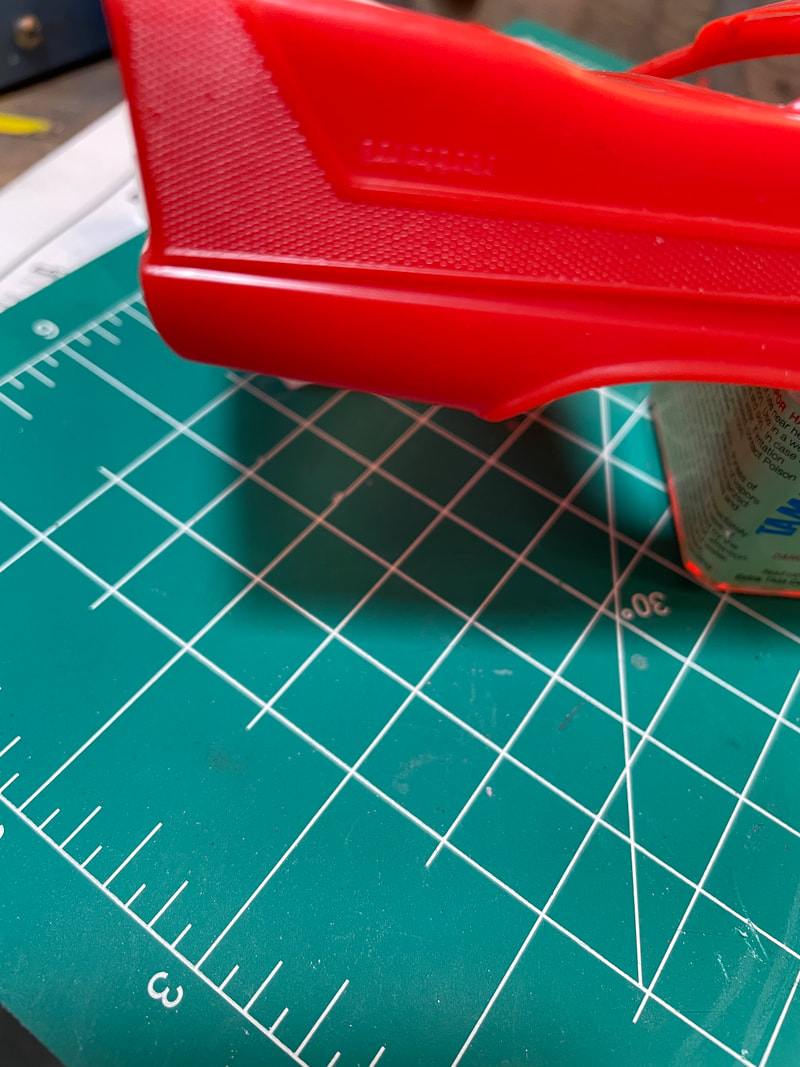
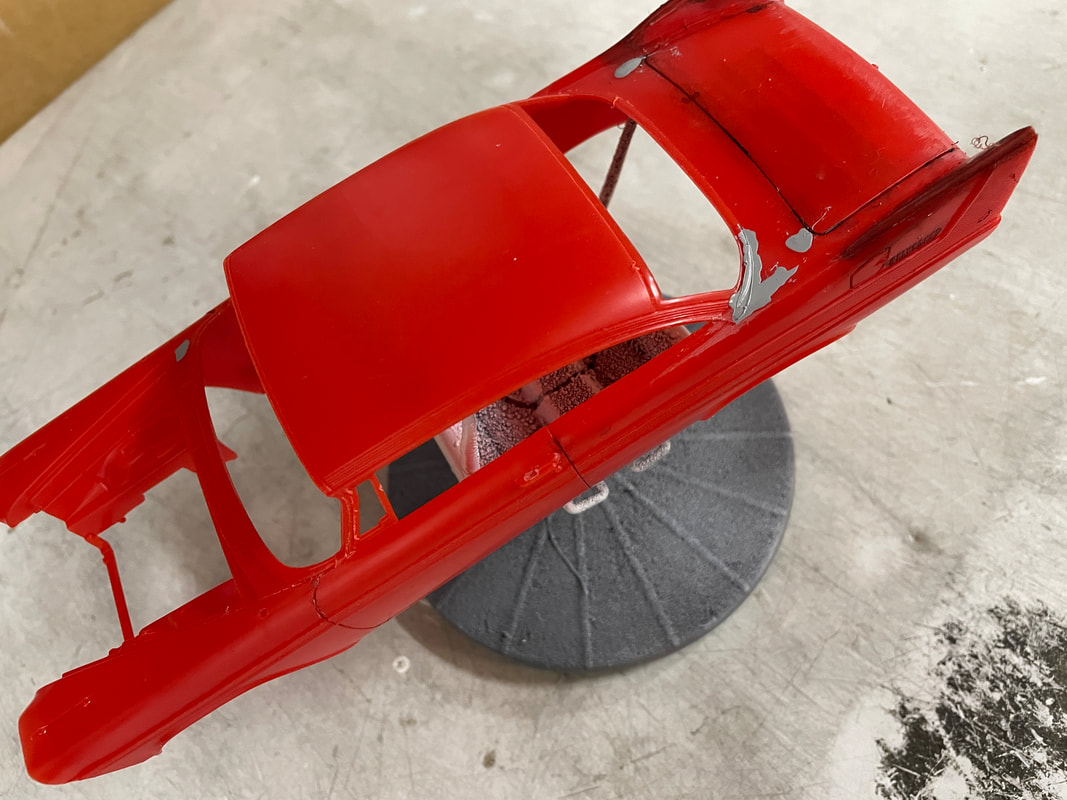
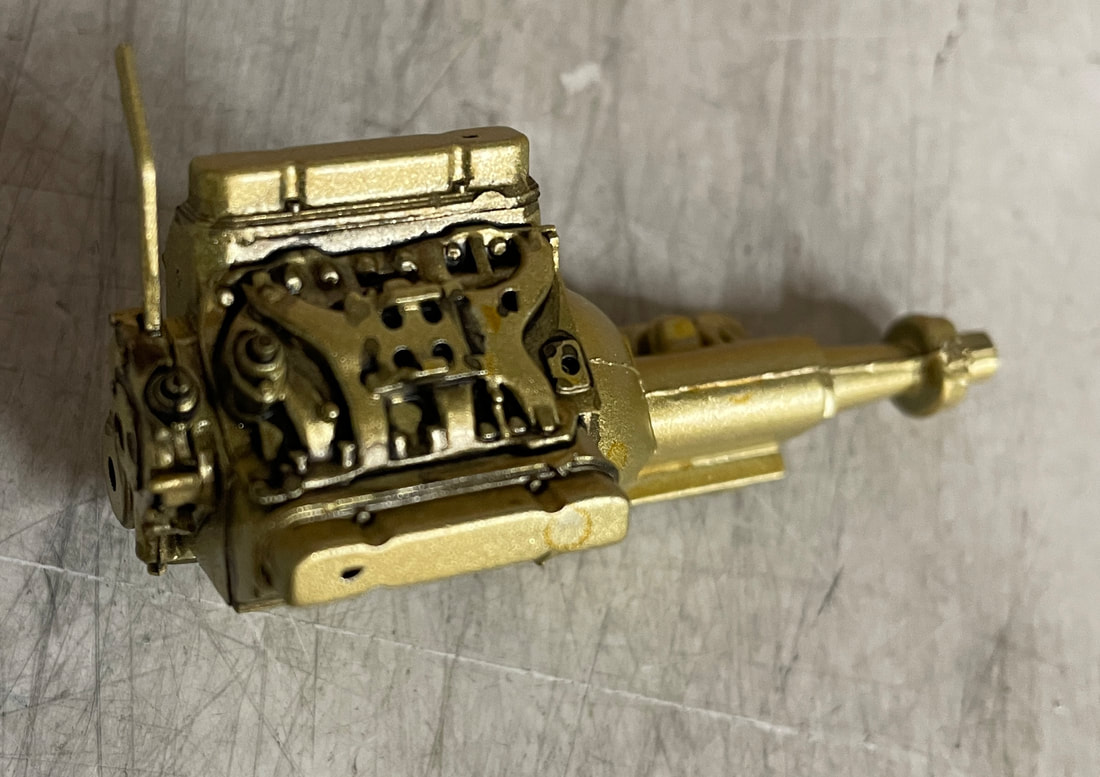
If you're a 1950's Plymouth fan, you know that while the book Christine refers to a Plymouth Fury, the movie car - and hence the kit - isn't really a Fury. This kit was originally tooled in 2012 and, overall, it's a nice kit. To be 100% accurate to the movie car, the intake needs to be updated; but for my purposes, I went with the kit out-of-the-box.
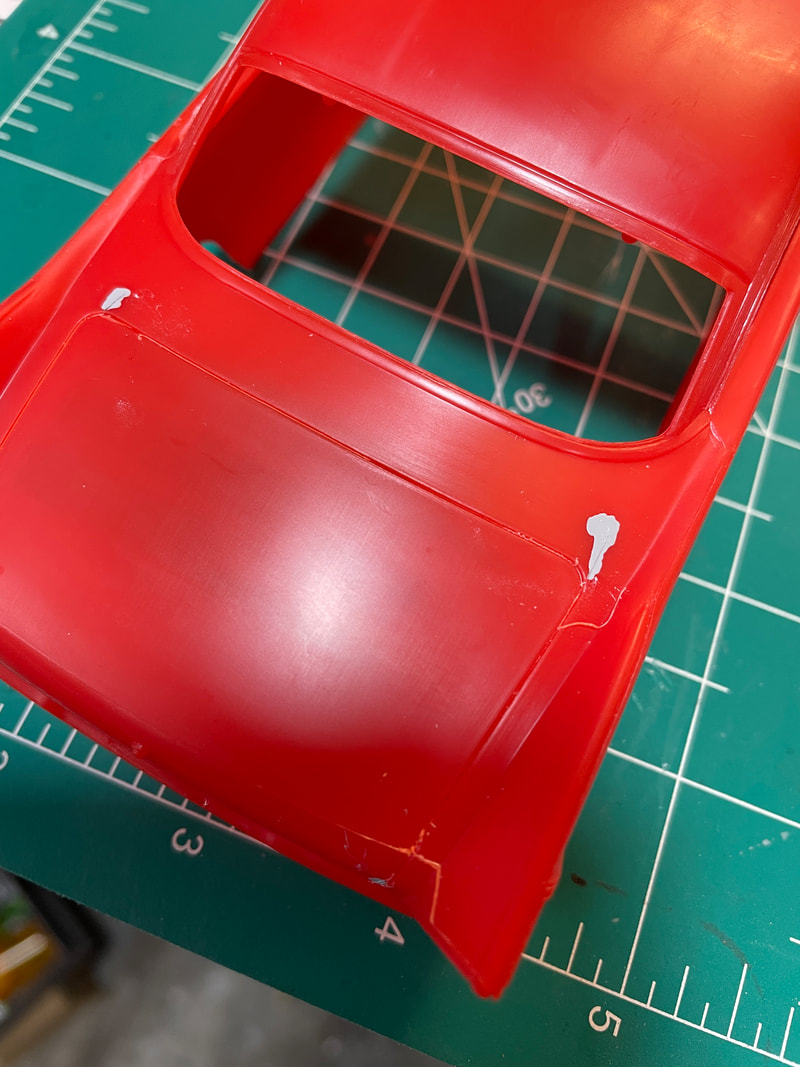
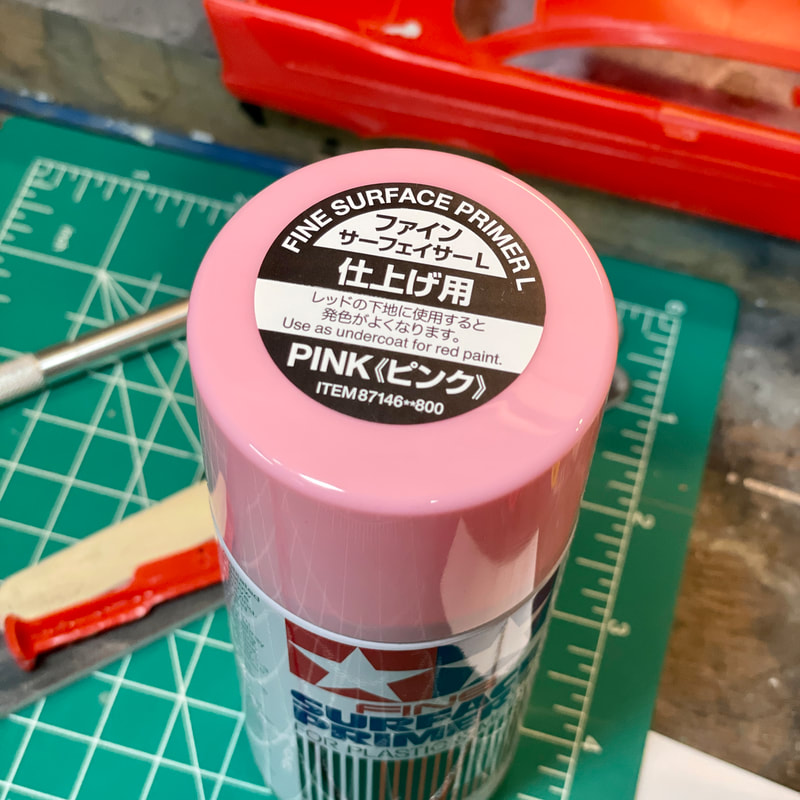
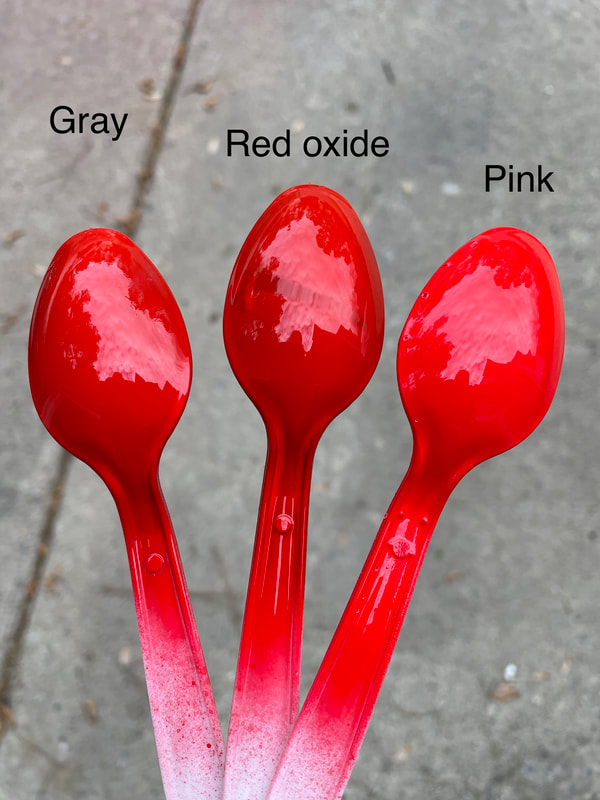
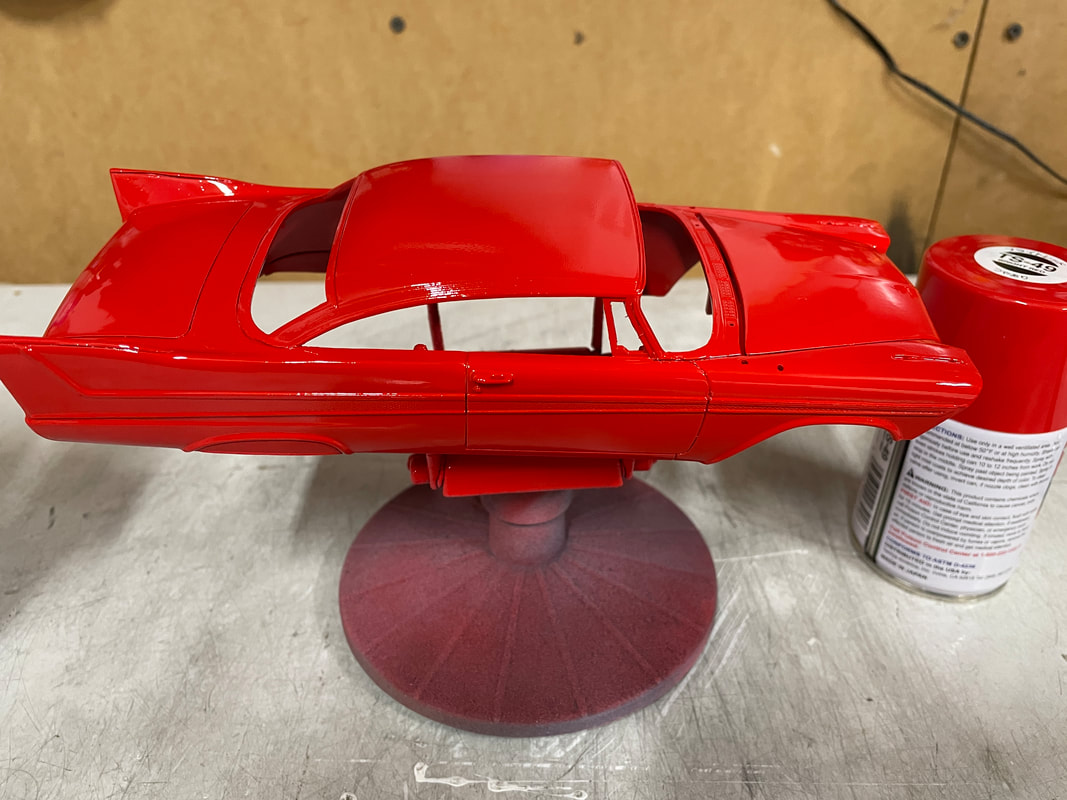
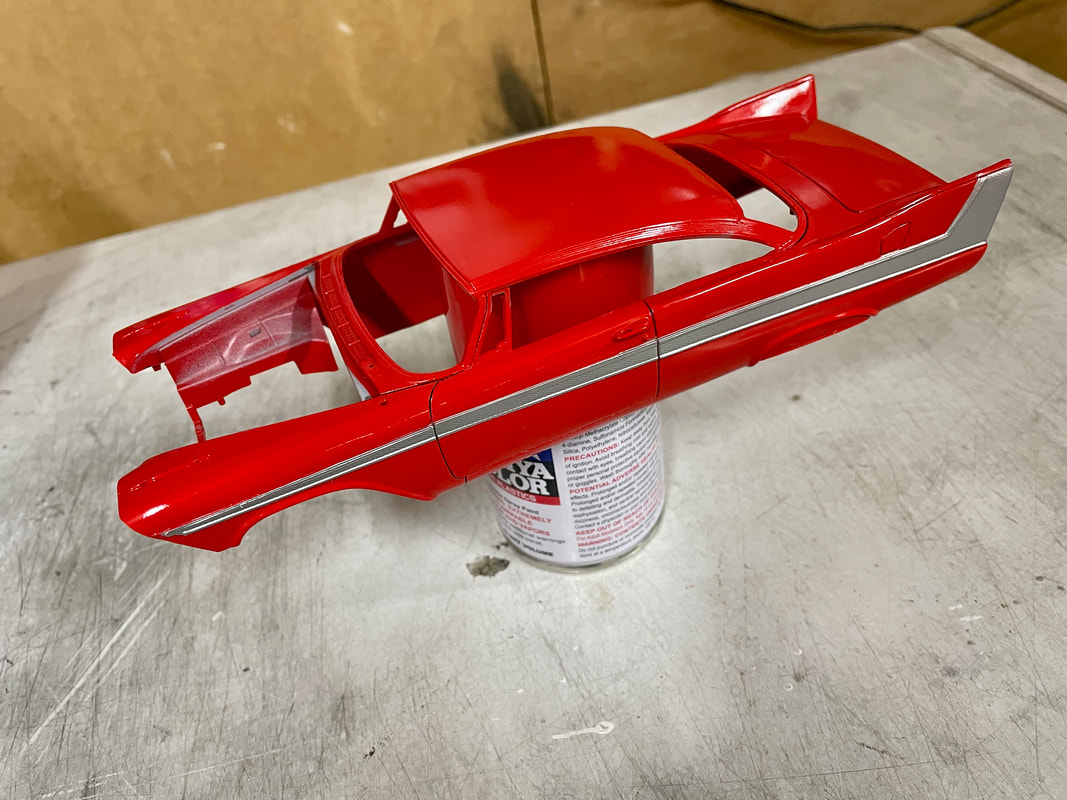
Paint is Tamiya Bright Red lacquer over Tamiya pink (!) primer (gray primer was used initially to look for flaws in the bodywork). Window tint is Tamiya "Smoke", sprayed in the inside of the "glass". All brightwork is Alclad II, sprayed over Tamiya Gloss Black lacquer.
If you're a 1950's Plymouth fan, you know that while the book Christine refers to a Plymouth Fury, the movie car - and hence the kit - isn't really a Fury. This kit was originally tooled in 2012 and, overall, it's a nice kit. To be 100% accurate to the movie car, the intake needs to be updated; but for my purposes, I went with the kit out-of-the-box.
Paint is Tamiya Bright Red lacquer over Tamiya pink (!) primer (gray primer was used initially to look for flaws in the bodywork). Window tint is Tamiya "Smoke", sprayed in the inside of the "glass". All brightwork is Alclad II, sprayed over Tamiya Gloss Black lacquer.
- AMT 1/25 Christine Plymouth Fury 801 (red mold)
- Tamiya Lacquers throughout
- Alclad II Lacquers - wheels, bumper, bright work
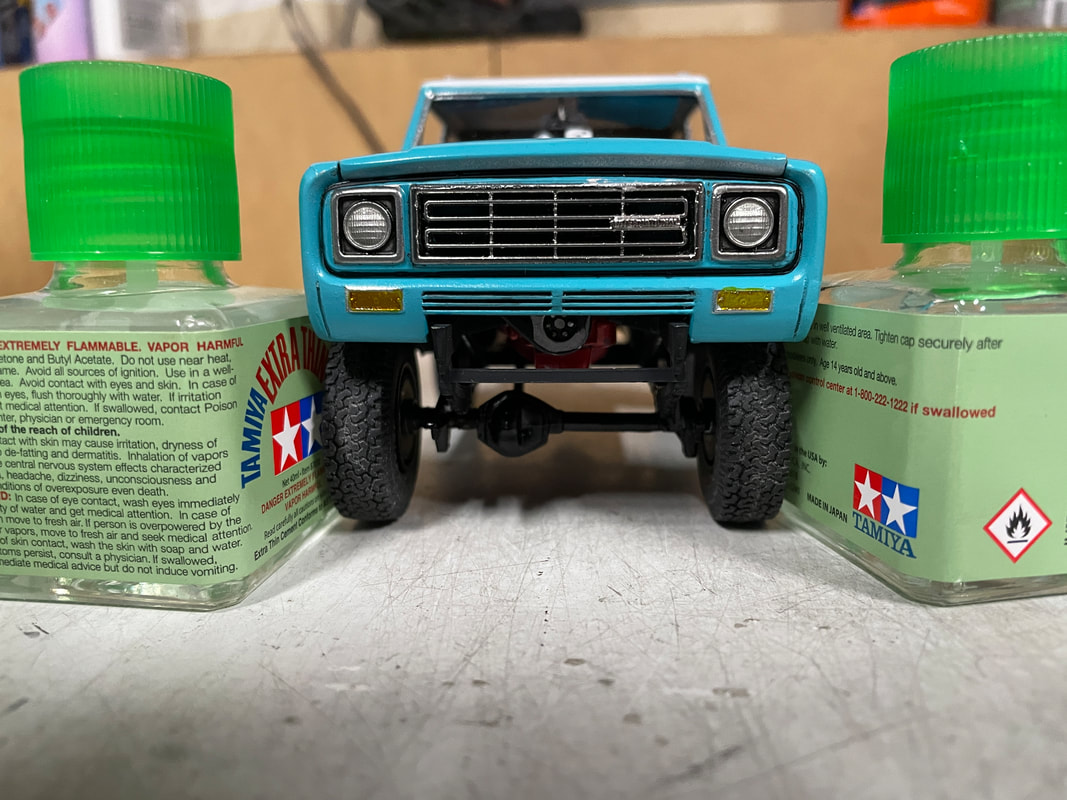
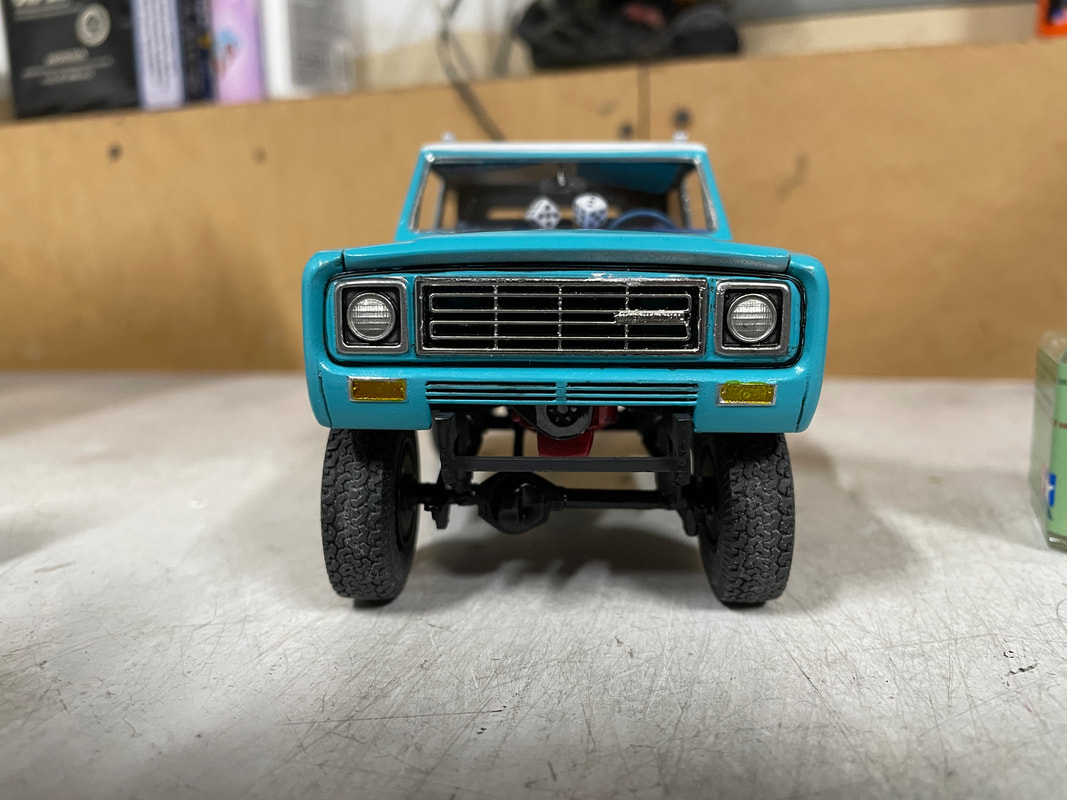
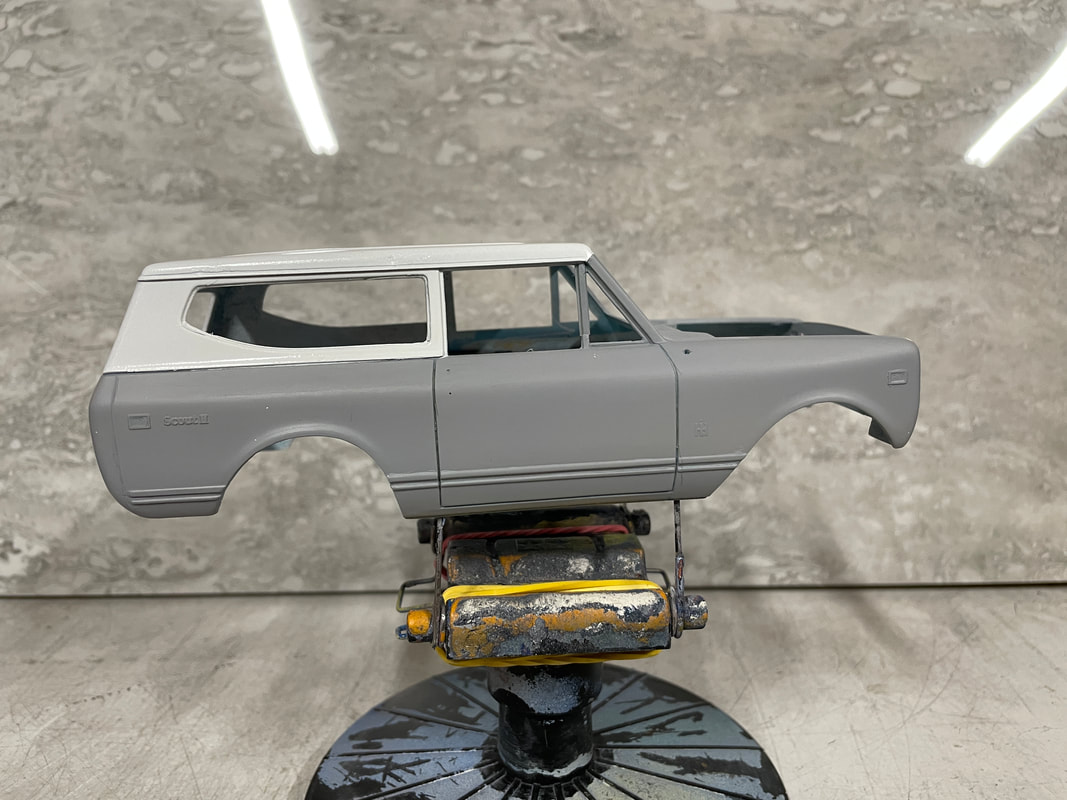
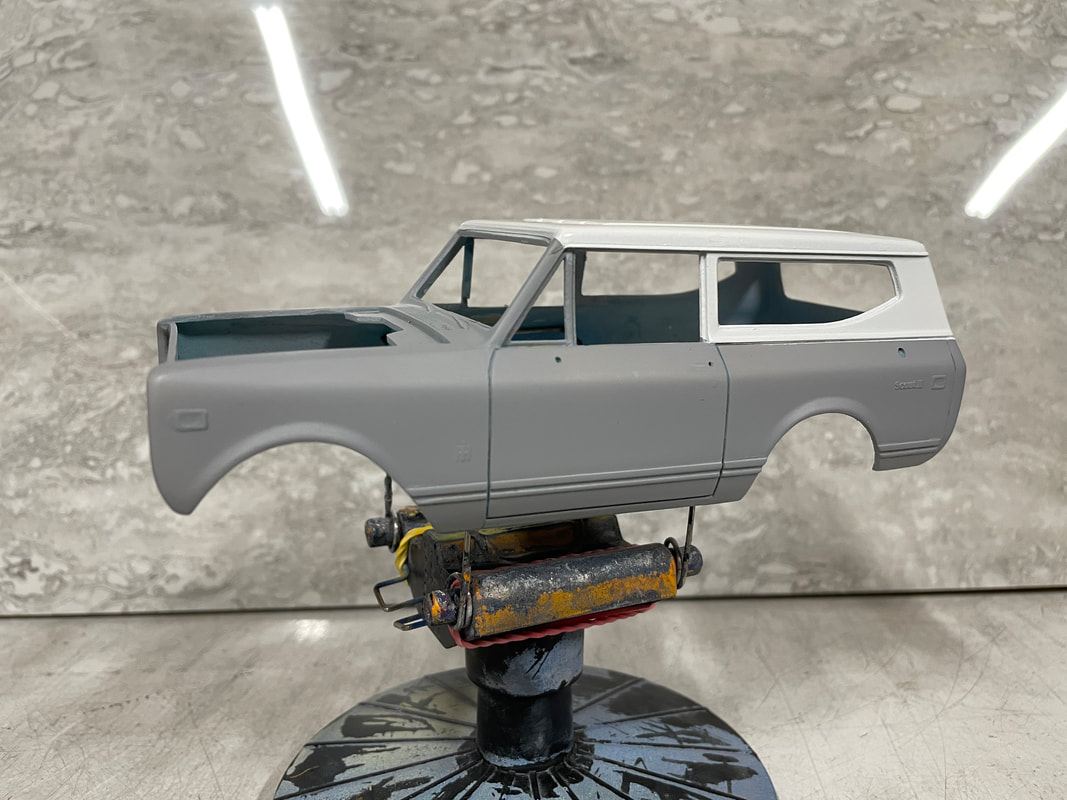
AMT / ERTL 1/25 International Scout II, redux.
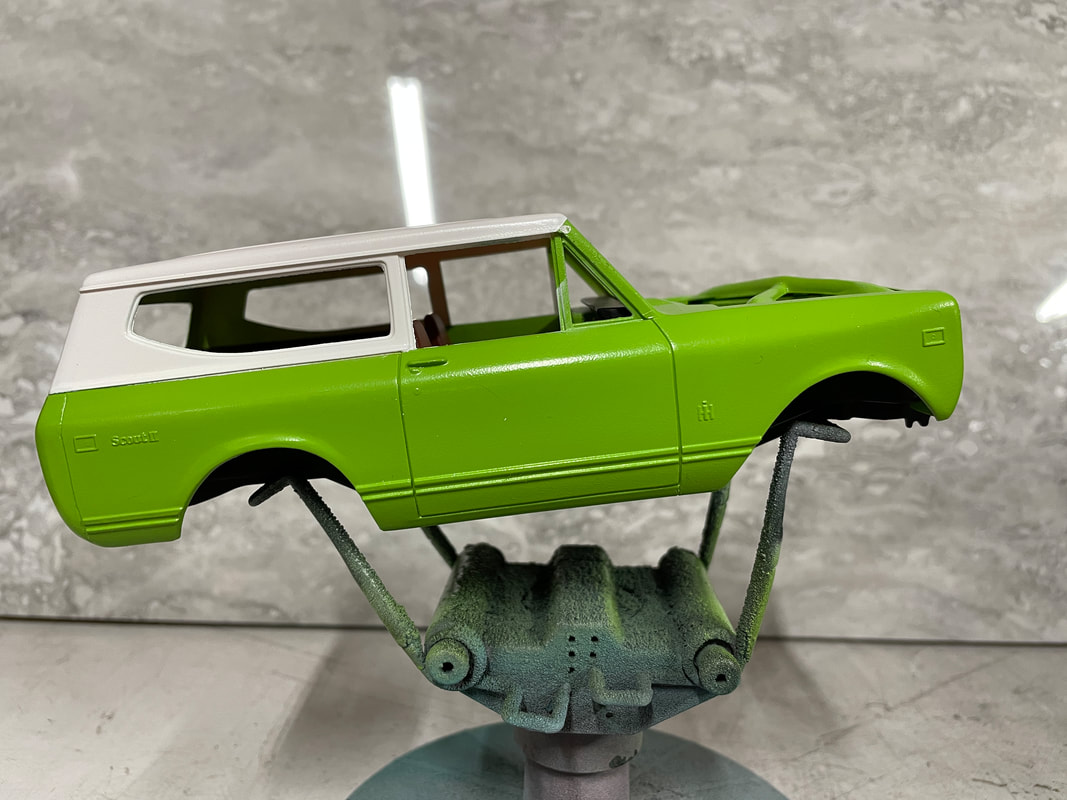
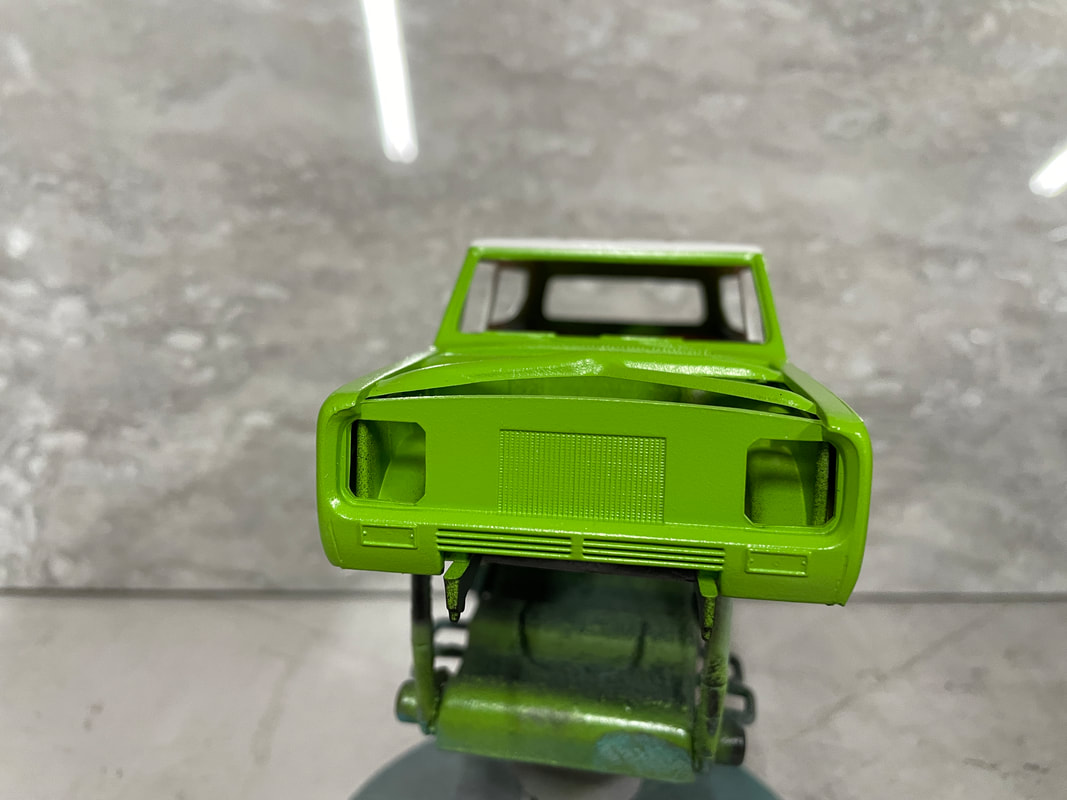
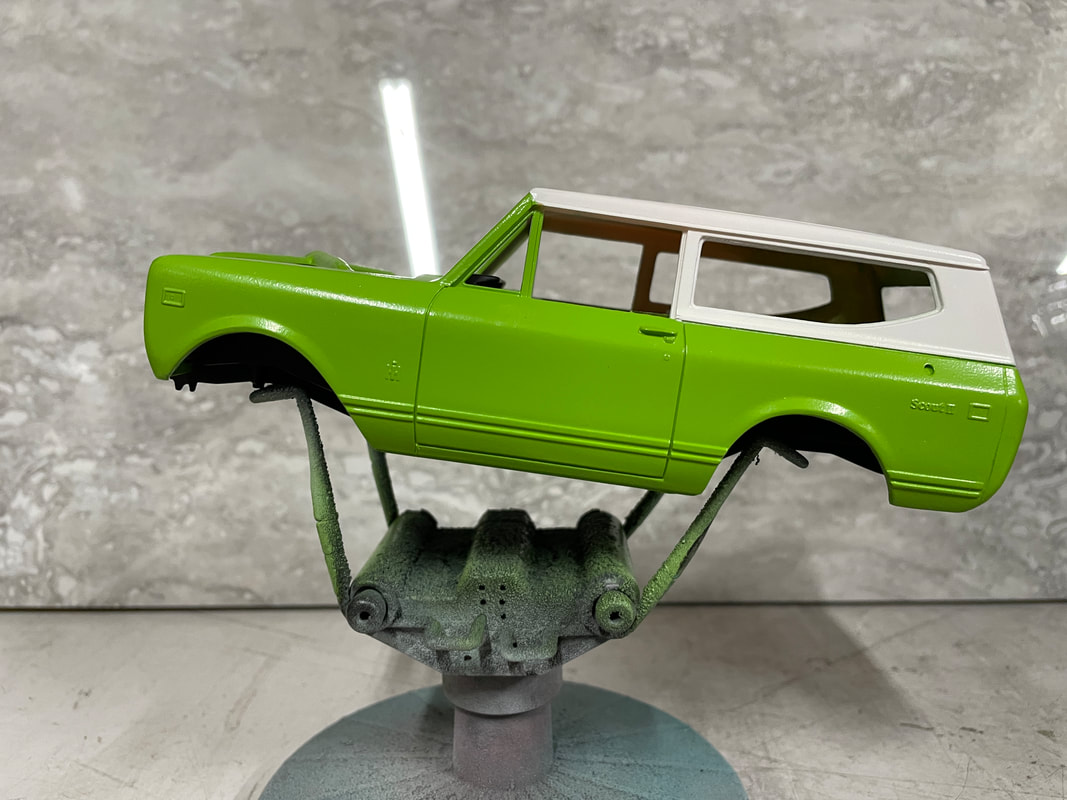
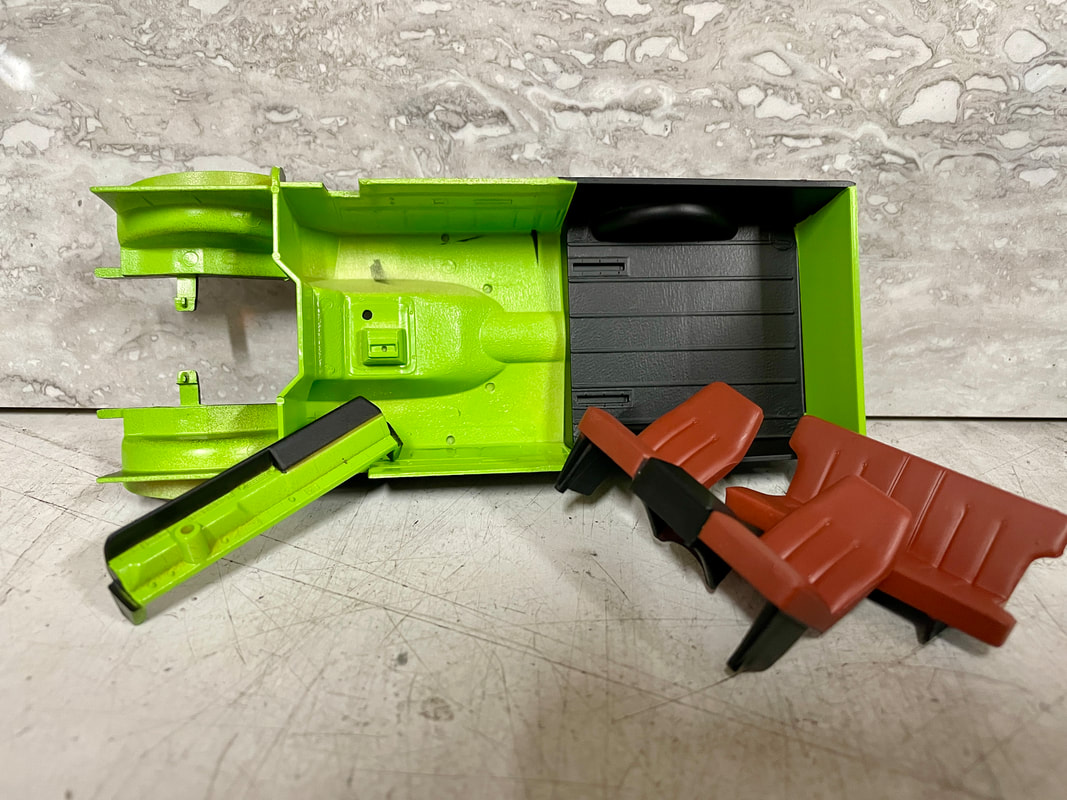
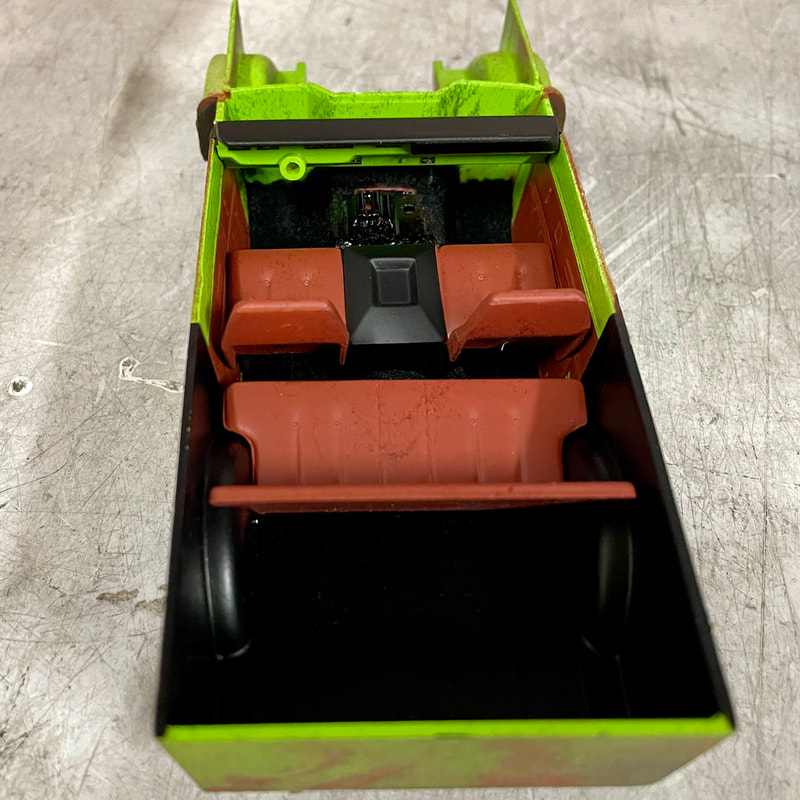
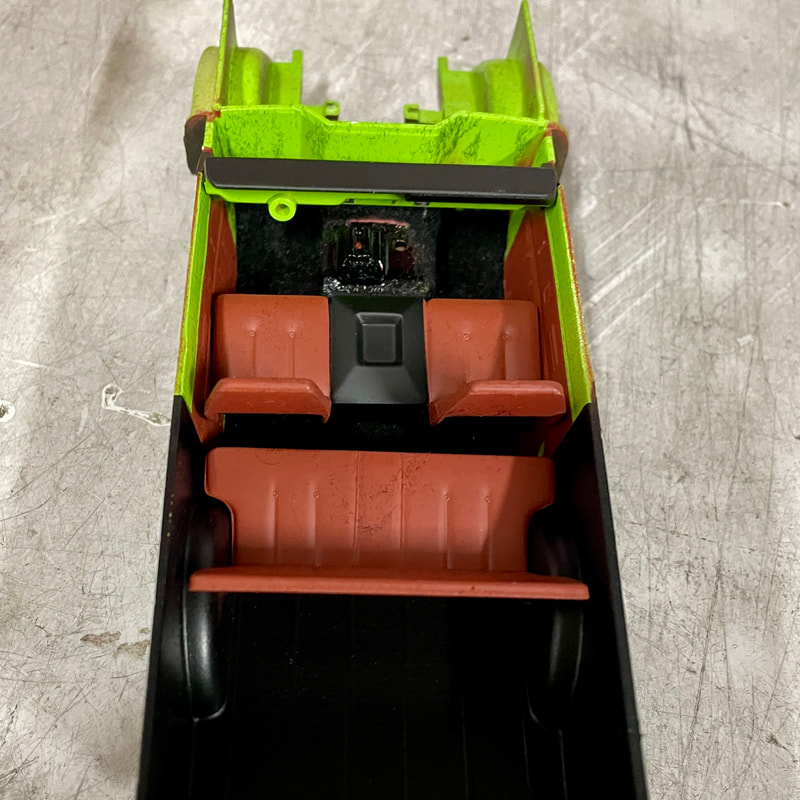
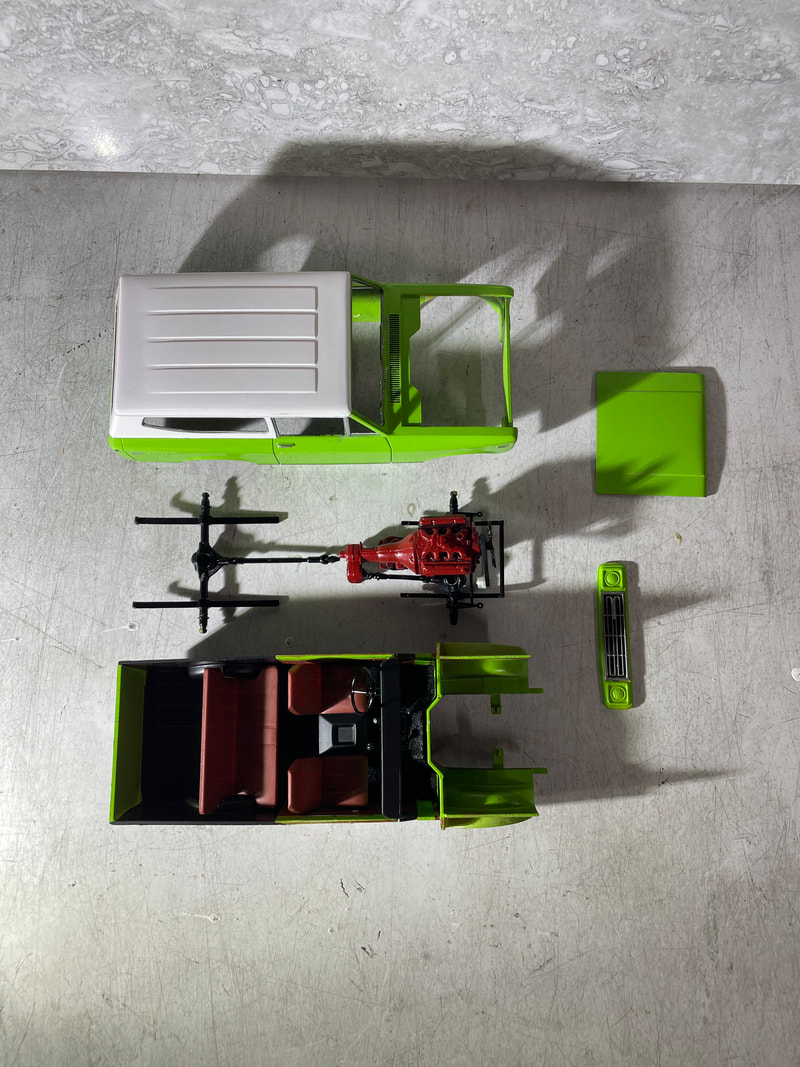
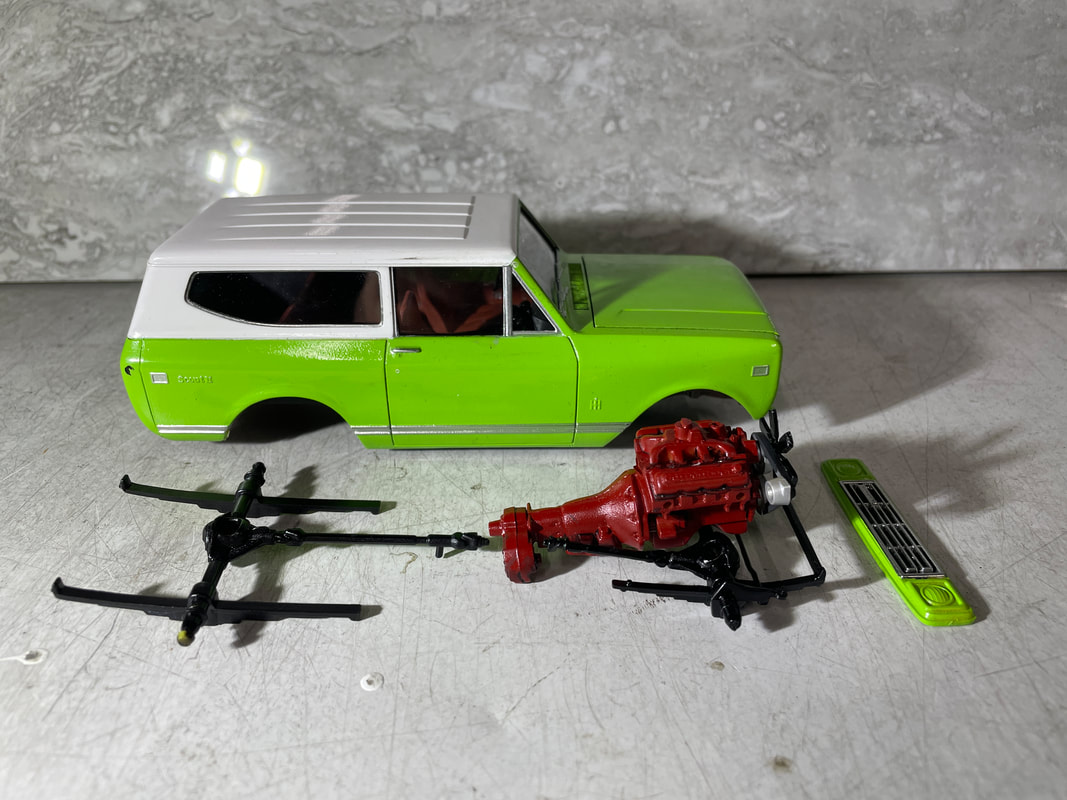
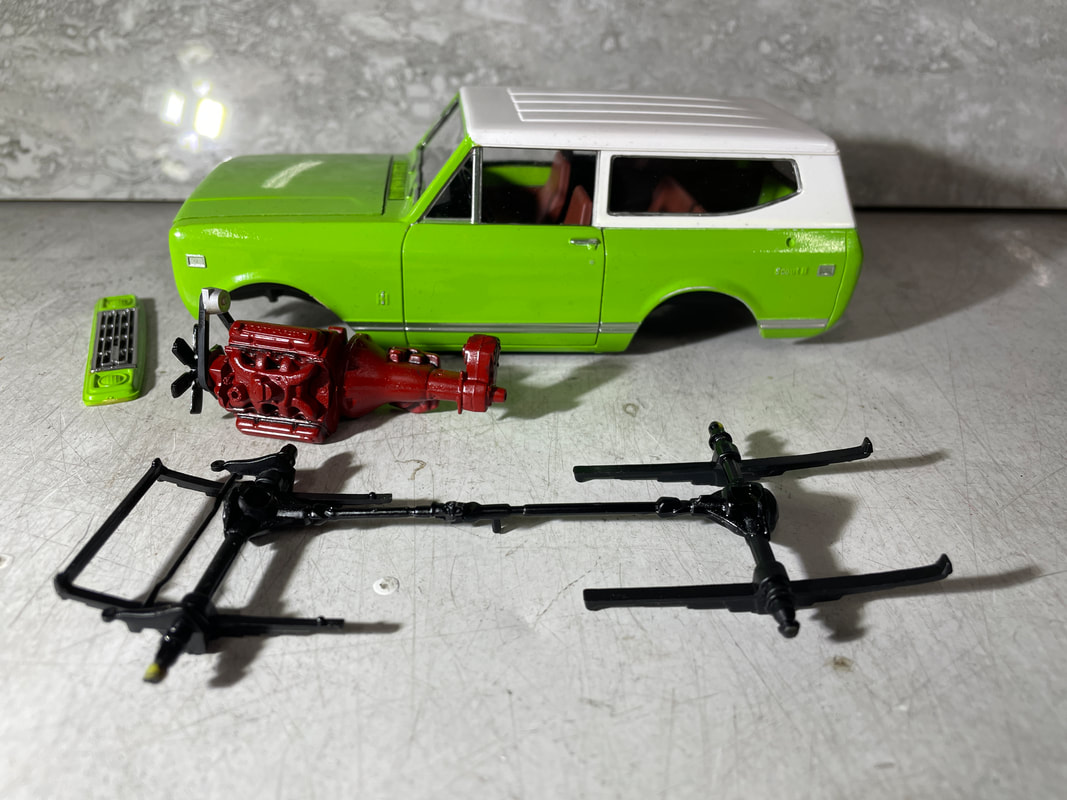
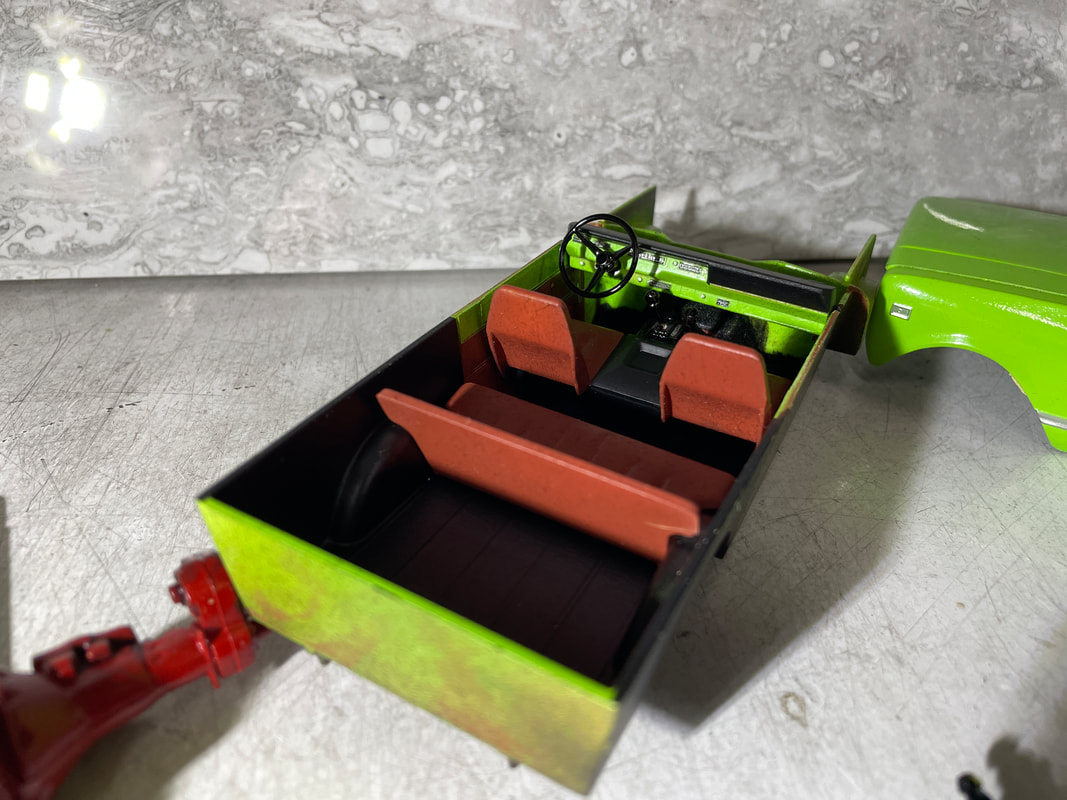
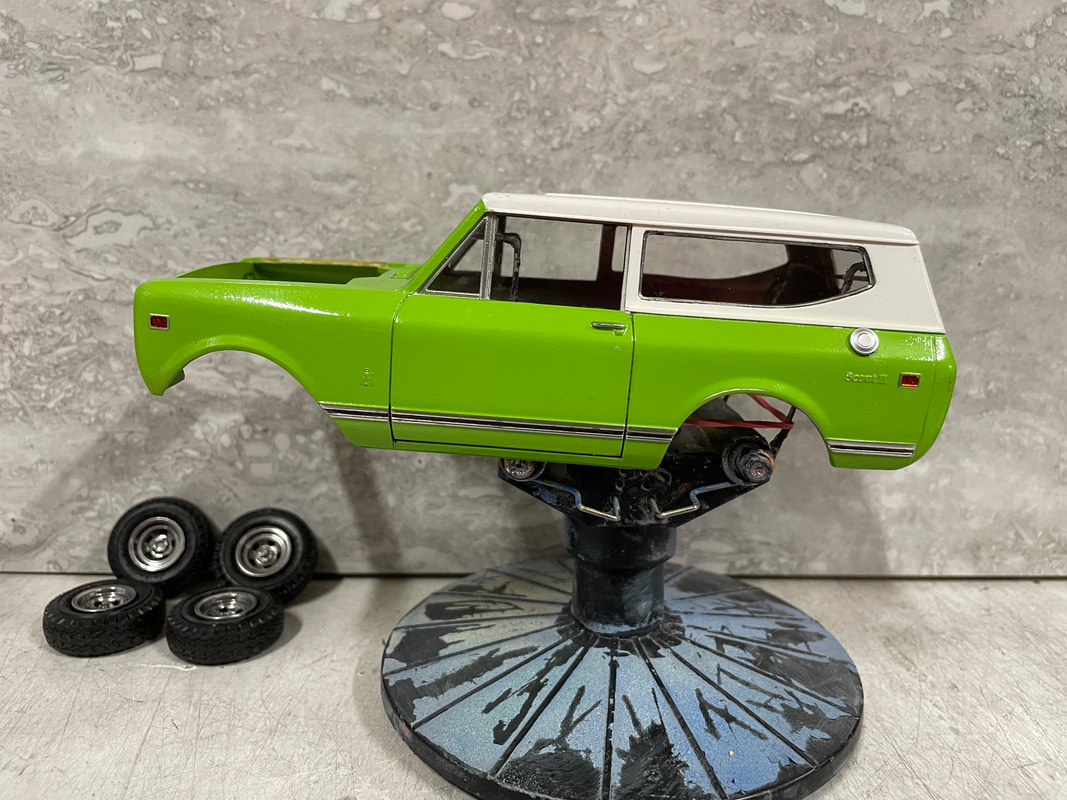
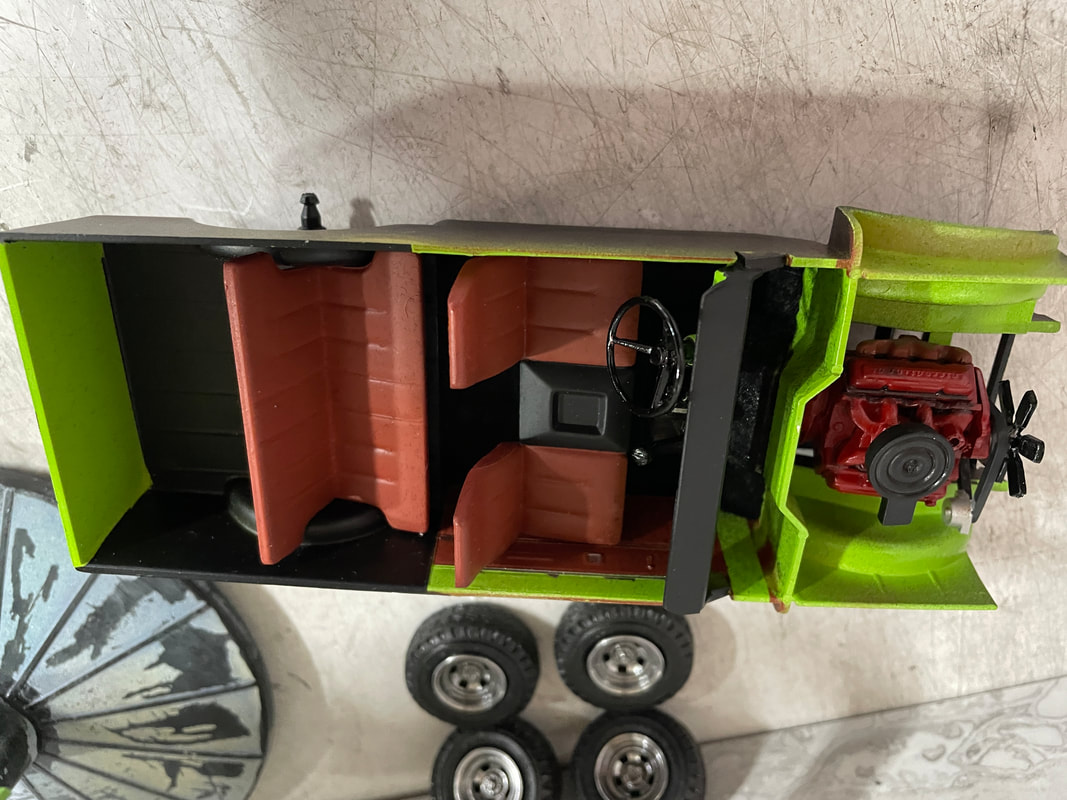
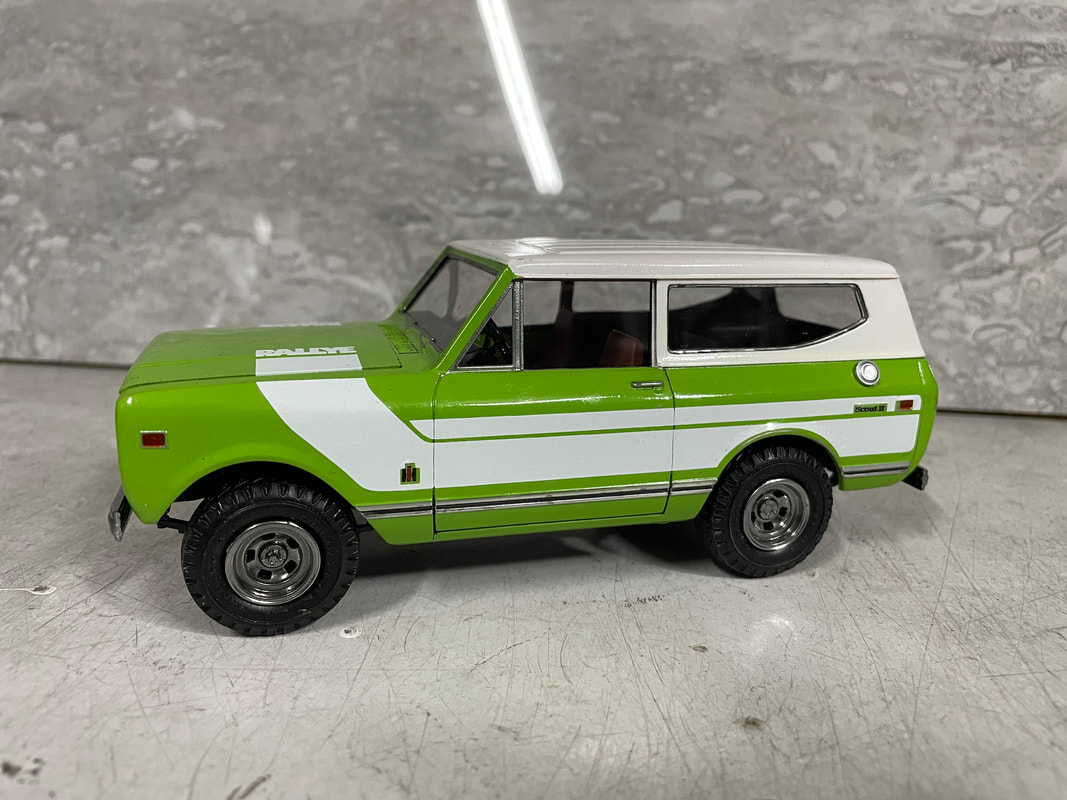
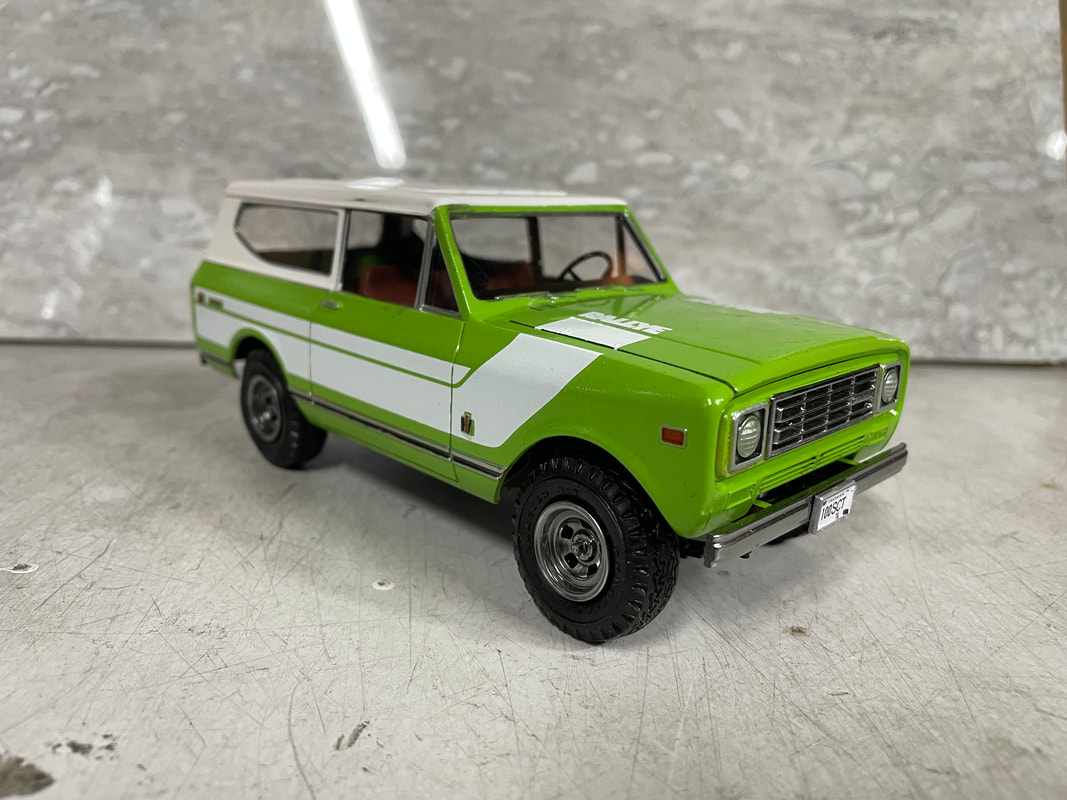
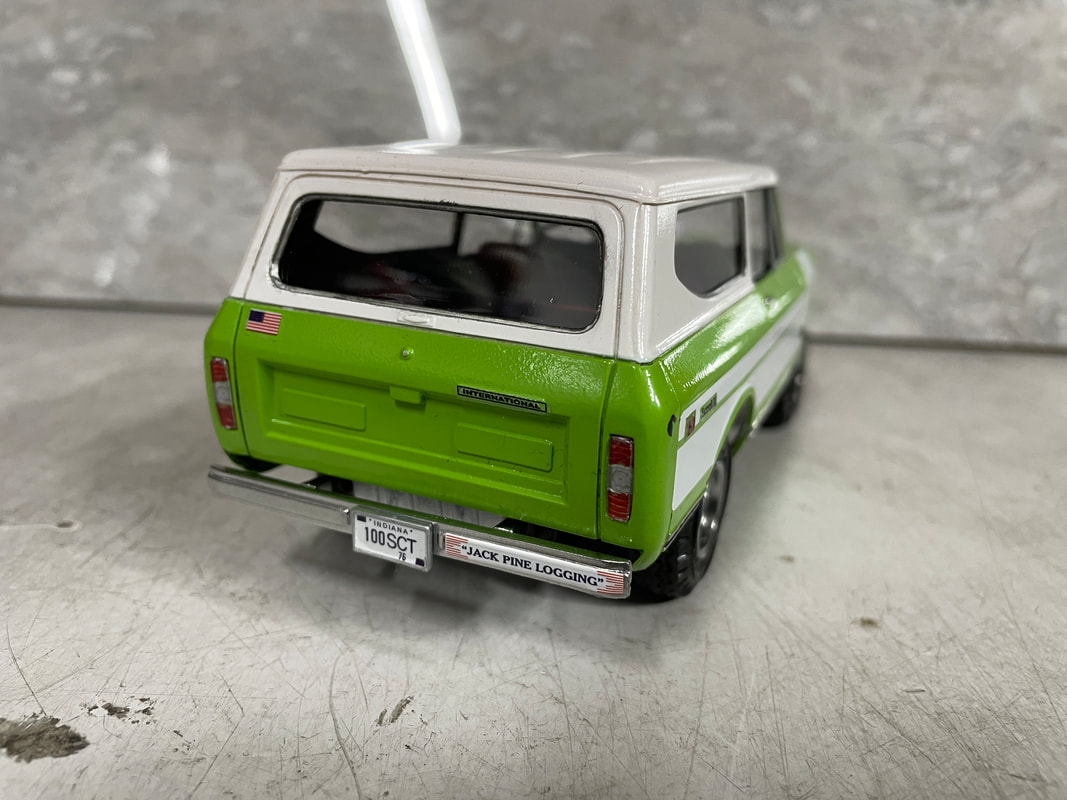
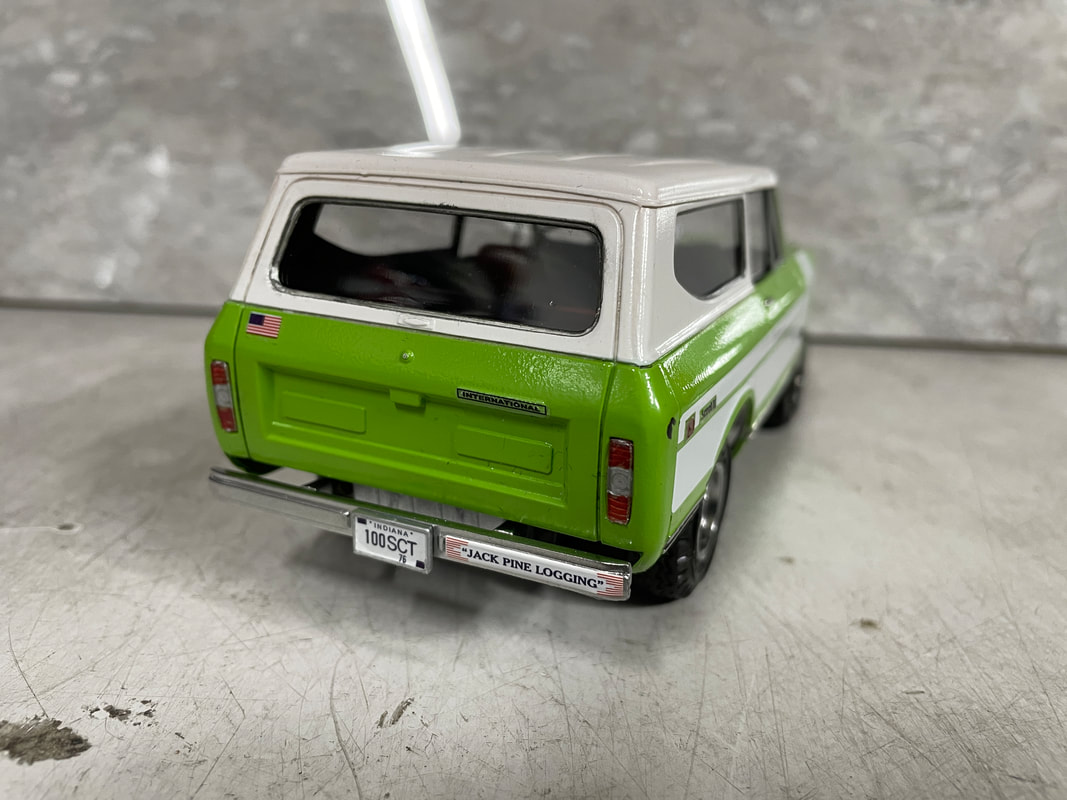
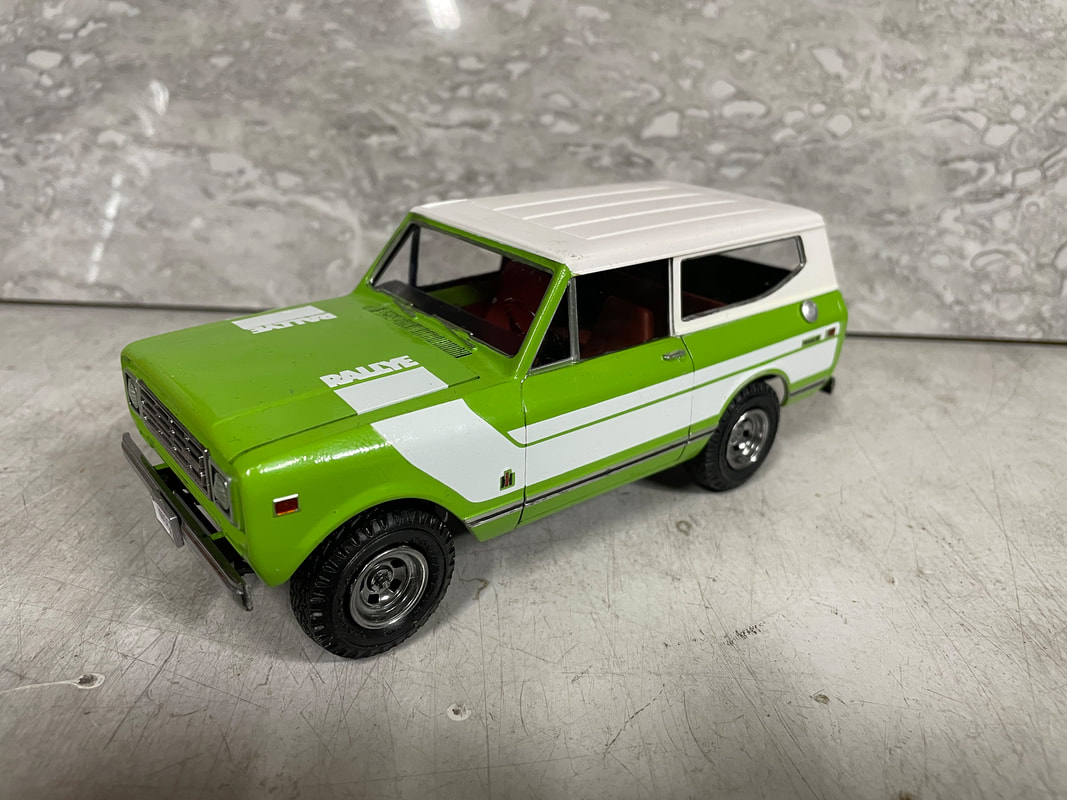
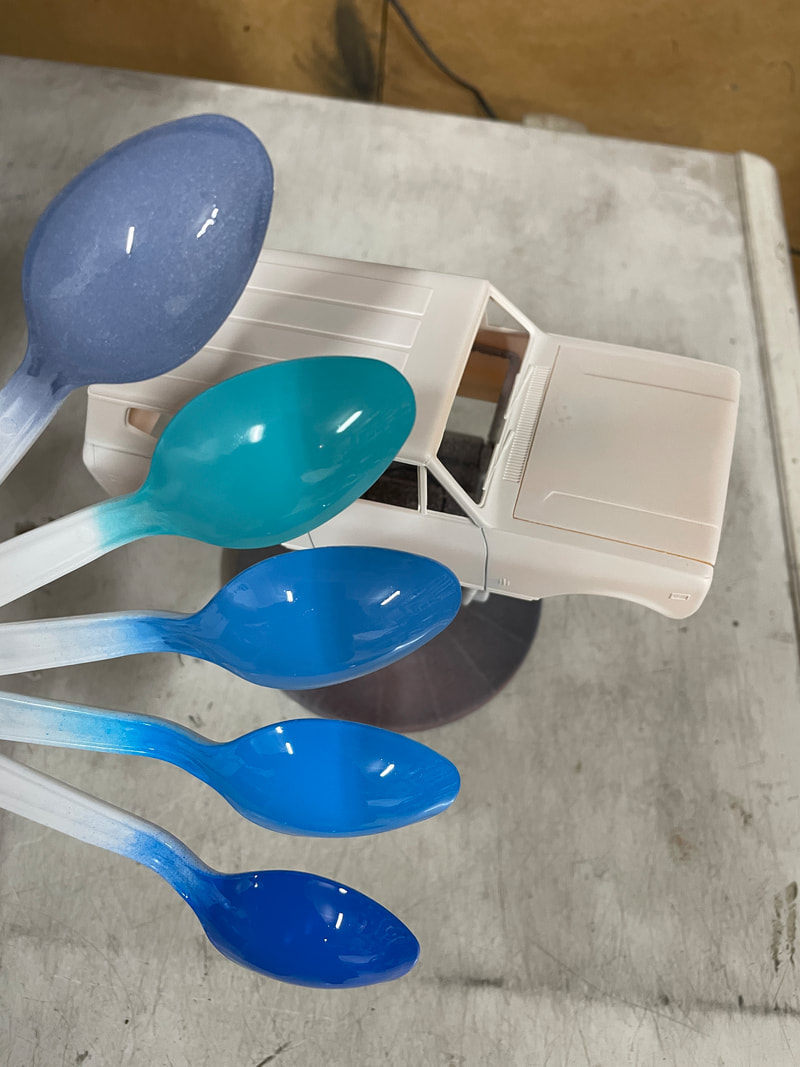
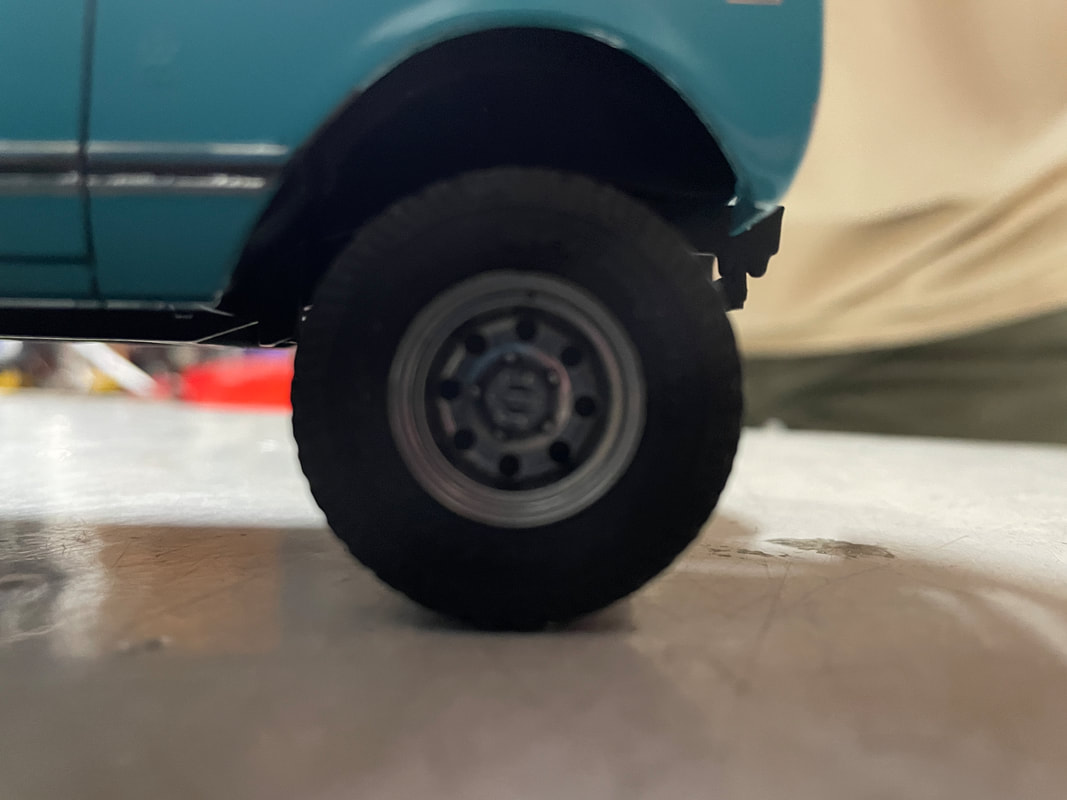
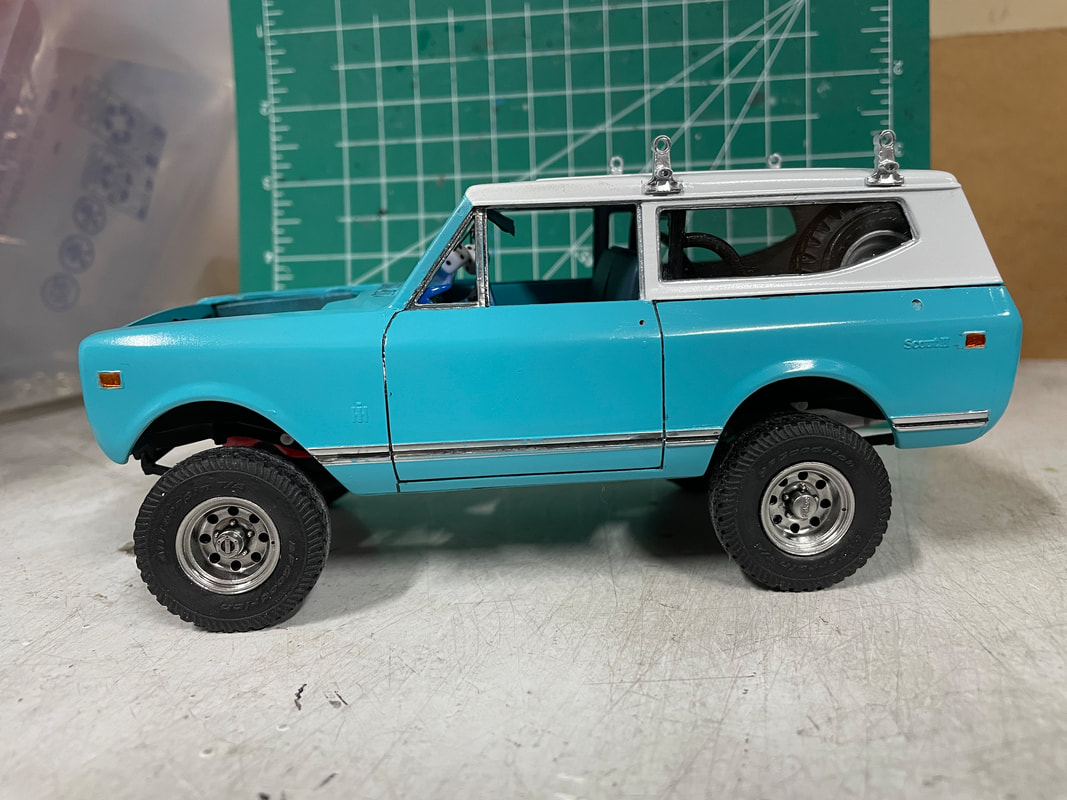
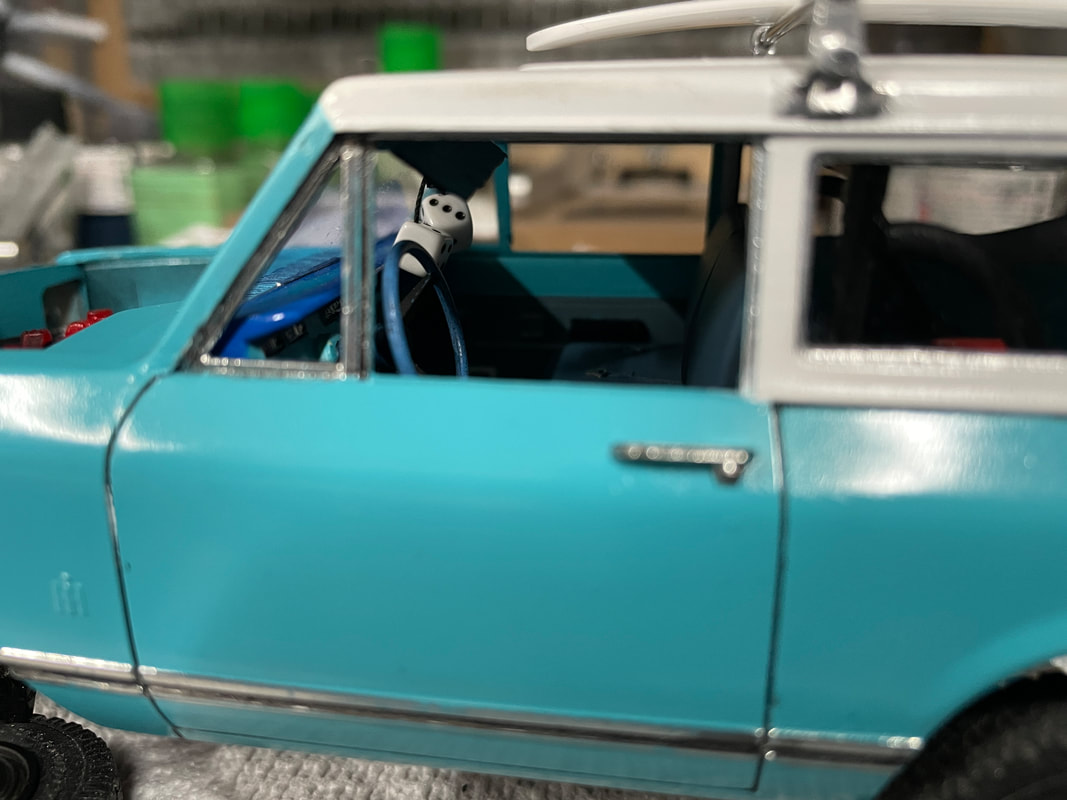
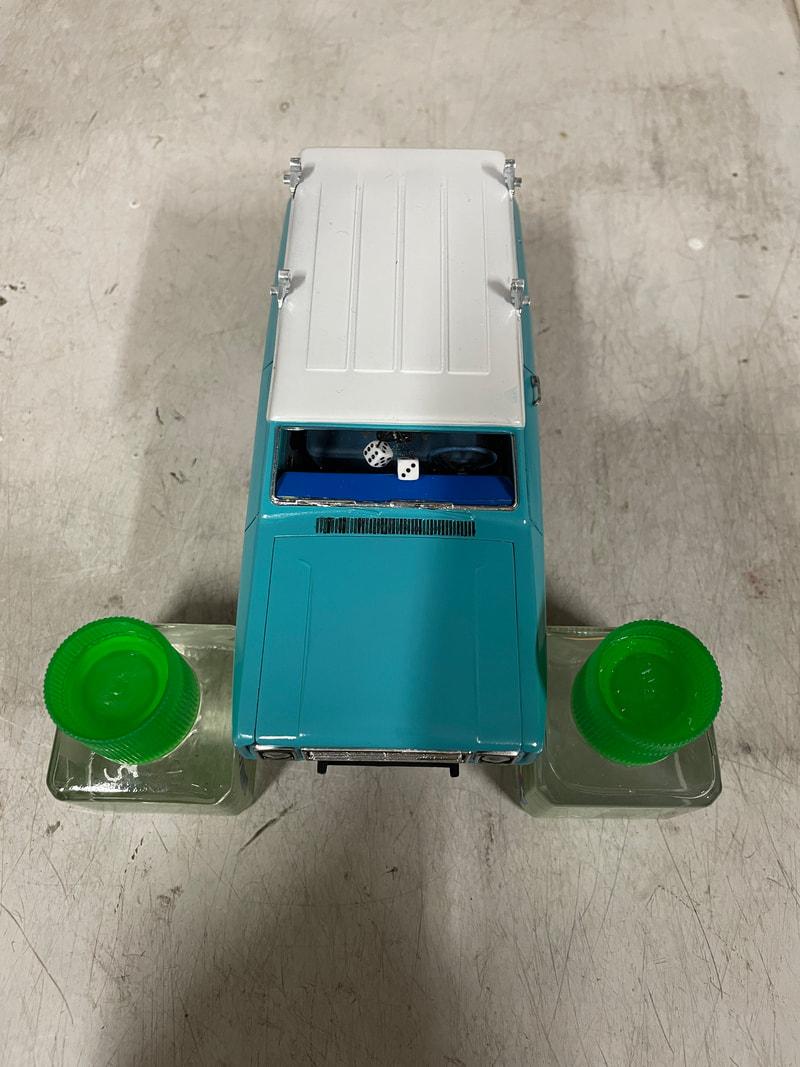
While deciding how to move forward with the Scout II that my Brother-in-law gave me, I snagged a good deal on another Scout II kit and decided to do the smart thing and build it straight from the box (haha).Color is old Testor's Model Master Sublime Green. These were cool paints and I hate that they were discontinued. In retrospect, I probably should have decanted and used my airbrush, but I've made it this far. Only additions are flocking for the carpet, and I think I'll fashion an antenna to hide black "dot" on the passenger rear corner. I think this is from the Tamiya panel liner fluid I was using. I attempted to polish it out, but once I realized I'd cut through the clear coat, I stopped. All "chrome" is Alclad II Polished Aluminum. Some small details to tidy up (such as the front lights) and I'll be done.
- AMT 1/25 Harvester International Scout II 1248/12
- Testors Enamel (exterior and "metal" portions of interior)
- Tamiya Lacquers (Interior)
- Alclad II Lacquers - wheels, bumper, bright work
AMT / ERTL 1/25 International Scout II

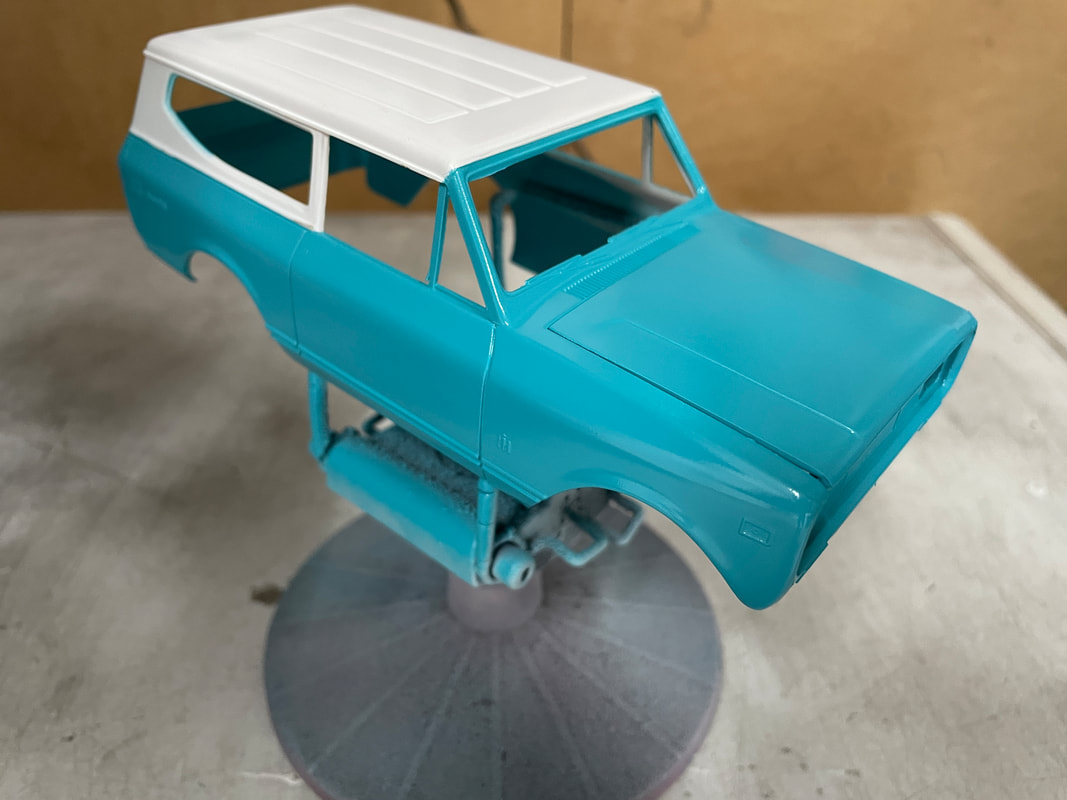
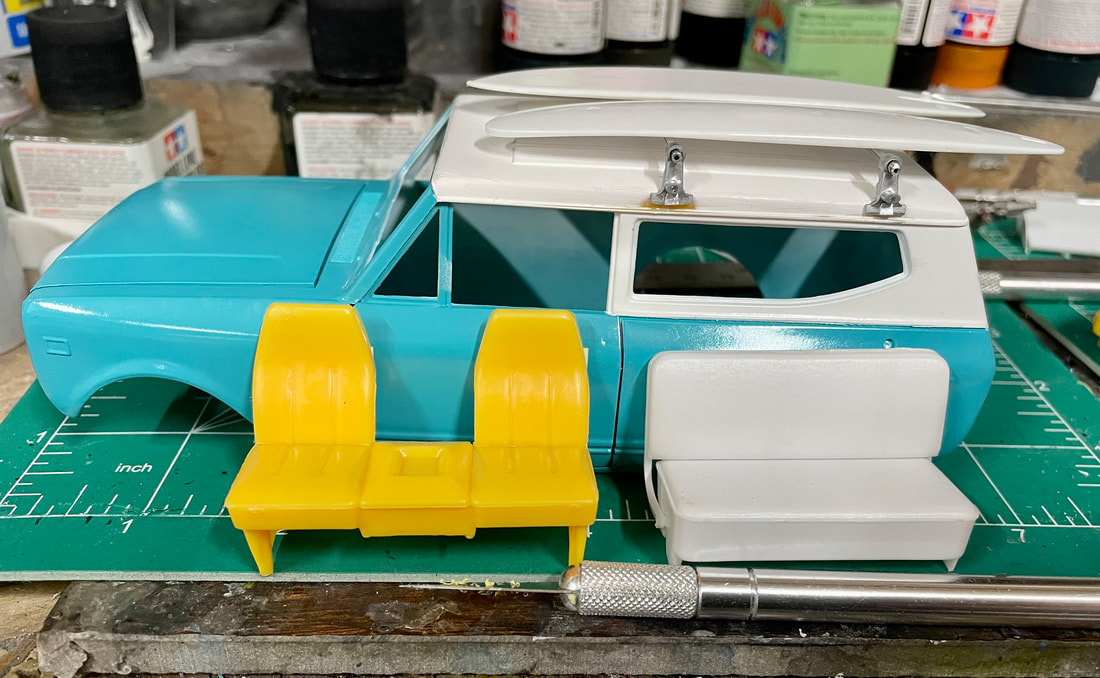
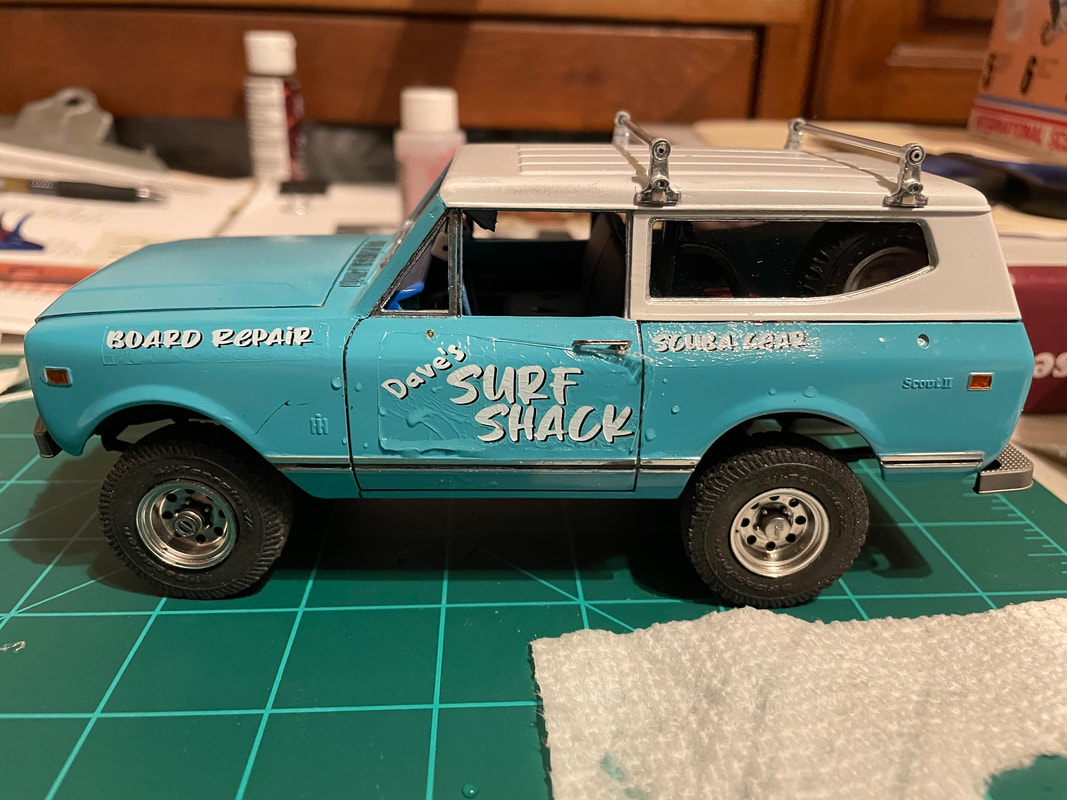
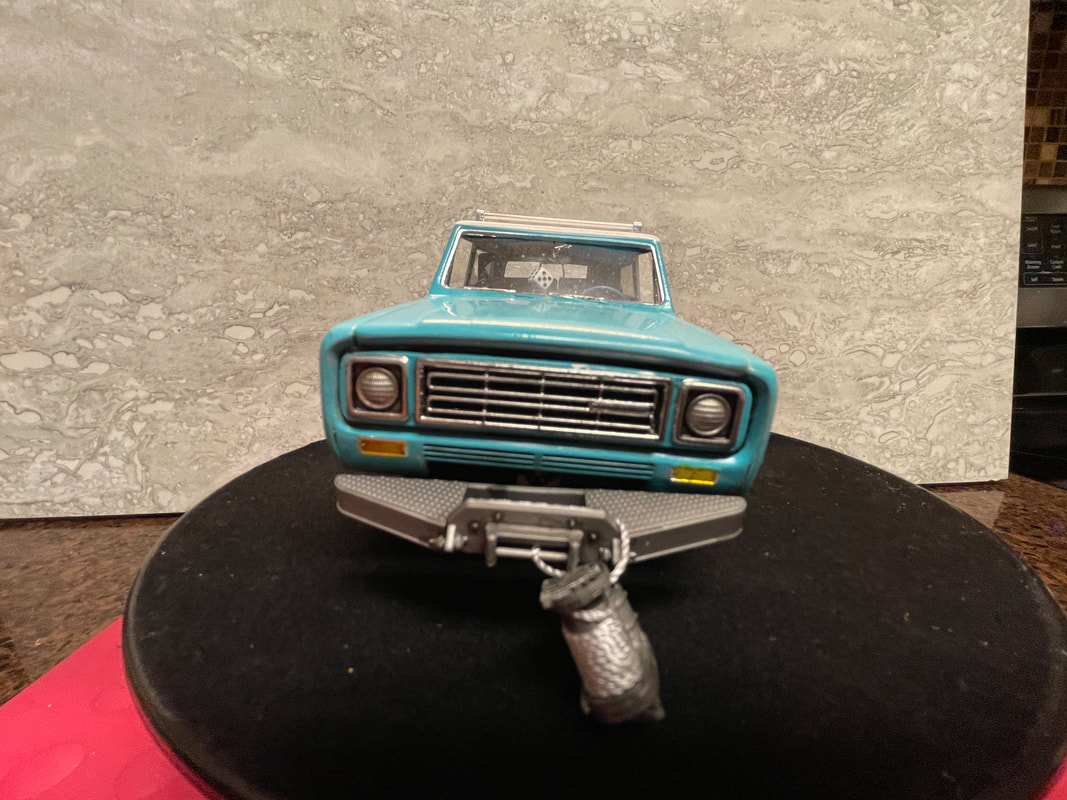
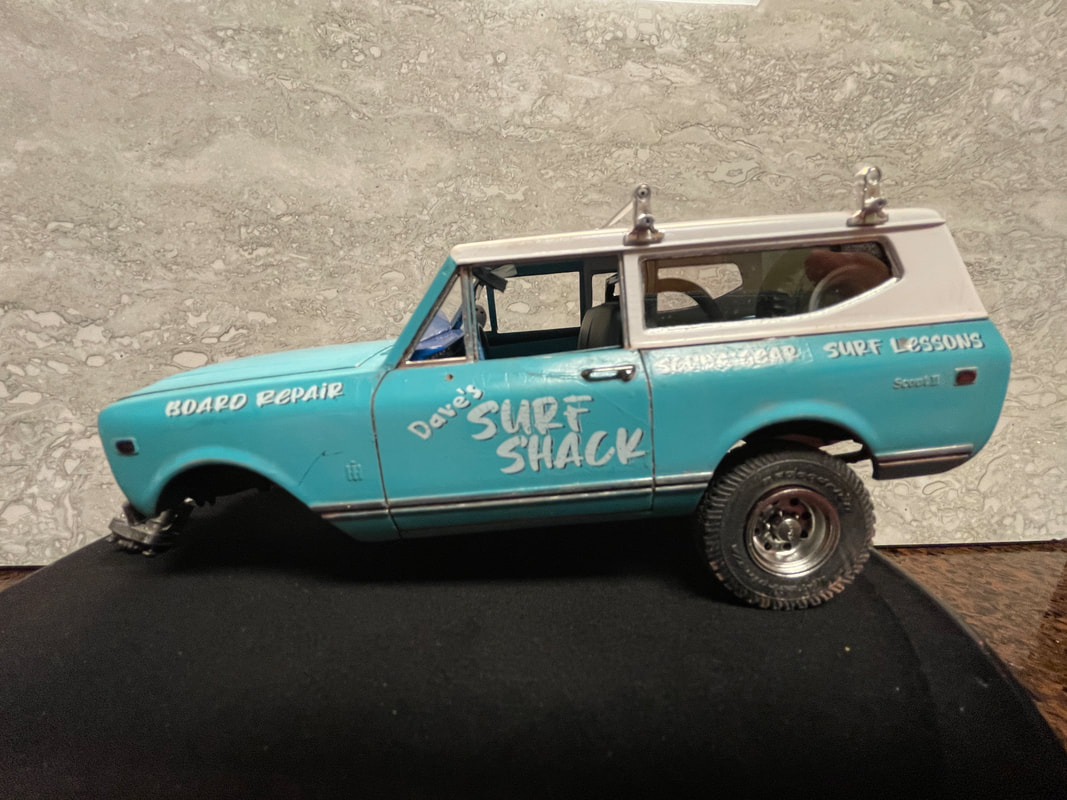
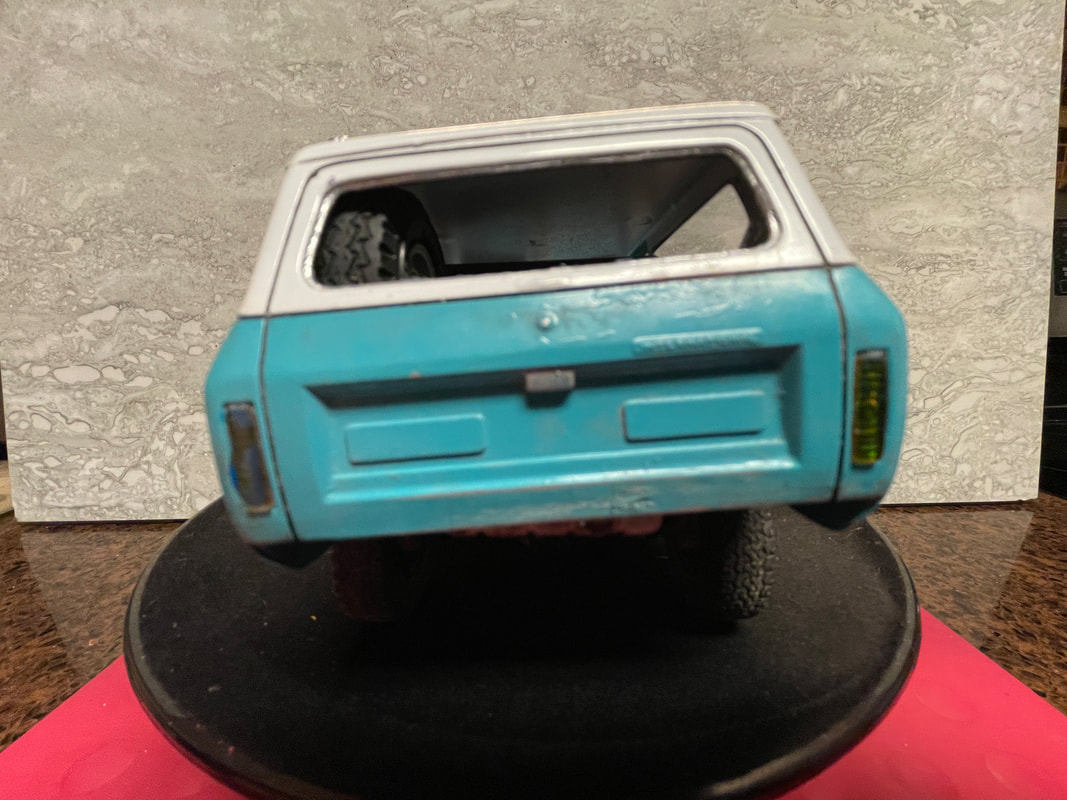
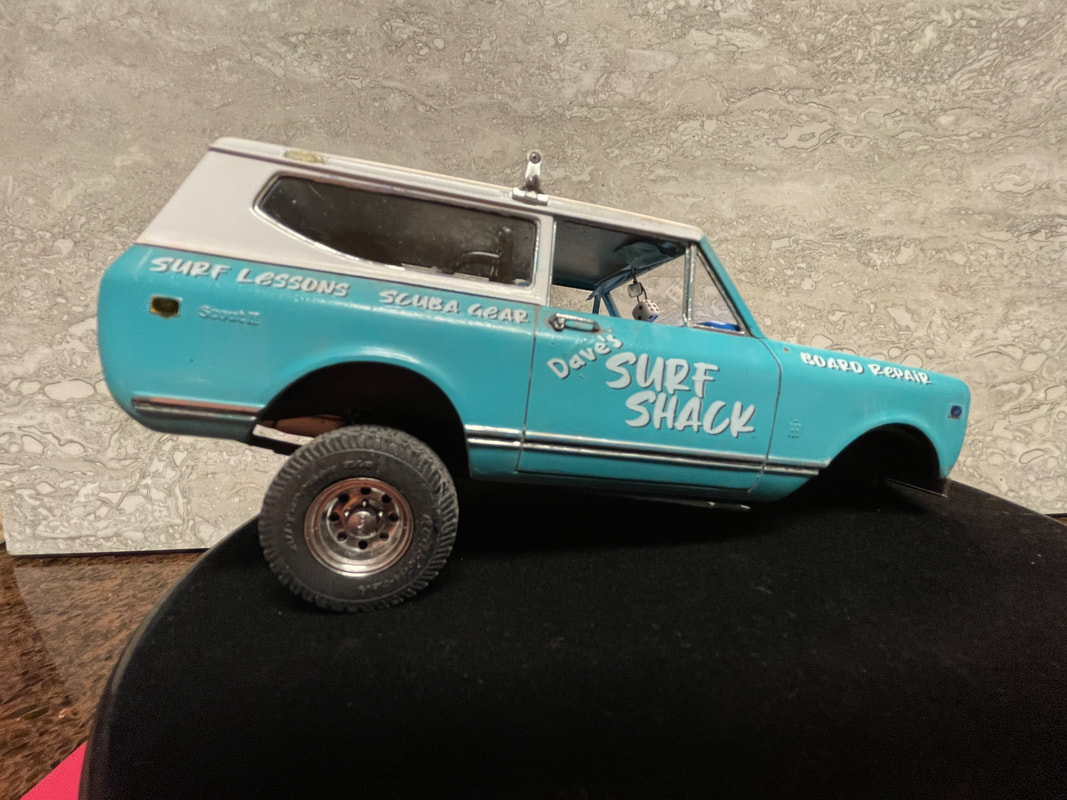
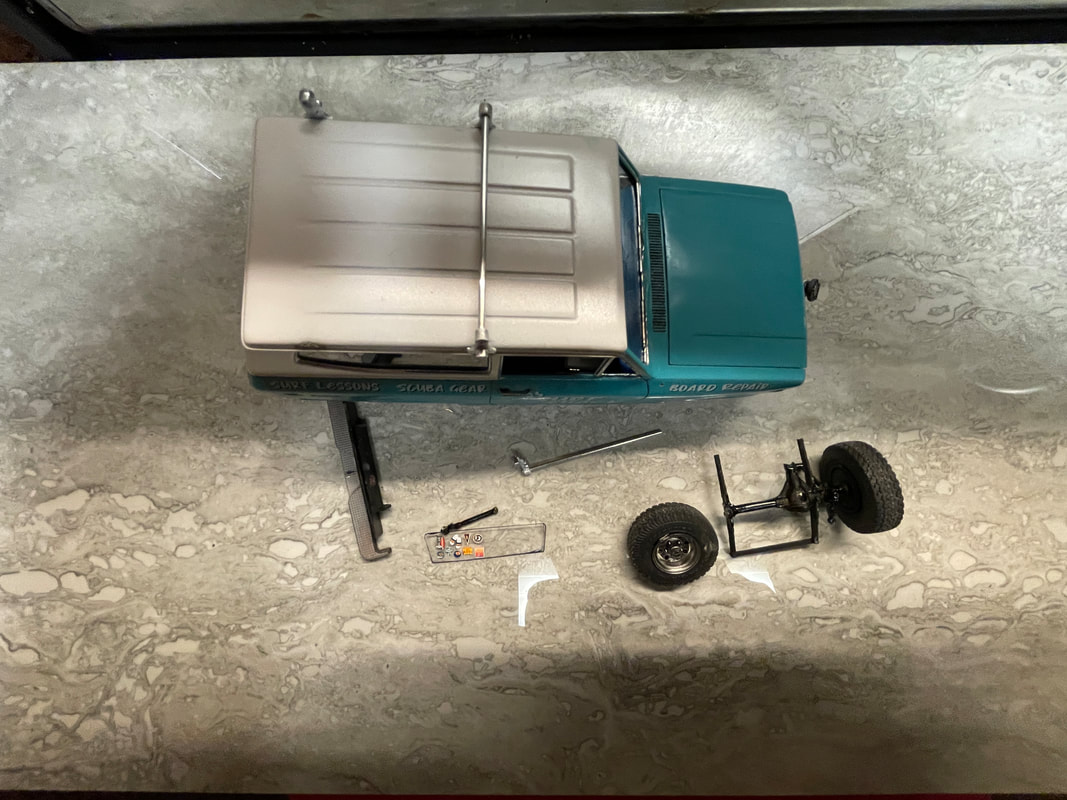
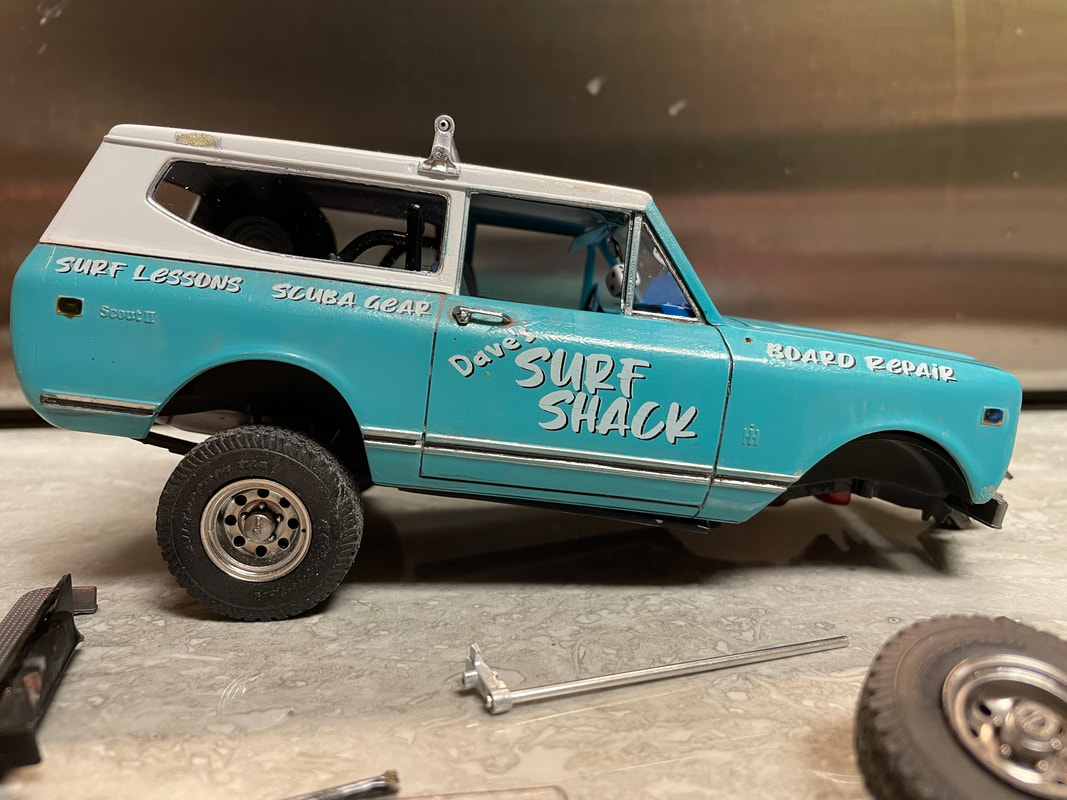
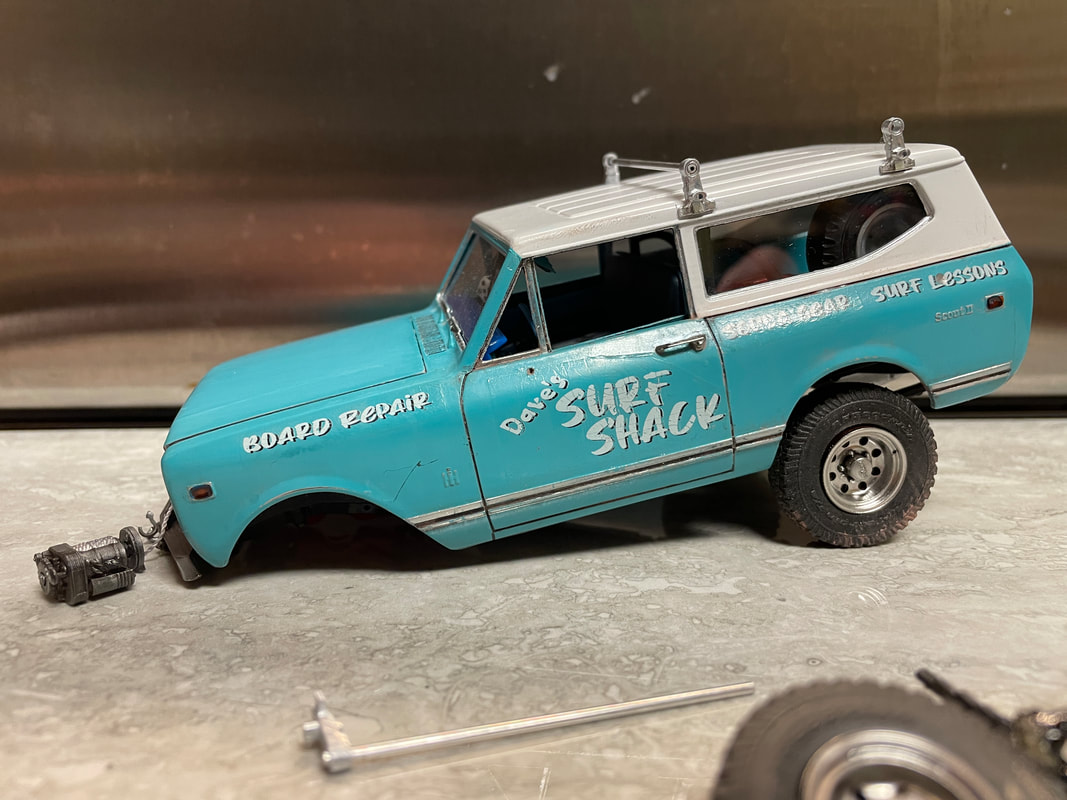
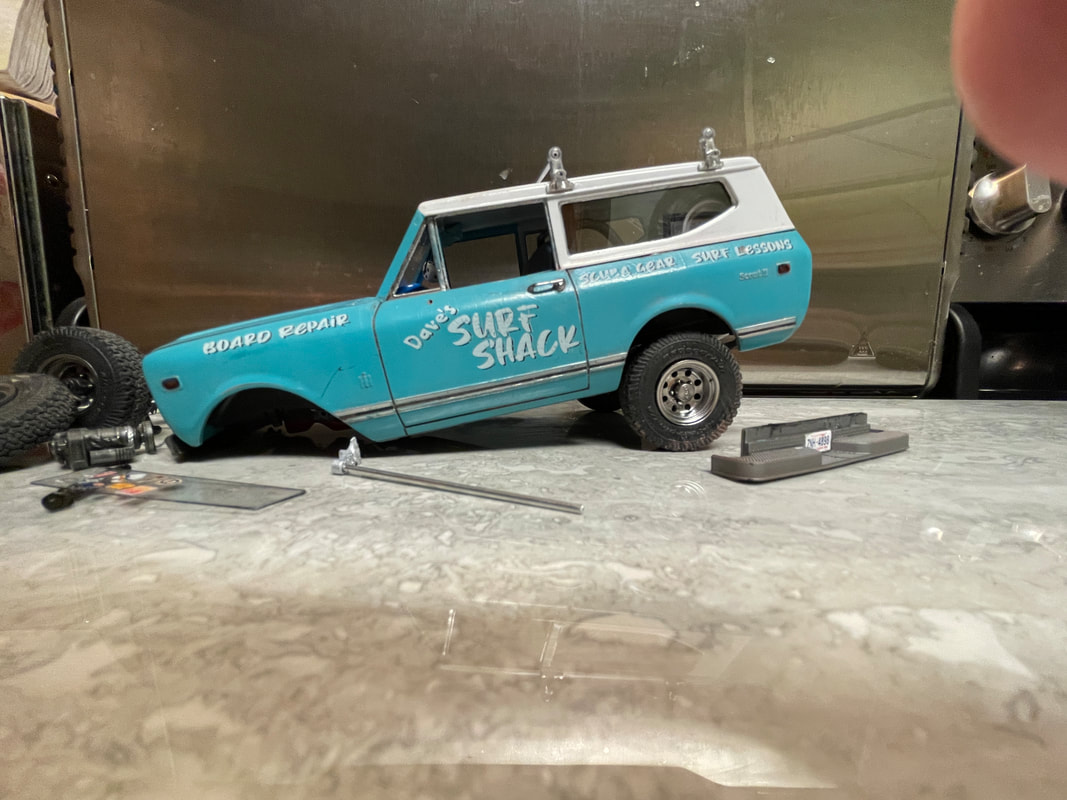
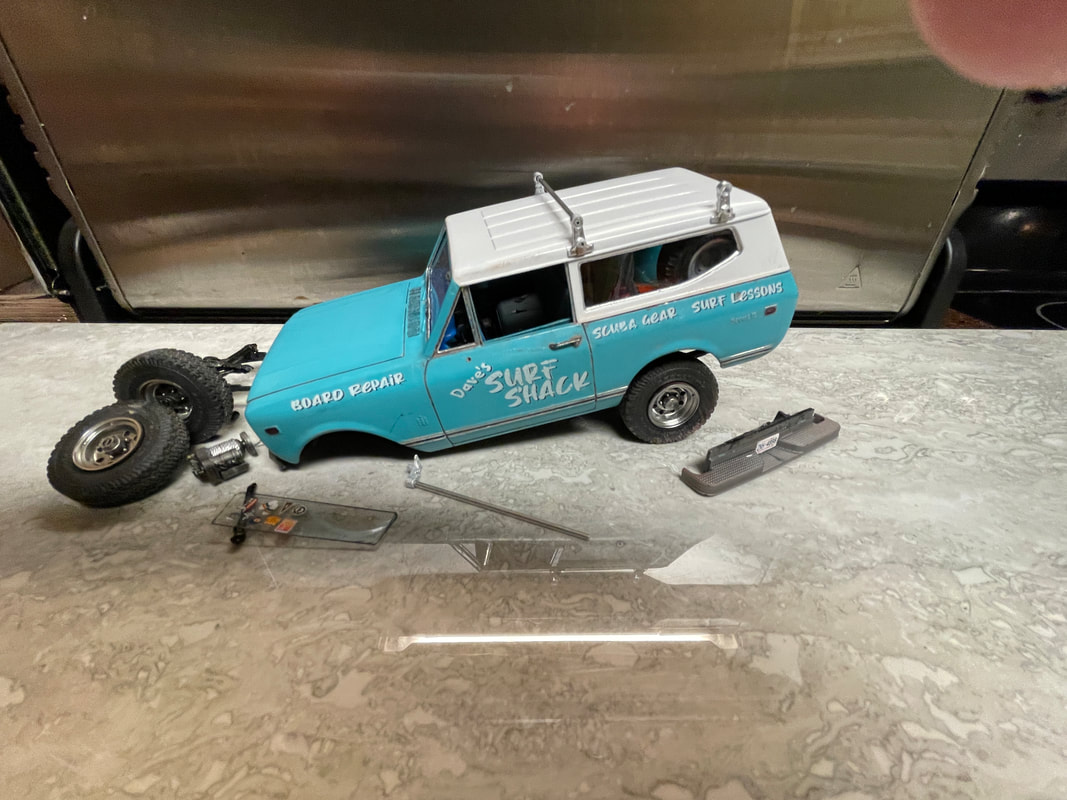
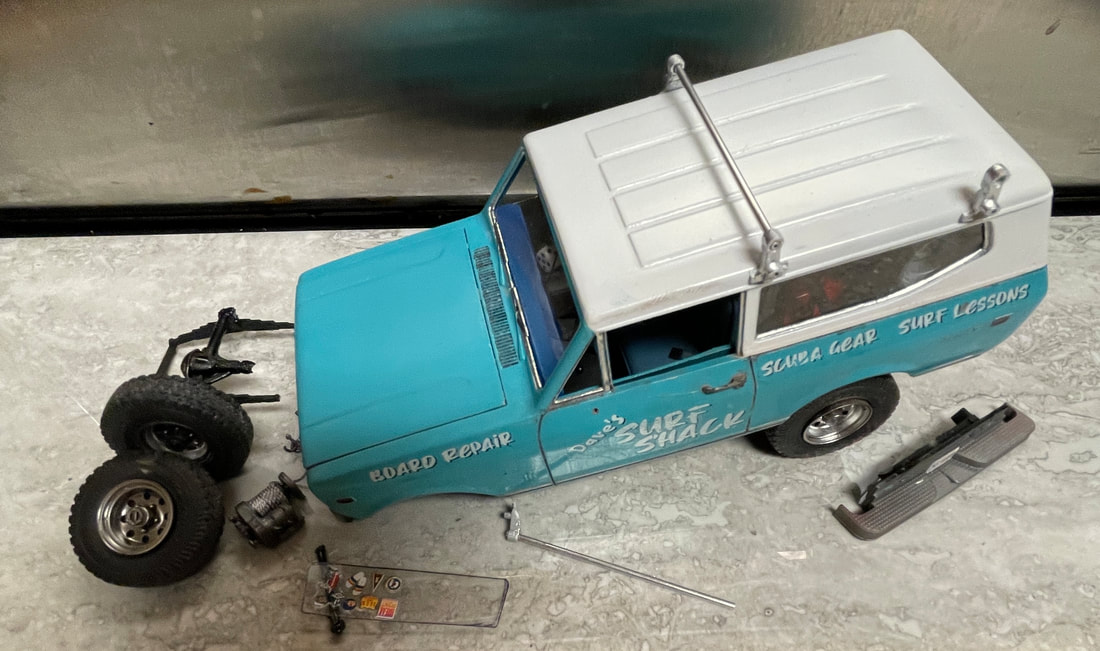
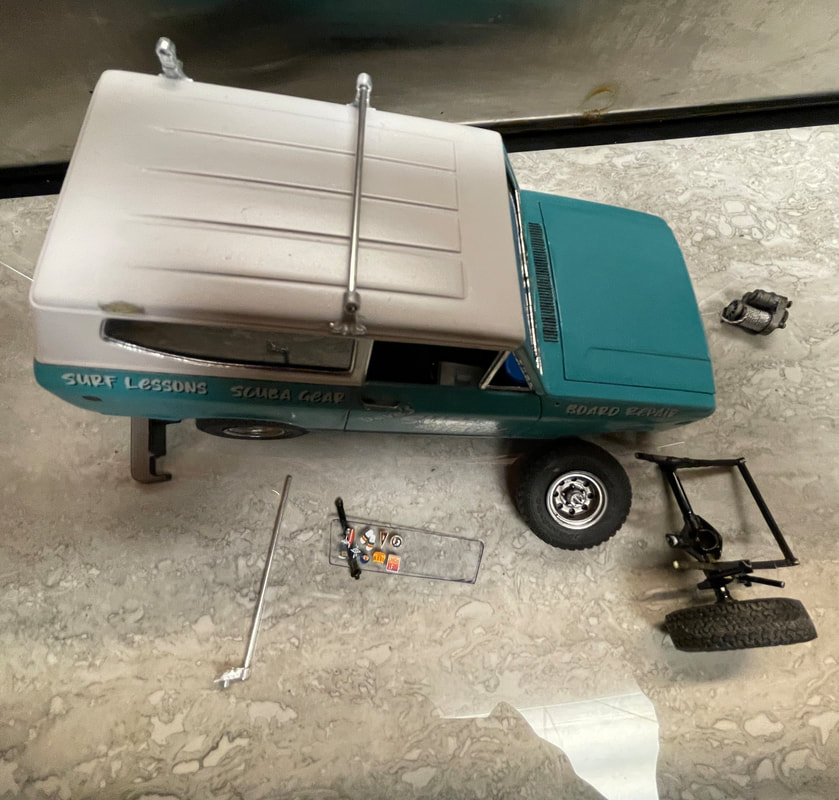
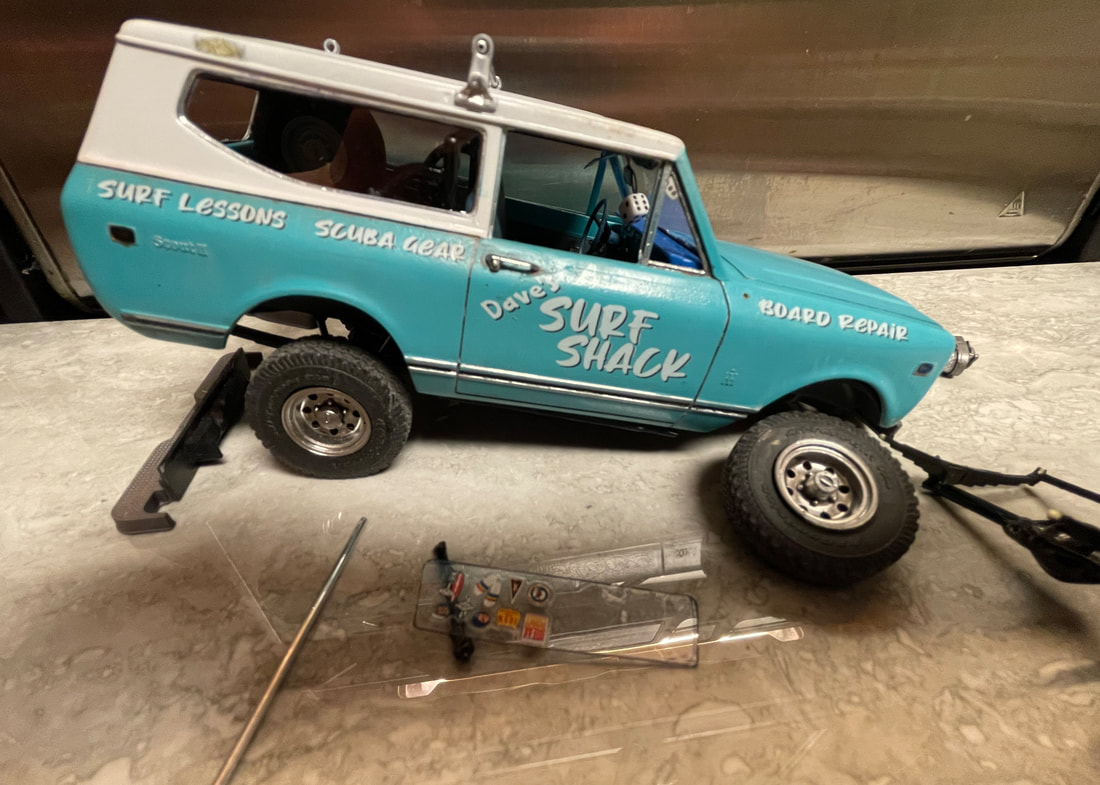
My Brother-in-Law gifted me this cool Scout II for Christmas (2022).
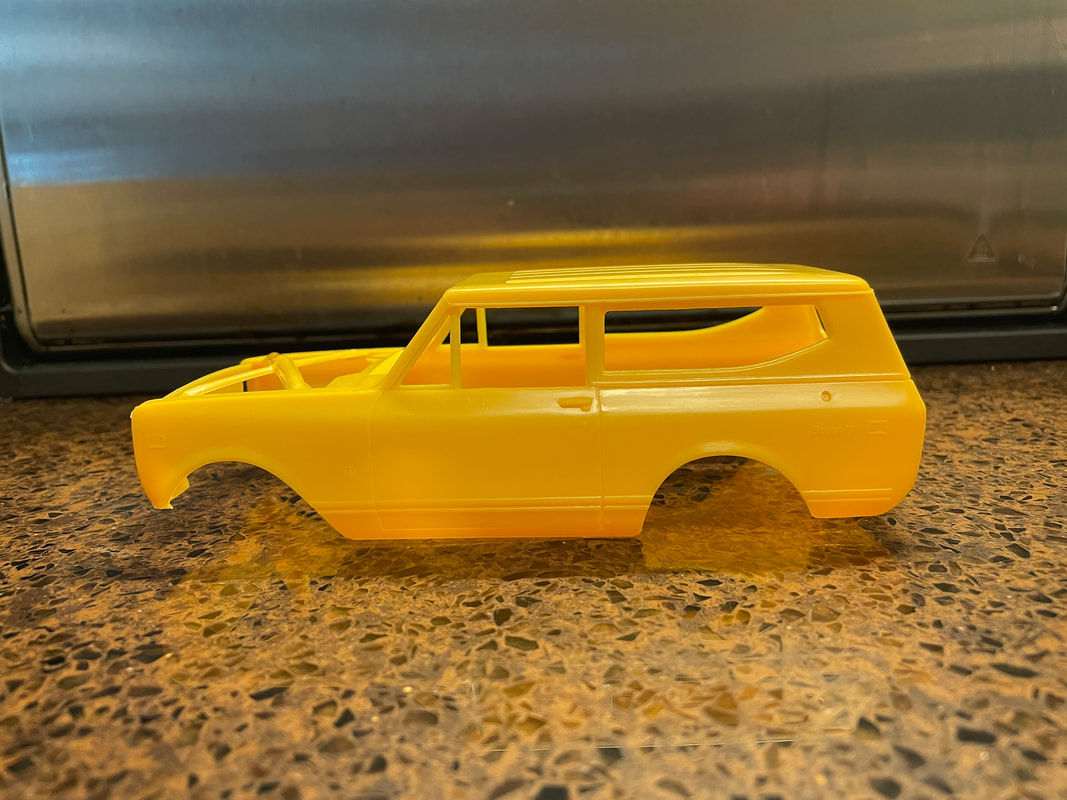
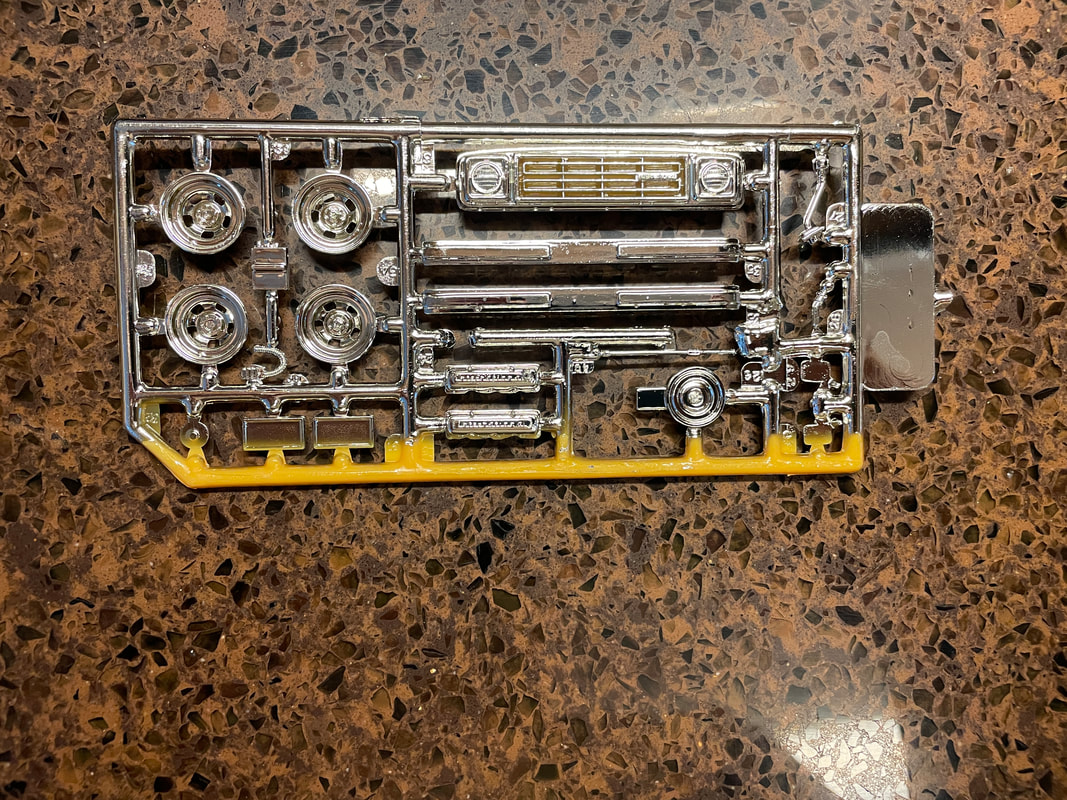
This kit was originally tooled by ERTL around 1976. This kit has been released several times, most recently by Round2 in their AMT line. Over the years, the original kit has been modified a few times - and there is even a Scout II SS version, which includes molded-in roadster doors. The body proportions are pretty good, although there is a pronounced bow to the hood and the top of the grill. One oddity of this kit is that the wheels and tires are molded in such a way, that the wheel retainer (rear) makes up part of the back of the tire. This makes it difficult to substitute other wheels and tires.
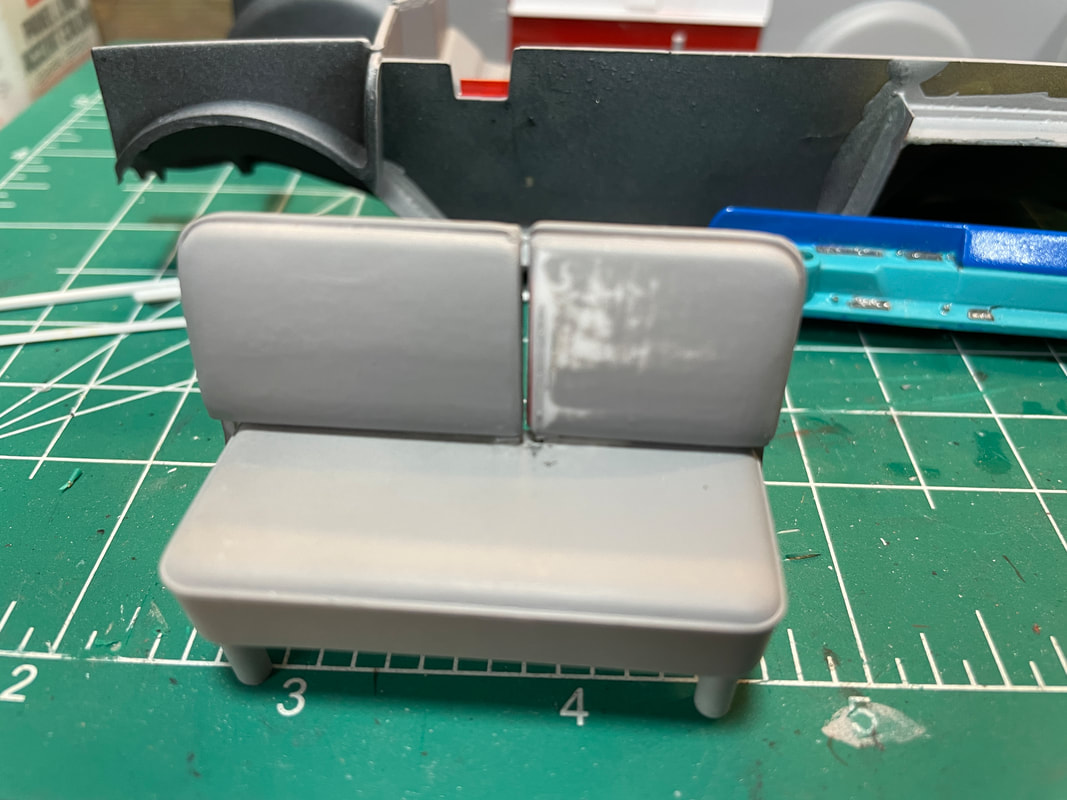
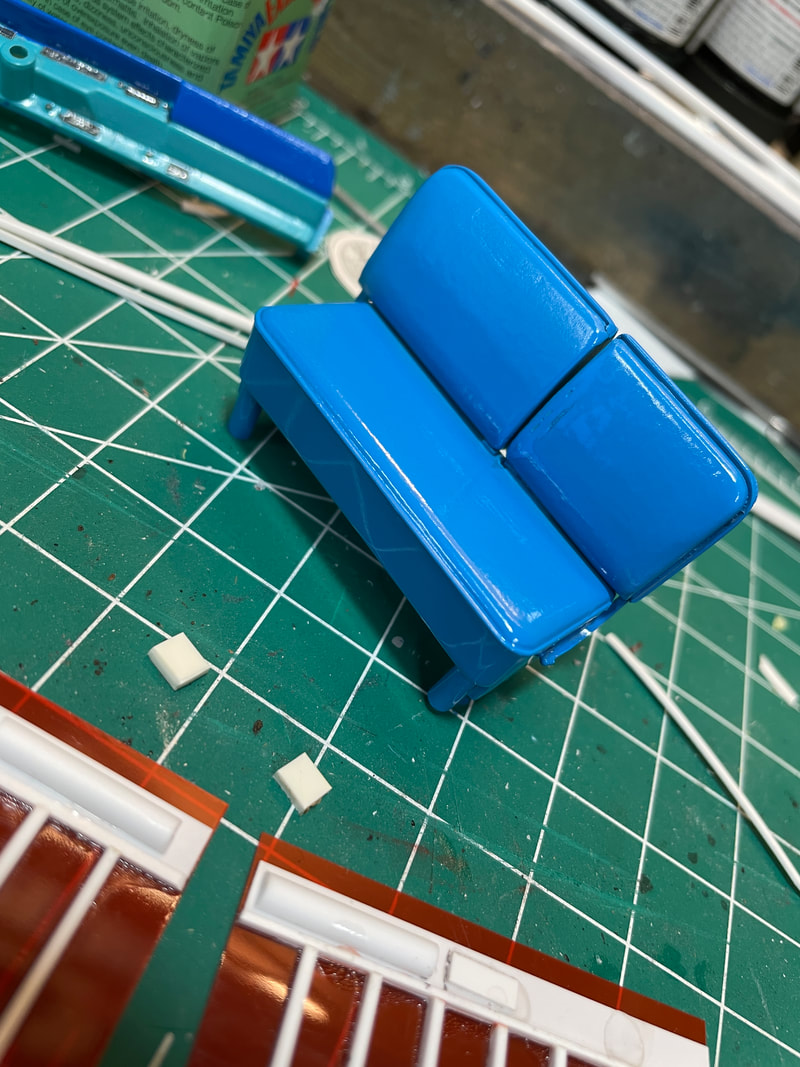
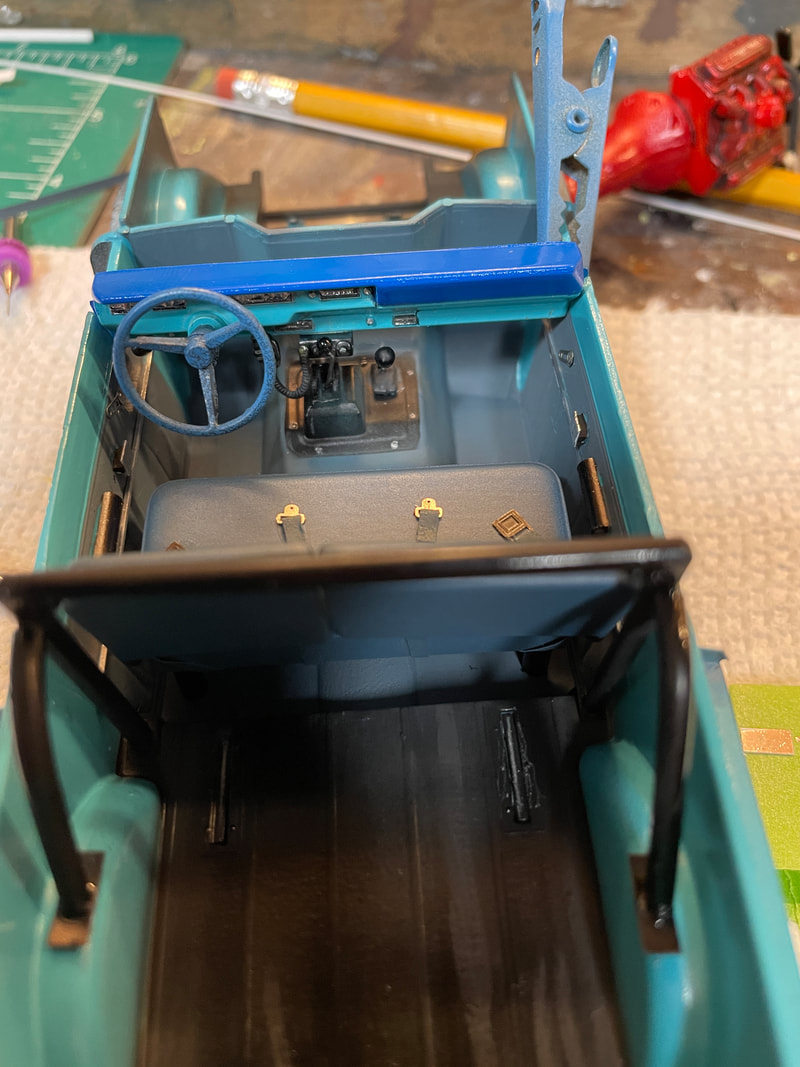
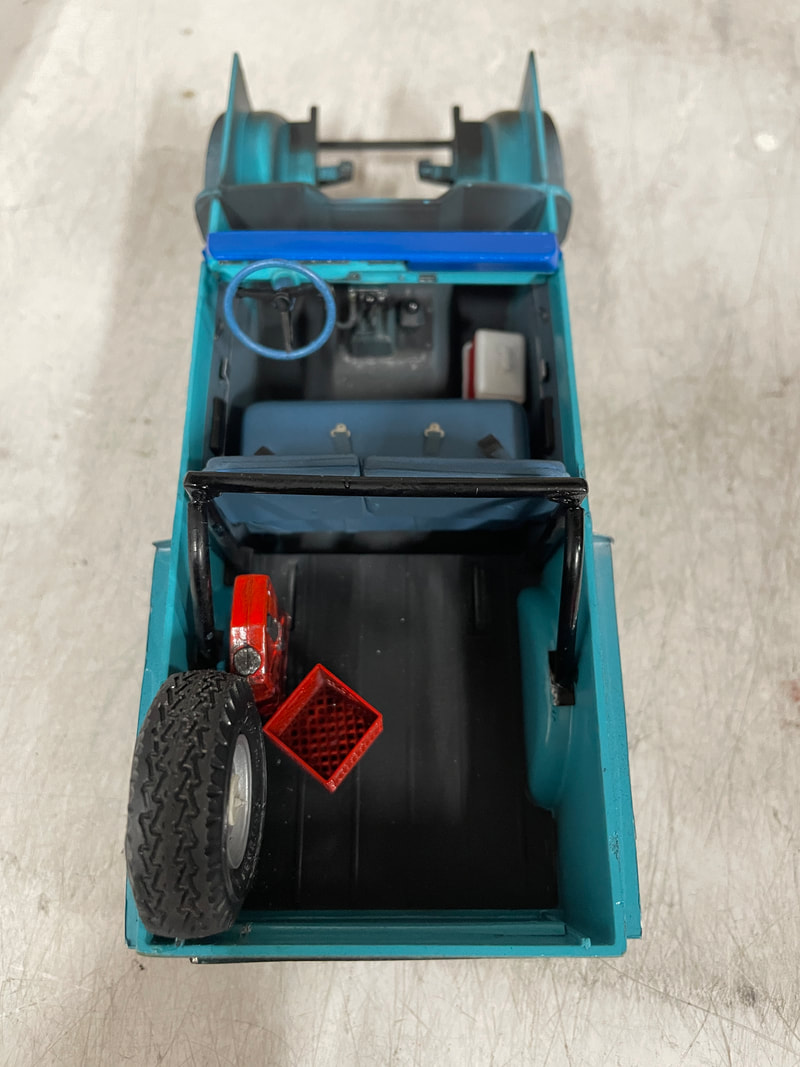
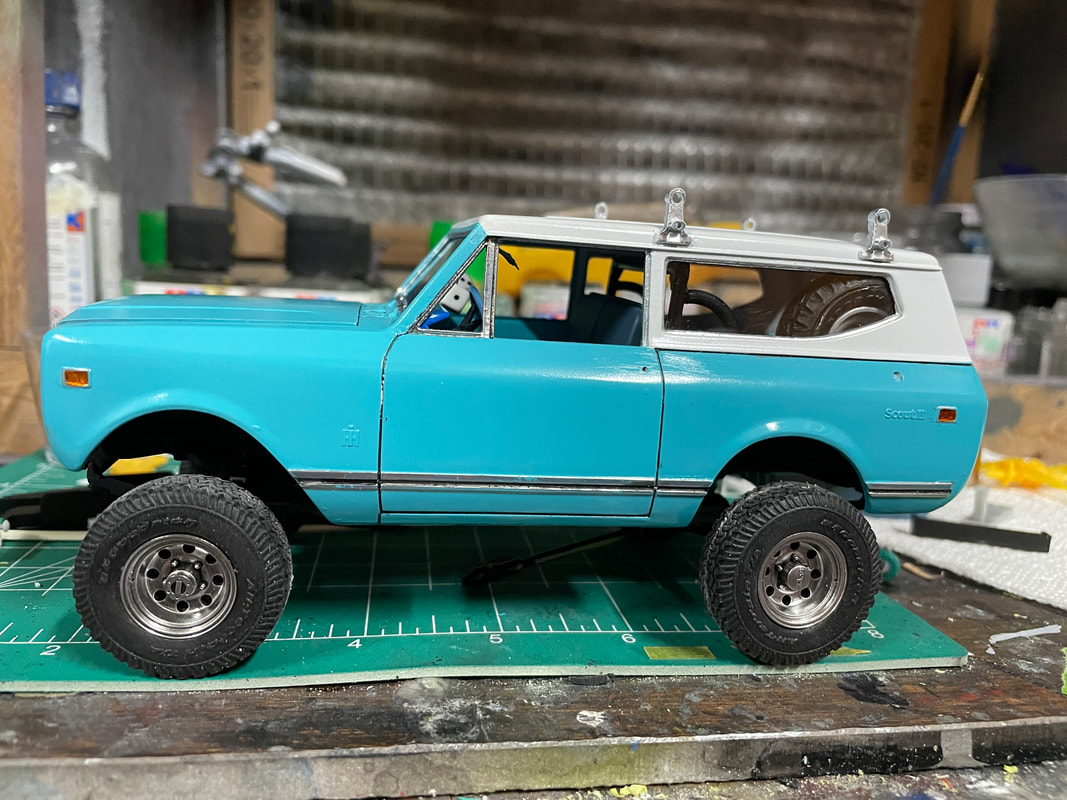
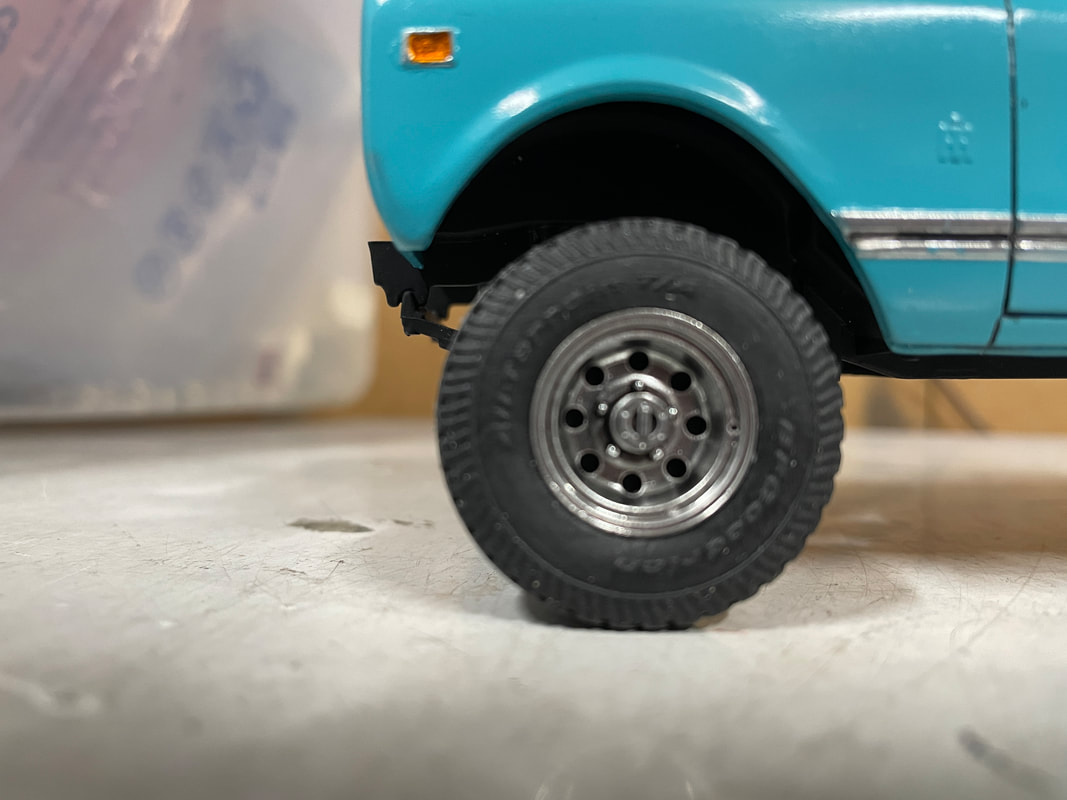
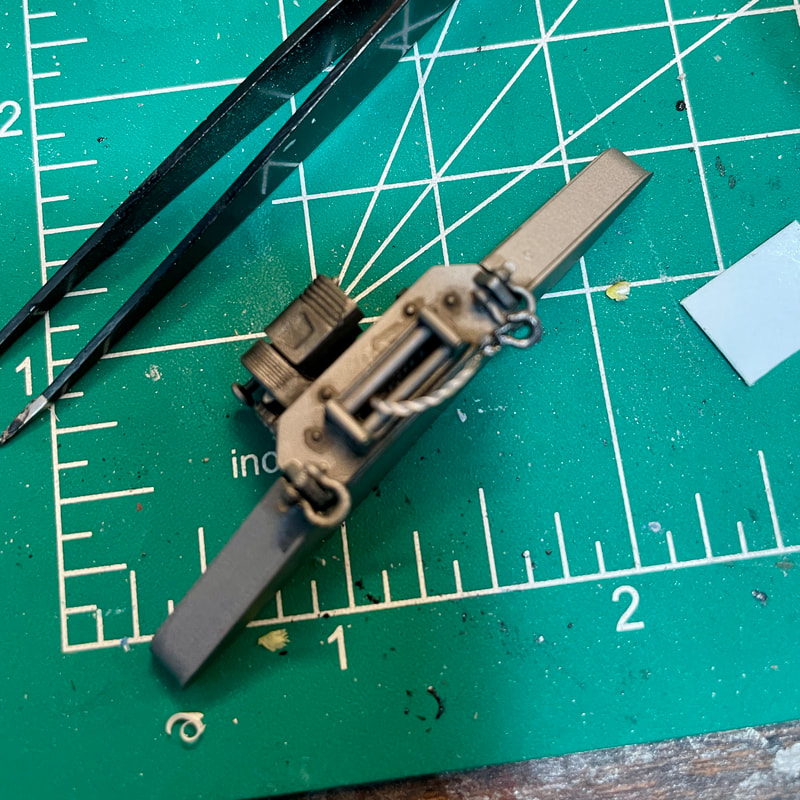
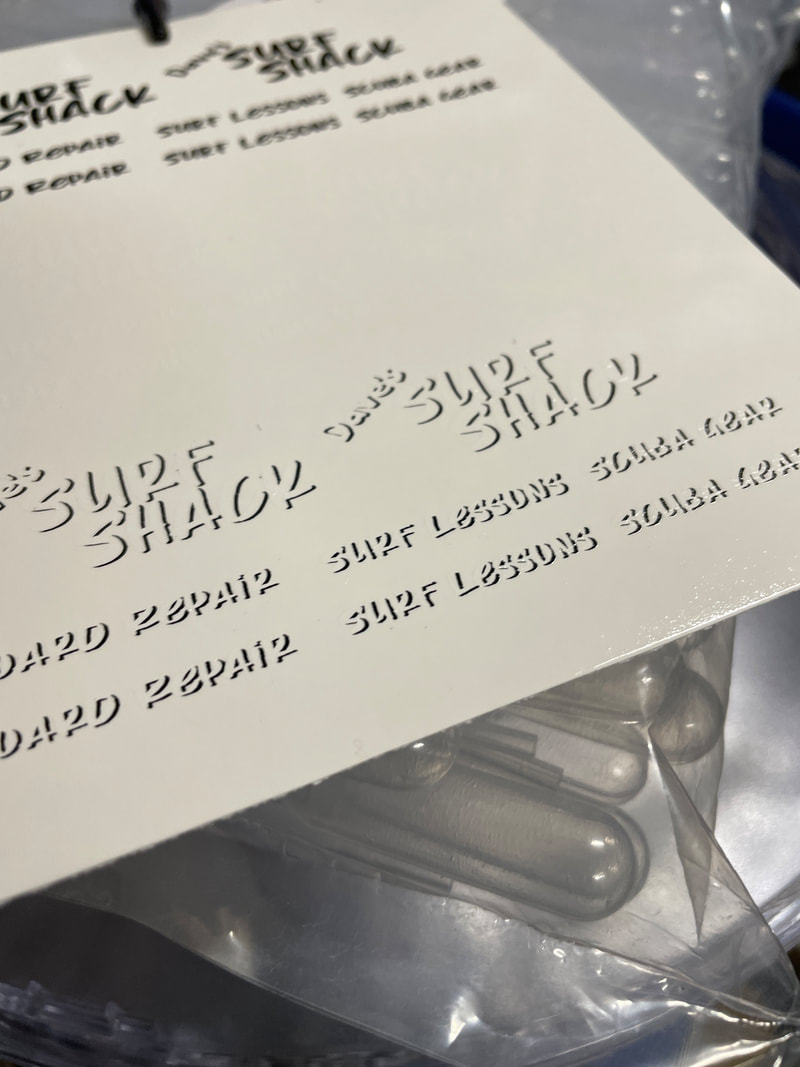
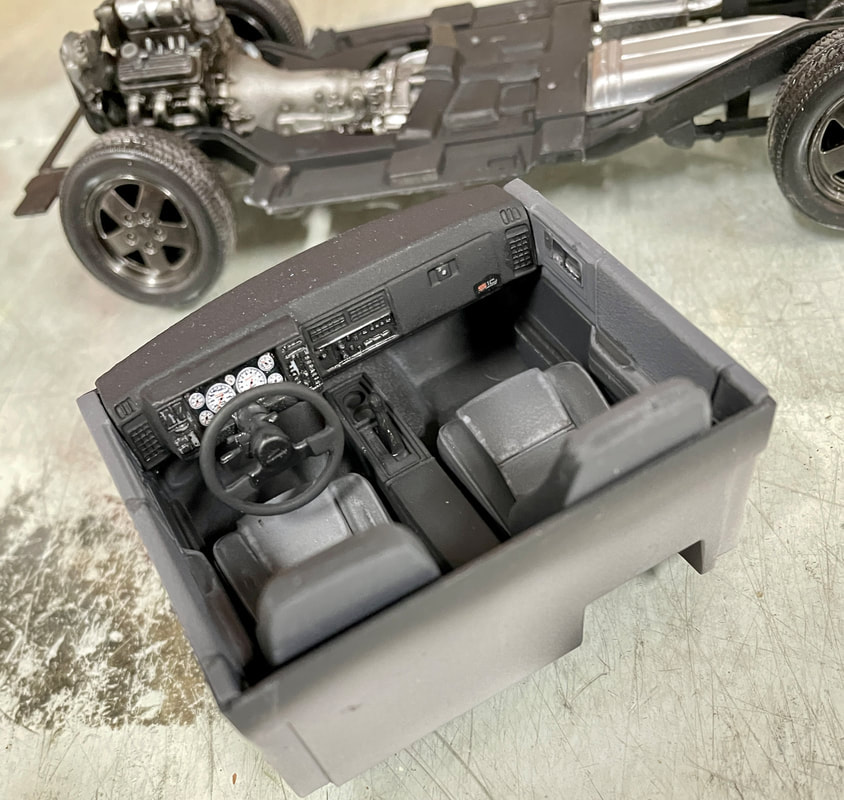
From the start, I decided to give the Scout a lift. I accomplished this by cutting up the suspension and flipping the axles to the lower side of the leaf springs. I modified a seat from an AMT 1957 Chevy pickup to make a bench for the front. I opened the grill by grinding material away from the back. I also used a few parts from the no longer available Olson Bros. line - both bumpers and the winch. This was my first attempt at making my own decals. Unfortunately, as I was nearing completion, I knocked the kit from my bench and it hit the floor doing significant damage. I've stripped the paint and am starting over .... :)
This kit was originally tooled by ERTL around 1976. This kit has been released several times, most recently by Round2 in their AMT line. Over the years, the original kit has been modified a few times - and there is even a Scout II SS version, which includes molded-in roadster doors. The body proportions are pretty good, although there is a pronounced bow to the hood and the top of the grill. One oddity of this kit is that the wheels and tires are molded in such a way, that the wheel retainer (rear) makes up part of the back of the tire. This makes it difficult to substitute other wheels and tires.
From the start, I decided to give the Scout a lift. I accomplished this by cutting up the suspension and flipping the axles to the lower side of the leaf springs. I modified a seat from an AMT 1957 Chevy pickup to make a bench for the front. I opened the grill by grinding material away from the back. I also used a few parts from the no longer available Olson Bros. line - both bumpers and the winch. This was my first attempt at making my own decals. Unfortunately, as I was nearing completion, I knocked the kit from my bench and it hit the floor doing significant damage. I've stripped the paint and am starting over .... :)
- AMT 1/25 Harvester International Scout II 1248/12
- Tamiya Lacquers (Interior and Exterior)
- Alclad II Lacquers - wheels, bumper, bright work
- Fireball Modelworks - wheels, tires
- Olson Bros (discontinued) bumpers, winch
- Various Sources - Interior "stuff"
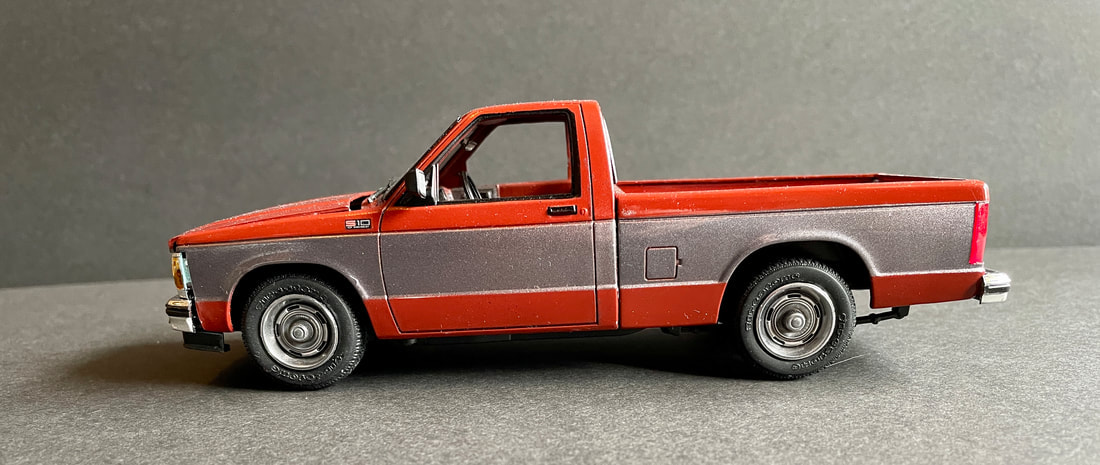
Revell 1/25 Chevrolet S-10
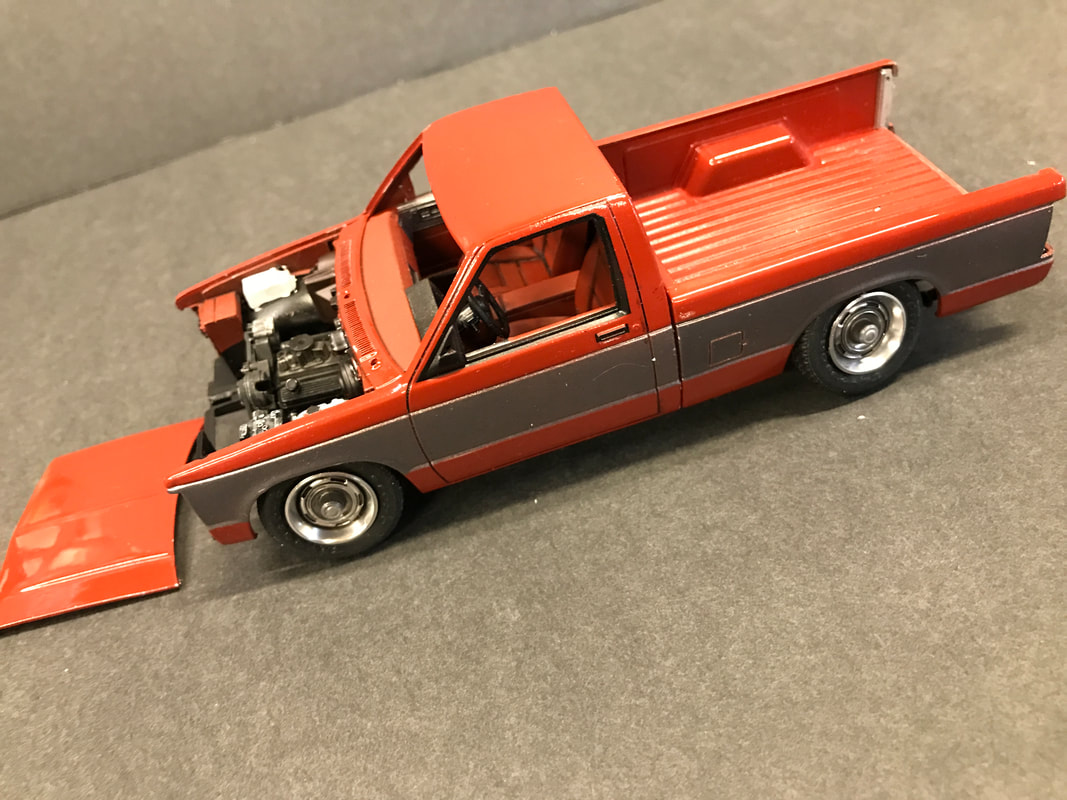
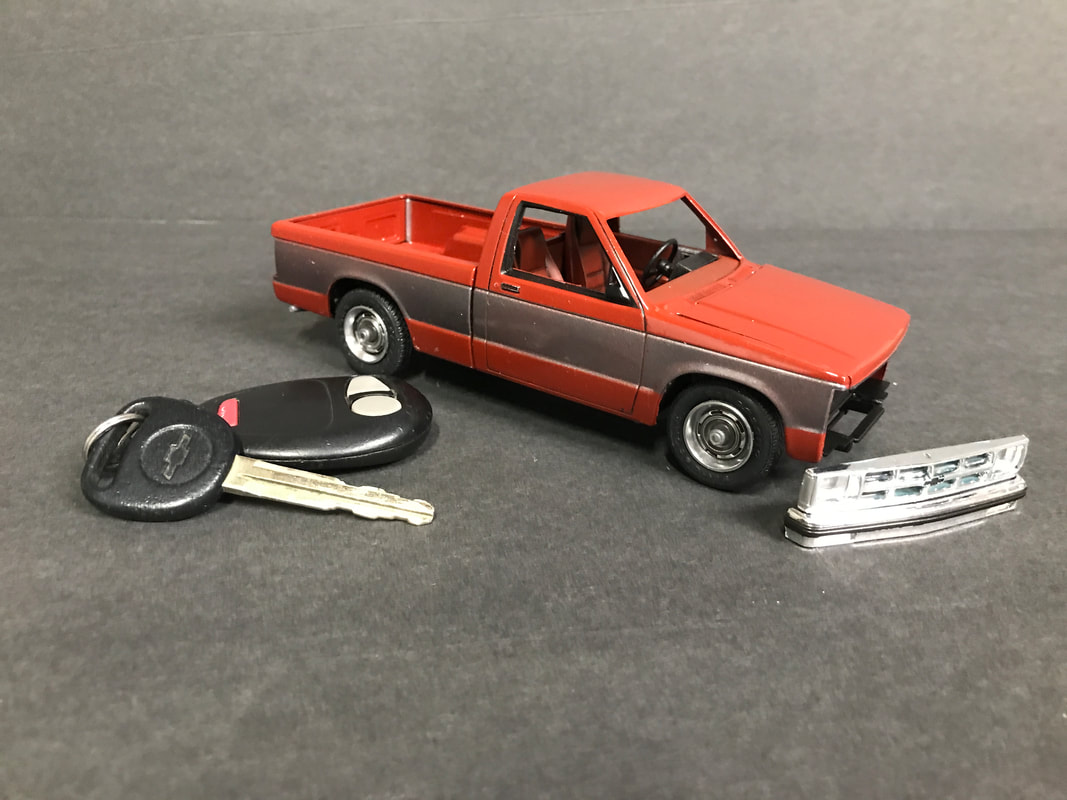
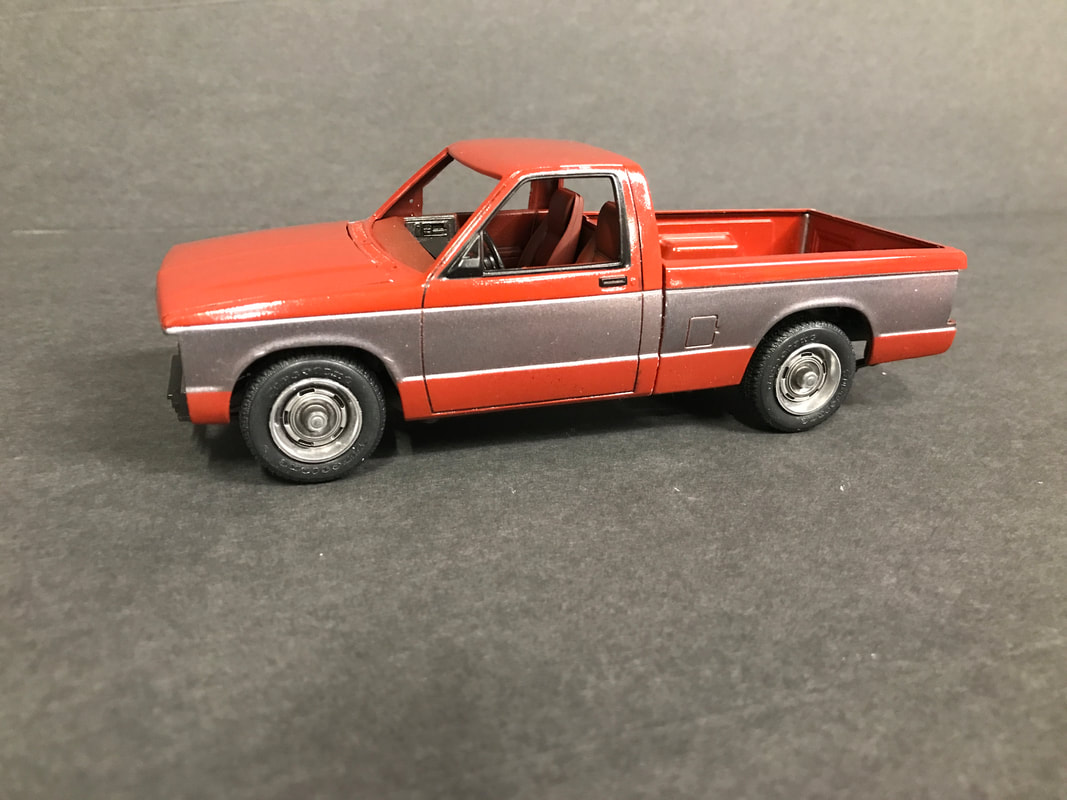
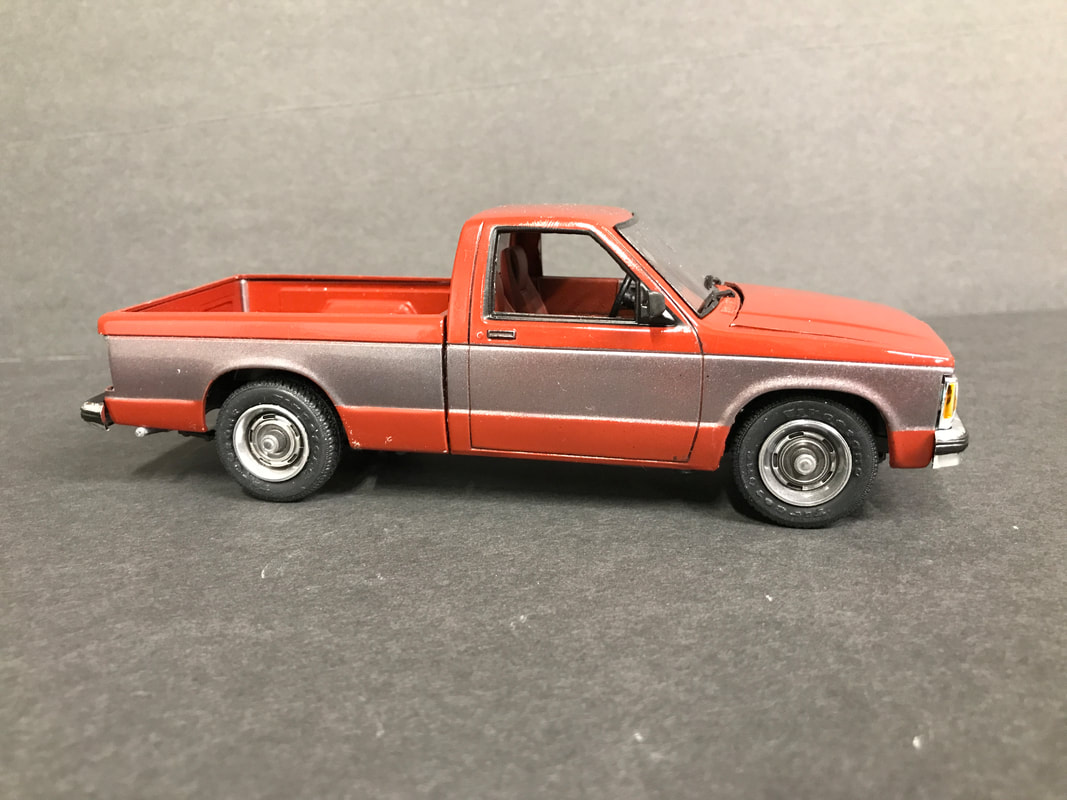
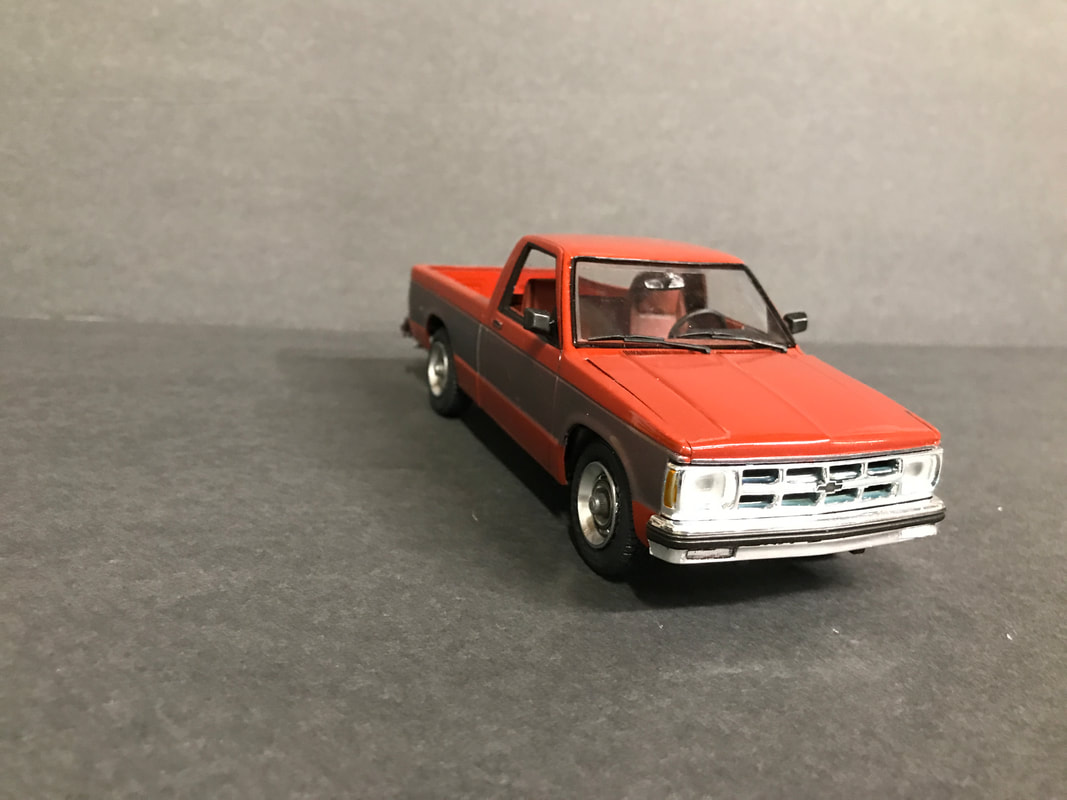
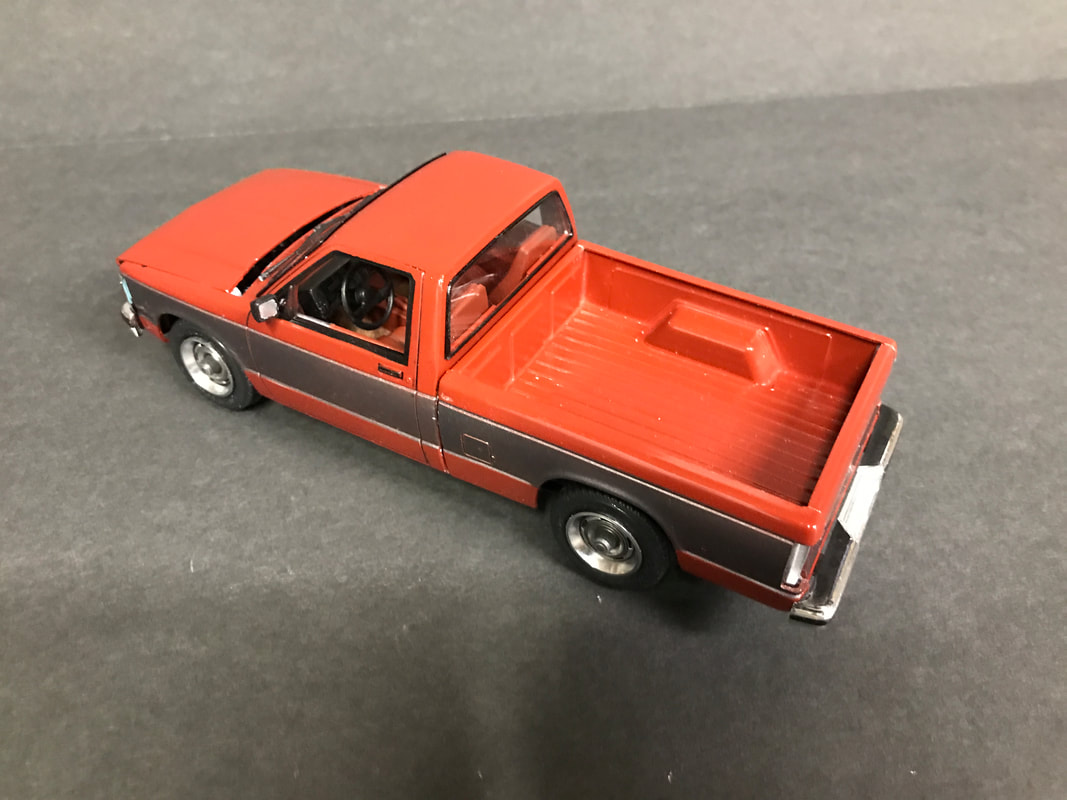
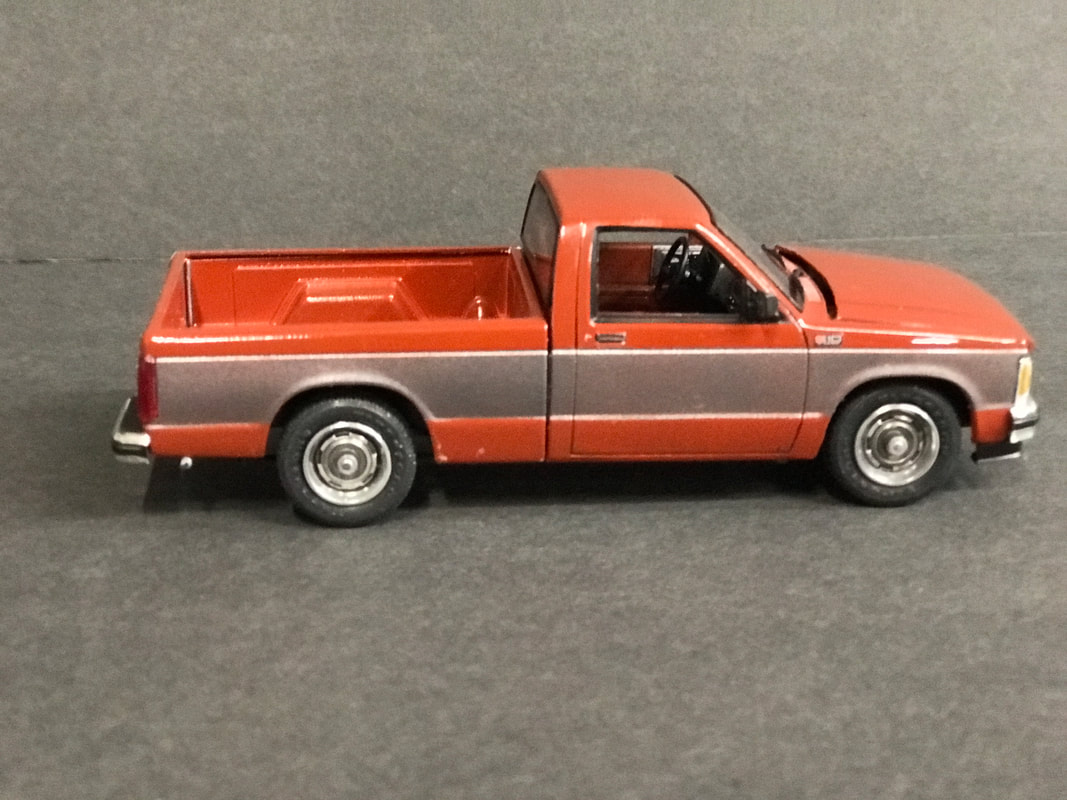
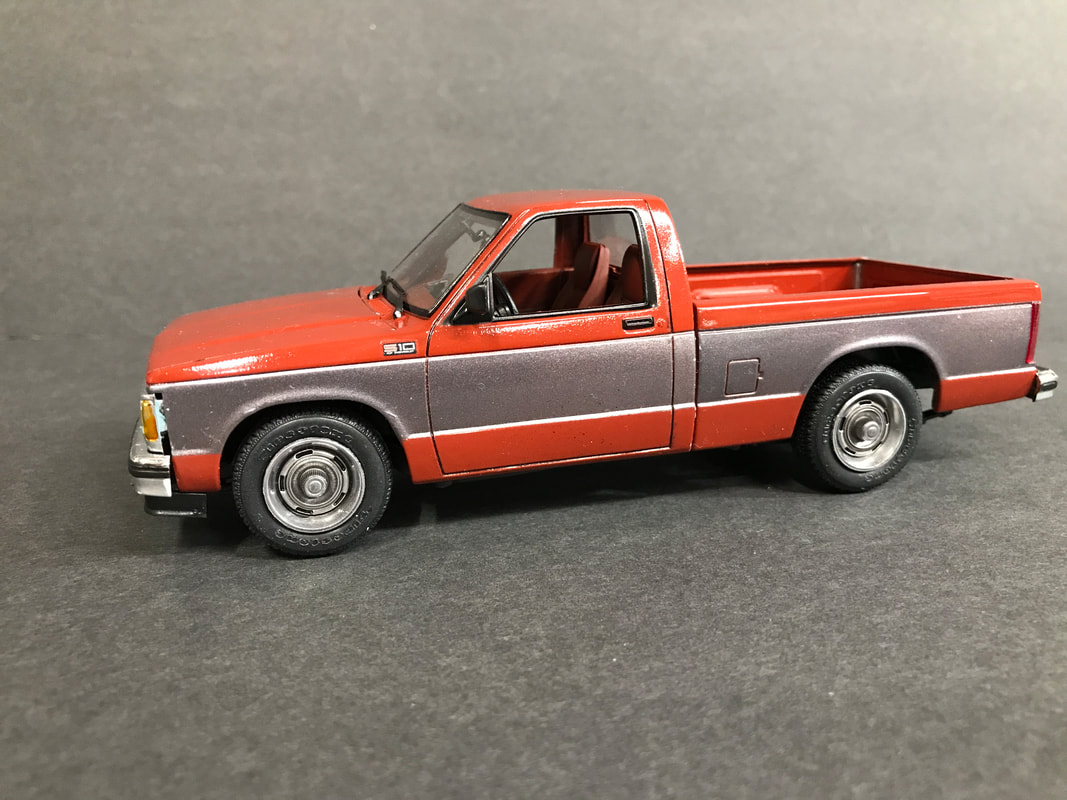
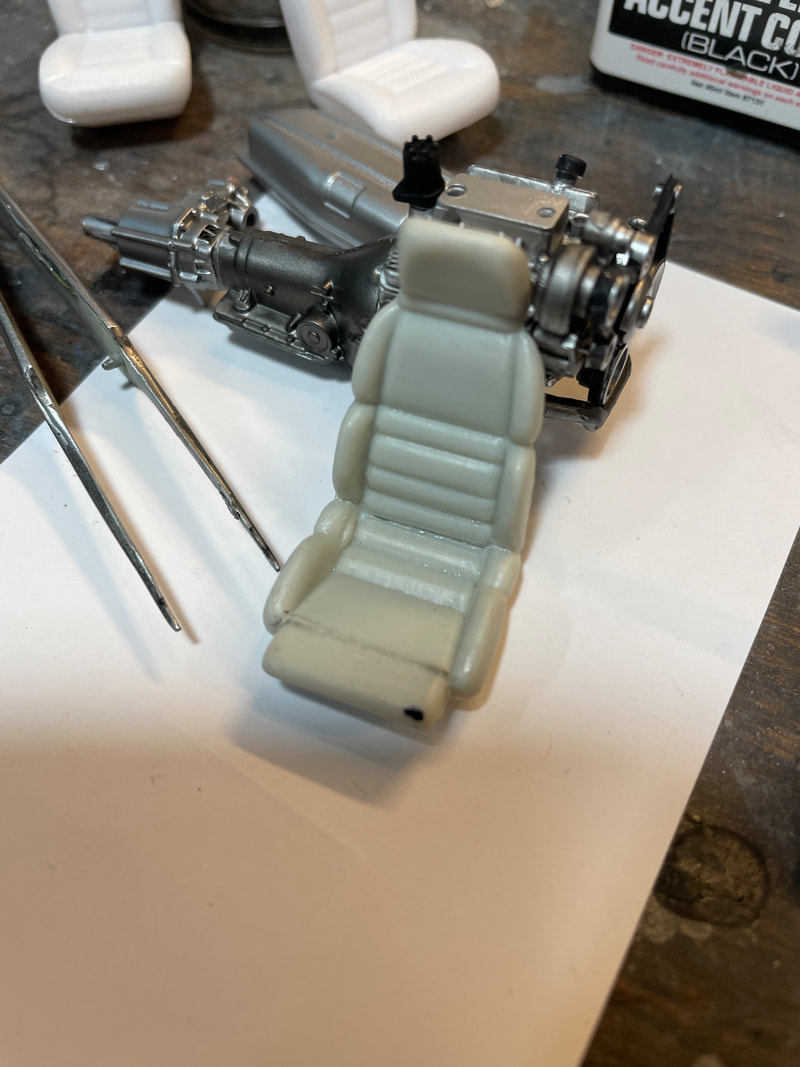
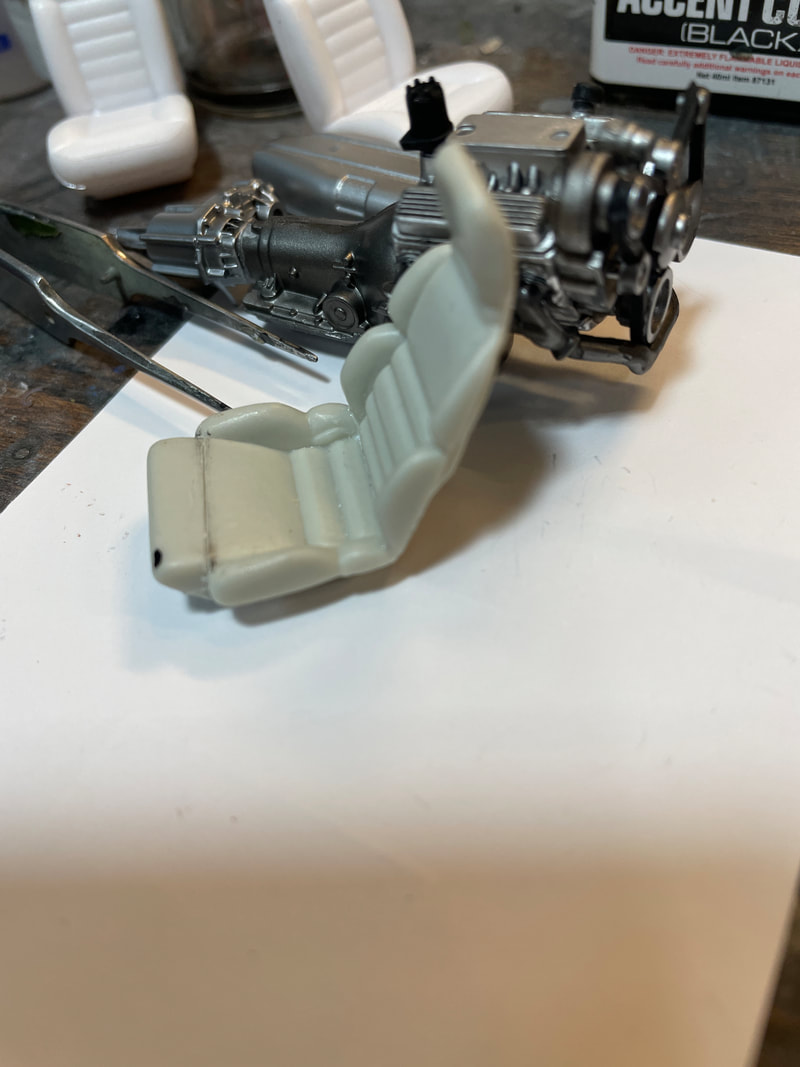
Originally released in 1993 by Monogram, the first generation Chevy S-10 is probably one of my favorite small pickups of all time. My Dad had a 4.3, extended cab, 4x4, which he drove for around 300,000 miles - before selling it. They were great little trucks, and I still see a few on the road today.
Monogram's kit (recently reissued by Revell as the "Street Sleeper") builds up nicely. The kit was originally issued with parts to build a 4.3 v6 engine and it came with 4x4 wheels, although it lacked an actual 4x4 setup. It has been reissued a few times, with various custom parts. It shares many parts with the equally fun-to-build Monogram GMC Syclone. The most recent Revell issue of the kit includes the Syclone drive train, S-10 wheels, and S-10 interior. Kind of an odd mashup, but workable.
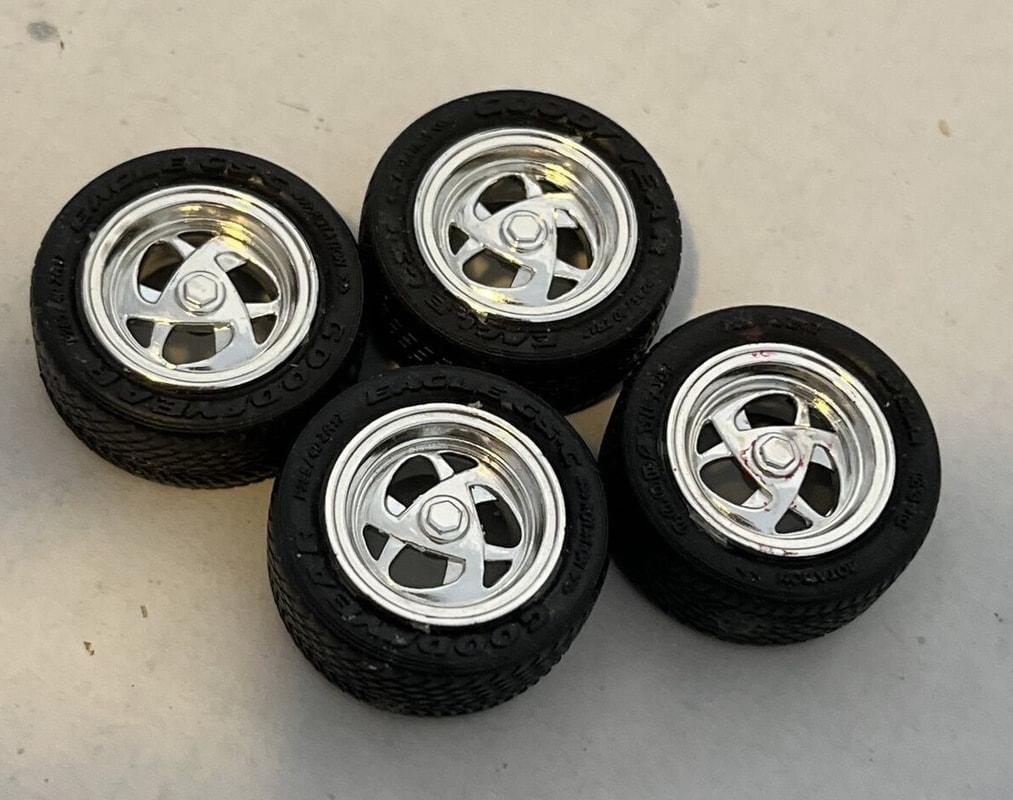
For this build, I actually used parts from a couple of issues of the kit that I had together in a box of abandoned projects. Rally wheels were sources as a "PIF" from the Spotlight Hobbies Message Board back in 2020. Tires are from an unknown AMT kit. Exterior colors are Tamiya Dull Red and Light Gunmetal
Monogram's kit (recently reissued by Revell as the "Street Sleeper") builds up nicely. The kit was originally issued with parts to build a 4.3 v6 engine and it came with 4x4 wheels, although it lacked an actual 4x4 setup. It has been reissued a few times, with various custom parts. It shares many parts with the equally fun-to-build Monogram GMC Syclone. The most recent Revell issue of the kit includes the Syclone drive train, S-10 wheels, and S-10 interior. Kind of an odd mashup, but workable.
For this build, I actually used parts from a couple of issues of the kit that I had together in a box of abandoned projects. Rally wheels were sources as a "PIF" from the Spotlight Hobbies Message Board back in 2020. Tires are from an unknown AMT kit. Exterior colors are Tamiya Dull Red and Light Gunmetal
- Monogram 1/25 Chevrolet S-10 Pickup 2434
- Tamiya Lacquers (exterior)
- Tamiya Acrylics (Interior)
- Alclad II Lacquers - wheels (sprayed over a basecoat of Tamiya Black Lacquer)
- Wheels and Tires from unknown sources
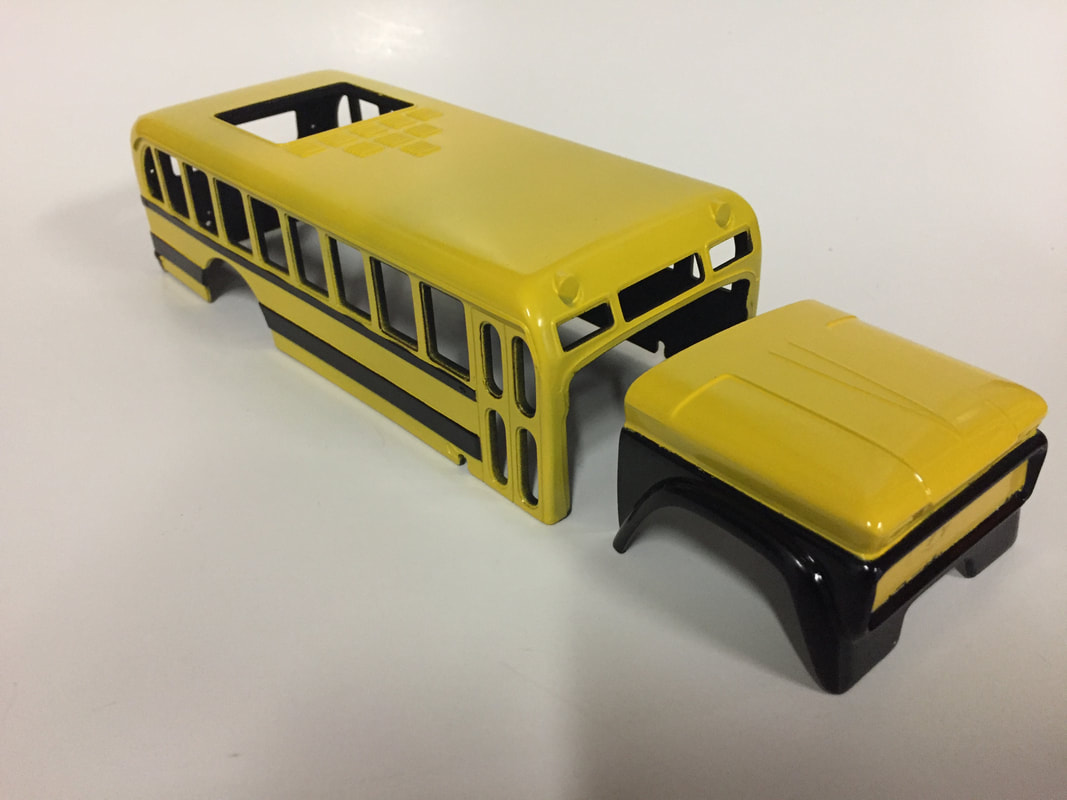
Monogram 1/24 Tom Daniel's "S'cool Bus" Show Rod
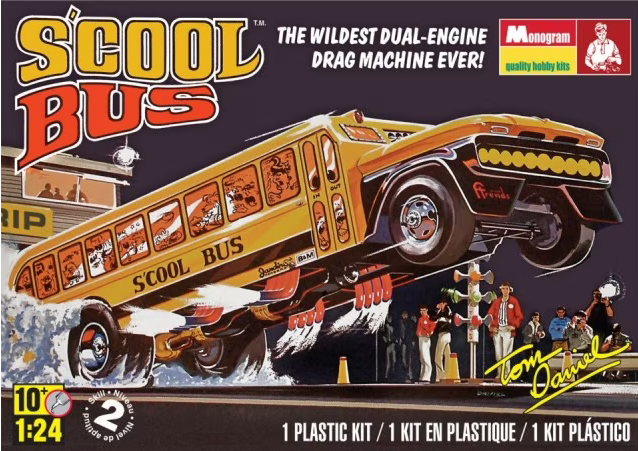
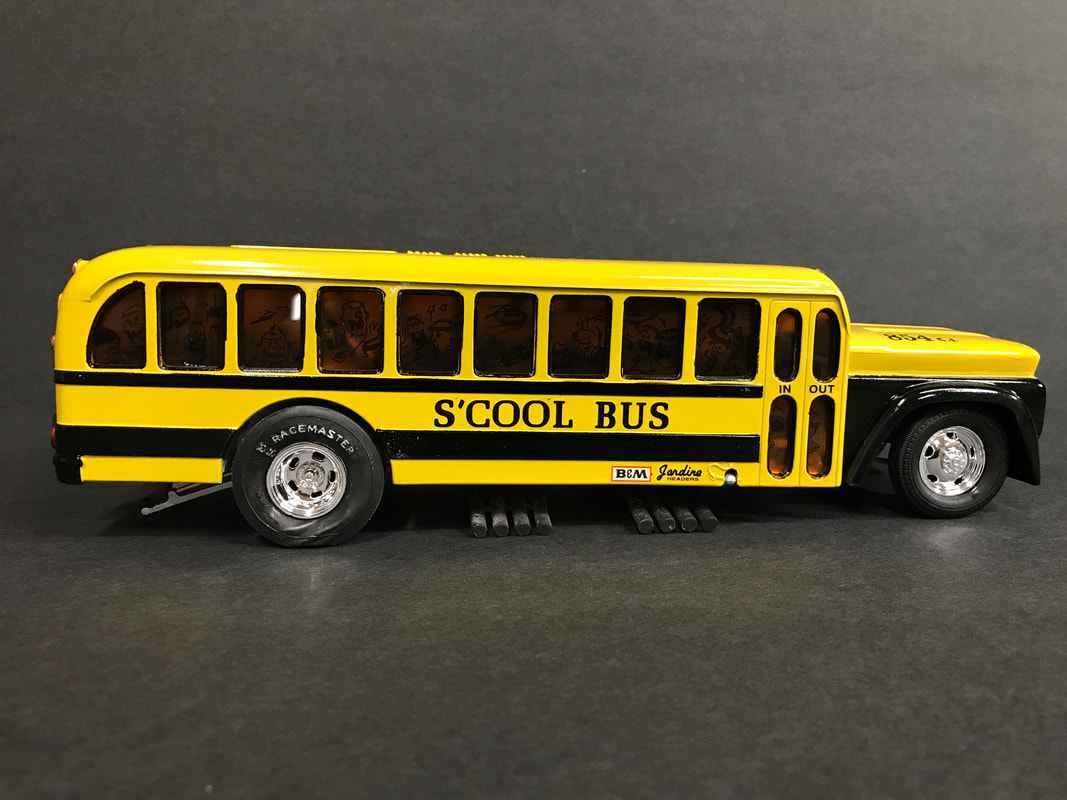
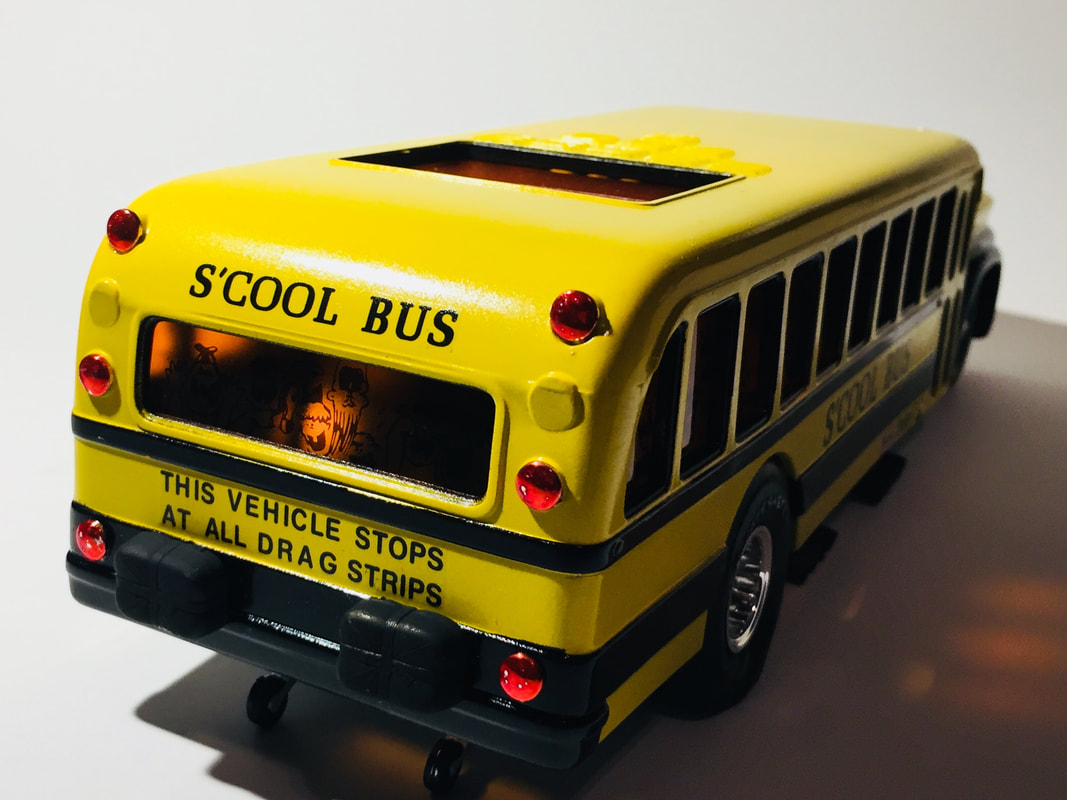
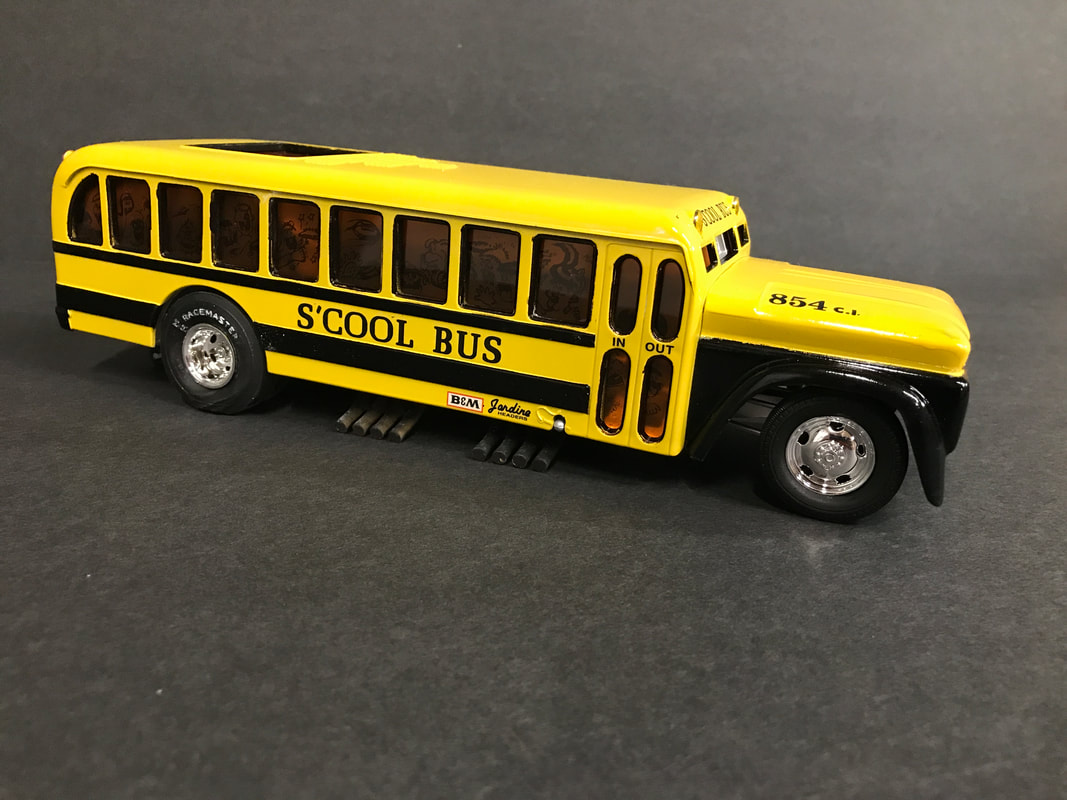
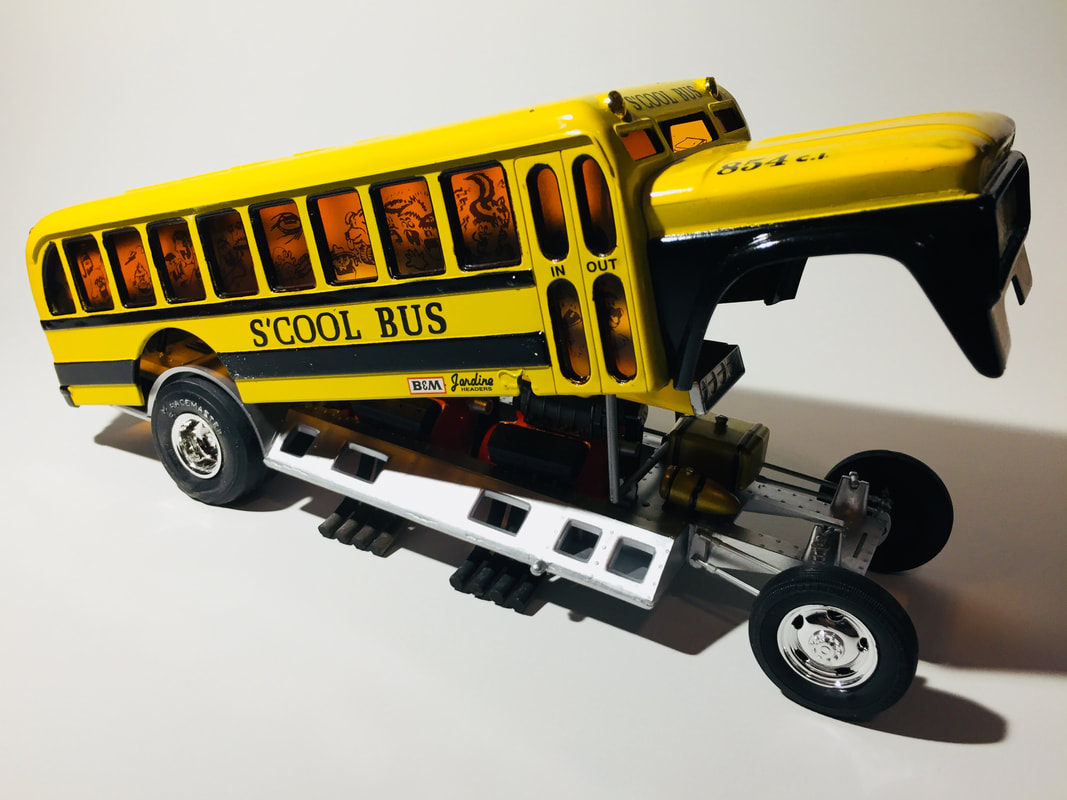
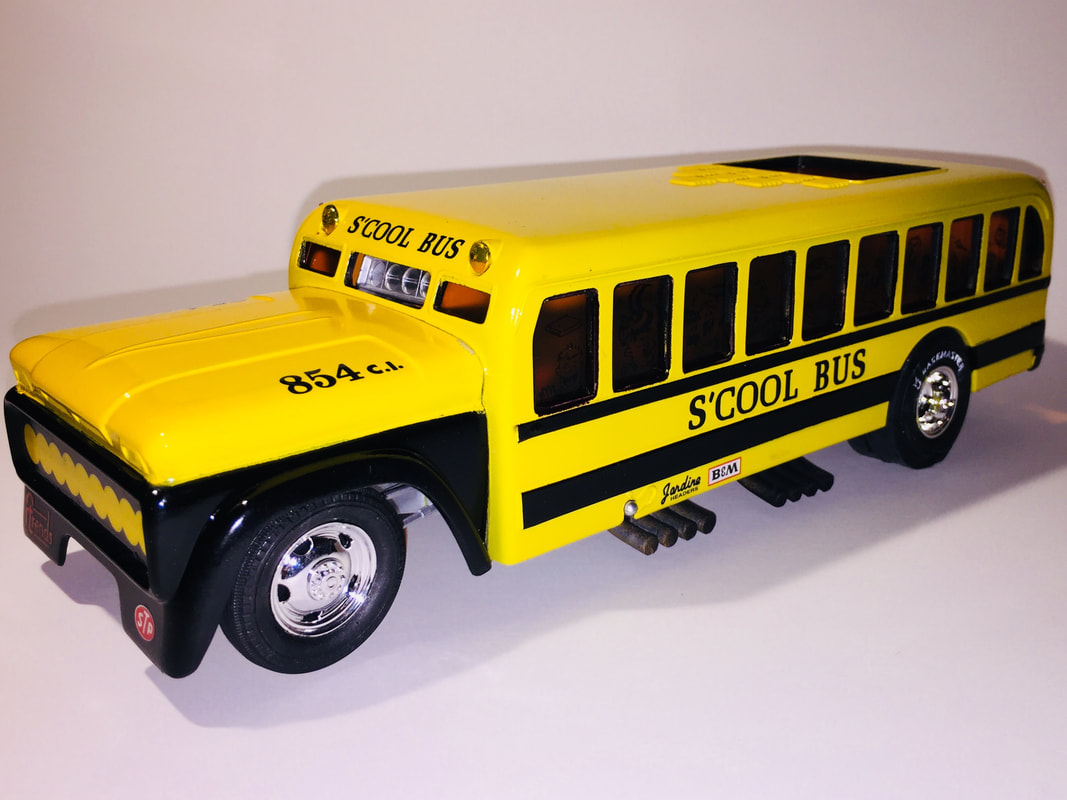
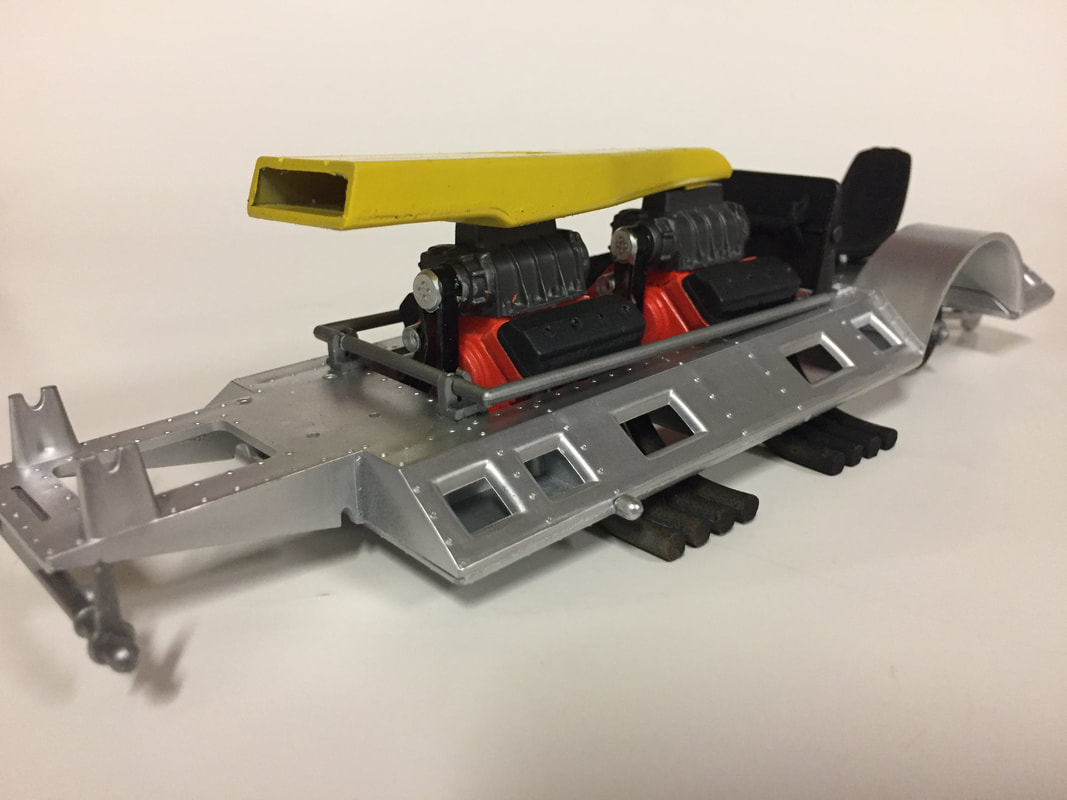
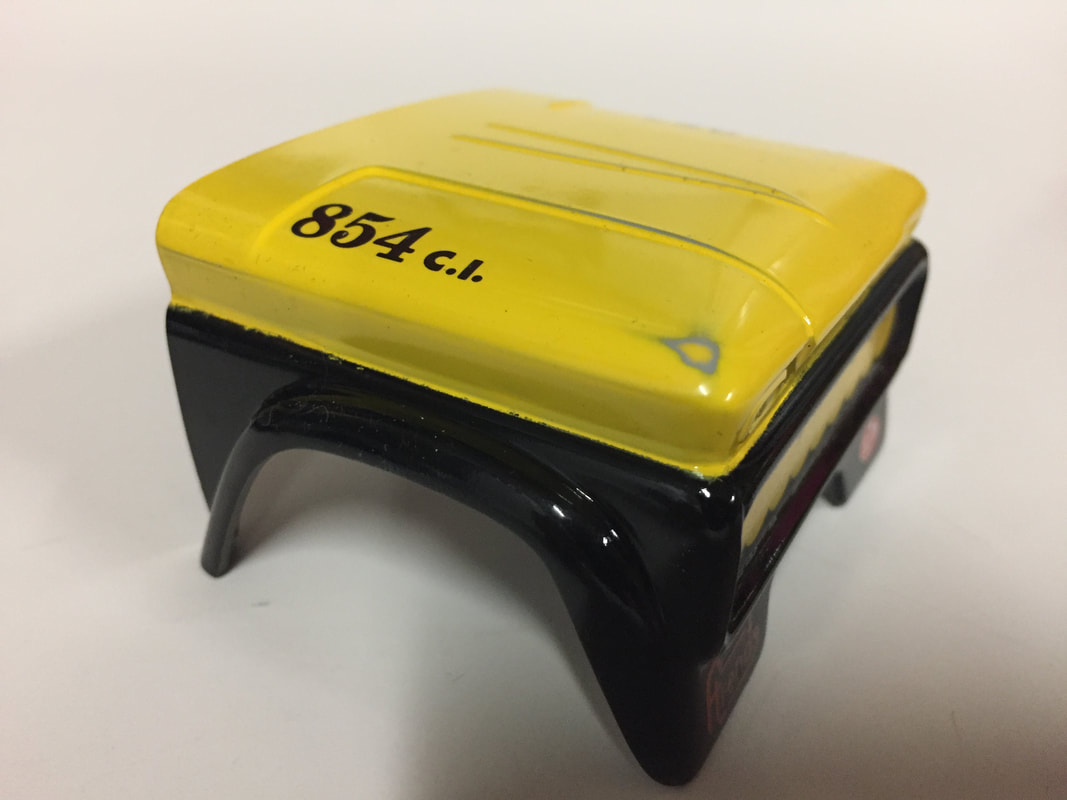
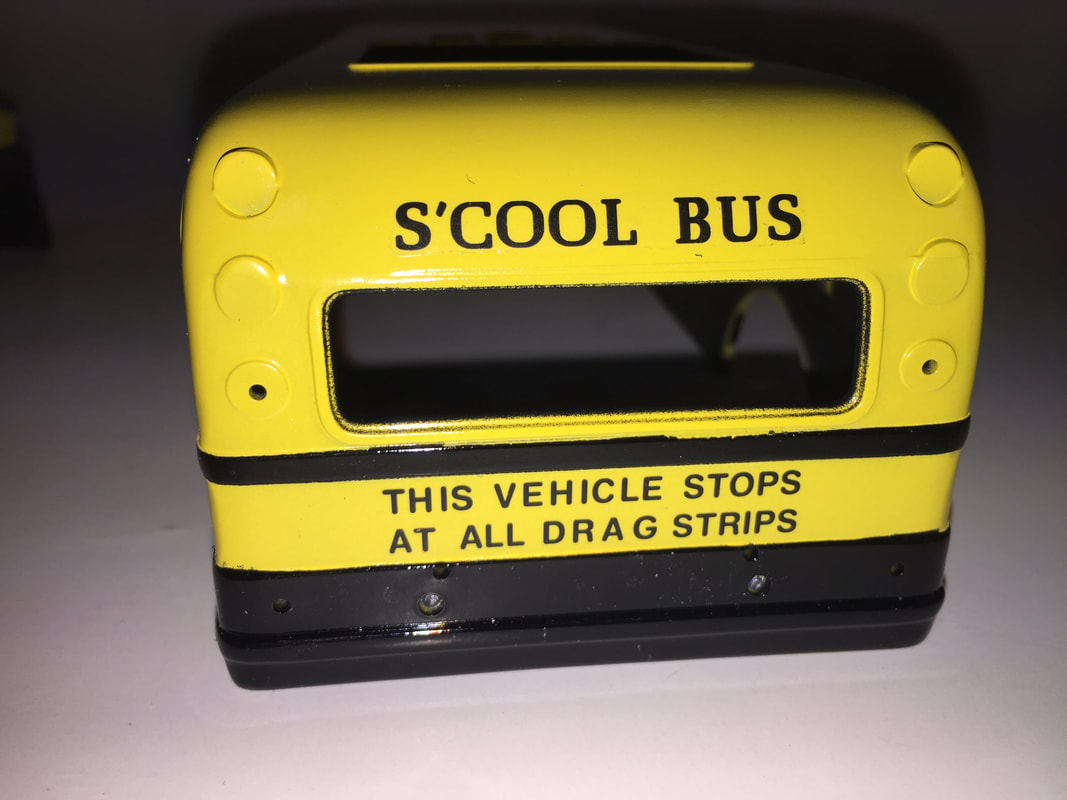
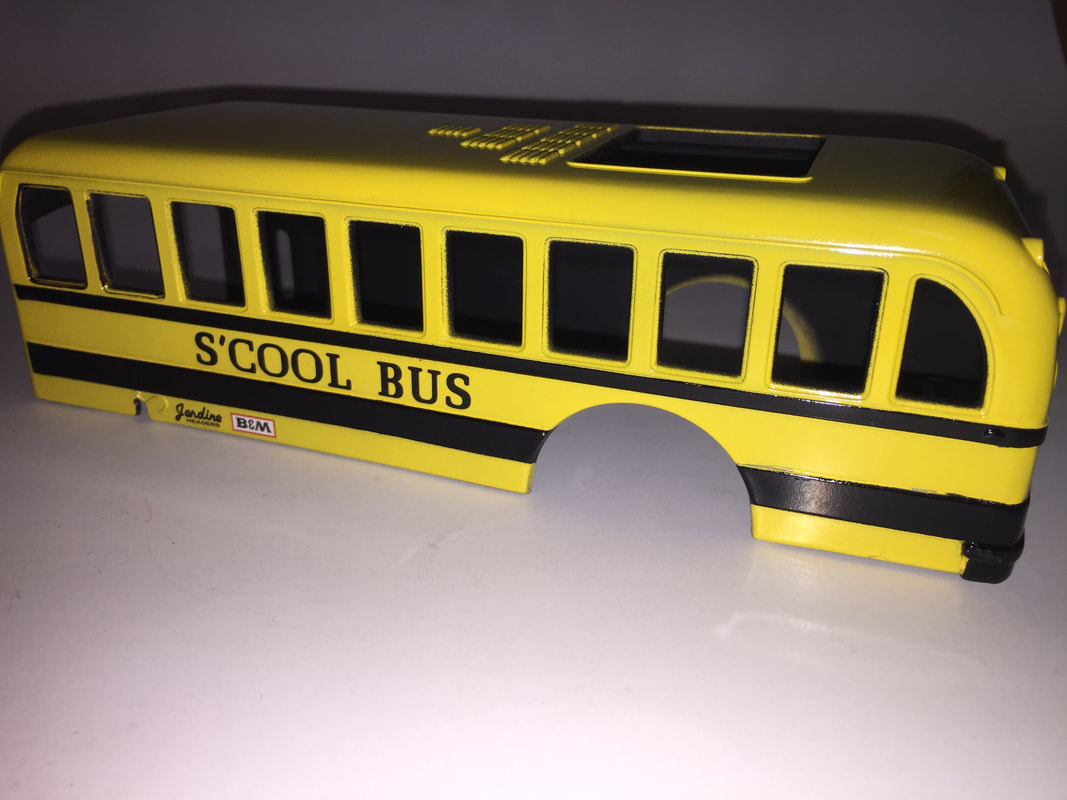
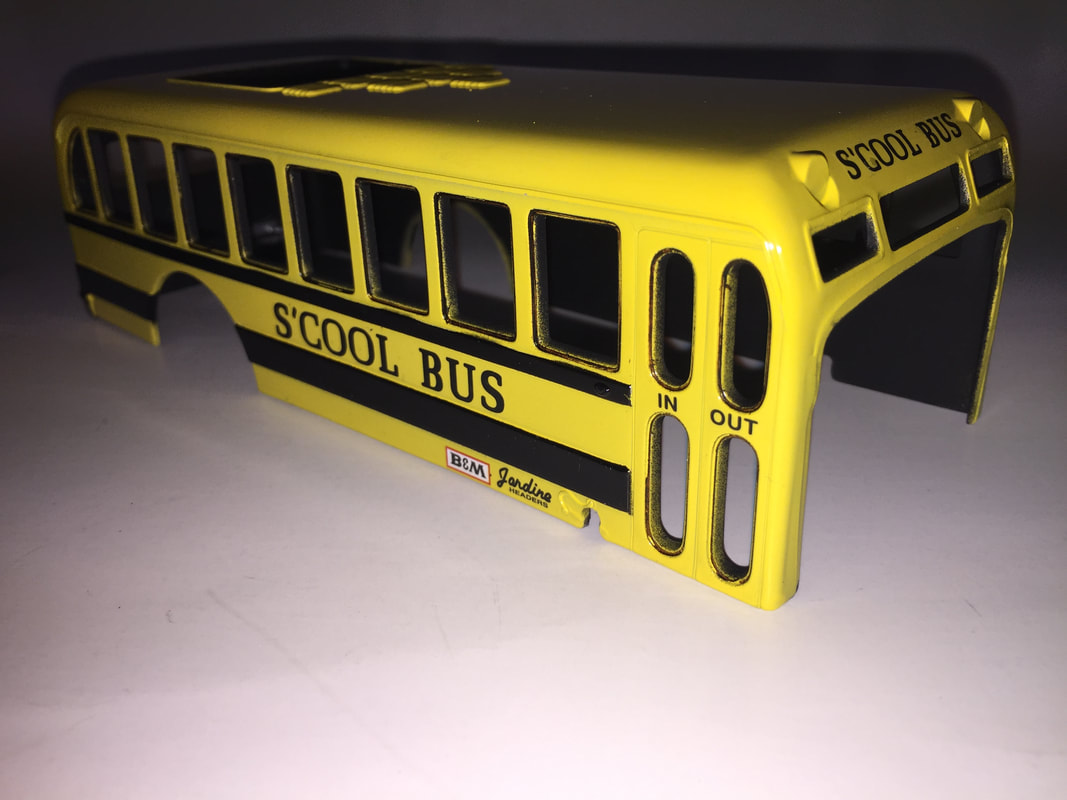
This absolutely looks like a product of the 1970's - dual blown Chrysler Hemi engines, tilt-up body, red tinted windows. It's, far out, man!
I built this kit back in 2018 or so. If I recall correctly, I used Tamiya Gloss Black and Tamiya Gloss Yellow (lacquers) for the body. Most other colors are Tamiya Acrylics. I built it straight from the box with no additional details. If you want to build this kit, look for one of the issues that includes the red tinted "glass" with the passengers printed on it.
Get a load of the description from the kit instructions:
GET READY FOR … The S’Cool Bus! How’d you like to ride to school in less than 8 seconds at over 190 mph? Imagine a dual blown fueler, with the latest trick chassis and … GASP!, for the ultimate funny car body – a chopped and narrowed fiberglass school bus shell with big spoilers built right into the front fenders. That’s 2000 mind-bending horsepower smoking those huge slicks out of the lights. It’s gotta be the hottest ever. The guys will really flip when they see the S’Cool Bus – and watch their eyes cross in disbelief as you tilt up the one-piece body, set the brace and show off the detailed dual engines, roll cage, fuel and water tanks and all the other goodies. And let ‘em admire those crazy double air ducts running to the big blowers. Extra added features include wheelie rollers, push button gear shift, special custom wheels and the new big fat “wrinkle” slicks.
Oh yeah, it was the 70's ...
- 1:24 Monogram Tom Daniel's S'cool Bus - 85-4080
- Tamiya Acrylics and Lacquers
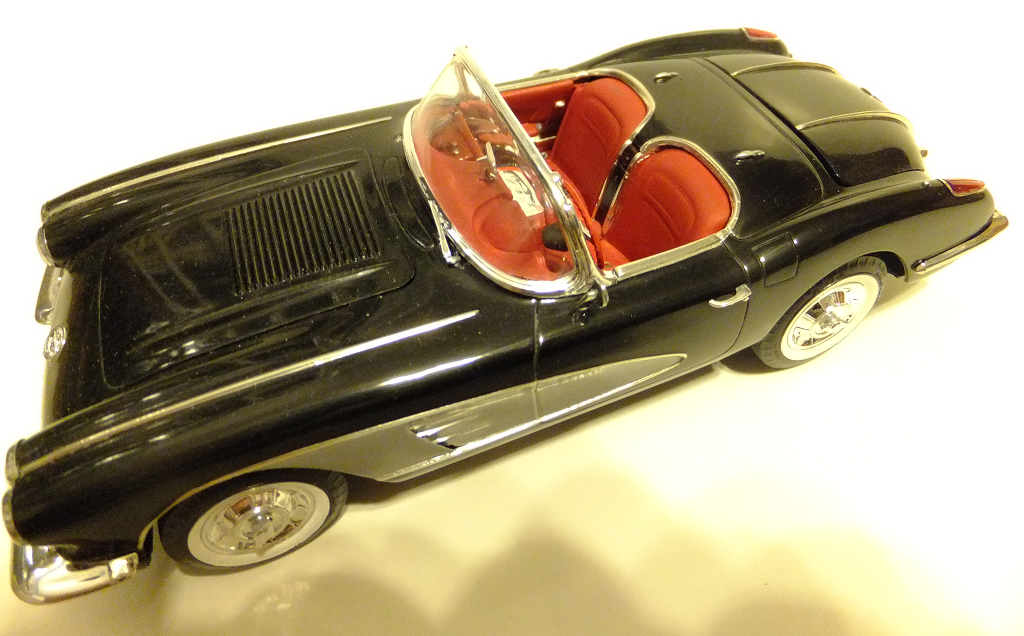
Monogram 1/25 1958 Corvette (Pro Modeler Edition)
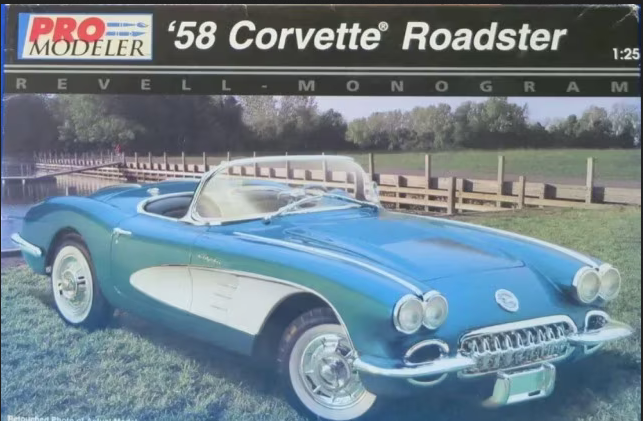

It's been a long time since Monogram released their Pro-Modeler line of kits - targeted at the adult buyer who was likely shopping for Tamiya quality. The Pro Modeler line was a little hit-or-miss in terms of what was in the box. In some cases, you received a previously released kit, but with updates such as recessed panel lines and/or nice decals (the 1/48 P-51B/C comes to mind - which is a great build, albeit of a rehashed 70's era kit!).
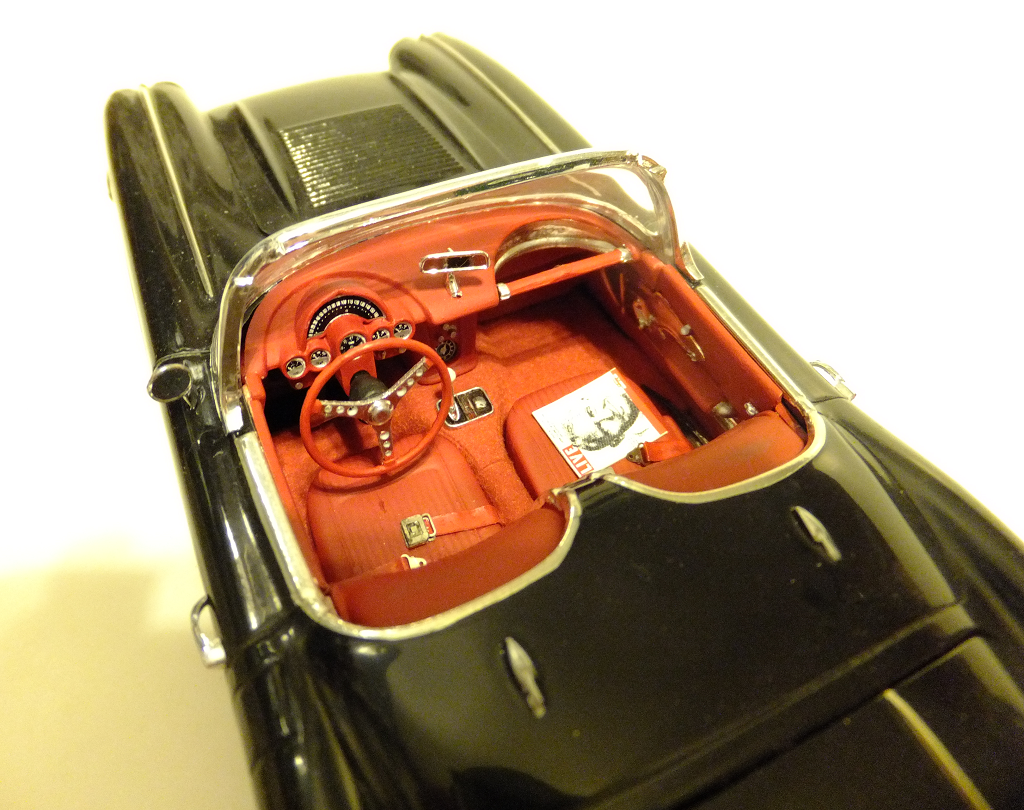
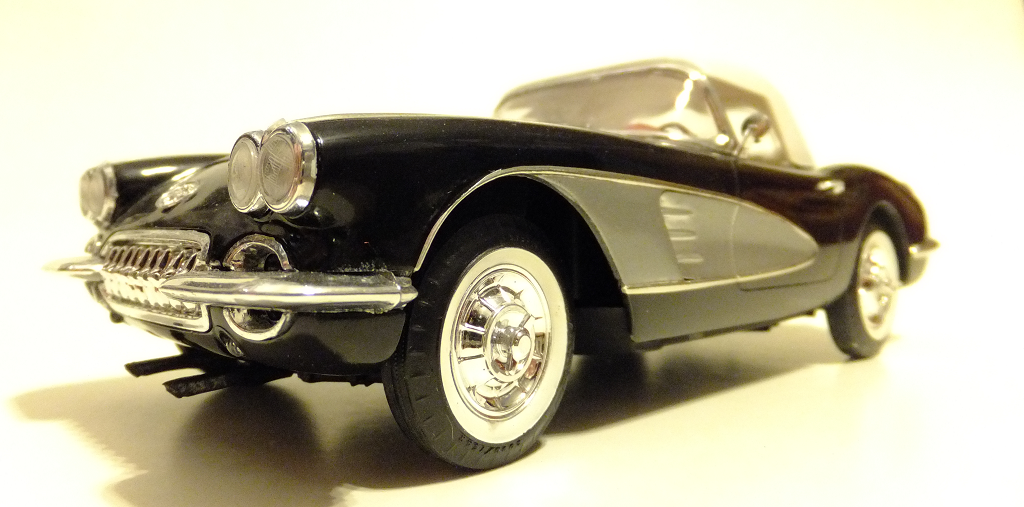
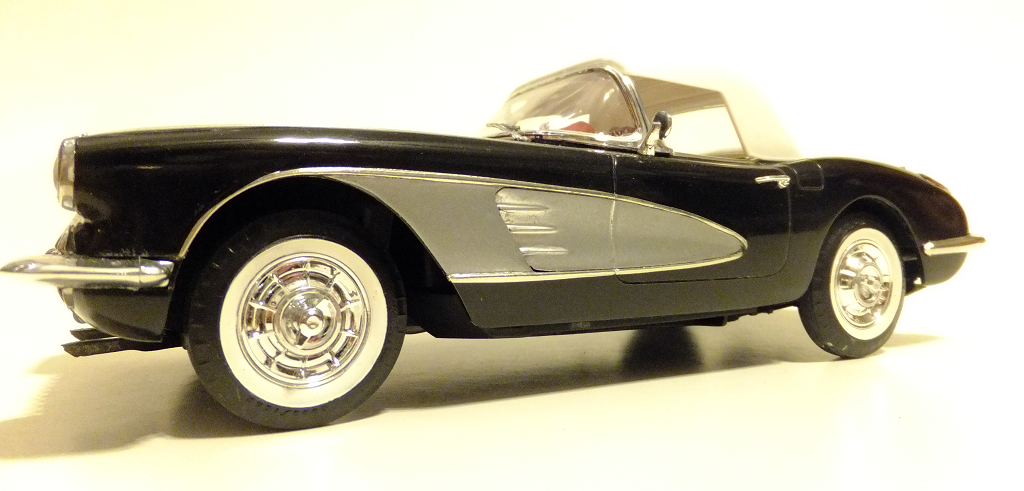
In terms of the automobile portion of the Pro Modeler line, this may have been one of the best. Don't misunderstand me - I have enjoyed each of the Pro Modeler kits I've built. The 1958 Corvette included separate coves (making painting easier) and the '58-only ribbed hood. Engine detail is very nice! This particular kit was painted with good ol' Testor's Enamel, sprayed through my faithful Badger 150 dual-action airbrush. This may have been one of my earlier attempts at using Bare Metal for trim. Decent, I guess. It was built shortly after the kit came out, which I believe was 1998.
In terms of the automobile portion of the Pro Modeler line, this may have been one of the best. Don't misunderstand me - I have enjoyed each of the Pro Modeler kits I've built. The 1958 Corvette included separate coves (making painting easier) and the '58-only ribbed hood. Engine detail is very nice! This particular kit was painted with good ol' Testor's Enamel, sprayed through my faithful Badger 150 dual-action airbrush. This may have been one of my earlier attempts at using Bare Metal for trim. Decent, I guess. It was built shortly after the kit came out, which I believe was 1998.
- 1:25 Revell Monogram '58 Corvette Roadster, 85-5938
- Testor's Enamels
- Bare Metal Foil
Moebius Models 1/25 Chrysler 300 Race Car (Tim Flock - Model King Release)
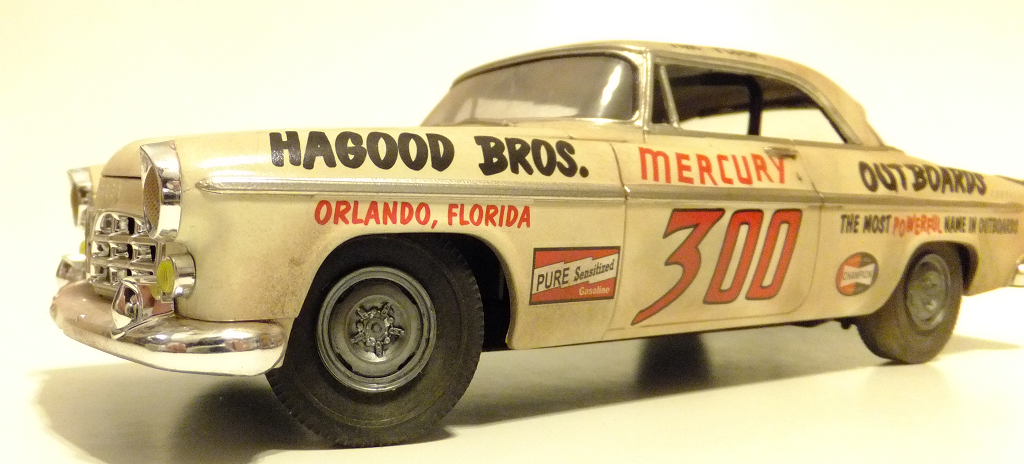
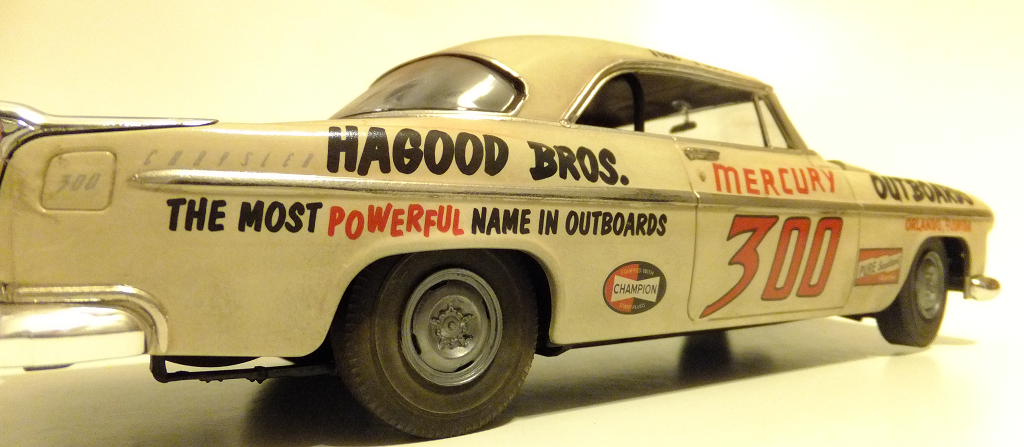
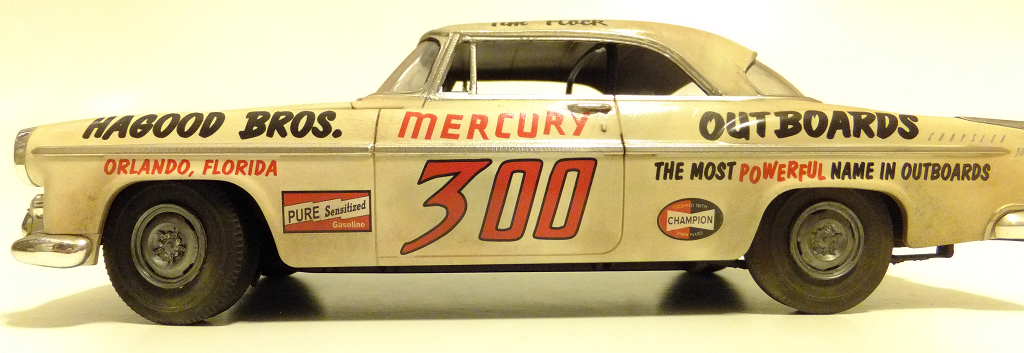
I built the 1/25 Tim flock Chrysler 300 shortly after the kit first came out. It's an easy kit to build, and it's well detailed. I used pastel dust to give it a "just raced" look. Well, there's no dents or such, so maybe it's more of a "been practicing" look. Anyway, if you've never built one of the Moebius 1/25 cars, I'd recommend you give one a try.
The car is painted in Testors Wimbledon White lacquer, which is technically a Ford color.
The car is painted in Testors Wimbledon White lacquer, which is technically a Ford color.
- 1:25 Moebius Models 1955 Tim Flock Chrysler 300 Race Car (Model King Release) 1203
- Testor's lacquer Ford Wimbledon White 1964 (8378)
- Bare Metal Foil
Monogram 1/24 Tom Daniel's Vandal!
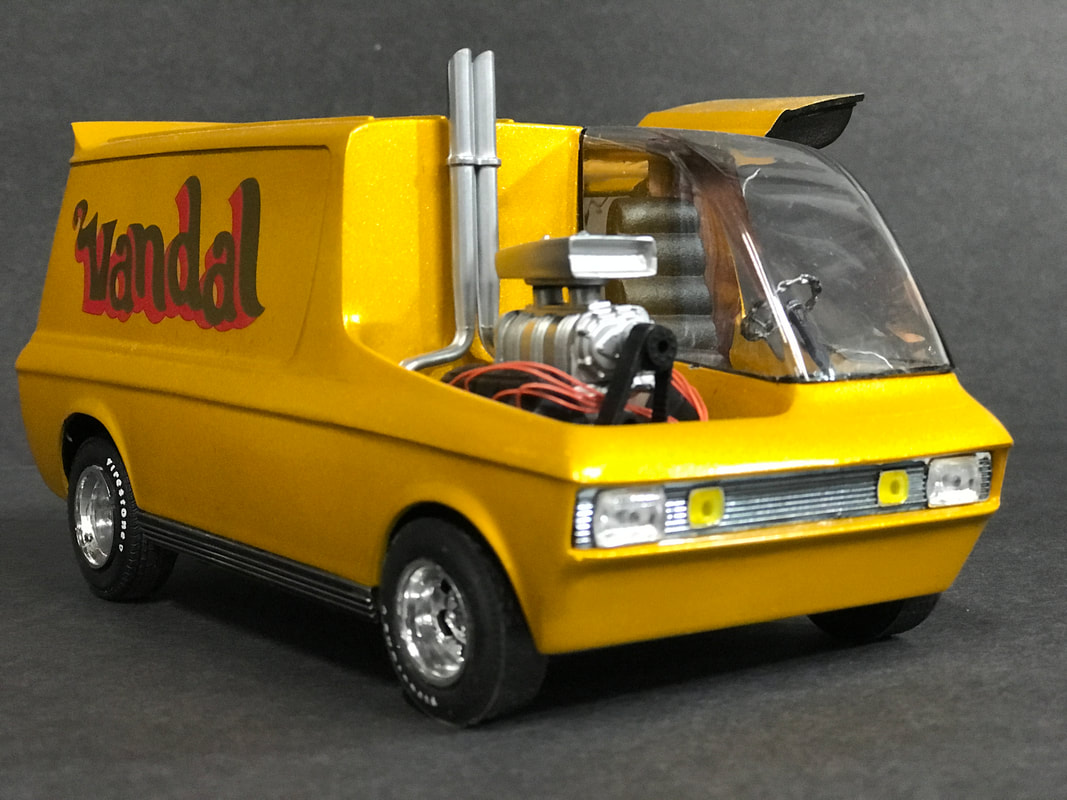
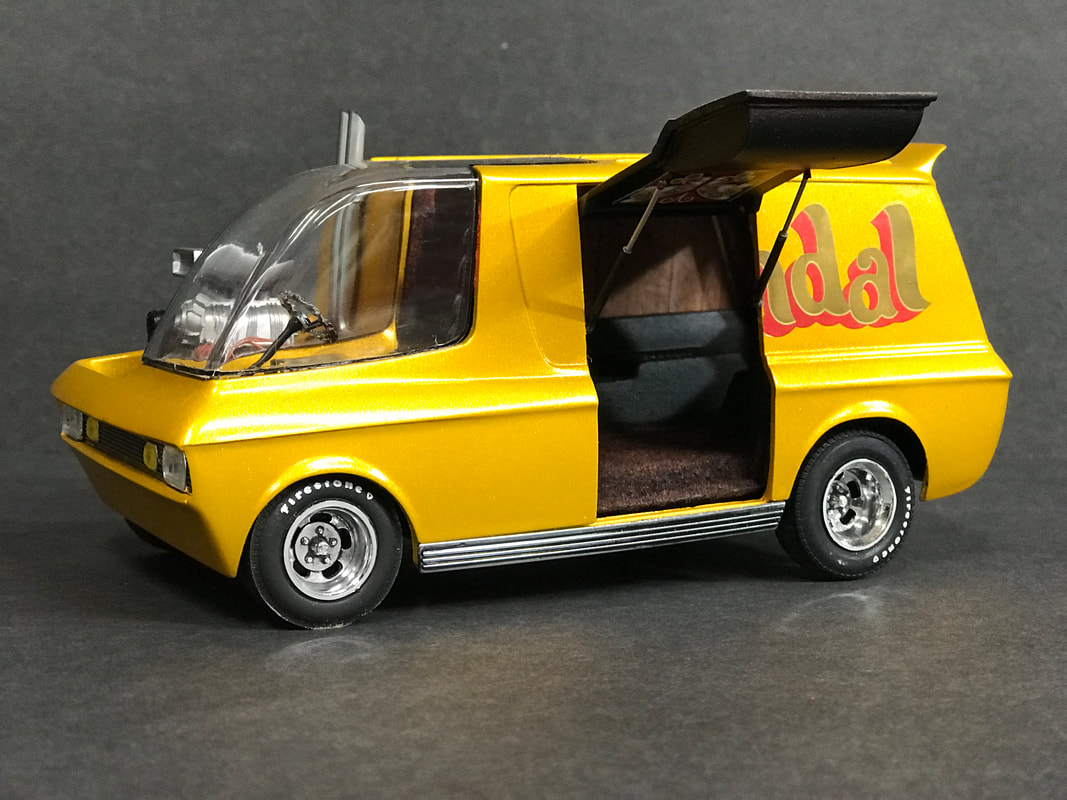
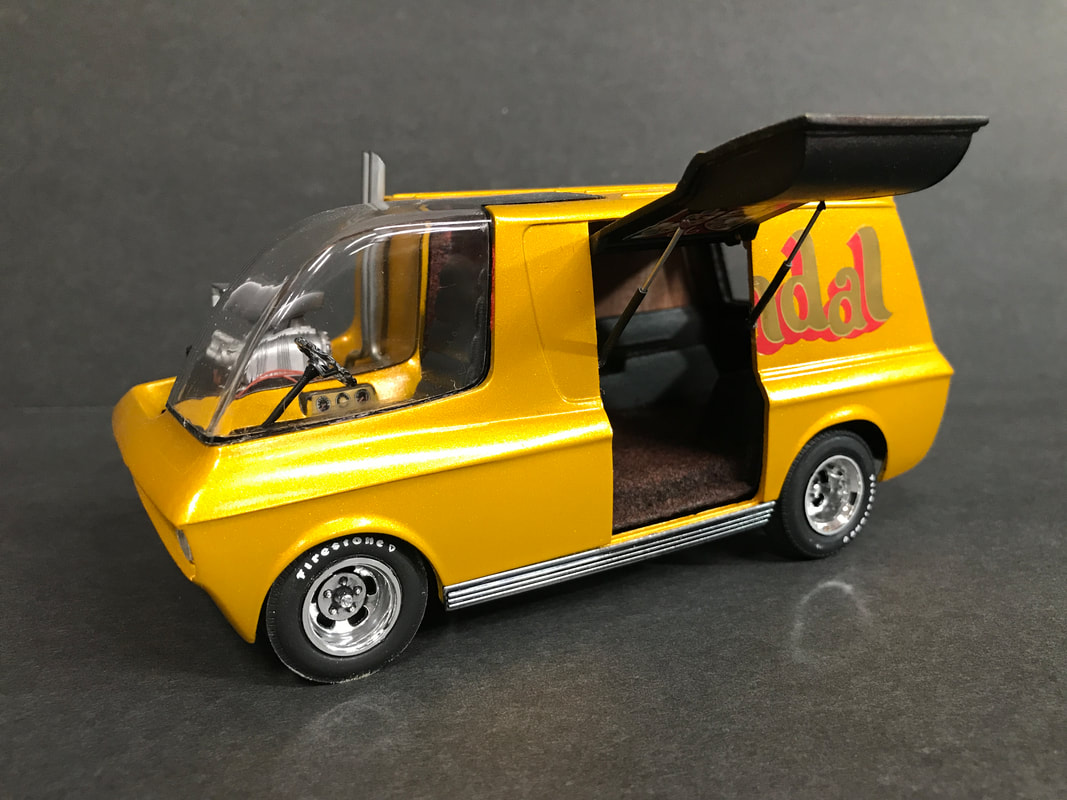
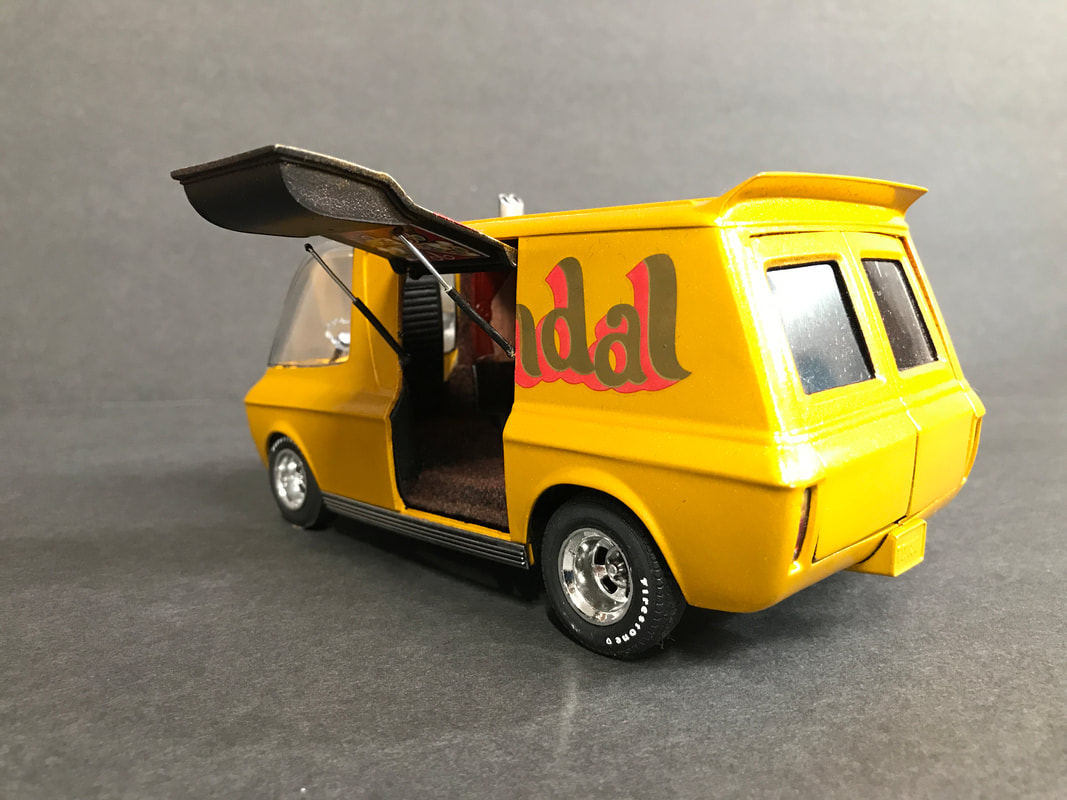
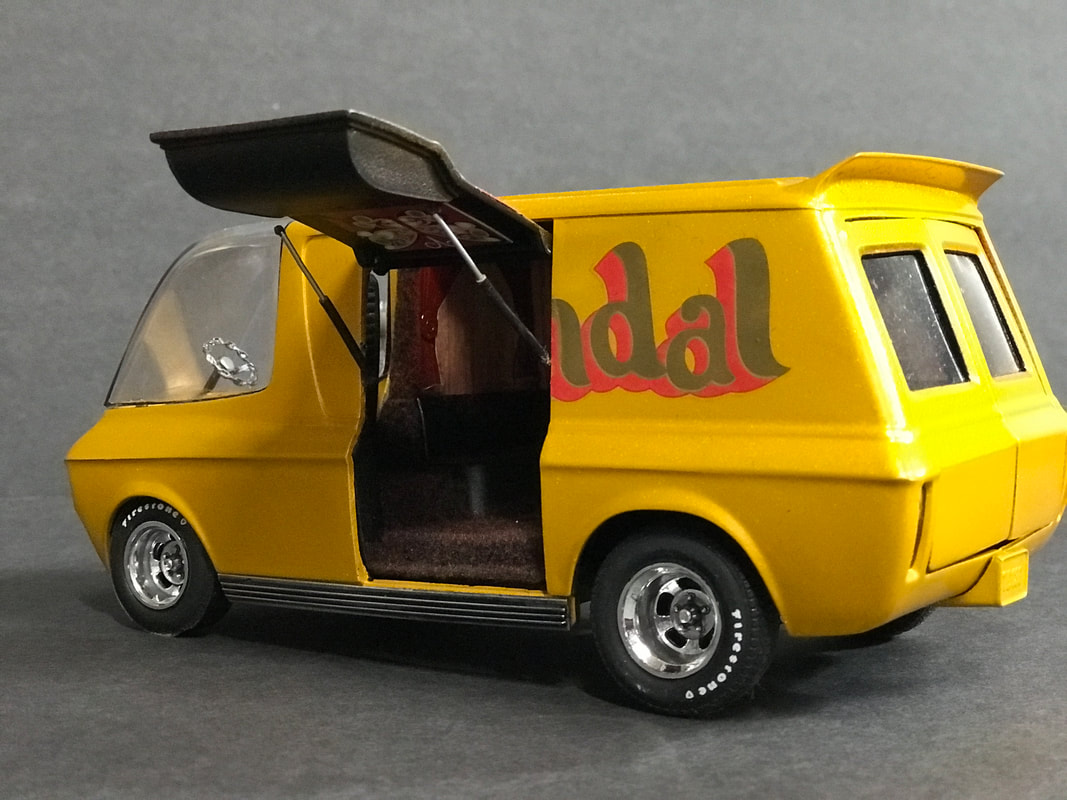
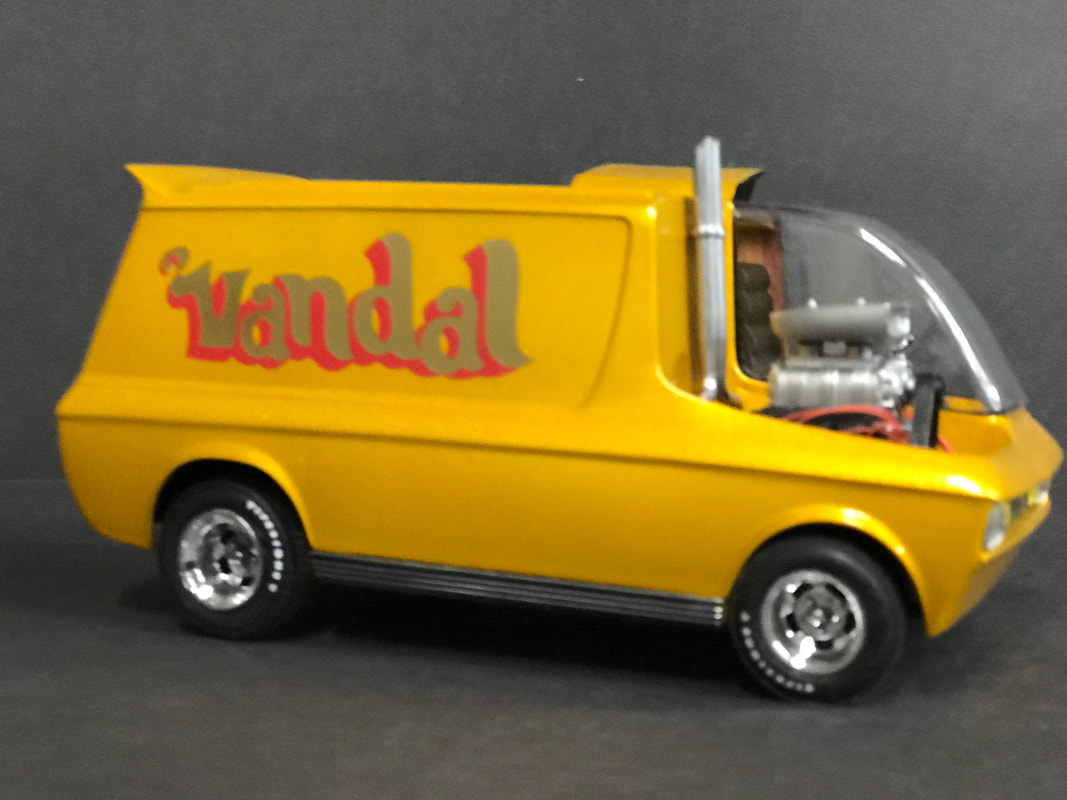
My take on the iconic Vandal. I shaved the bumpers, added “wood” paneling to the interior, and cut the rear doors such that they appear to open more traditionally. I filled the “CHEV” impression on the back, and swapped the wheels for some from the parts box. I added flocking for the carpet, spark plug wires, Firestone lettering for the tires from Fireball Modelworks, a parts-box chain steering wheel, and Testor's Inca Gold lacquer to top it all off.
Peace, Ya’ll!
Peace, Ya’ll!
- 1:24 Monogram Tom Daniel Vandal
- Testor's One Coat lacquer Inca Gold 1839
- Ken's Fuzzy Fur flocking
- Parts box wheels (rear)
- Fireball Modelworks tire decals
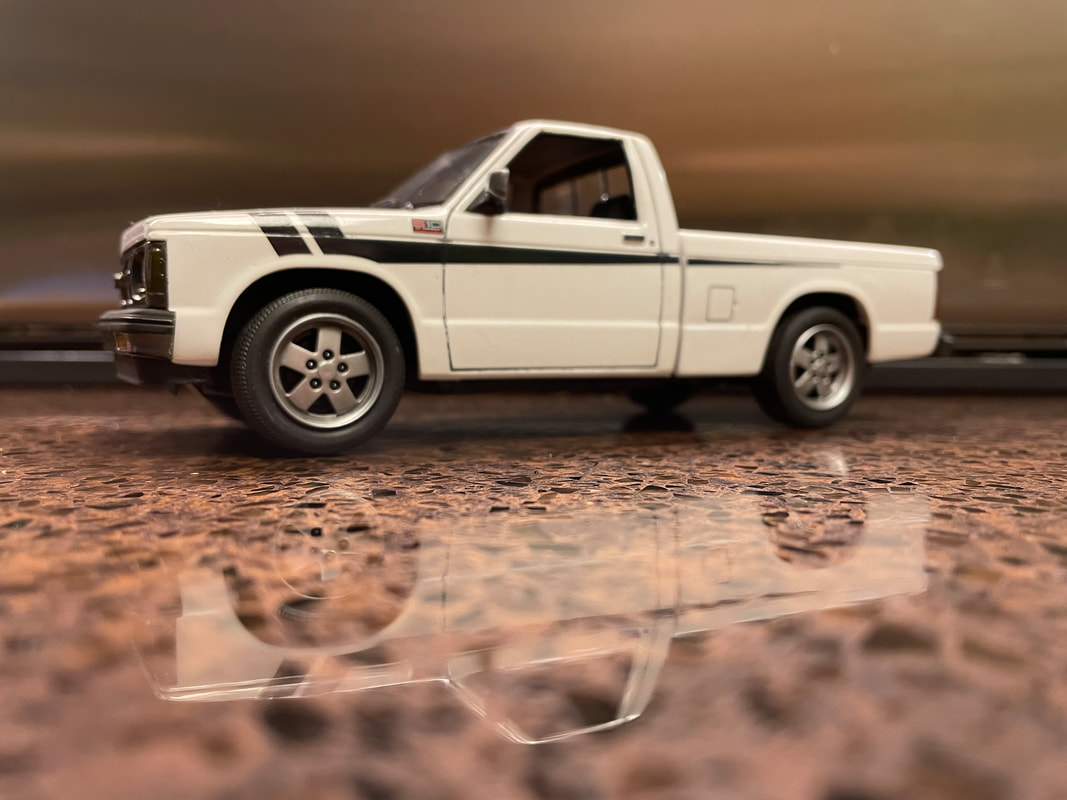
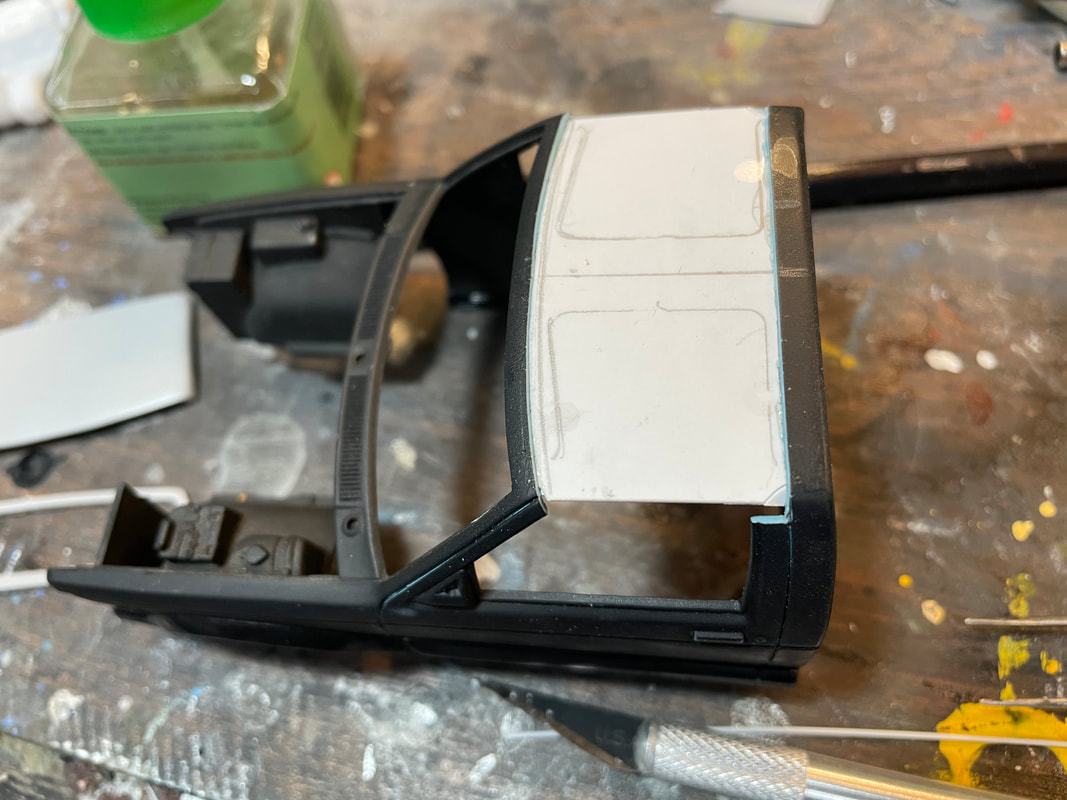
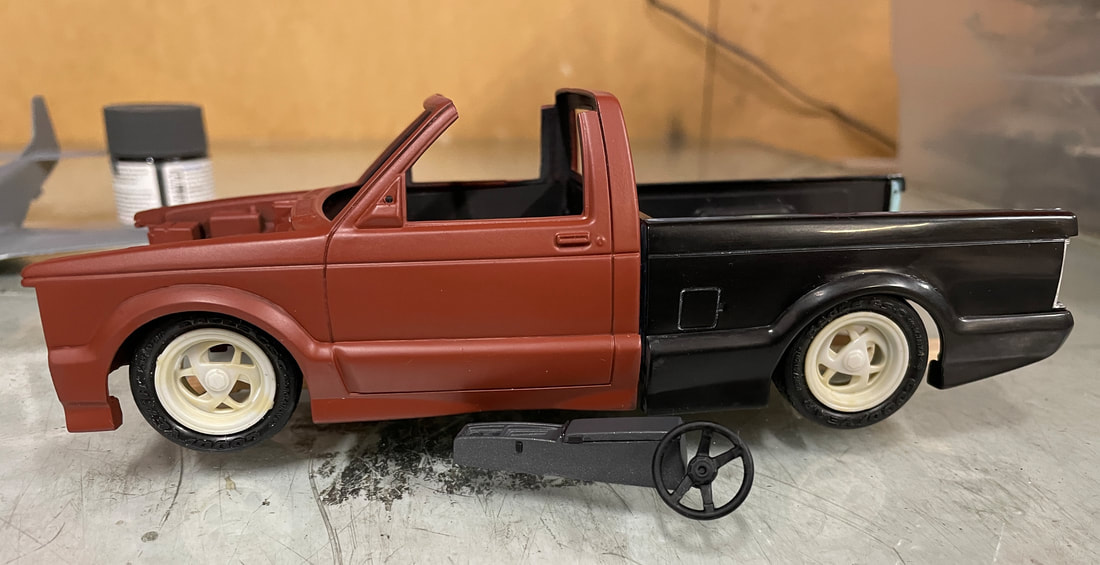
Revell S-Series Truck, redux
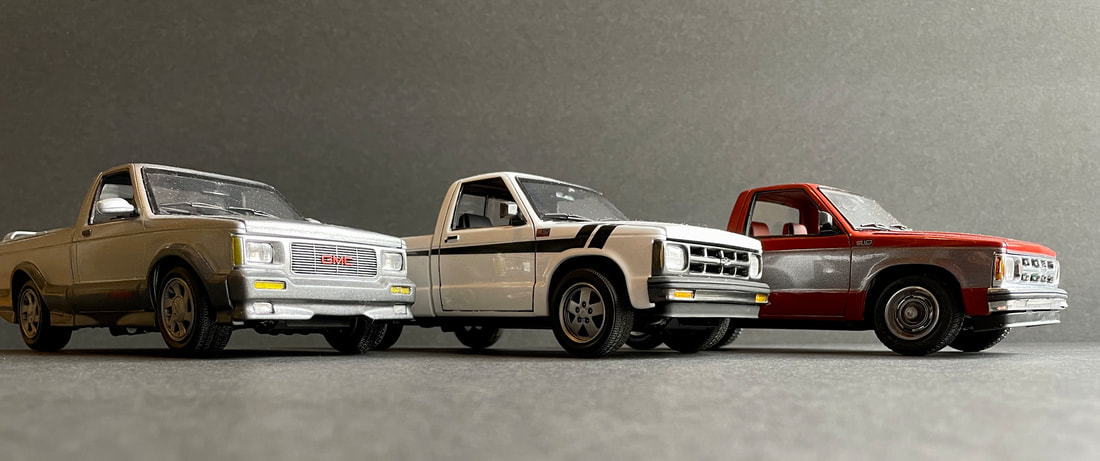
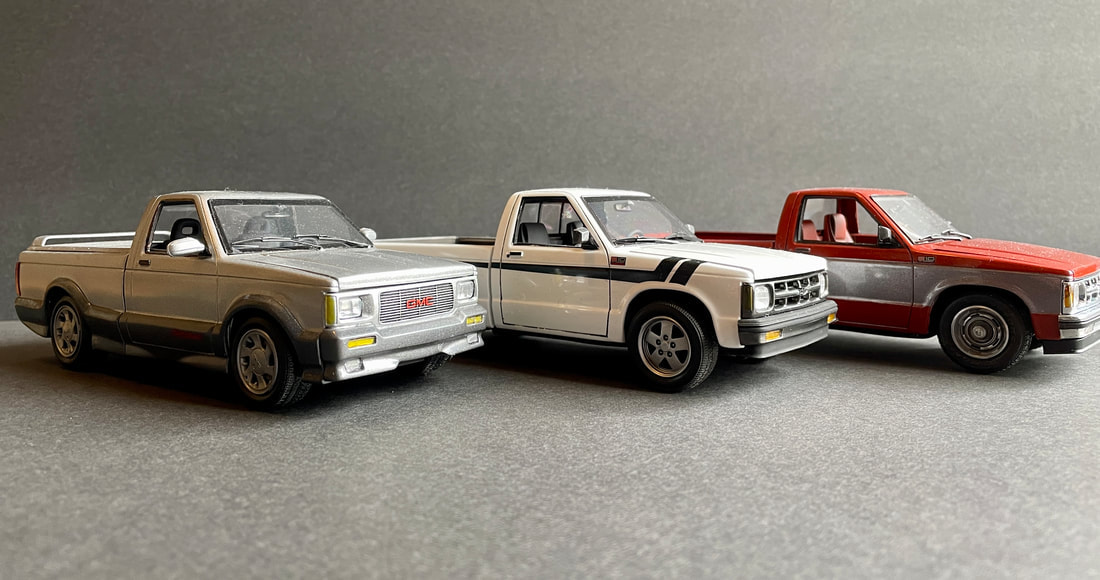
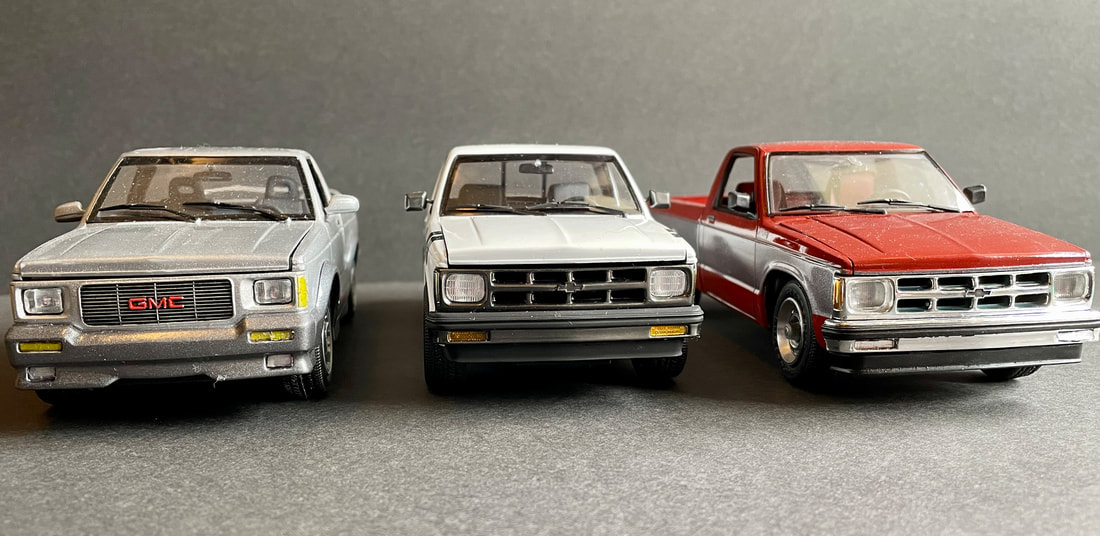
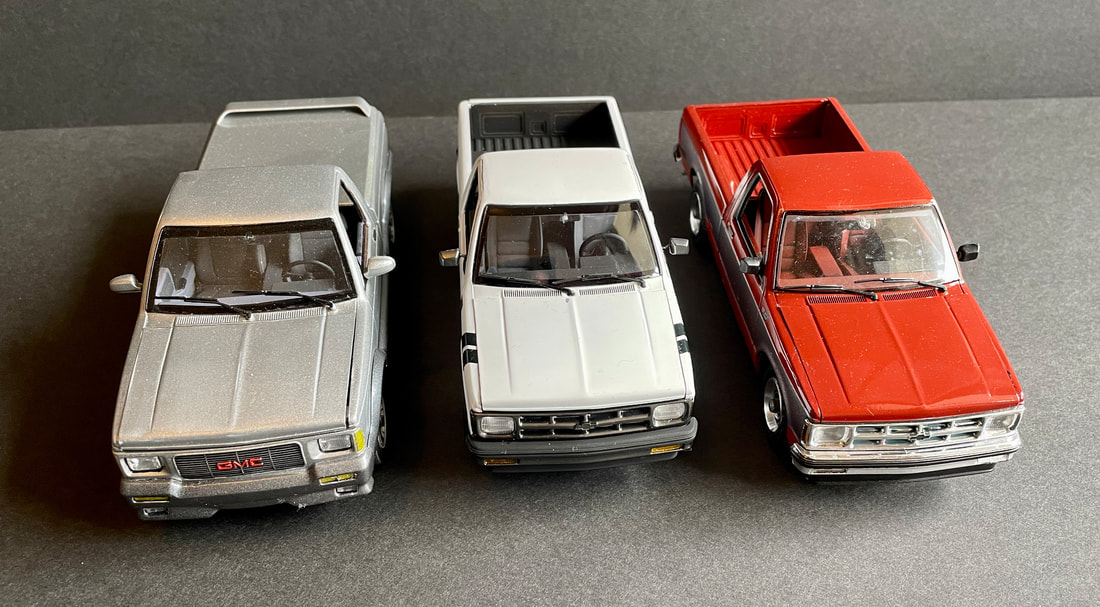
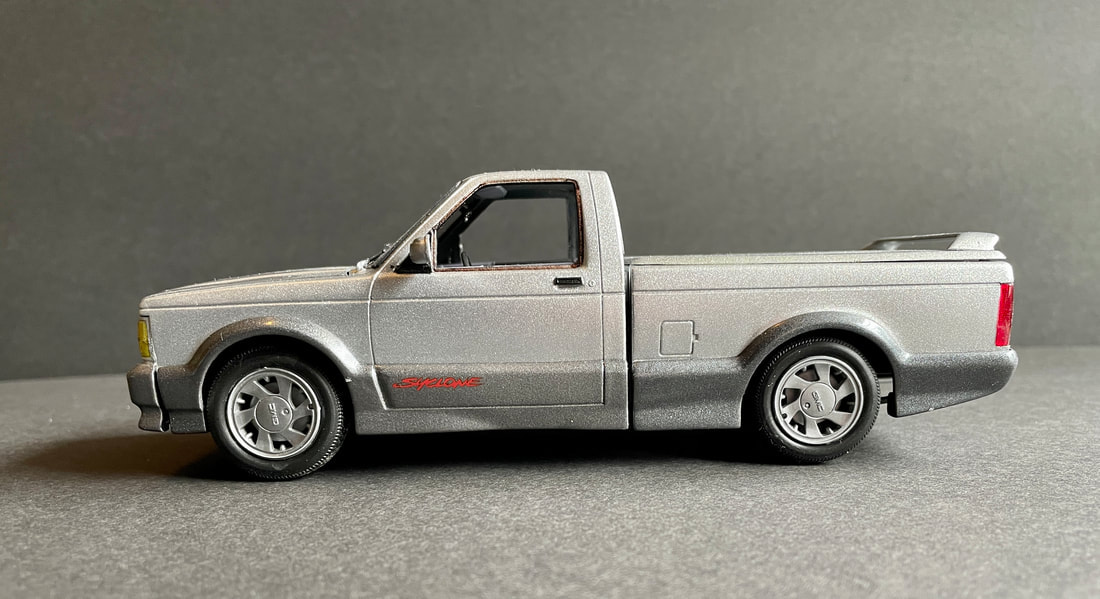

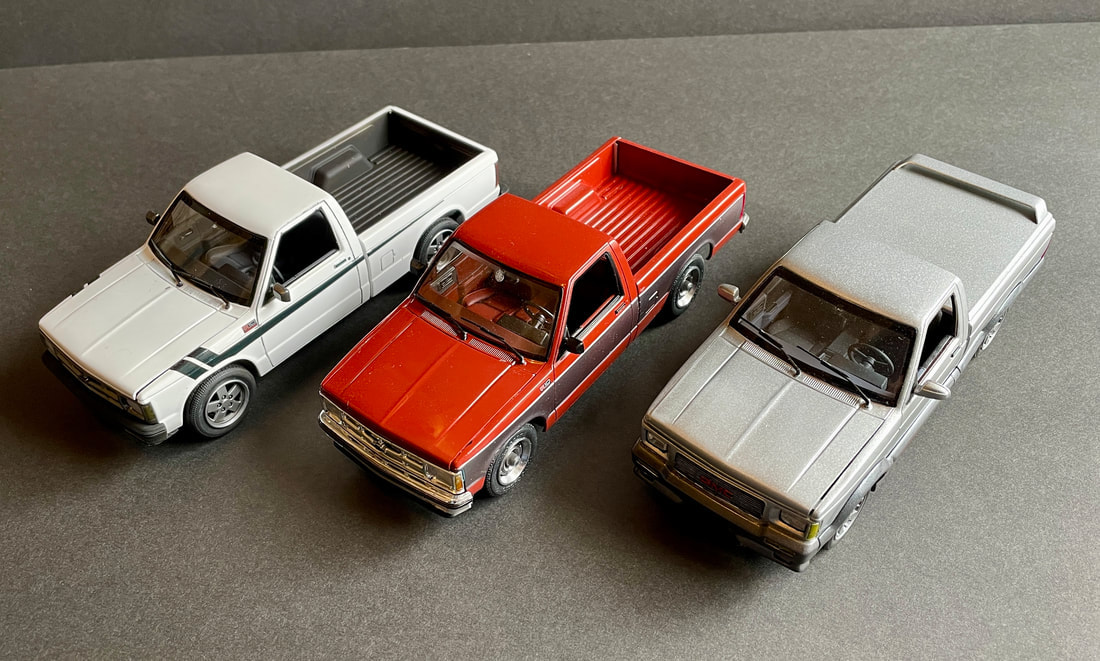
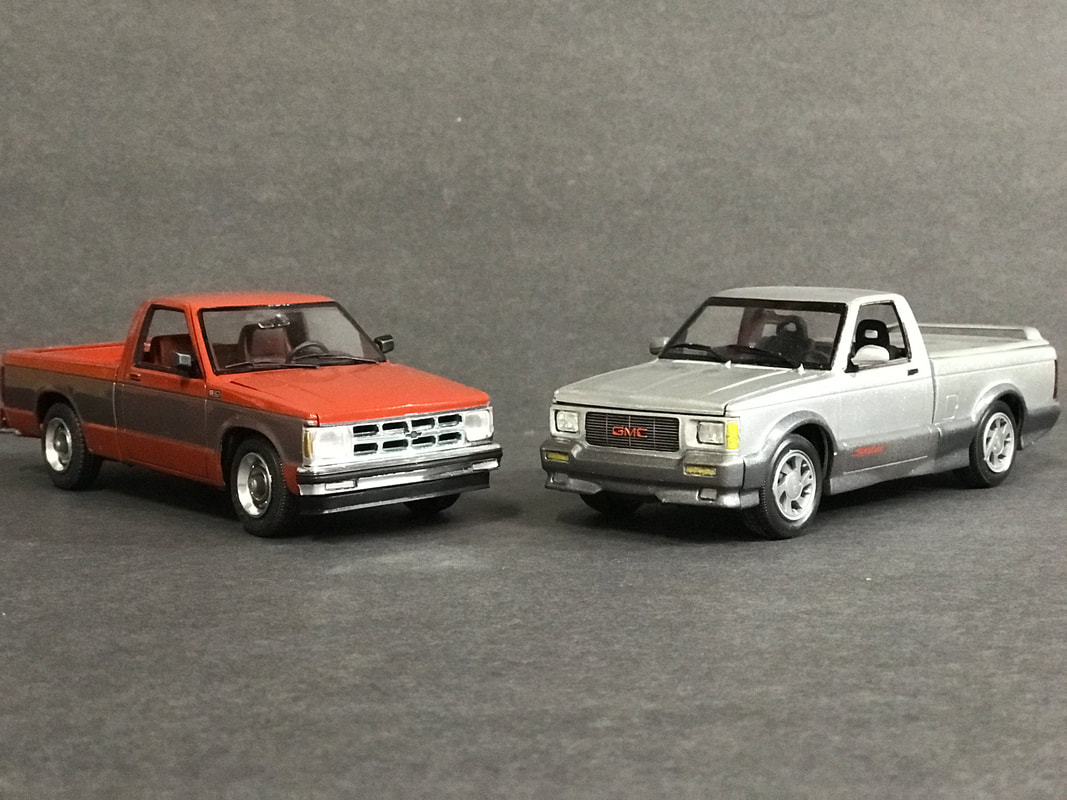
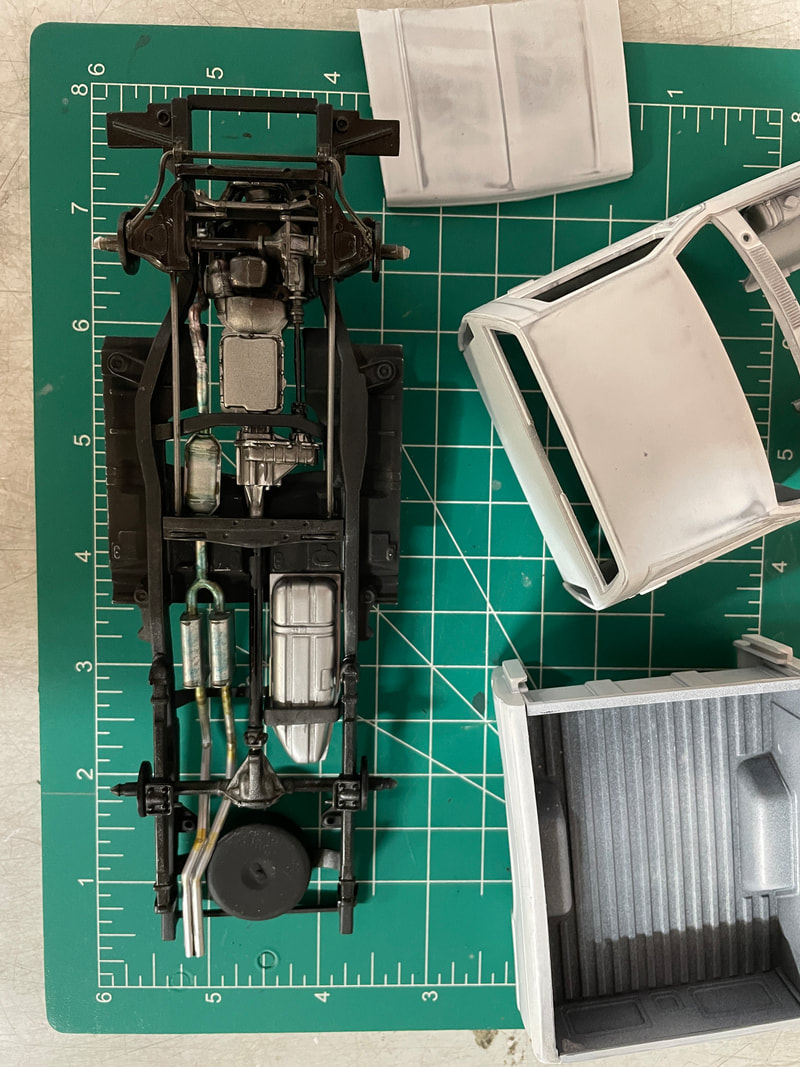
So far, I've built three of the Revell/Monogram S-10/Syclone pickups. The red and gray one is built from the 3-n-1 S-10 "Lowrider" kit (which is a great kit, if you can find one!). The Syclone was built using the early (black plastic) issue of the kit, but I painted it in a non-factory silver/gray combination. Even now, I'm not sure if I like it. The white S-10 was built from the 2019 "Street Sweeper" issue - which contains Syclone underpinnings and S-10 interior/exterior parts. But, at least on the shelf, it looks like an S-10. Anyway, a few pics of the three together ...
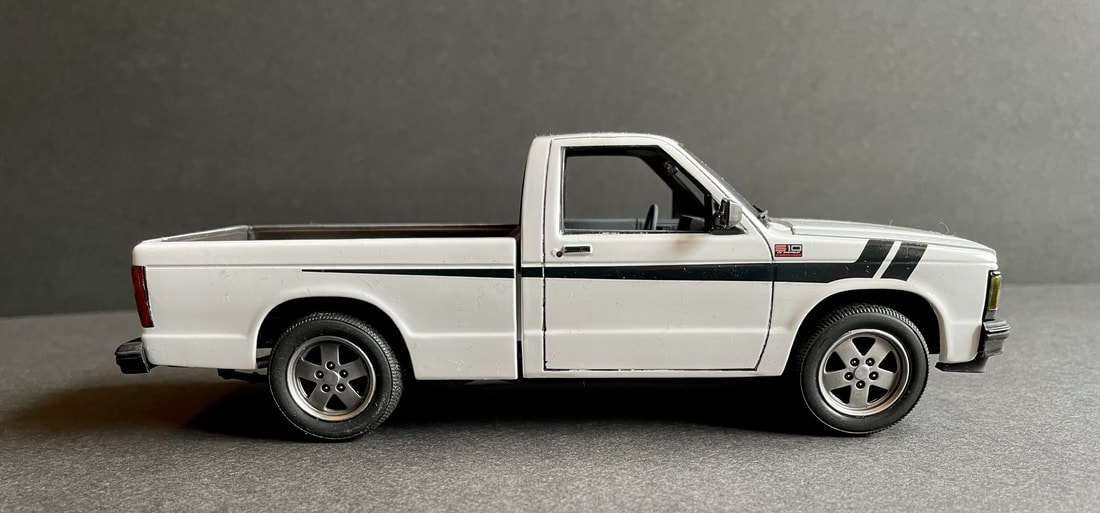
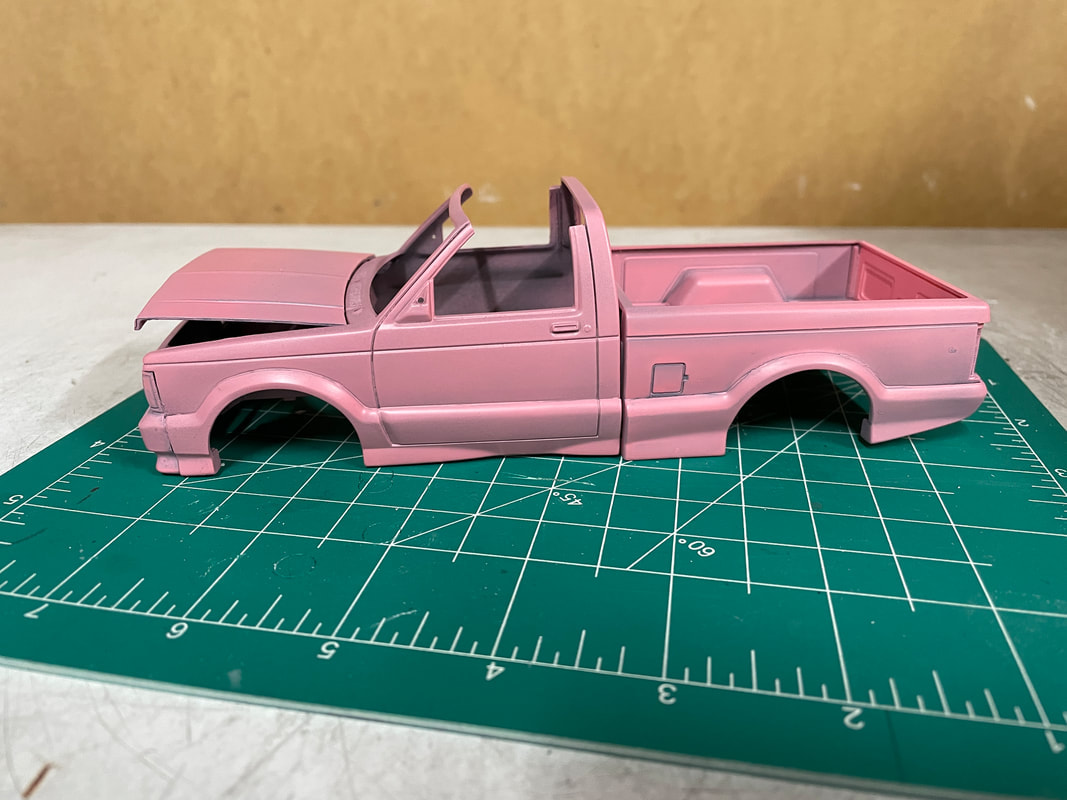
Revell 1/25 Chevrolet S-10 "The Street Sleeper"

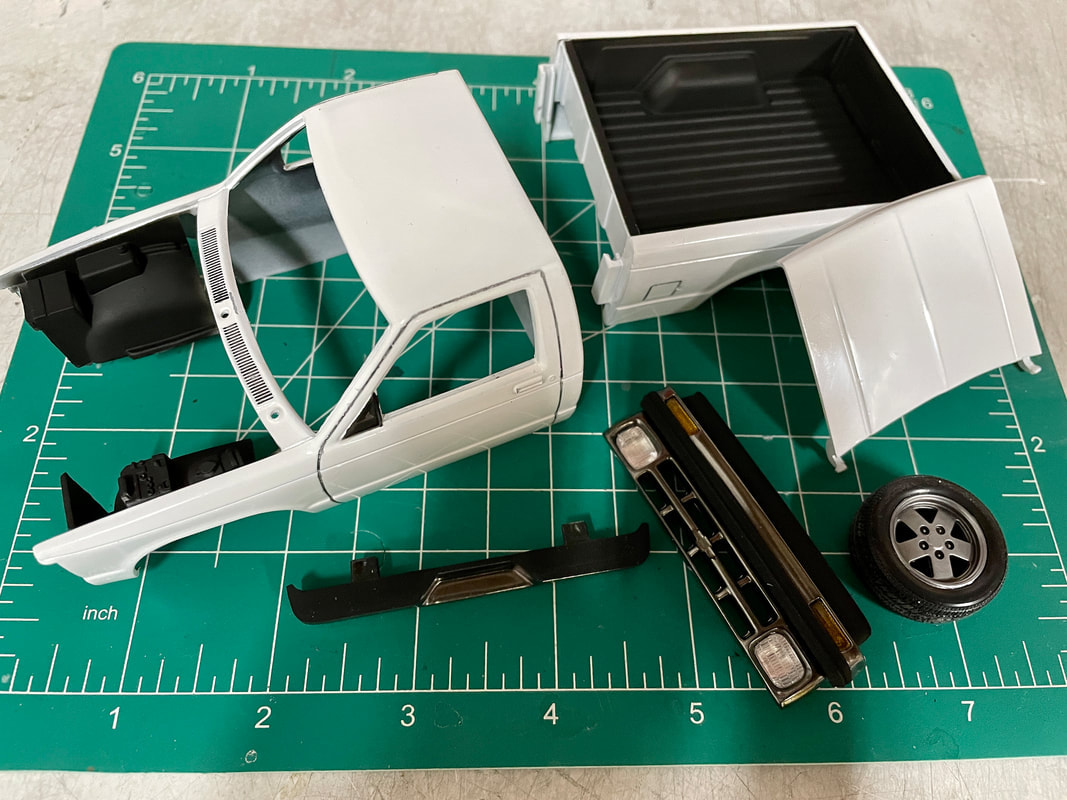
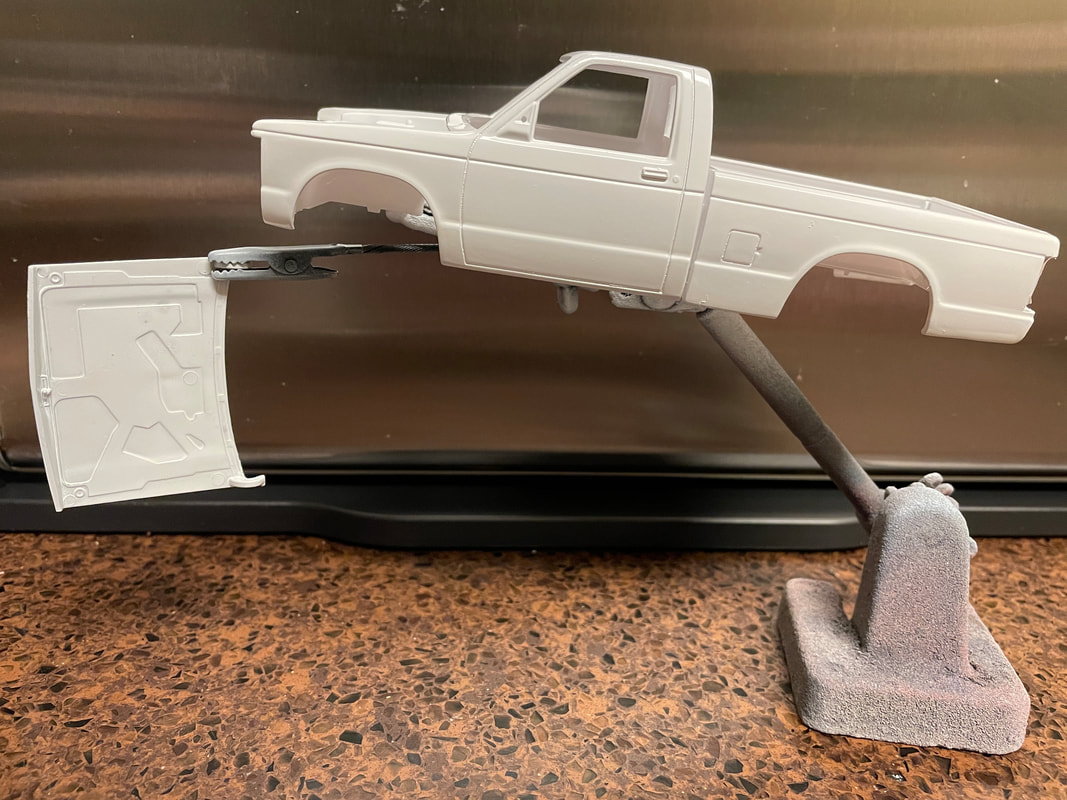

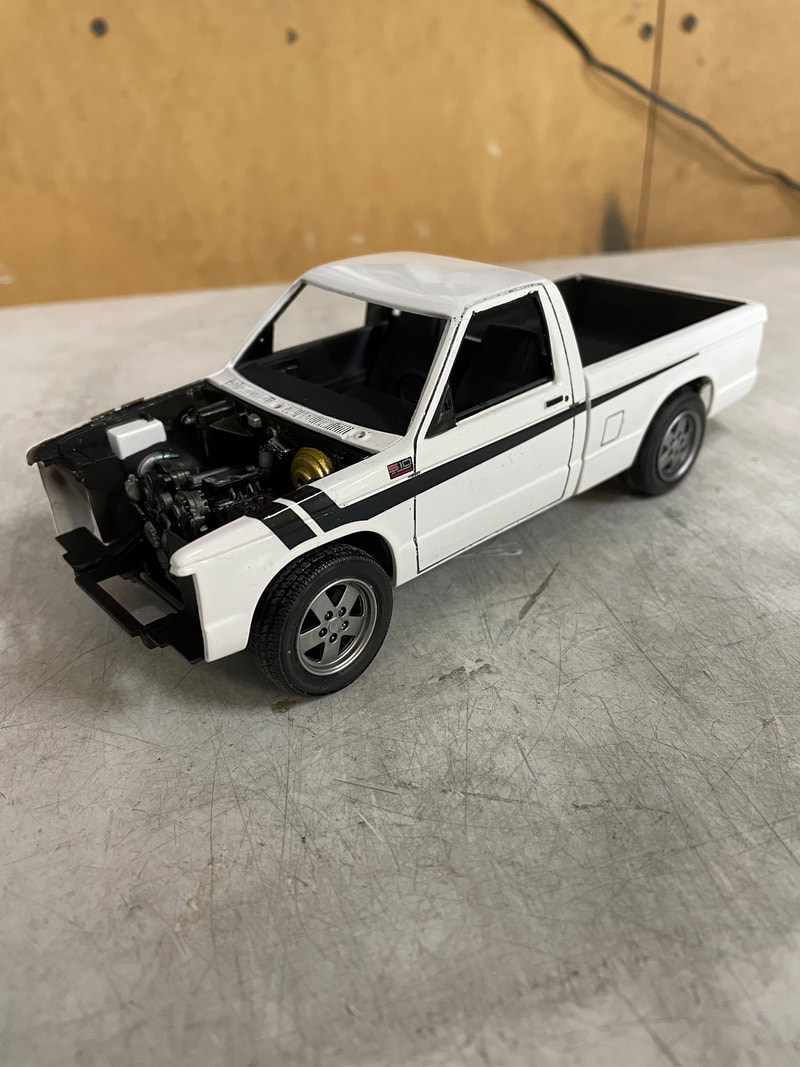
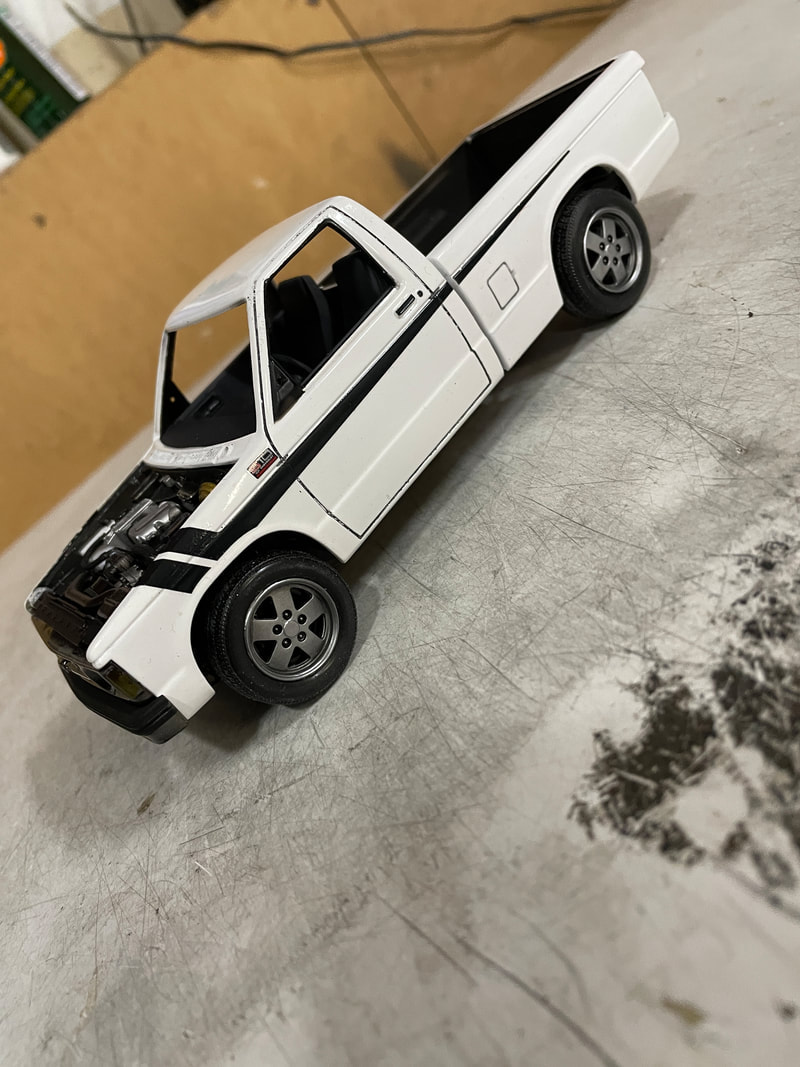
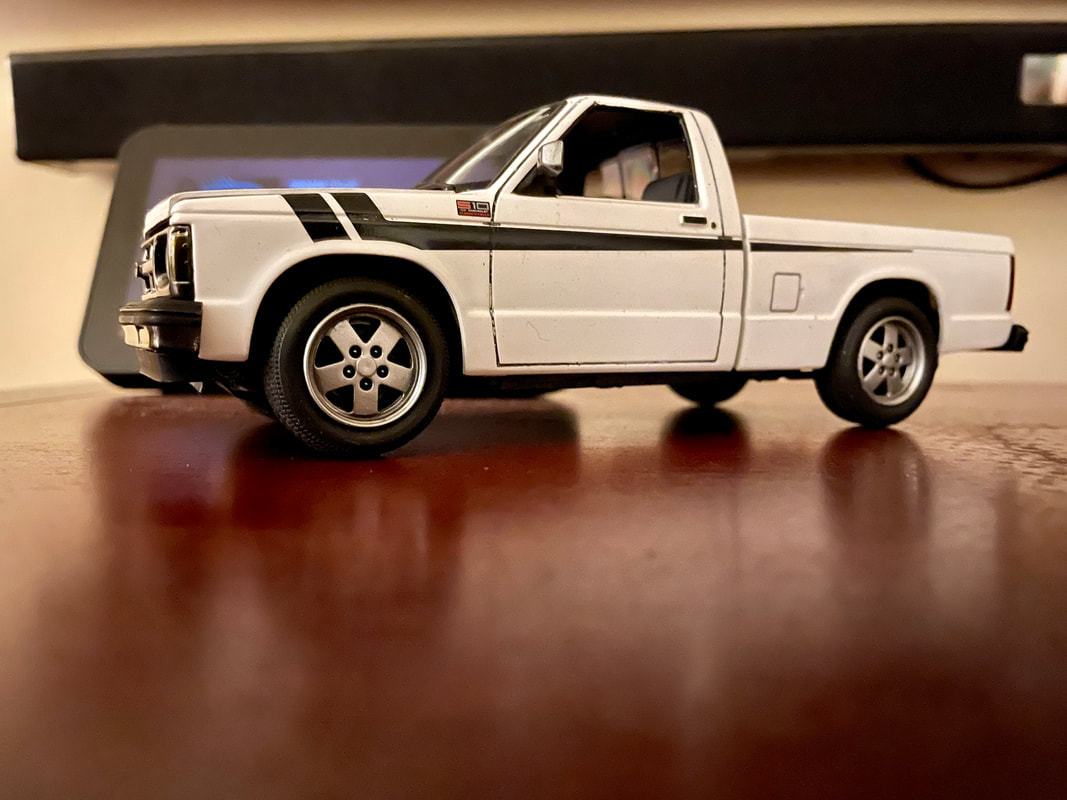
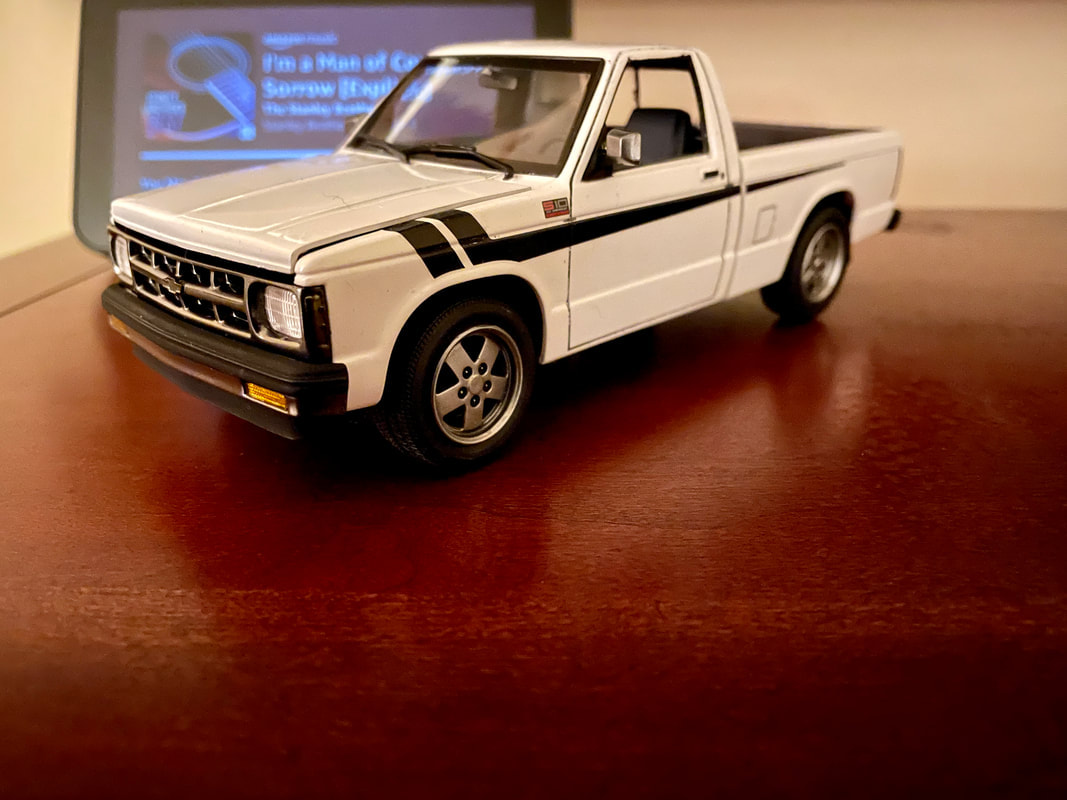
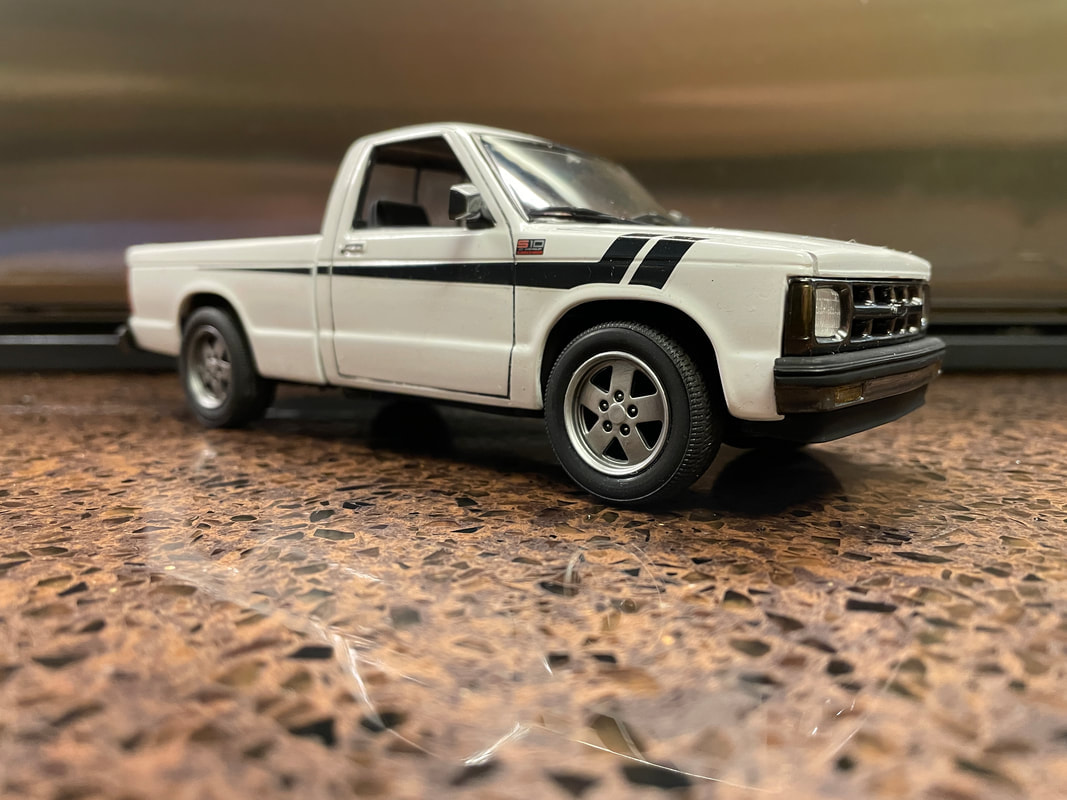

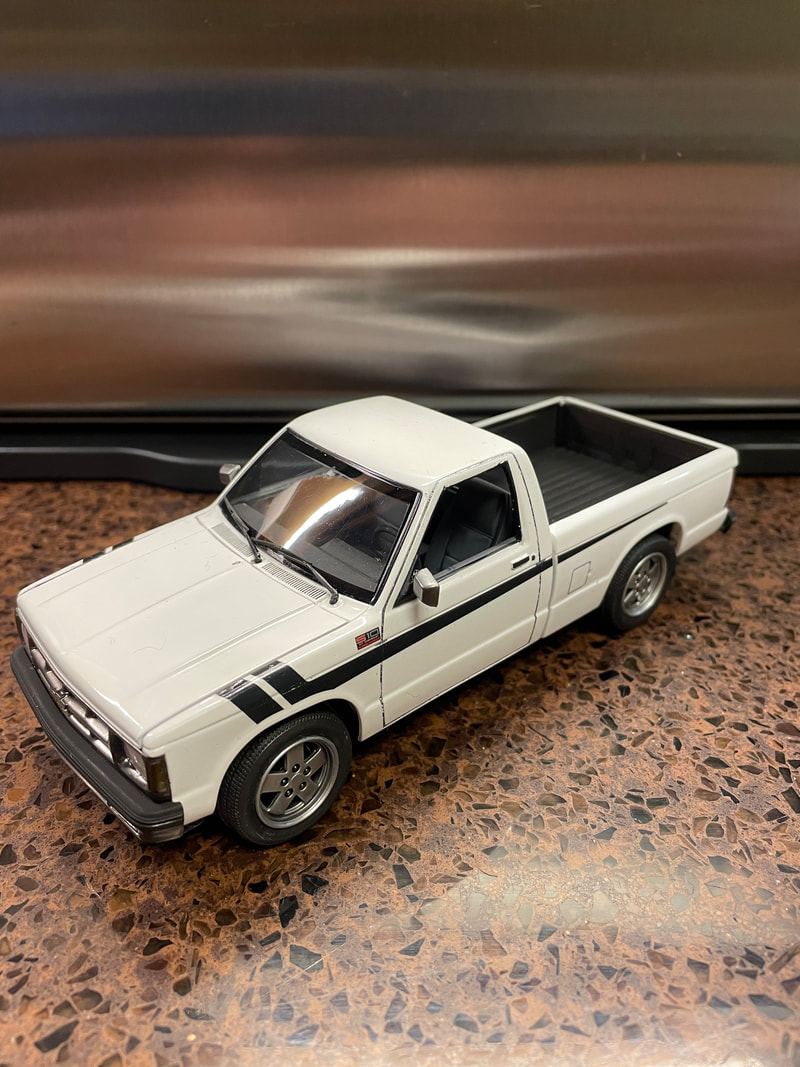

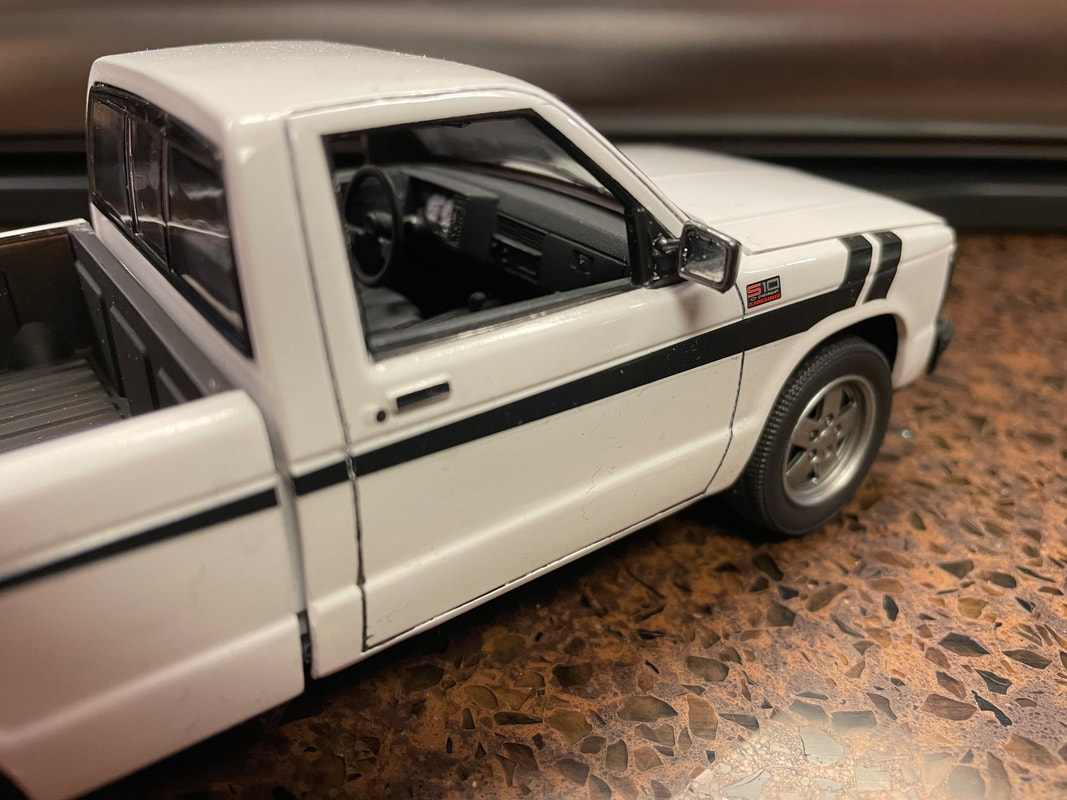
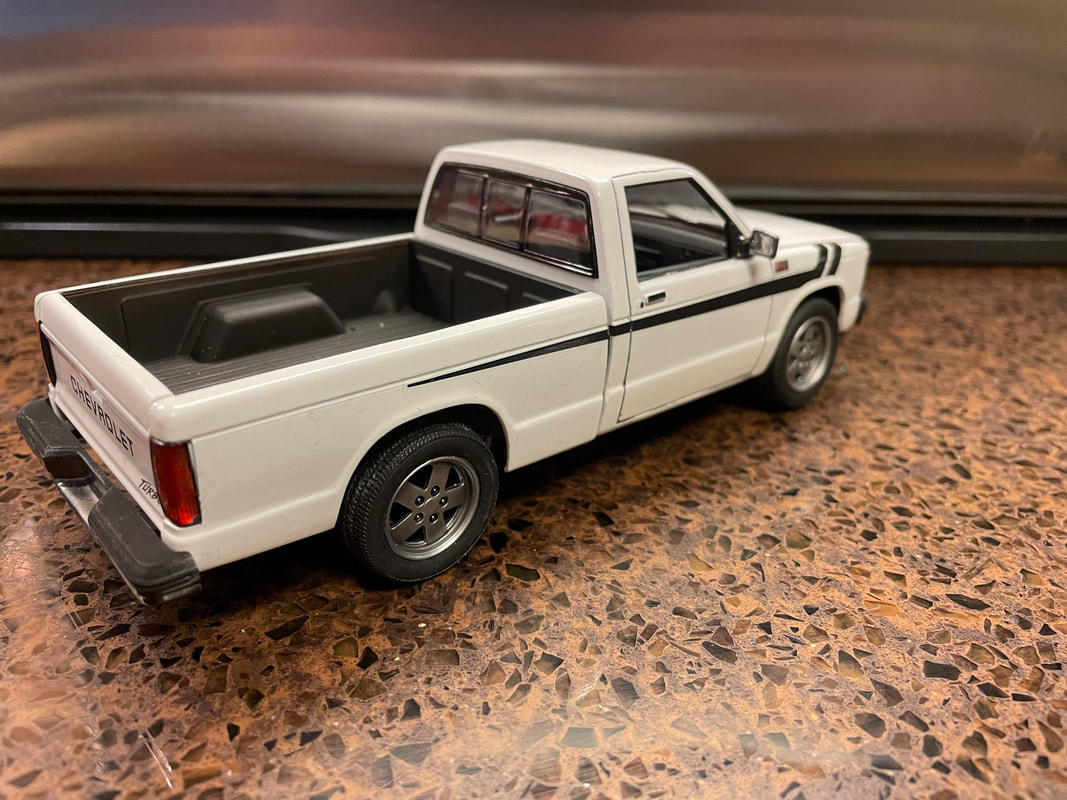
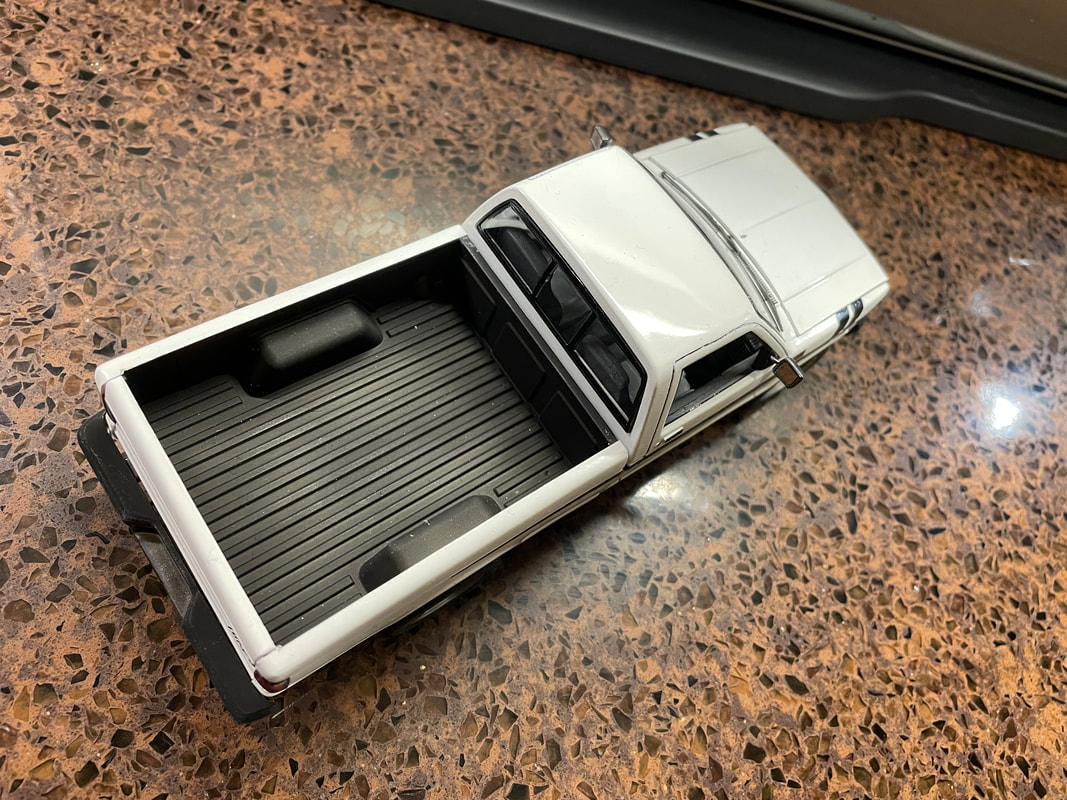
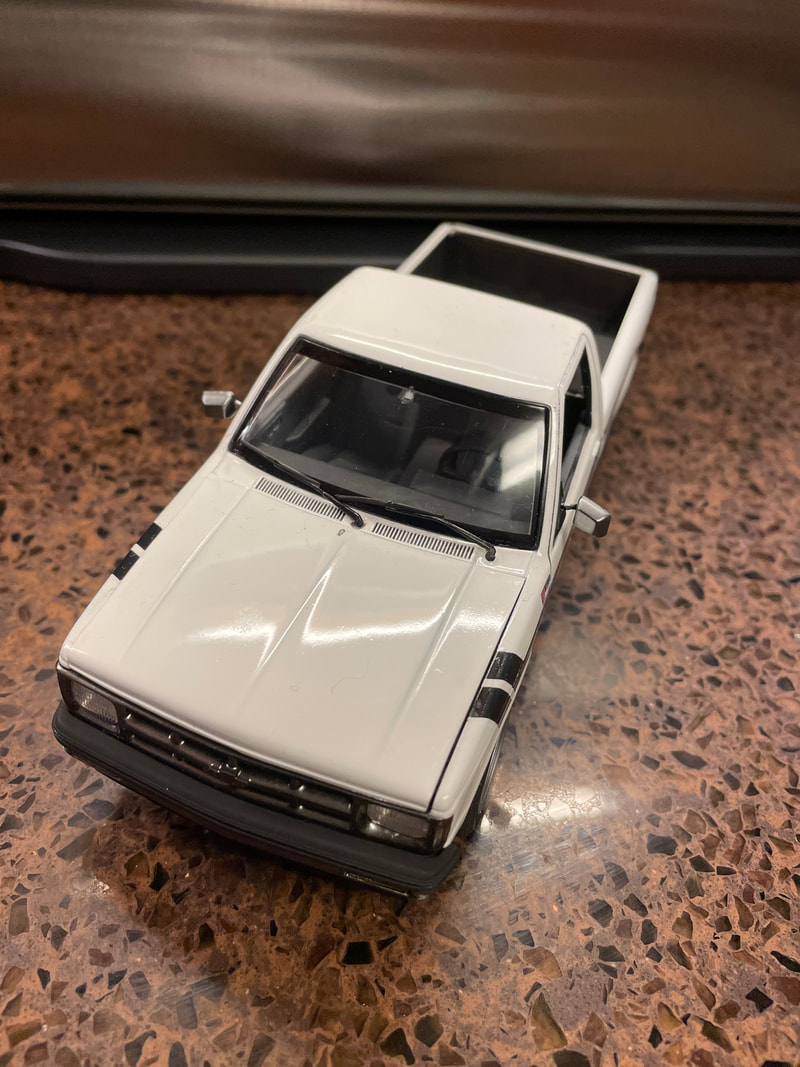
I had just barely started this late in 2021 and thought I should finish it up. This is Revell's reissued late 1990's Chevy S10. This kit does not allow you to make a "regular" S10 right out of the box. The tooling is shared with Revell's excellent (and out of production) GMC Syclone. The most recent issue of the S10 has the S10 body panels and wheels, but the Syclone engine and drivetrain. No matter, with the hood closed, it looks very much like the S10. I suppose if you were clever, you could build the rumored prototype that GM used back in the day - but I've never seen pictures of that (S10 body with the mechanicals that were used for the Syclone.)
As for the build, I primed the body with Tamiya fine white primer, and then sprayed Tamiya Pure White lacquer for the body; followed by Tamiya clear lacquer. I used Tamiya semi-gloss black for the bed liner. Kit decals were used. I used Tamiya's polishing compounds once the clear had cured.
I striped the chrome plating from all plated parts, and sprayed the bumpers, grill, and wheels with Alclad II Black Chrome. I later redid the wheels using Alclad II Magnesium, which I felt looked better. Interior is all Tamiya acrylics.
- 1:25 Revell Chevy S-10 "The Street Sleeper" 85-4503
- Tamiya lacquers and acrylics throughout
- Alclad II for bumpers, grill, and wheels
Tamiya 1/24 Datsun 280ZX
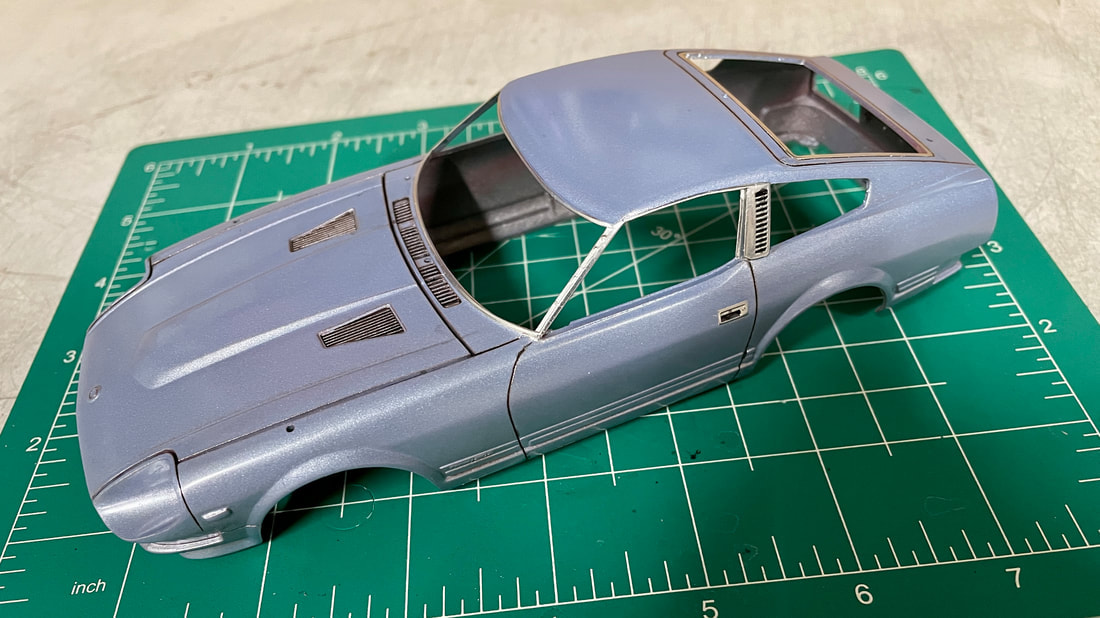
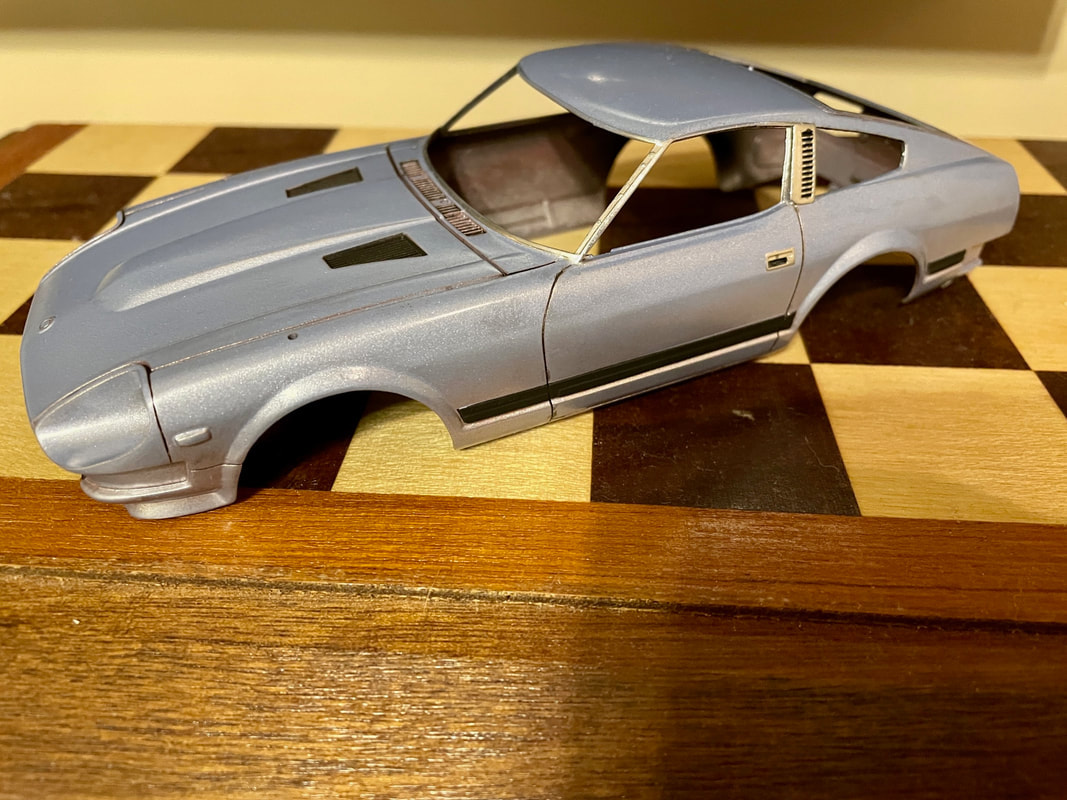

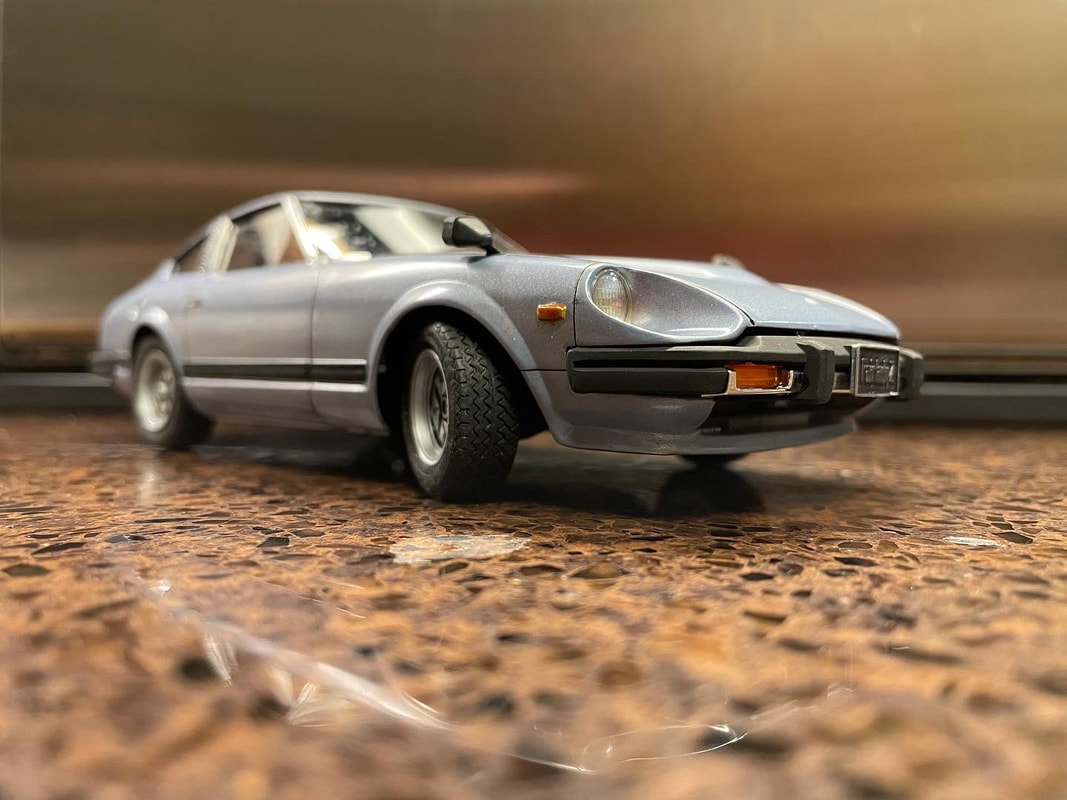
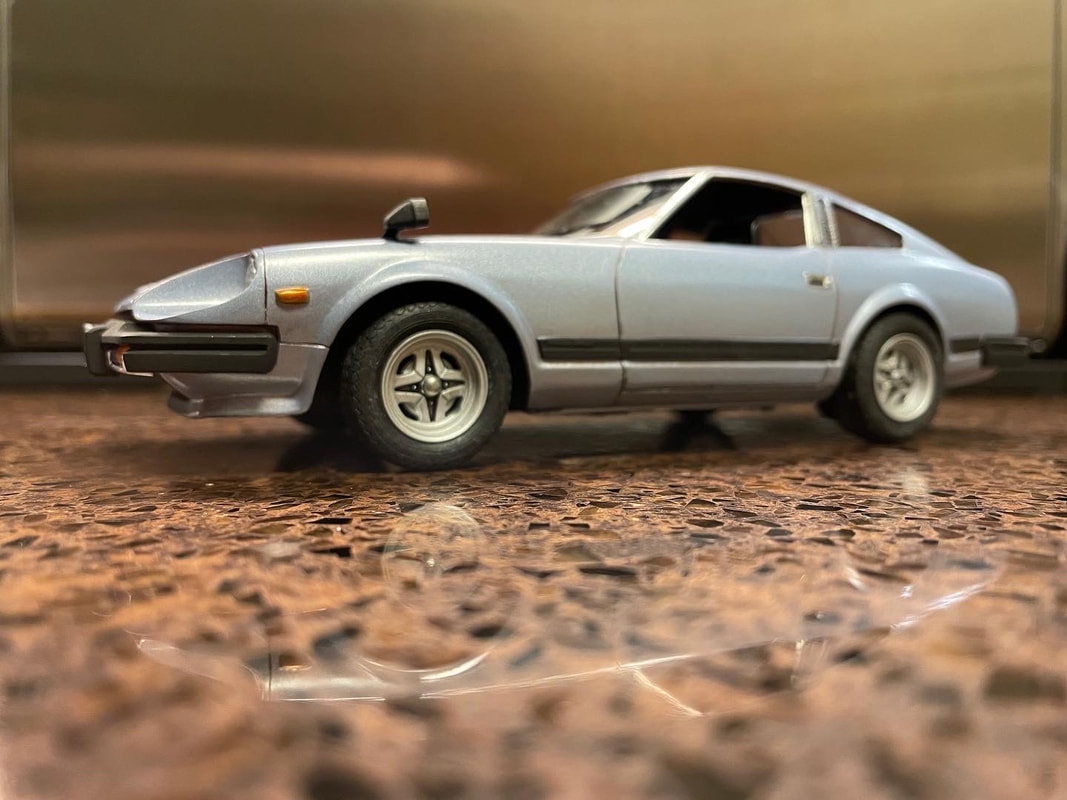
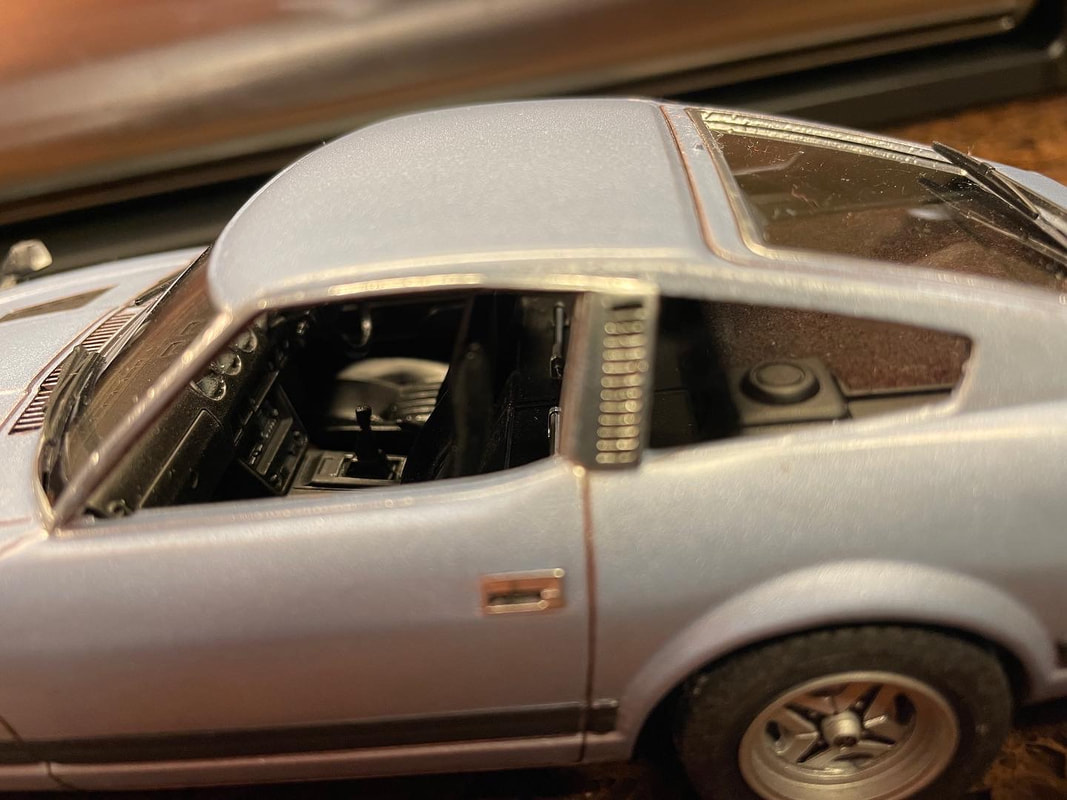
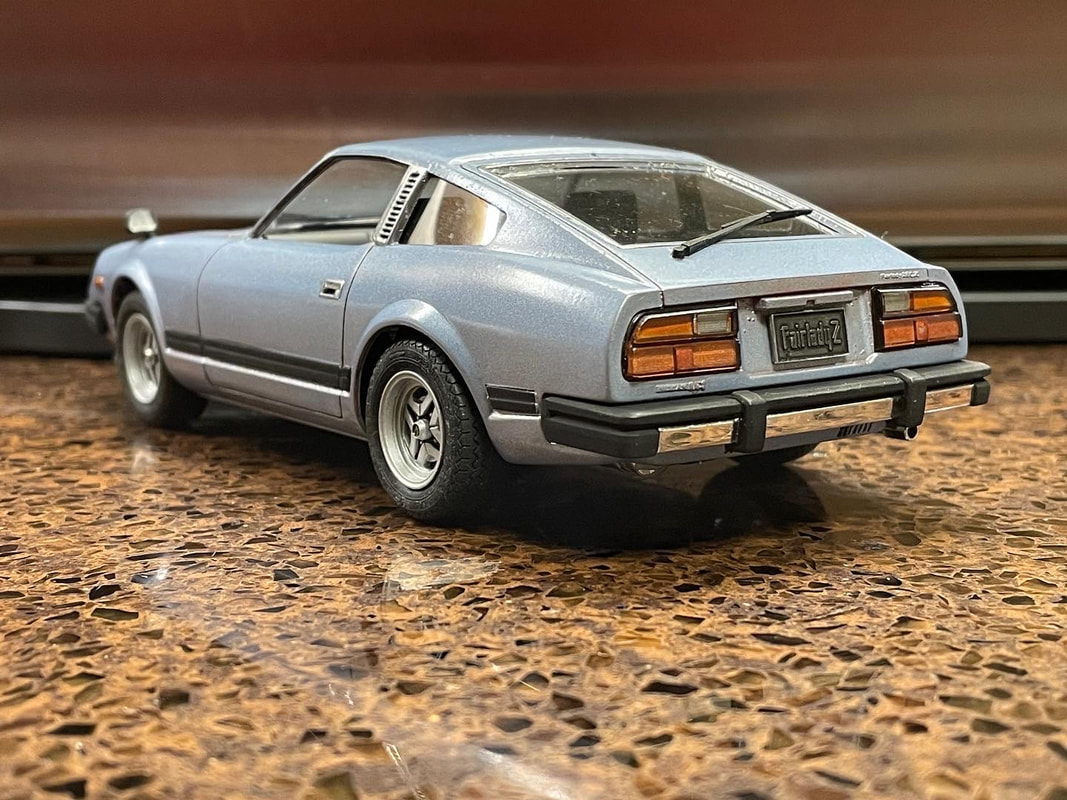
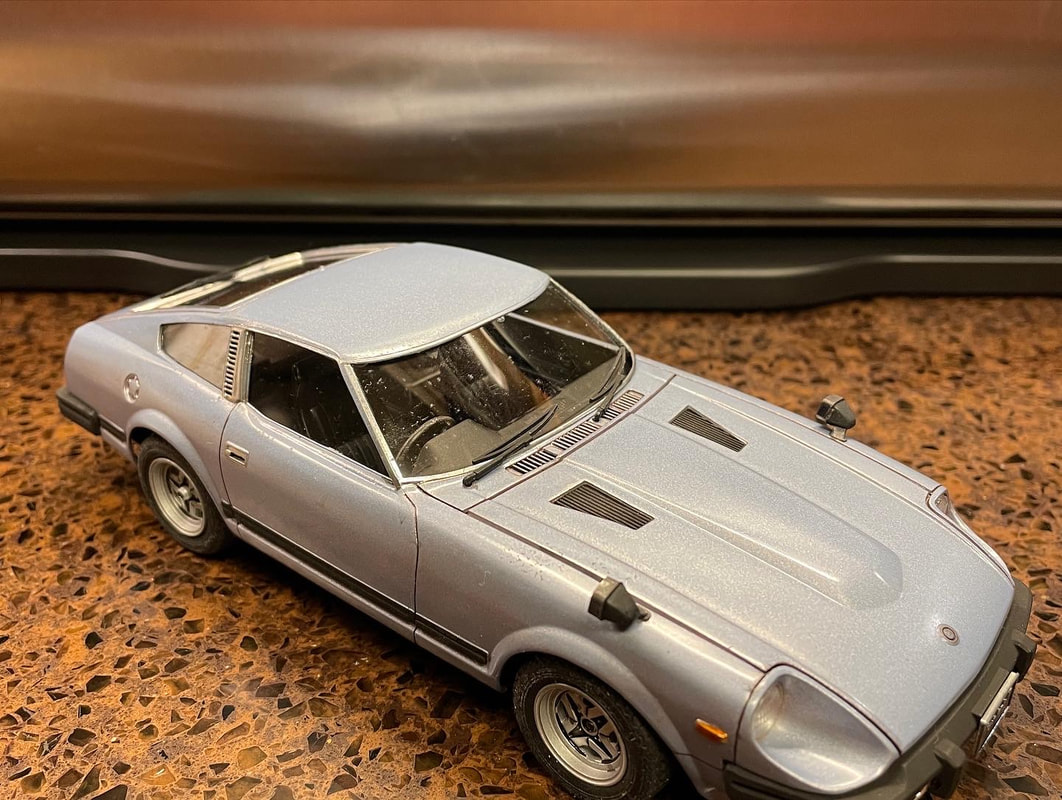
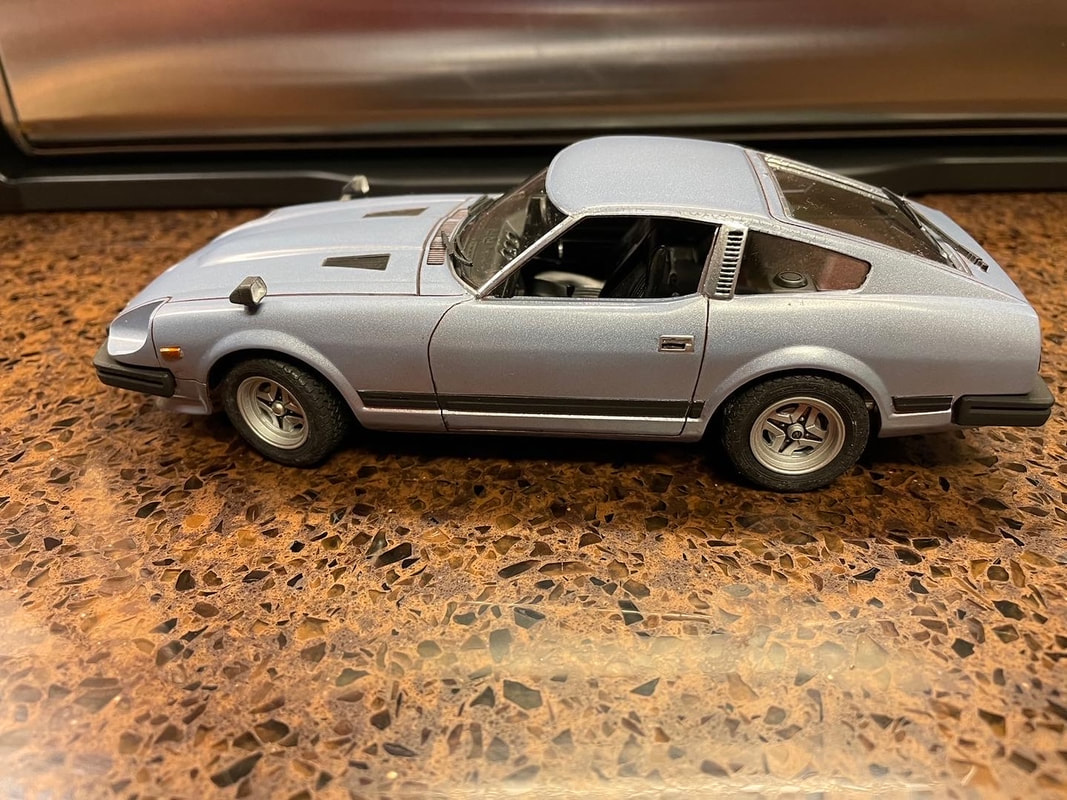
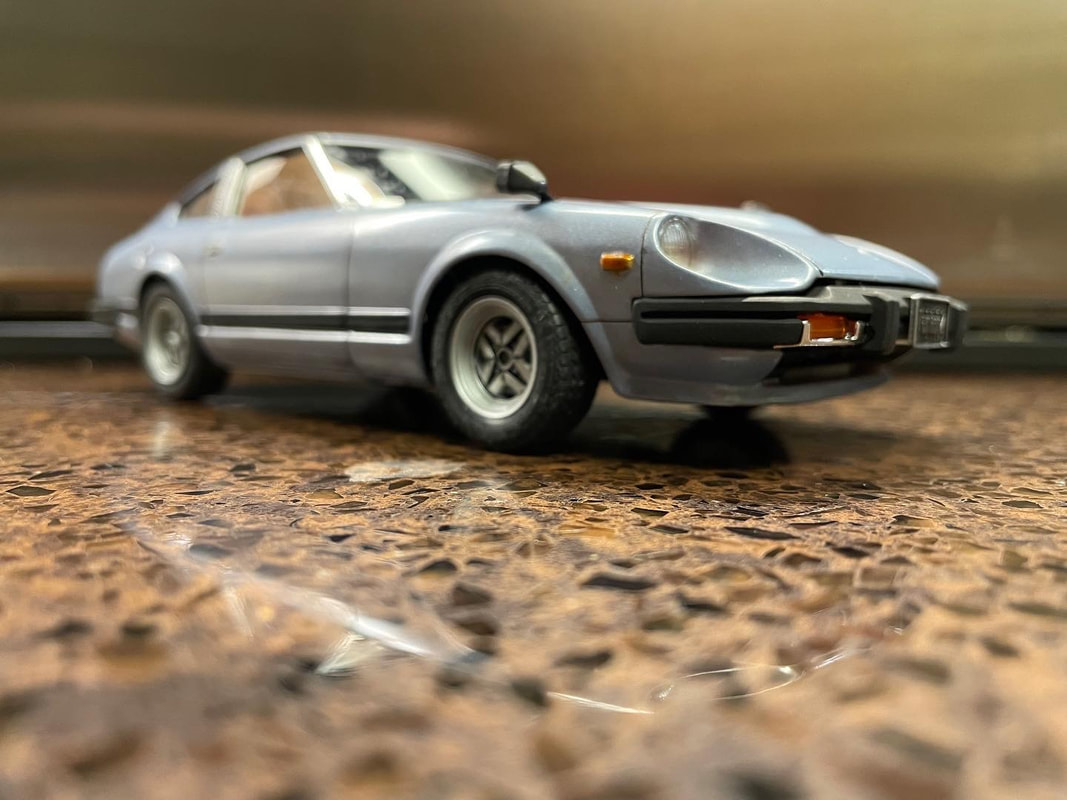
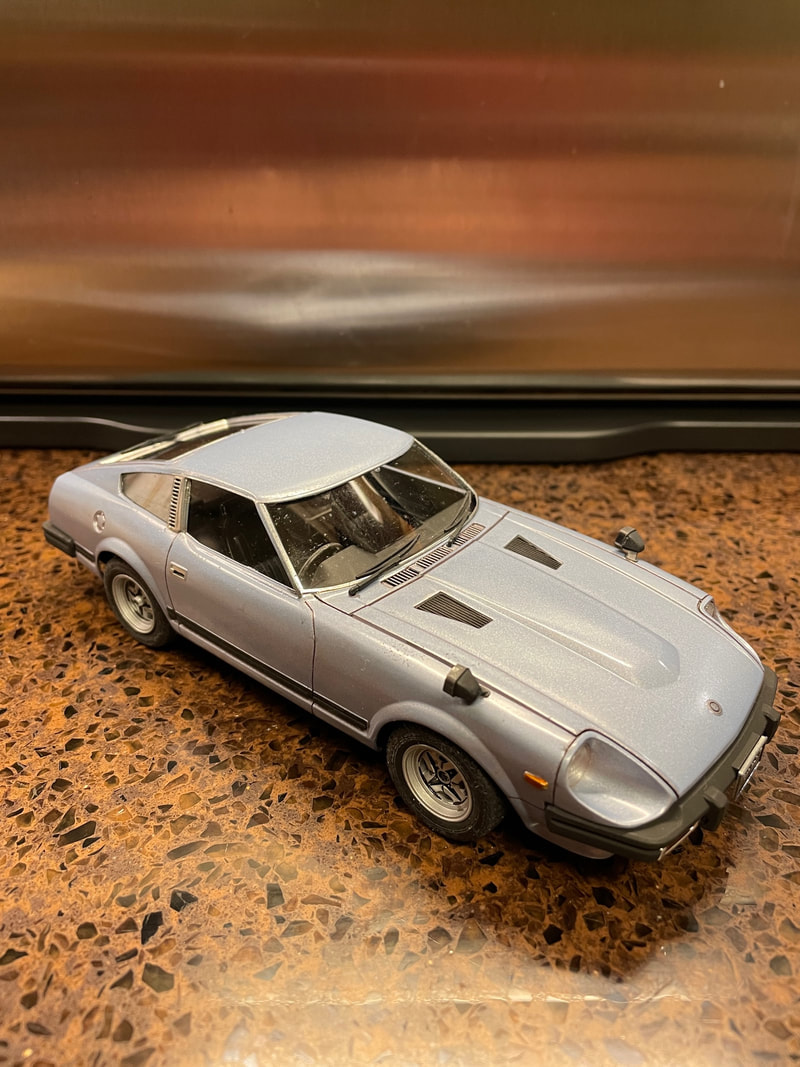
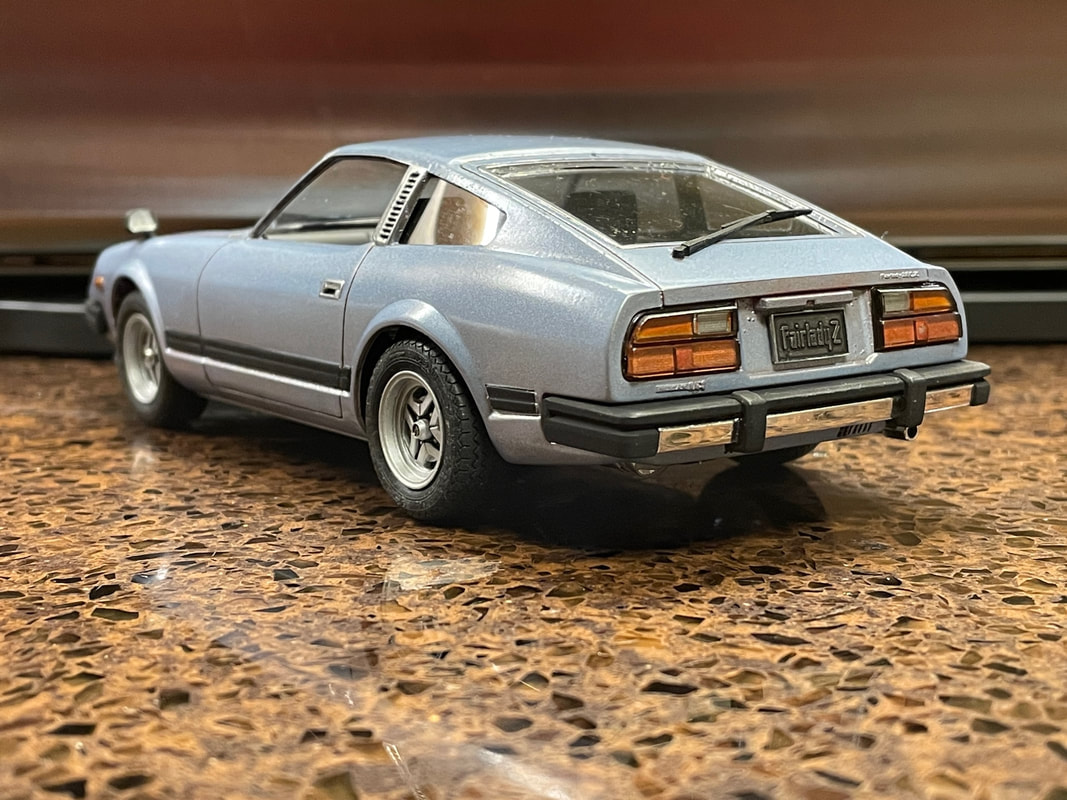
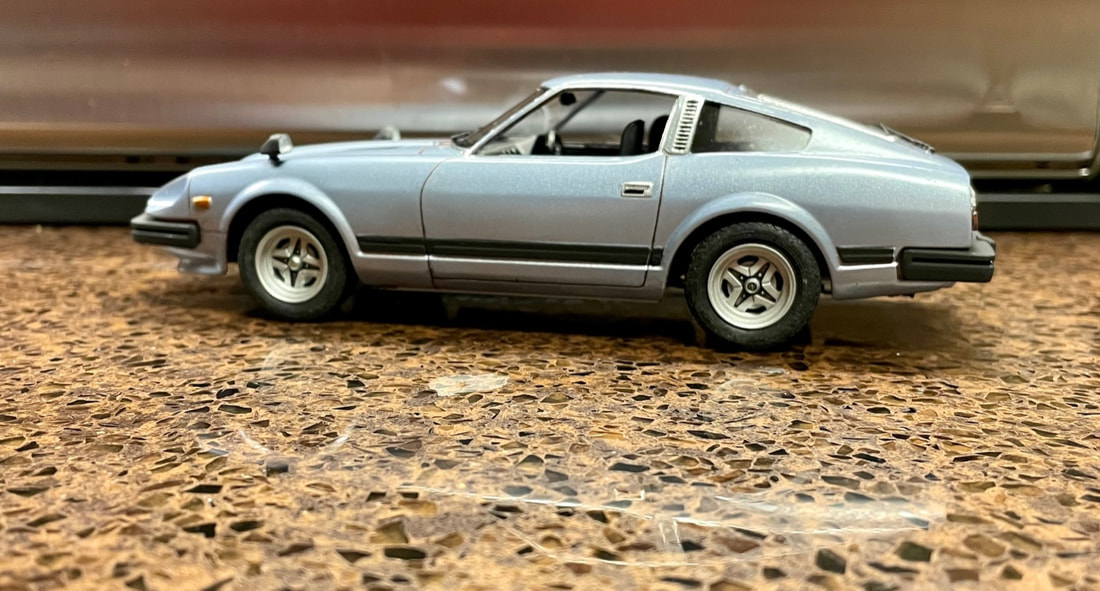
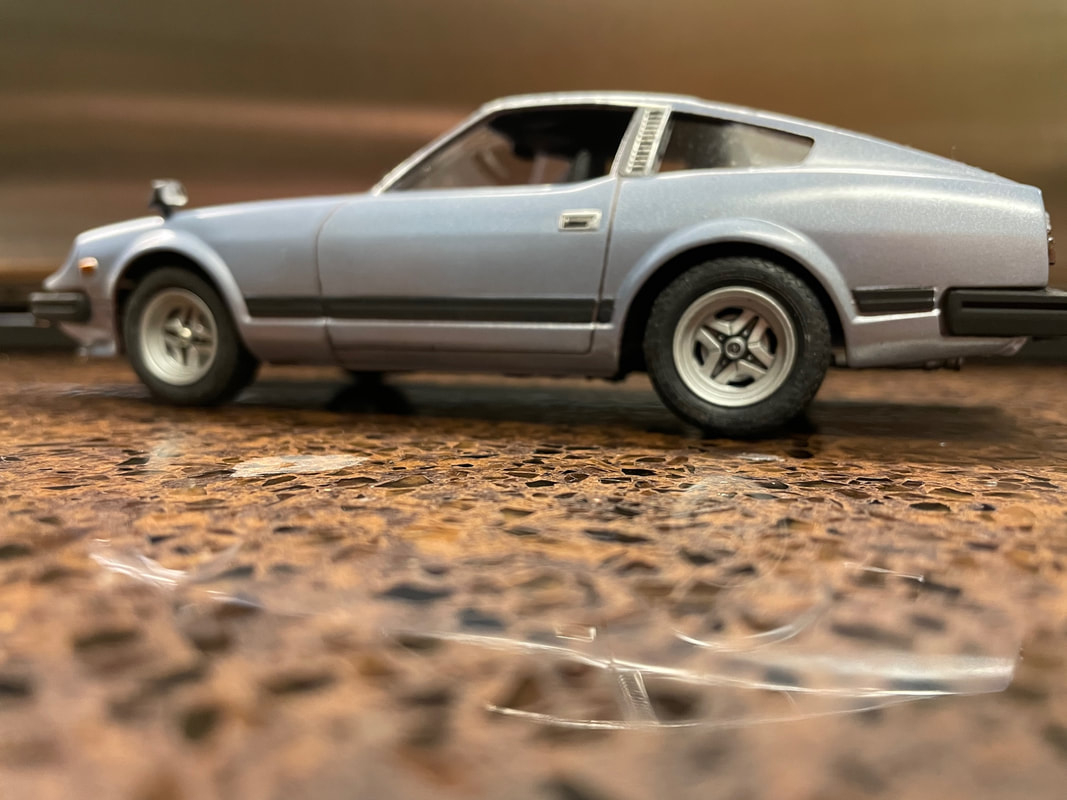
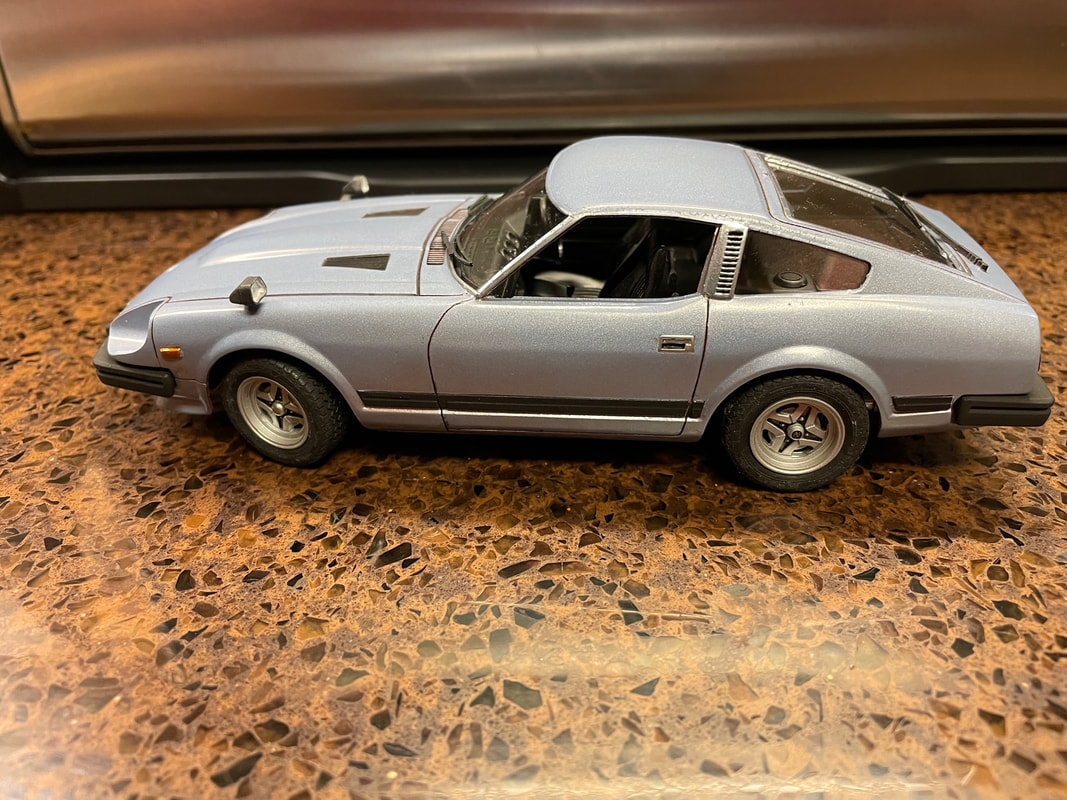
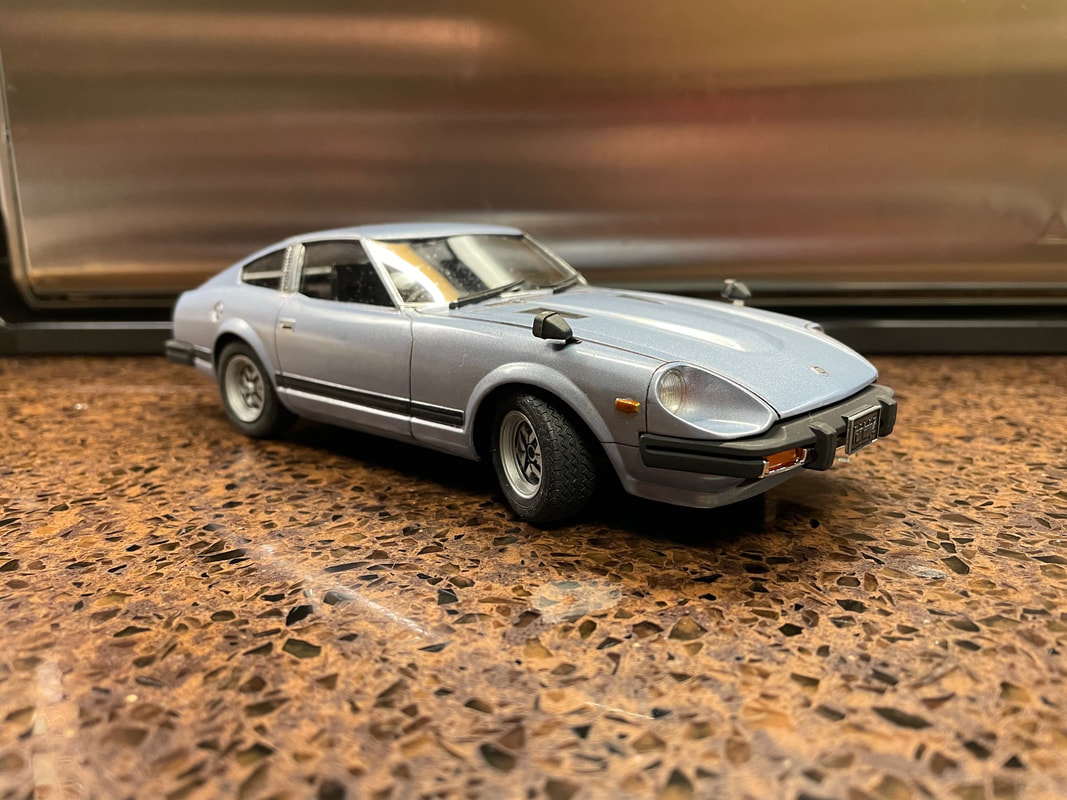
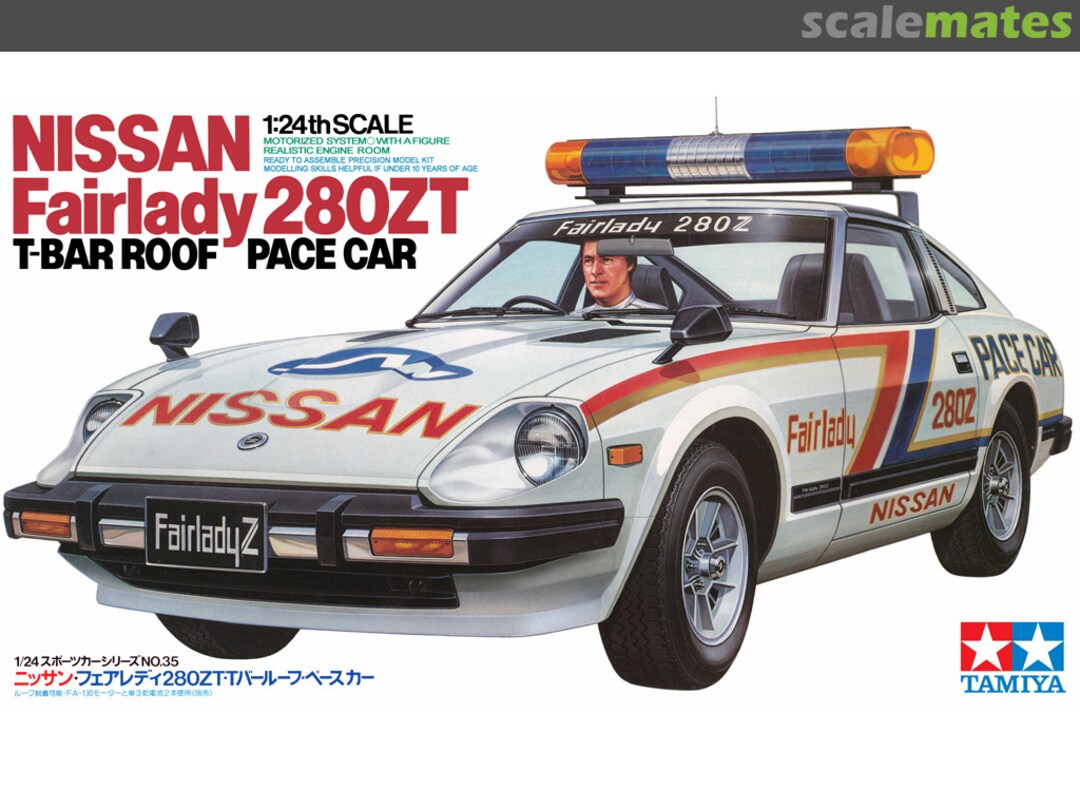
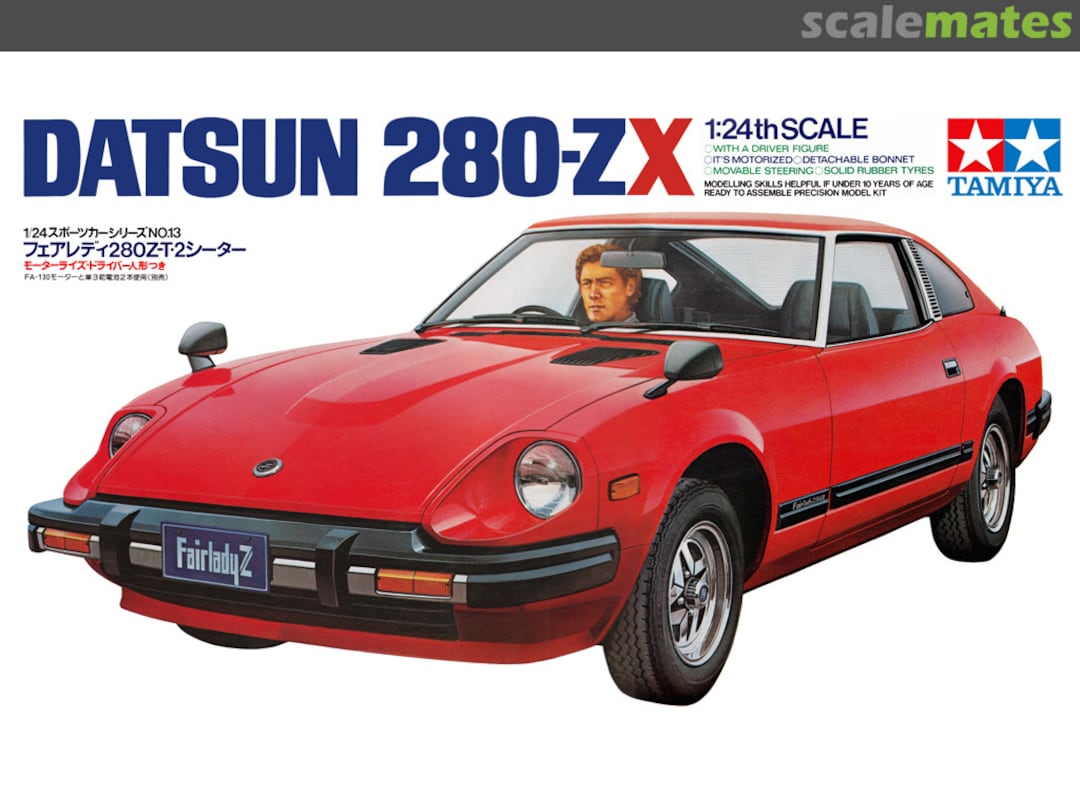
This is Tamiya's 1/24 motorized (motorizable?) Datsun 280ZX, circa 1979. Like most Tamiya kits, it fits together pretty easily - no major modifications necessary. Interestingly, the kit does offer the option of cutting the hood open and includes parts for a detailed engine - something not very common with Japanese kits of the era. I elected to leave the hood closed for this particular build. Paints are Tamiya lacquers and acrylics throughout. My goal was to build the kit as if it were driven daily.
- 1:24 Tamiya Datsun 280-ZX 2413
- Tamiya lacquers and acrylics throughout
Monogram 1/24 Oldsmobile Aerotech (High Performance Series)
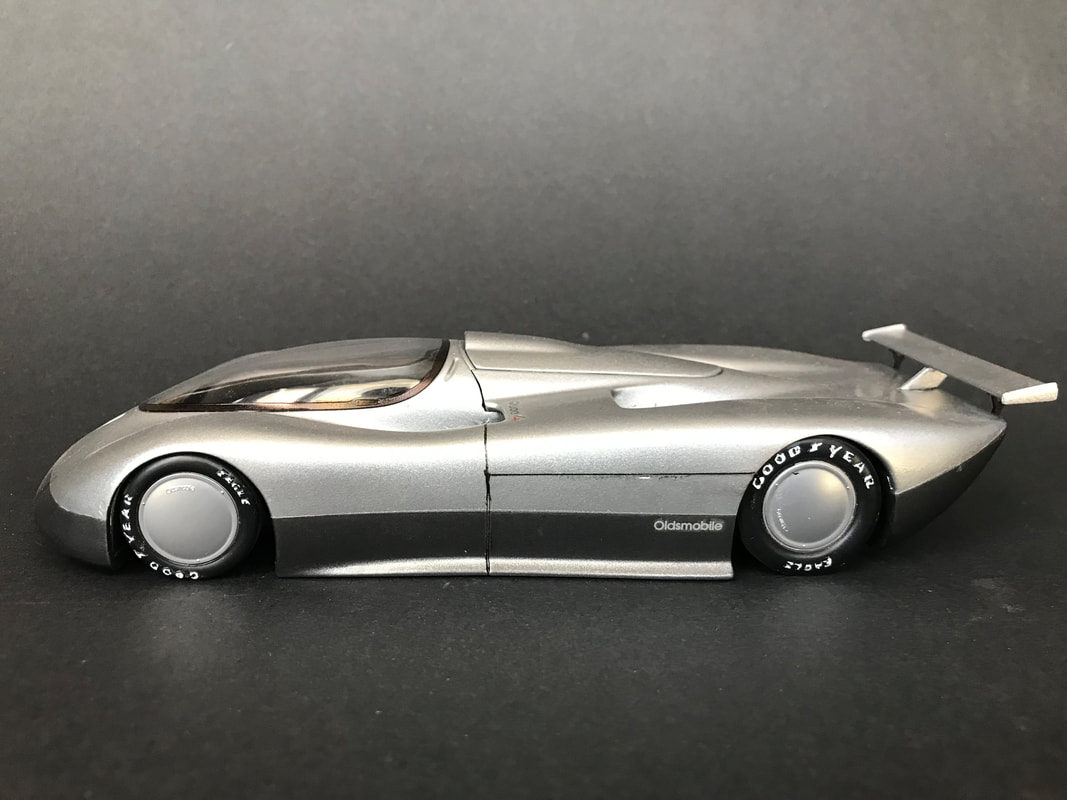
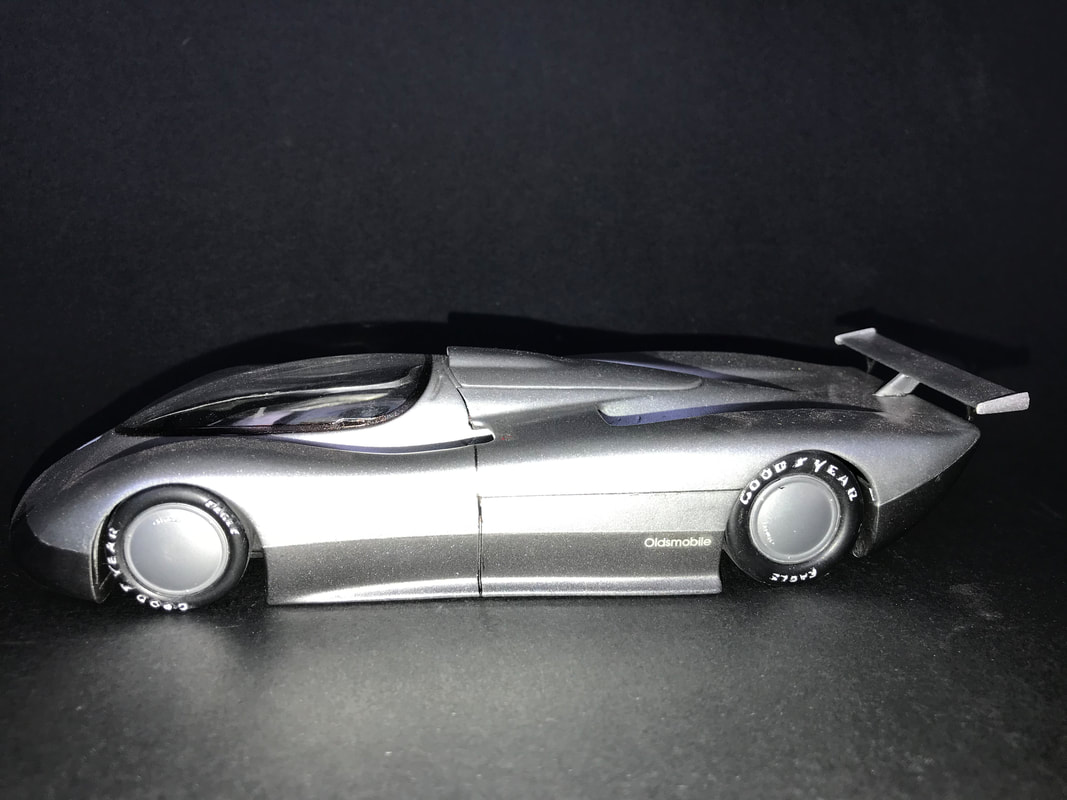
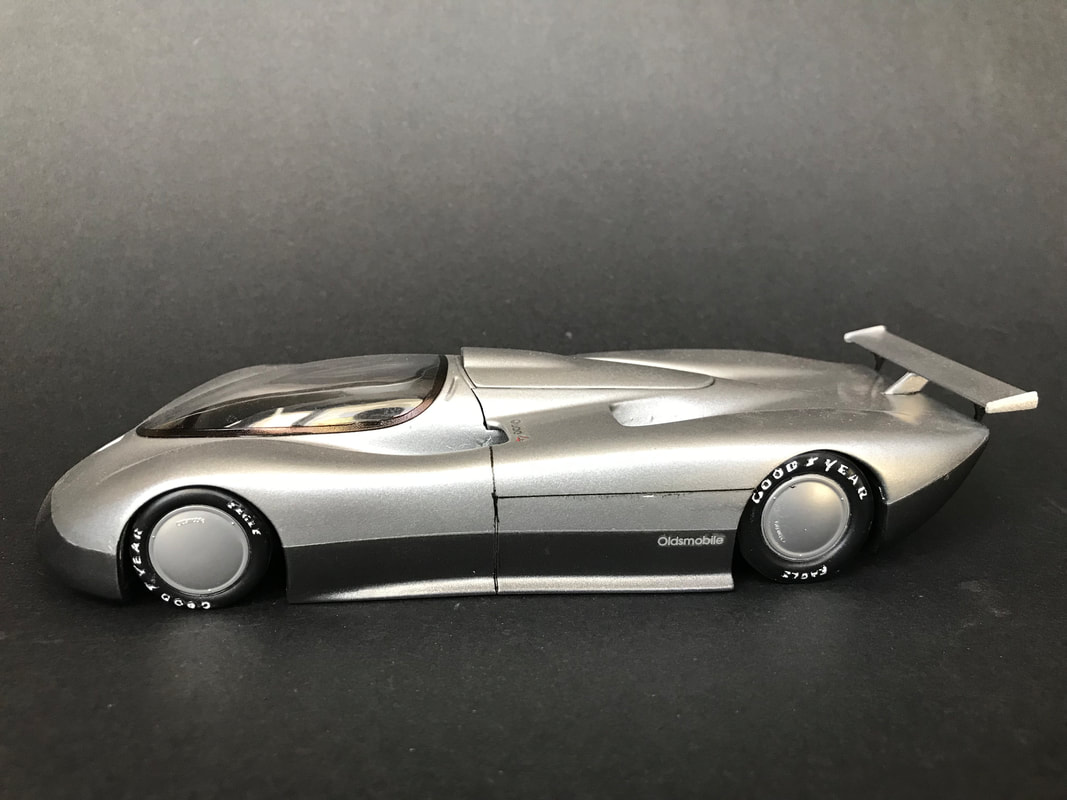
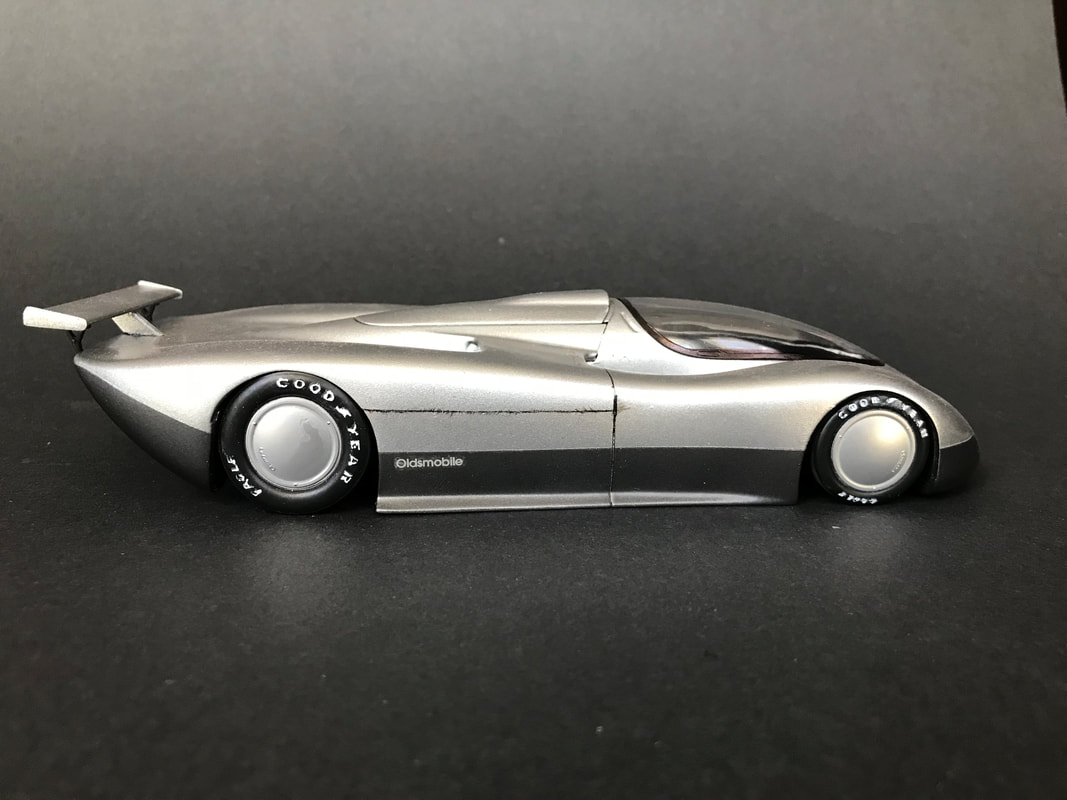

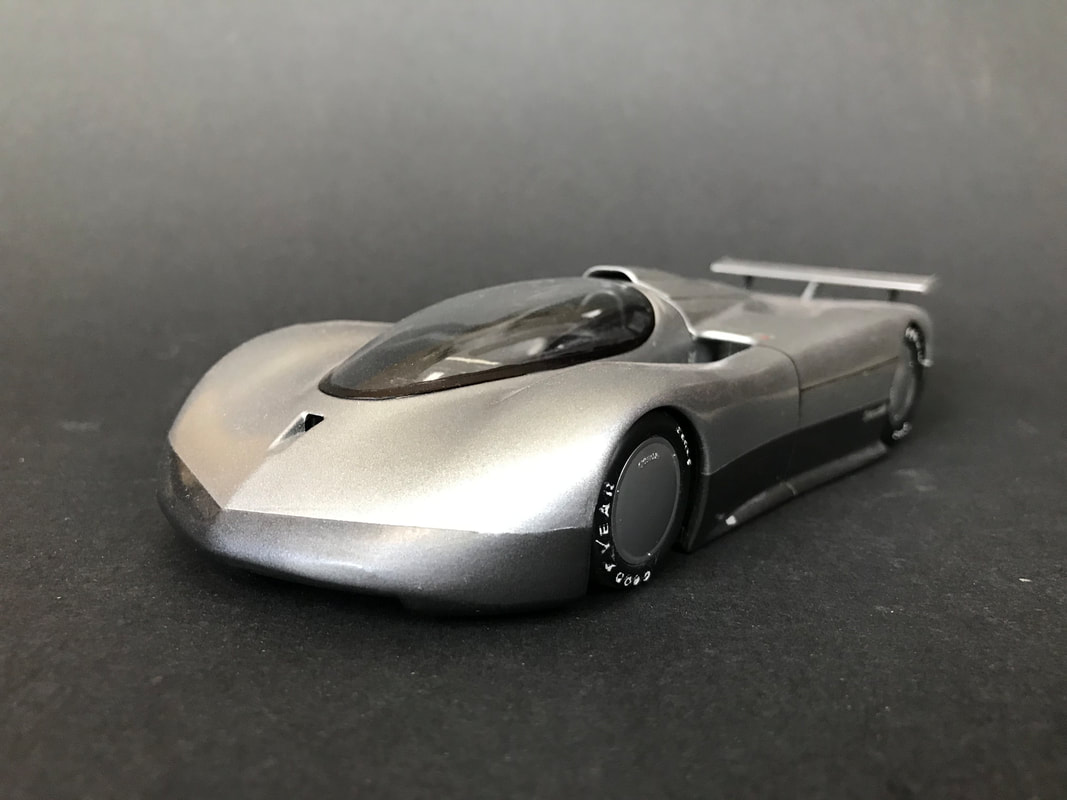

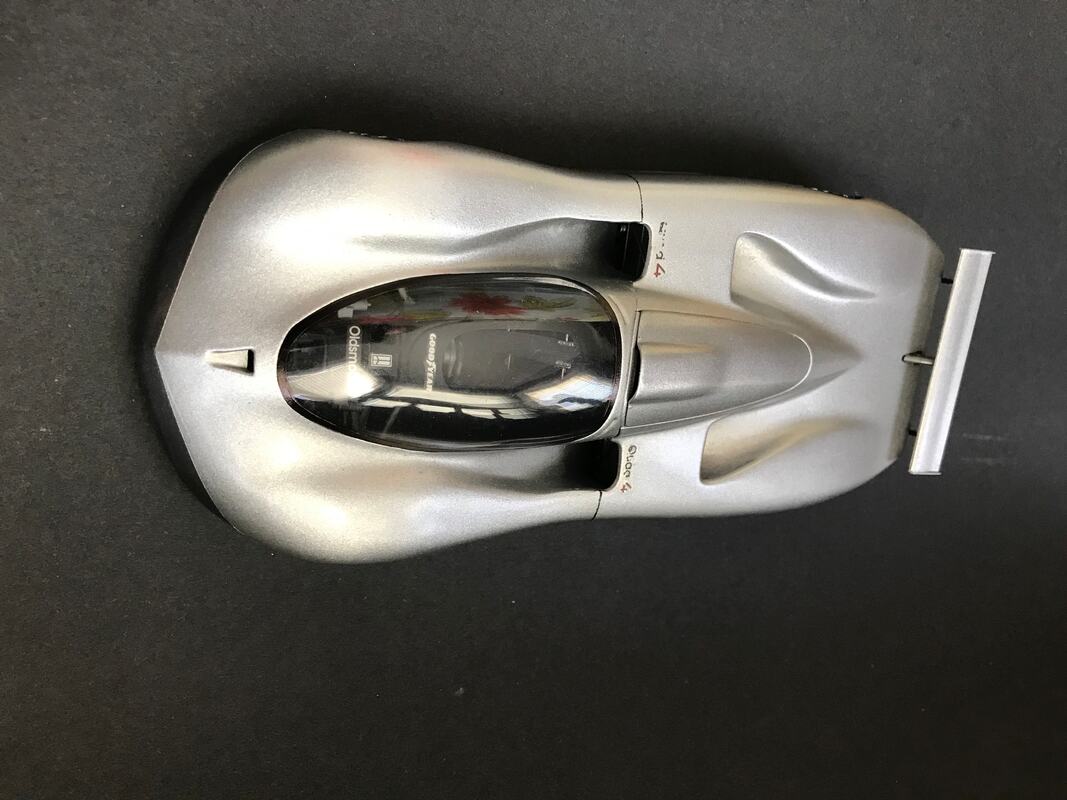
This is the Monogram Oldsmobile Aerotech, which was part of the short-lived "High Performance Series" of model kits. The kit offers the option of building the "Long Tail" or "Short Tail" version of the Aerotech. The Short Tail version is what I chose for my build. Kit is straight from the box, including the supplied spark plug wires.
- 1:24 Monogram Olds Aerotech ("High Performance Series") 2901
- Testors Extreme Lacquer for the exterior
Revell 1/24 '68 Volkswagen Beetle (California Wheels)
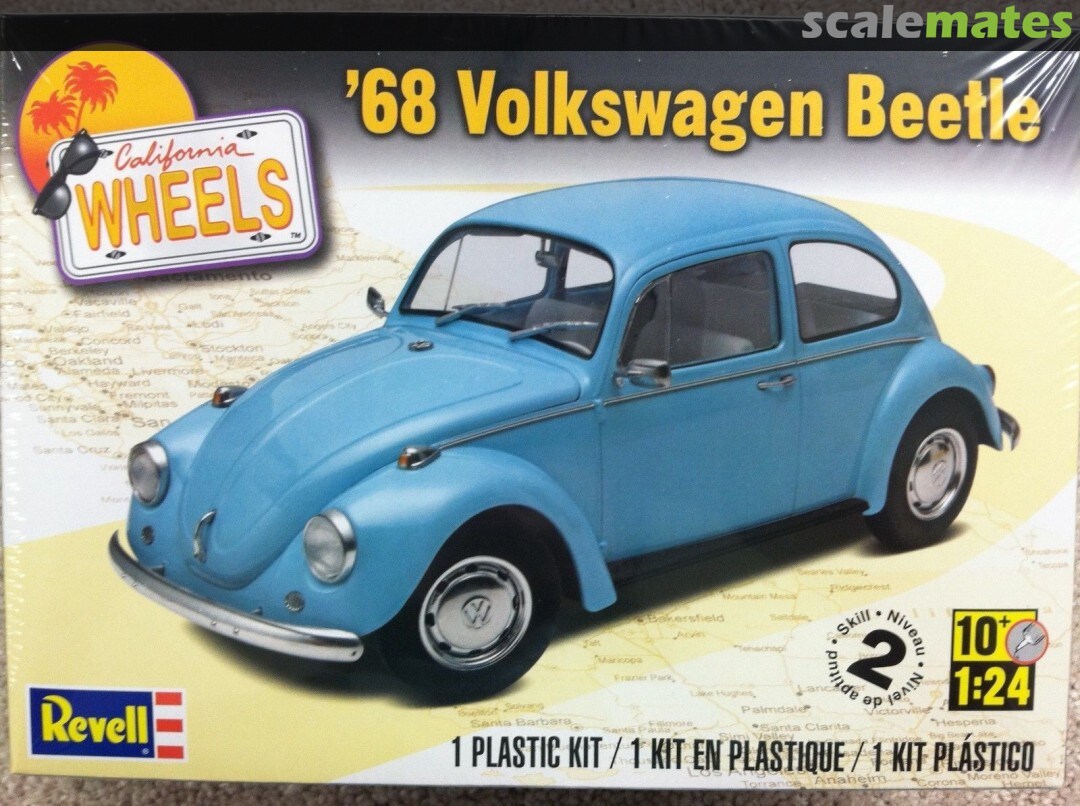

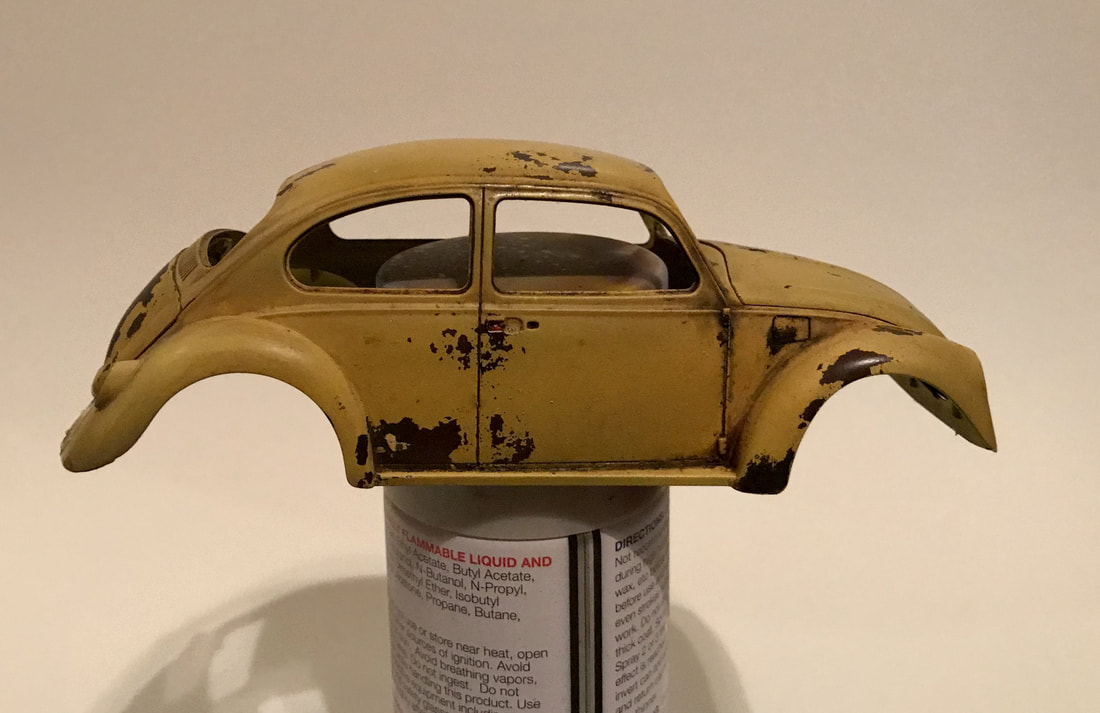
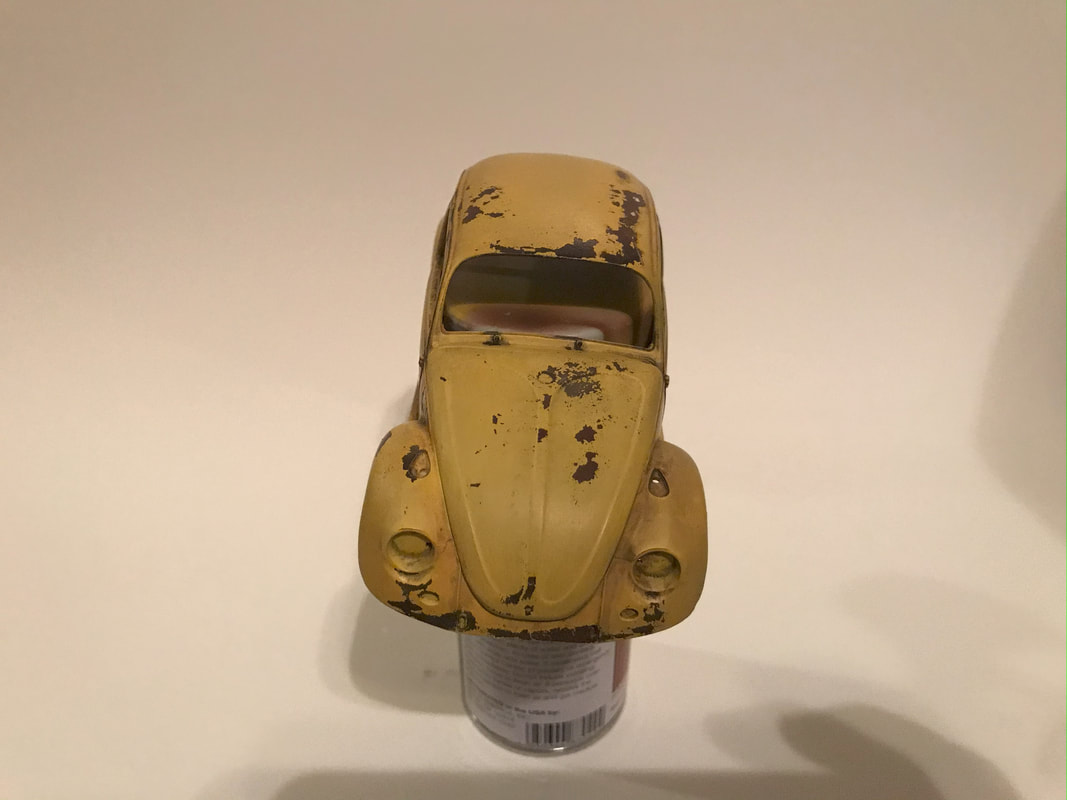
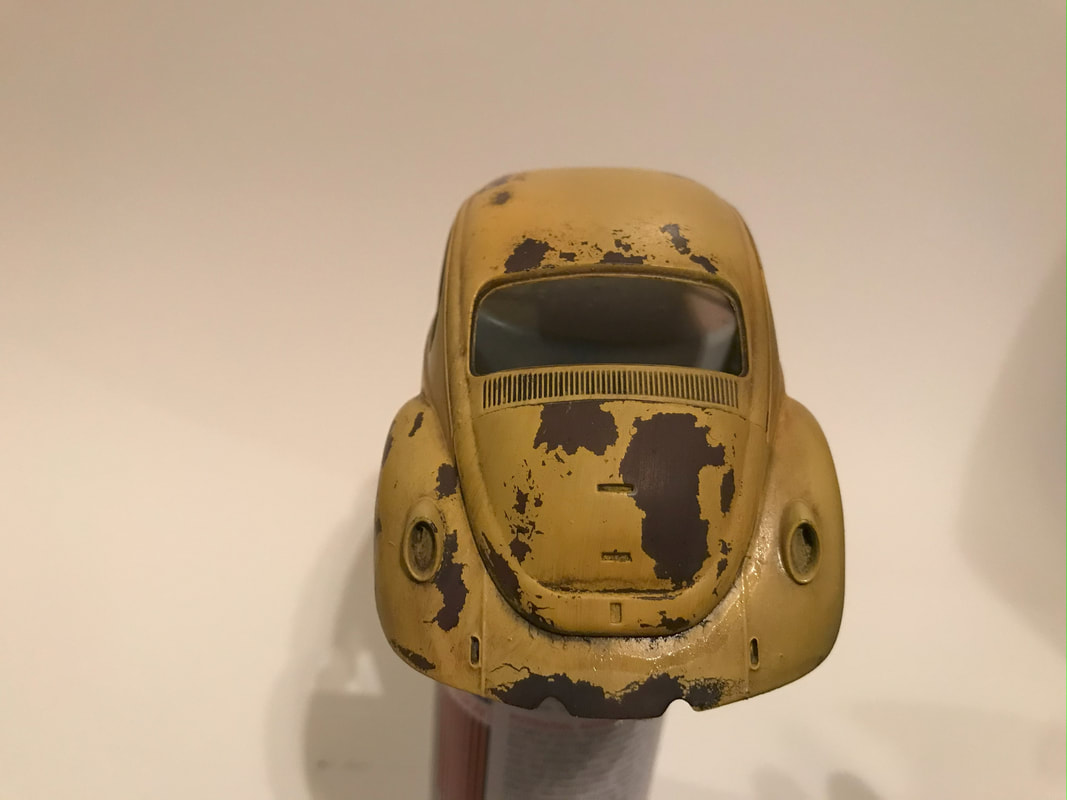
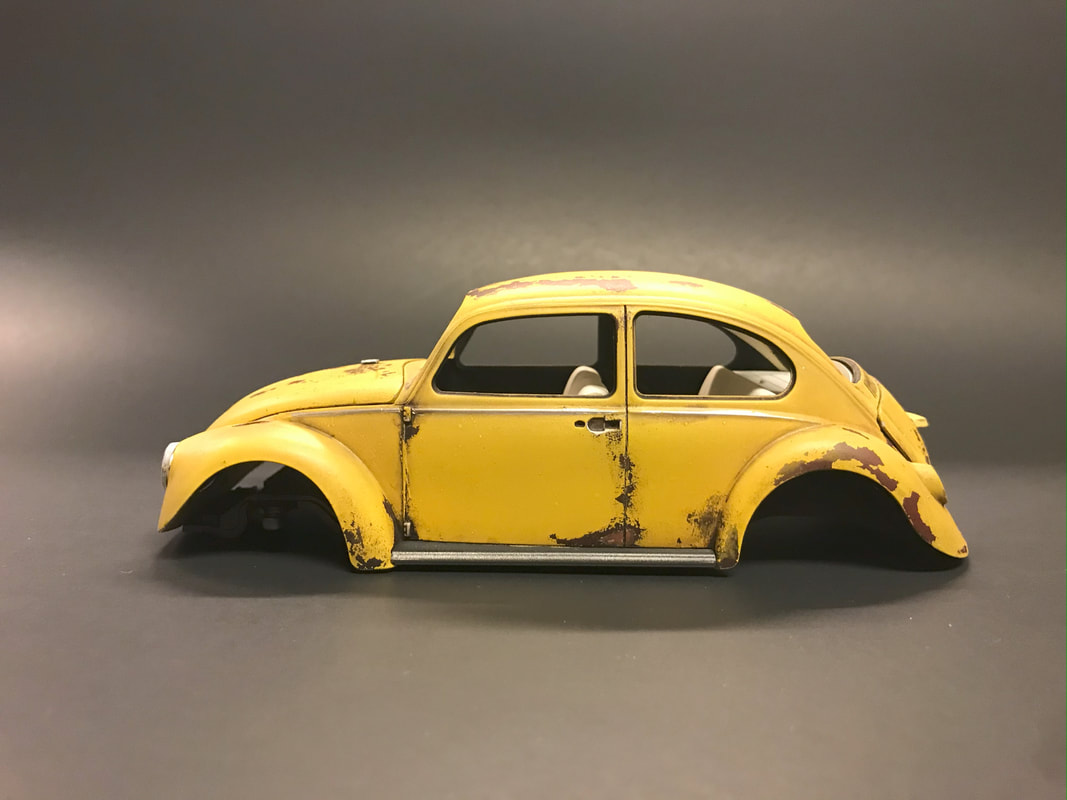
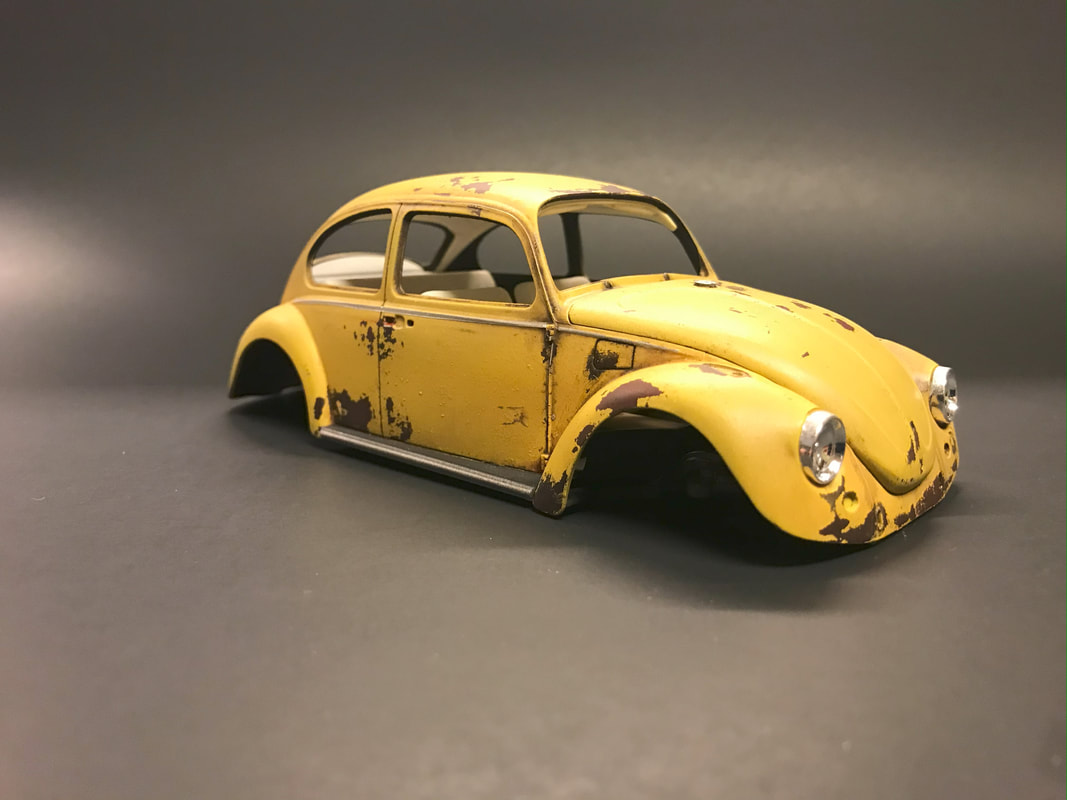
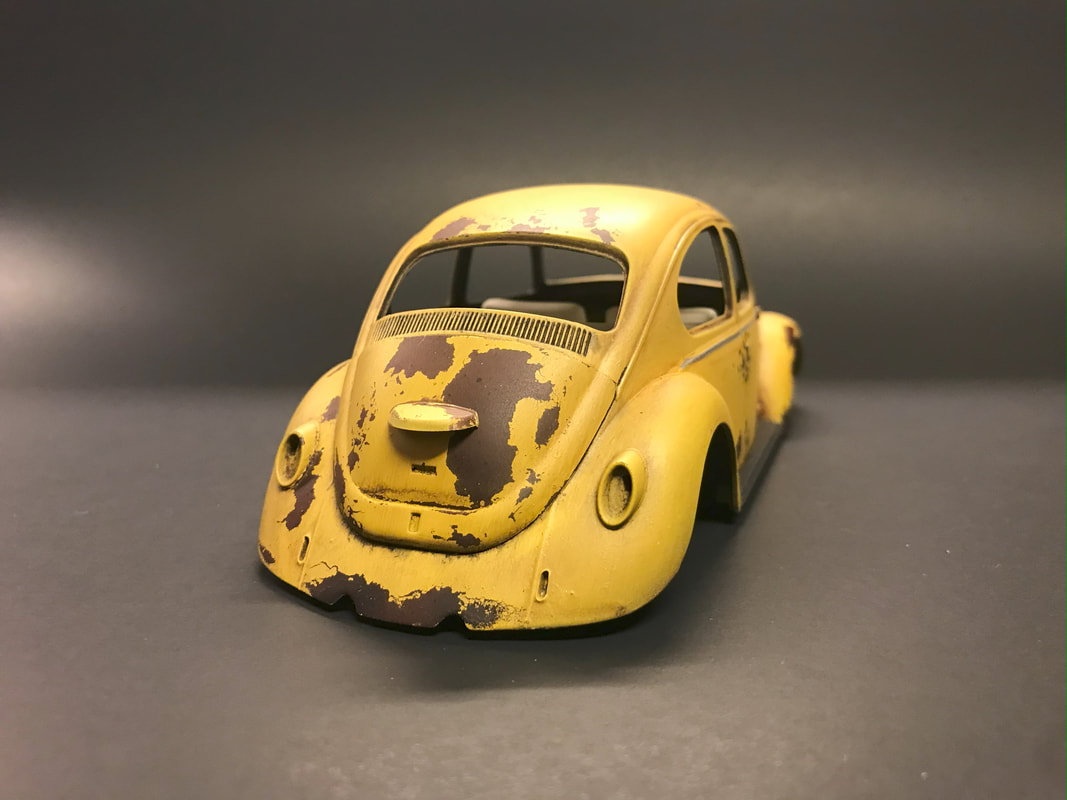
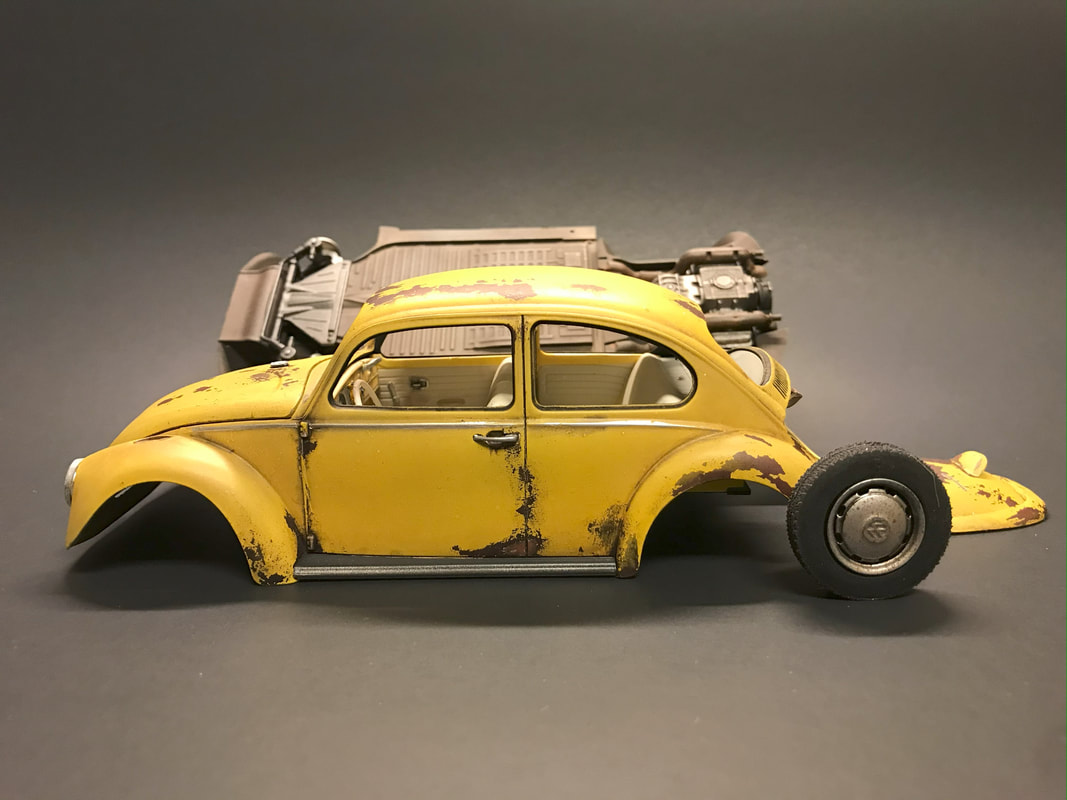
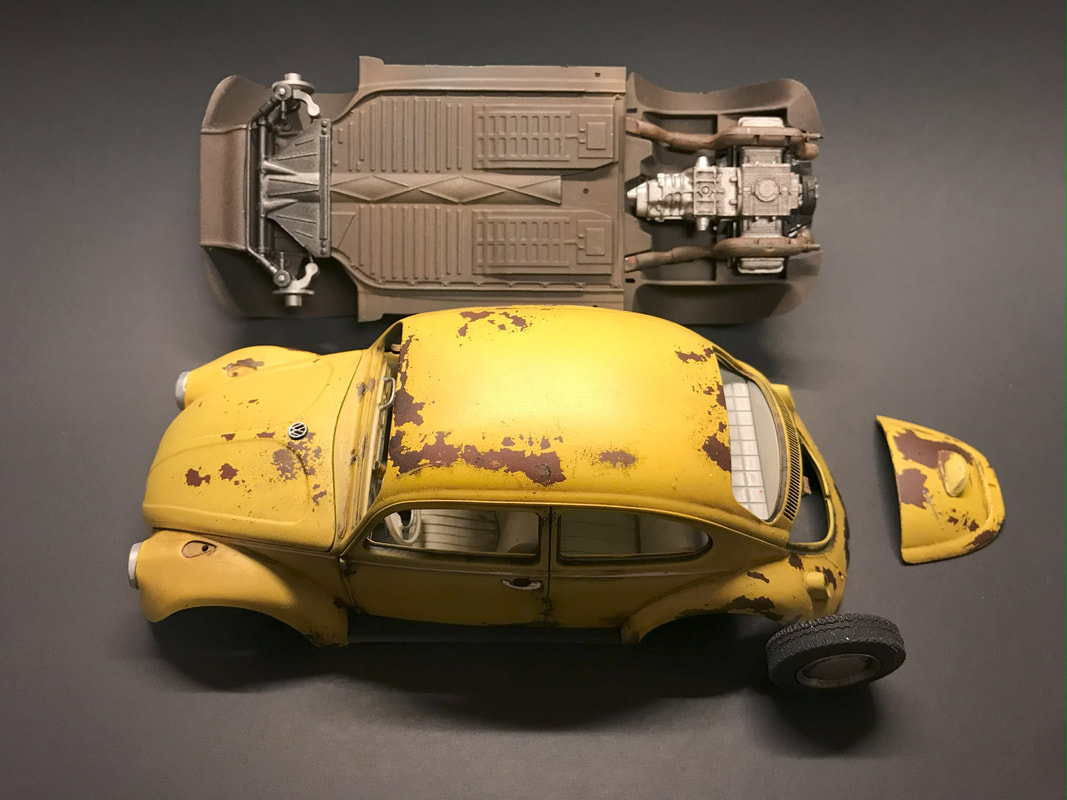
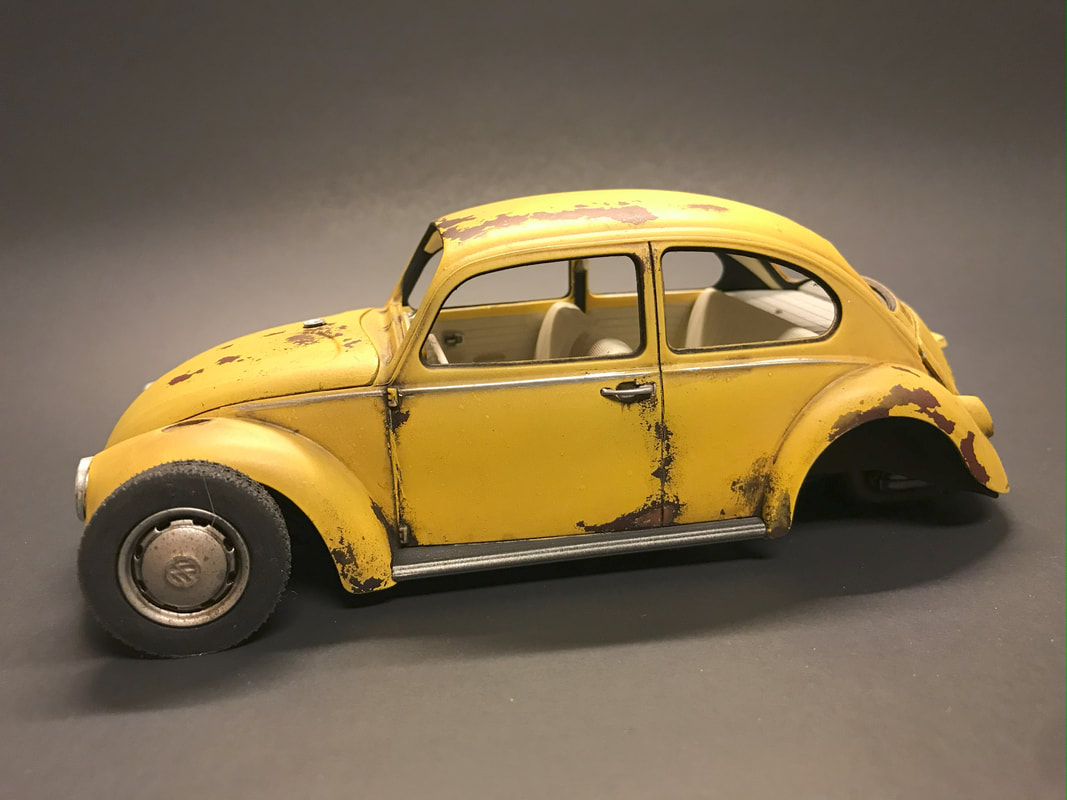
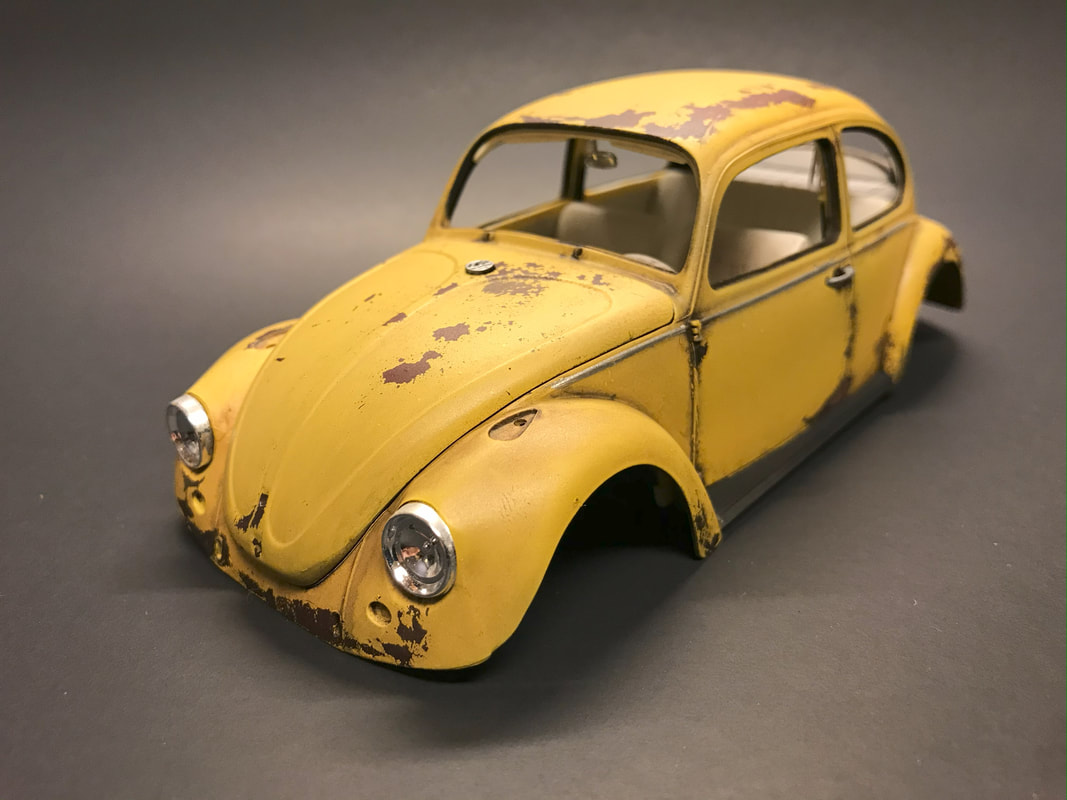
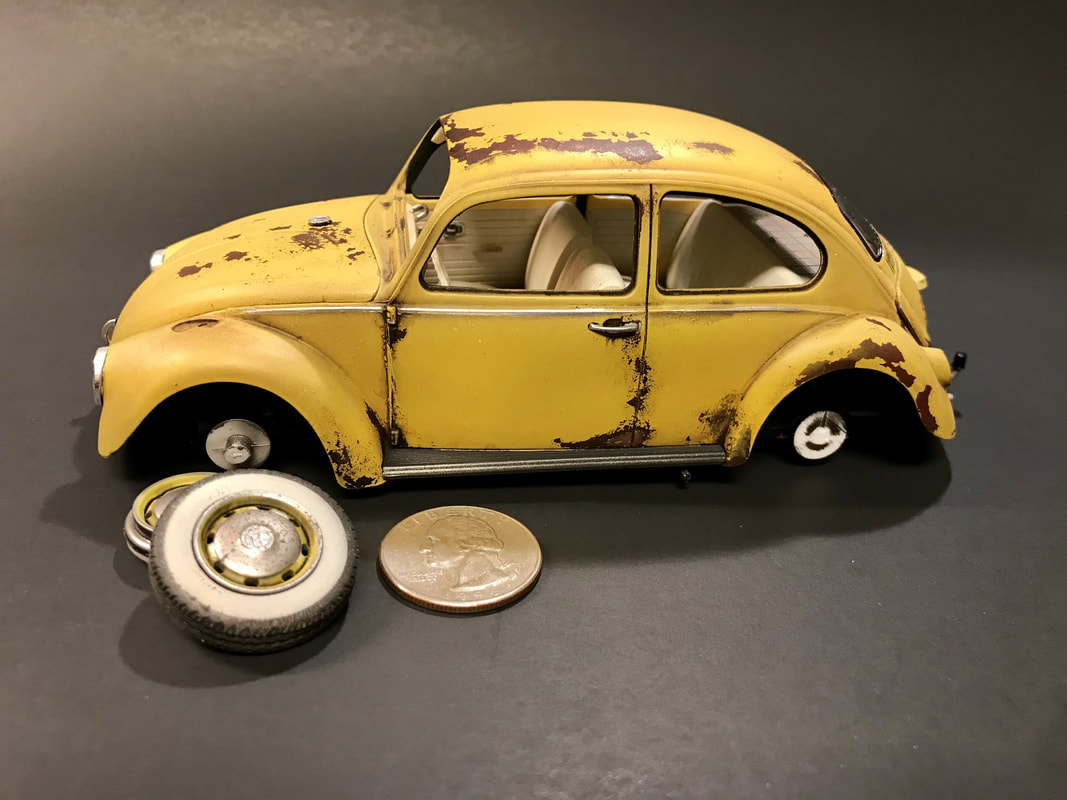
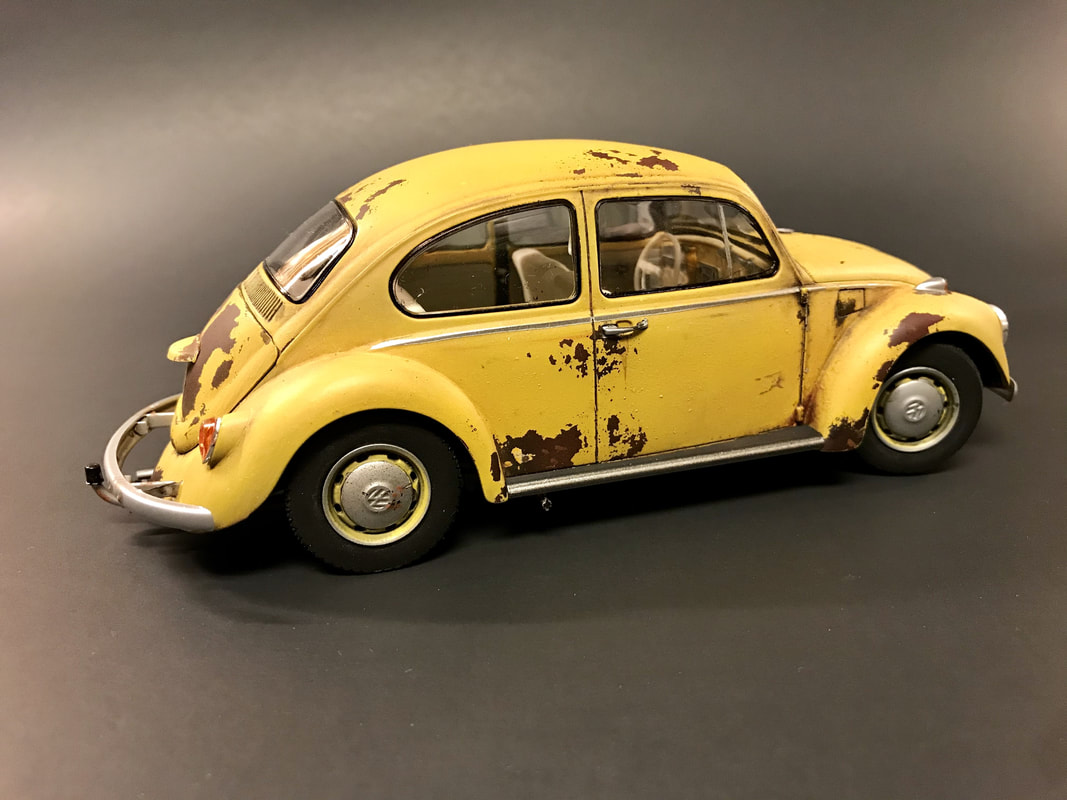
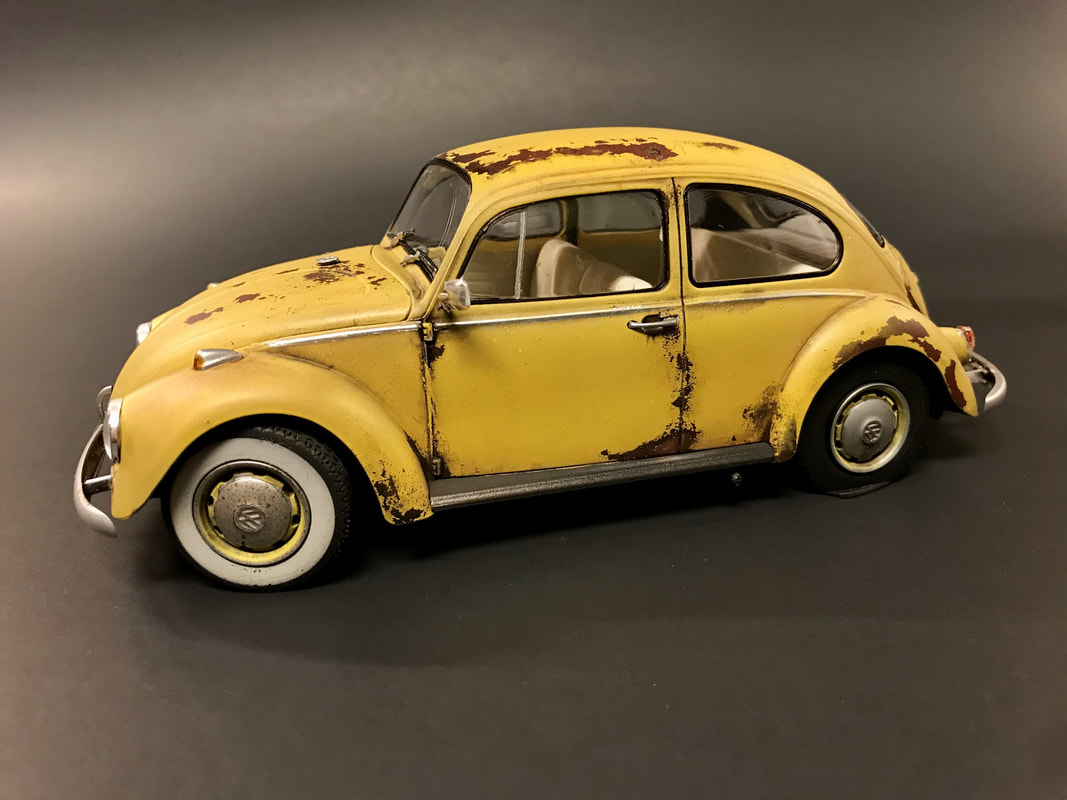
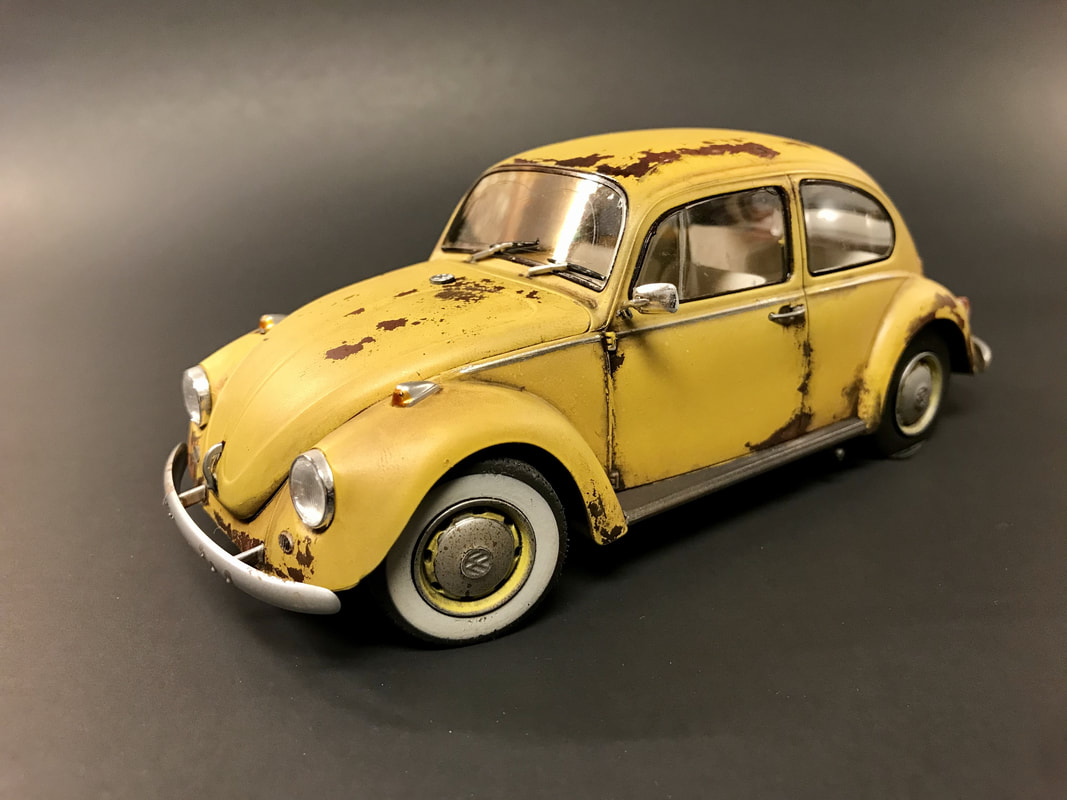
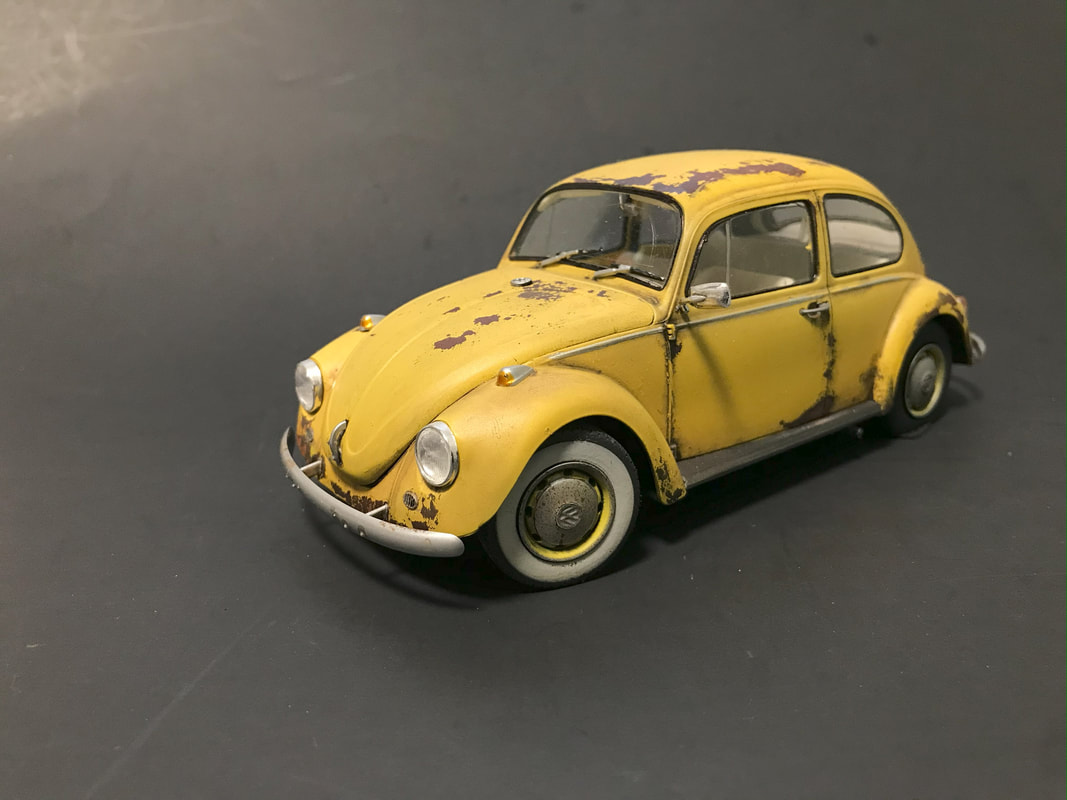
This is the newish Revell 1968 Volkswagen Beetle in 1/24 scale. There has been some commentary on the internet about whether this kit represents a "proper" 1968 model. I do not know, but I do know that the kit is a blast to assemble!
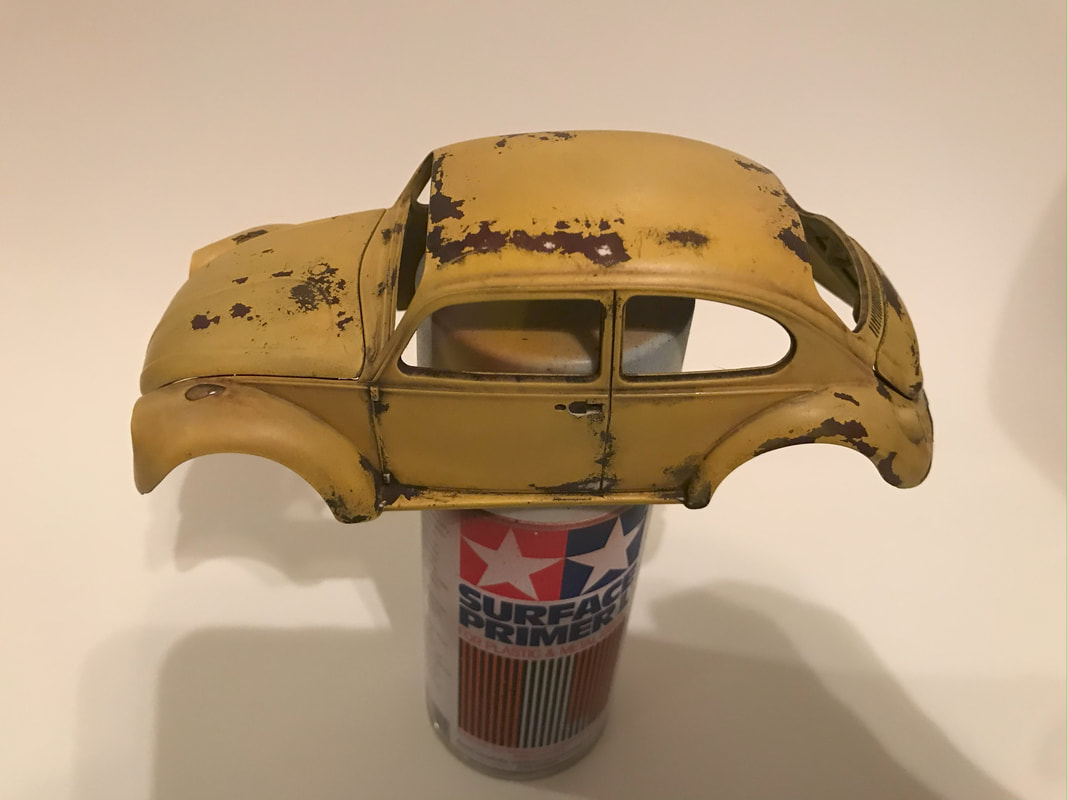
This was my first foray into weathering with hairspray (aka "the hairspray technique"). The kit is assembled straight out of the box. For my attempt at weathering, I first primed using Tamiya's spray primer in gray. I then airbrushed some Tamiya Red Brown (XF-64) and mixed various amounts of Tamiya red, black, brown, yellow to the basic Red Brown and sprayed random patterns over the car. At this point, it was just a rusty brown VW bug. Next, I sealed this with a shot of good ol' Testor's Dull Cote. Next up, I ran some Tamiya Panel Line Wash in black, brown, and I think dark gray in the various panel seams, door lines, and where the fenders meet the body. I also washed some of the brown panel line wash in random spots over the body. Finally, another shot of Testor's Dull Cote. At this point, after sufficient drying time - I shot some cheap (read - nasty smelling!) hair spray that I found at the $1 store over the car. Lastly, for some color I shot thinned Tamiya Flat Yellow (XF-3) over the body, and lightened this with Tamiya Flat White (XF-2) for the top portions of the car. Once this had dried to the touch, I started scraping paint off with a water-moistened old paint brush (I'd cut the bristles down shorter). This allowed me to remove the yellow and reveal the rusty patina underneath. Once done - and I had to do a few touch ups - I shot a final layer of Testors Dull Cote. For the chassis and some smaller areas on the body, I used Vallejo's Rust, Stain, and Streaking set and I did a few more washes with Tamiya Panel Line Wash.
For a final touch, I dotted various oil paints over the body and pulled this off via a brush loaded with mineral spirits to create some subtle rain streaks.
Lastly, I flattened one tire, and created a whitewall by using Tamiya Flat White (tinted with tan) shot through a circle template.
Of note, the "glass" is far too clean for a trusty rusty bug. Oops.
- 1:24 Revell '68 Volkswagen Beetle (California Wheels Release) 85-4192
- Tamiya lacquer primer
- Tamiya Acrylics interior / exterior
- Testors Dull Coat final finish
Monogram 1/24 Wally Dallenbach, Jr. Monte Carlo
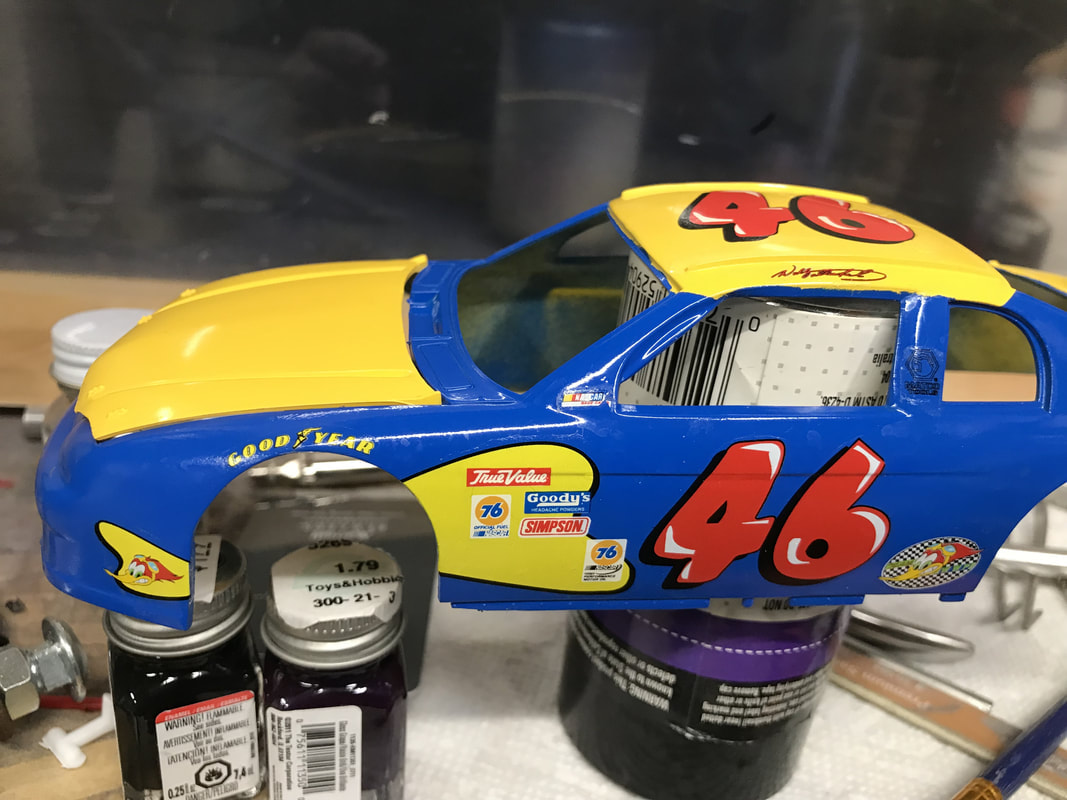
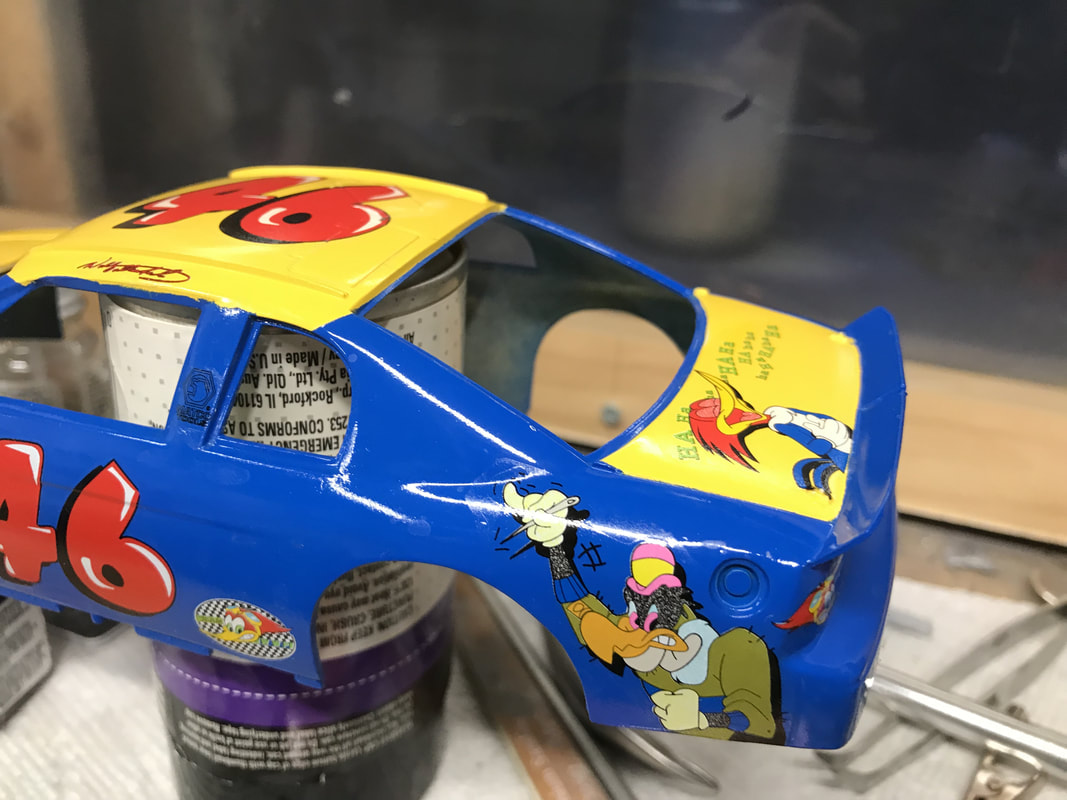
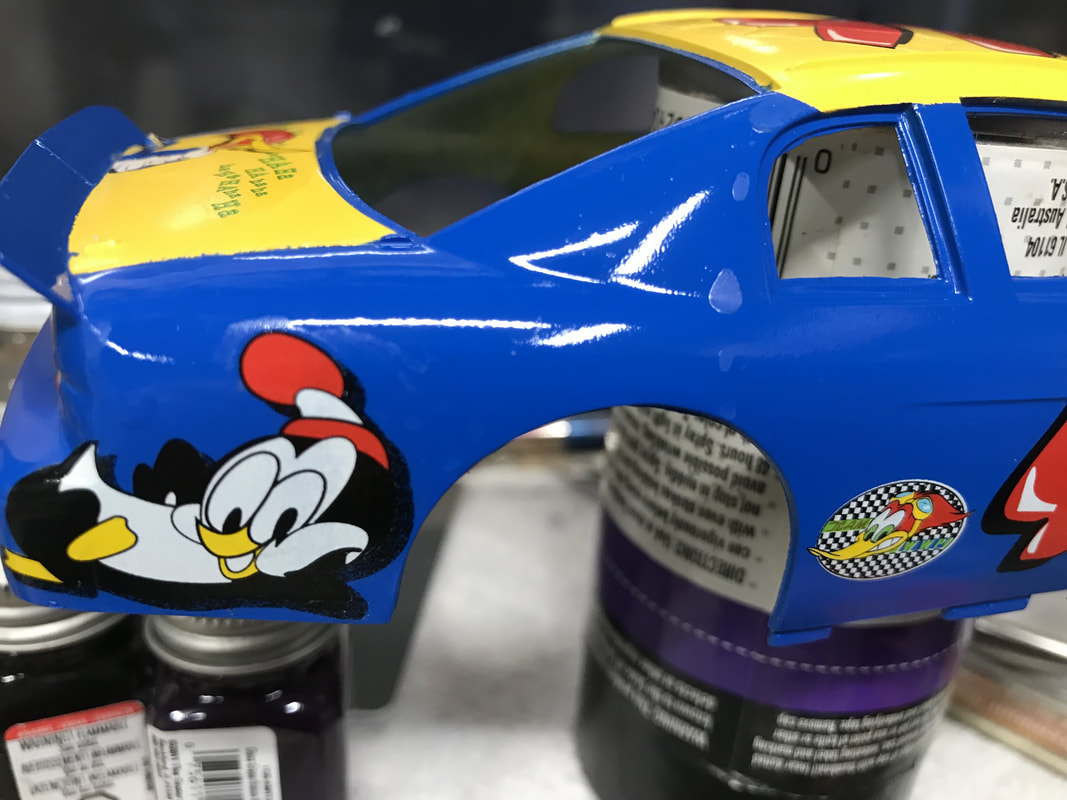
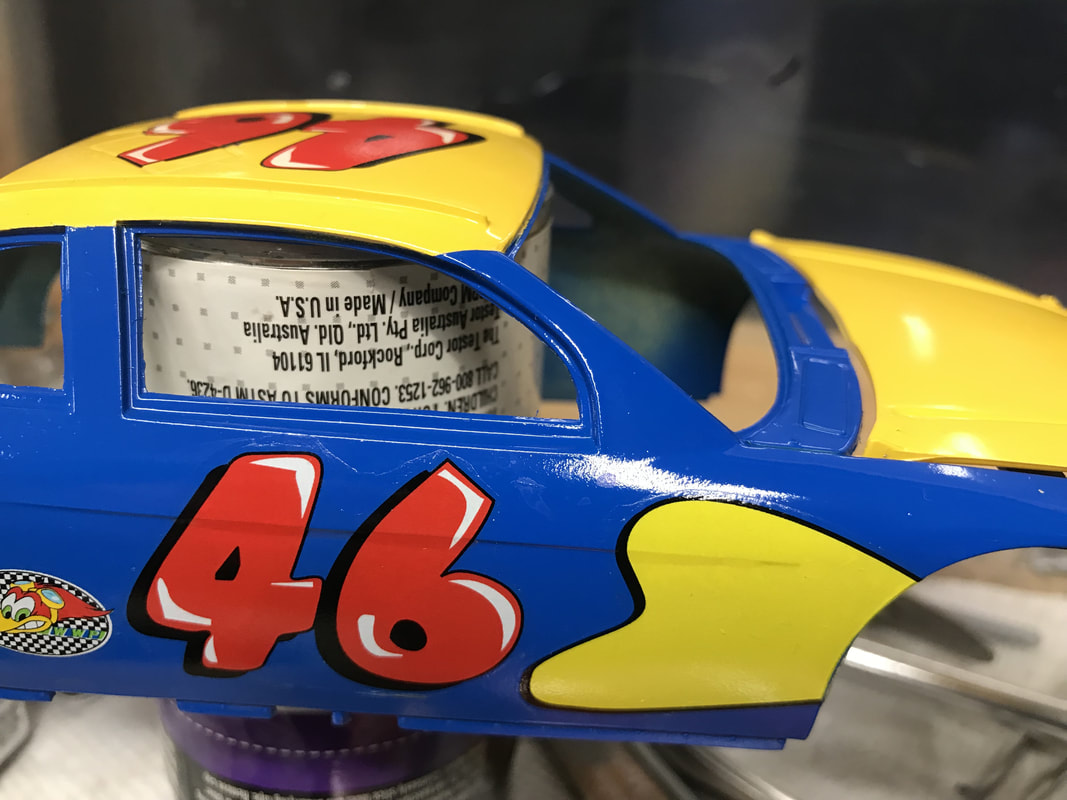
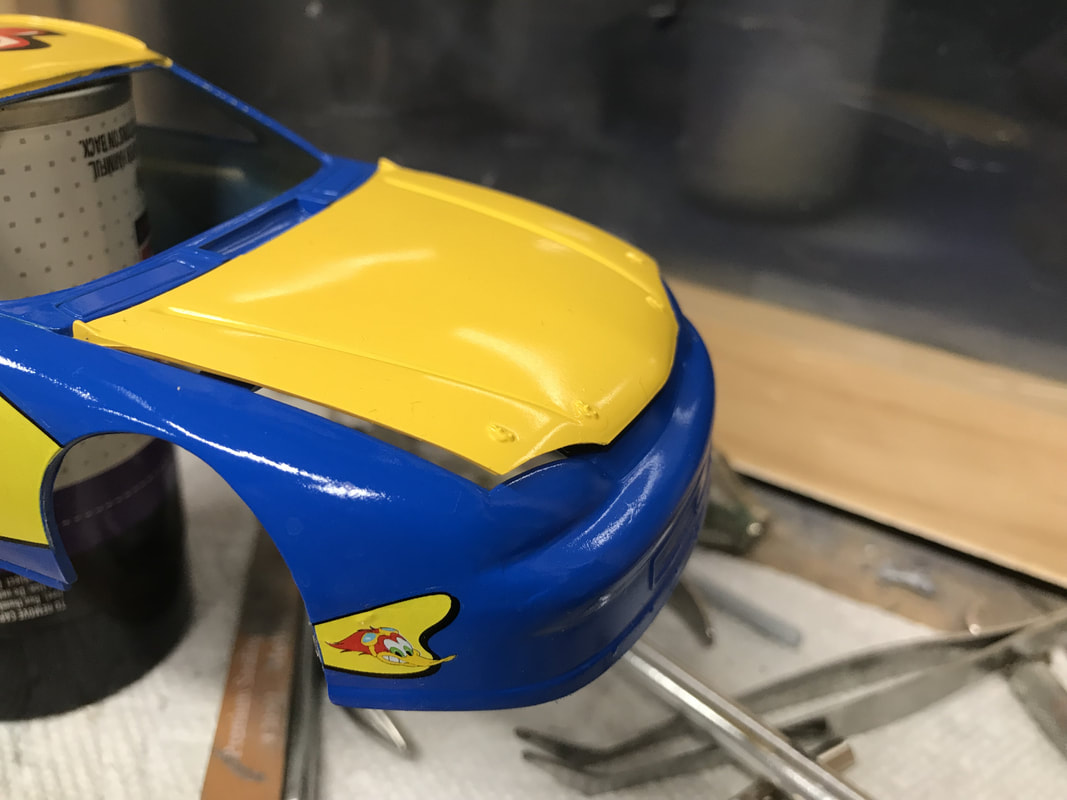
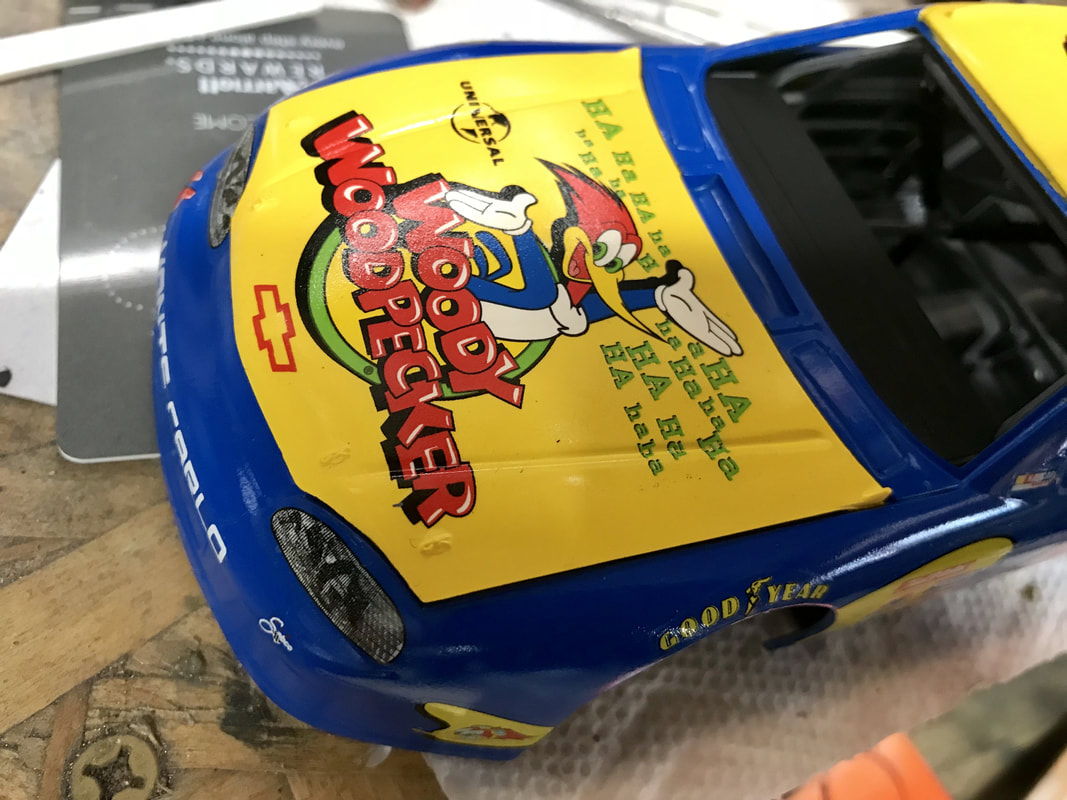
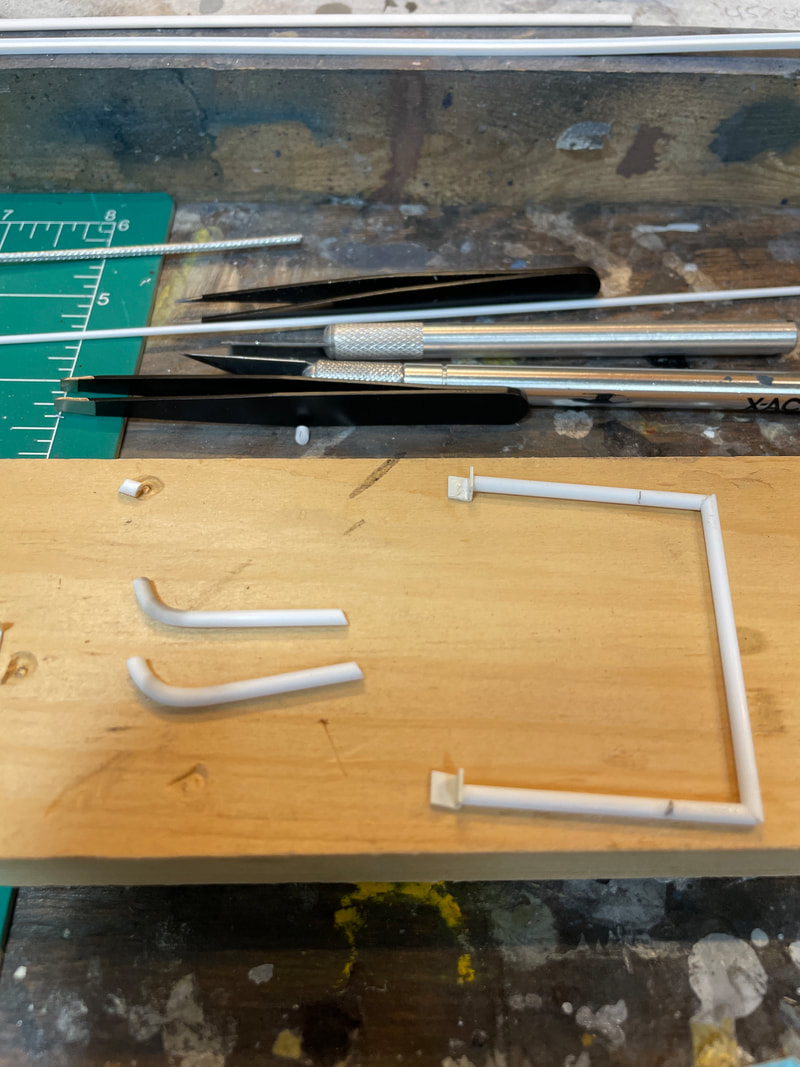
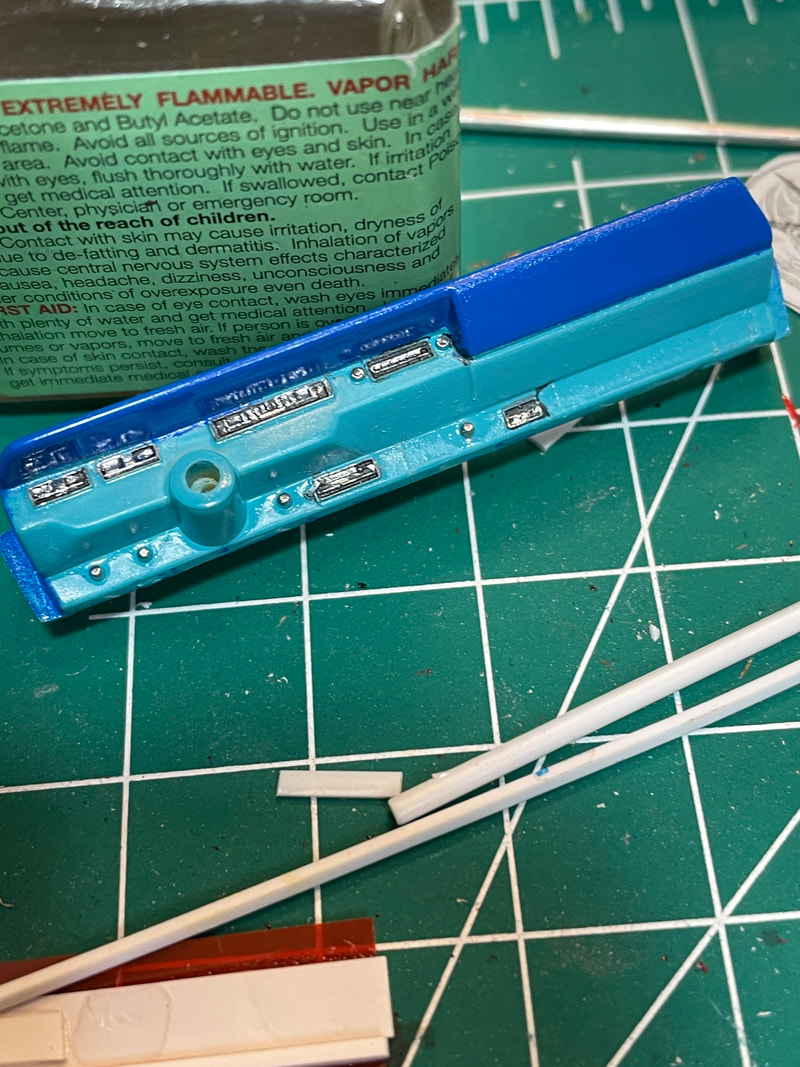
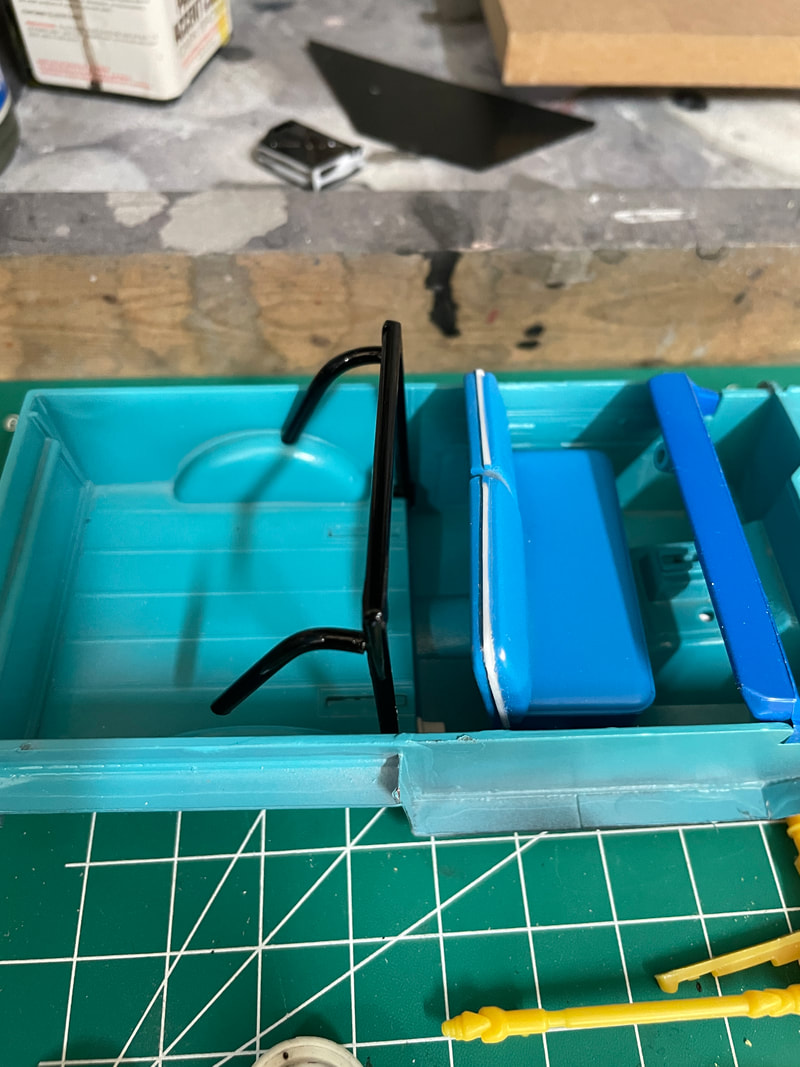
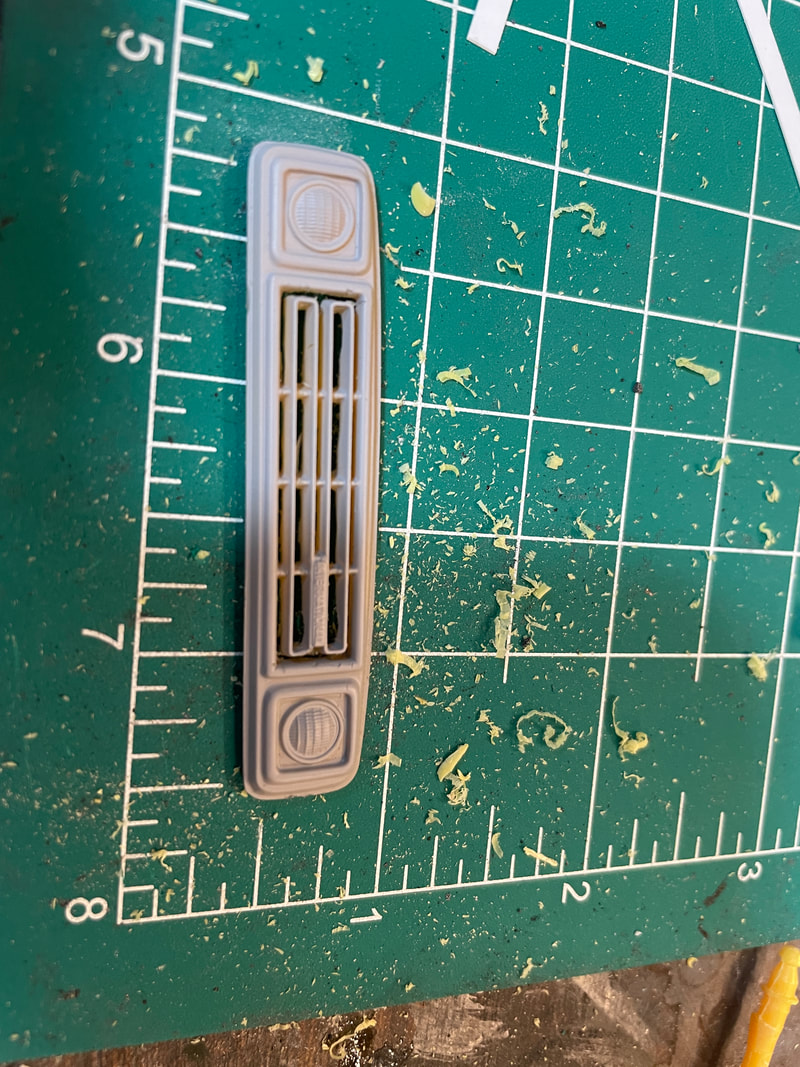
Here's one that has languished on, or near, my workbench for a long time. I did purchase multiple sets of decals just because I was worried about yellowing. Turns out, that has not been an issue. However, with the age of the kit, the decals have been difficult to work with - breaking easily, etc. (As a footnote, I keep my decals in a closet in the guest room, sealed in a storage container. I've rarely had issues; but at 20 years old....) I used Tamiya spray lacquers for the blue and yellow; topped with Testors Wet Look Clear Extreme Lacquer. Here are some in progress shots; pardon the incredible mess that is my workbench.
- 1:24 Monogram Wally Dallenbach Jr.'s #46 Woody Woodpecker Universal Studios Monte Carlo 85-4132
- Tamiya lacquers
- Testors Wet Look Clear Lacquer
Revell / Monogram 1/24 "Ferrari Daytona" (Corvette)
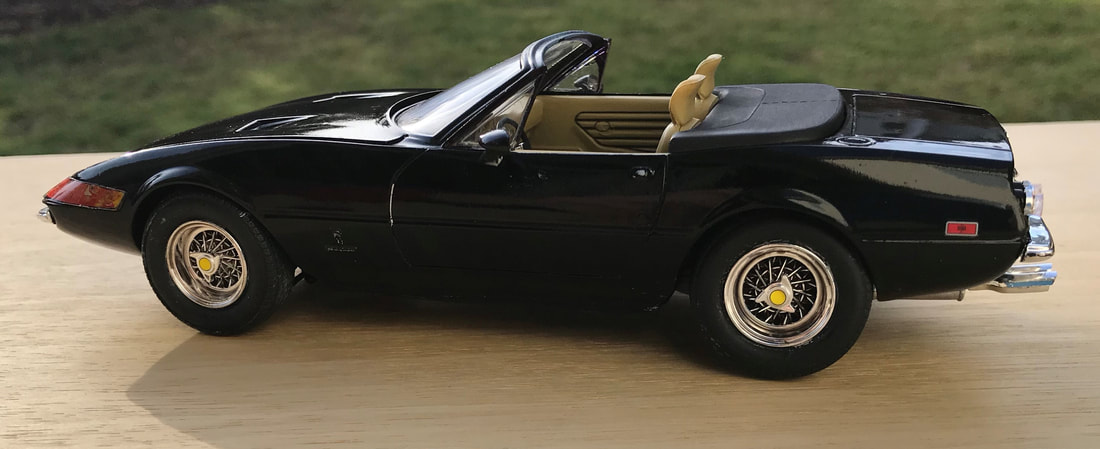
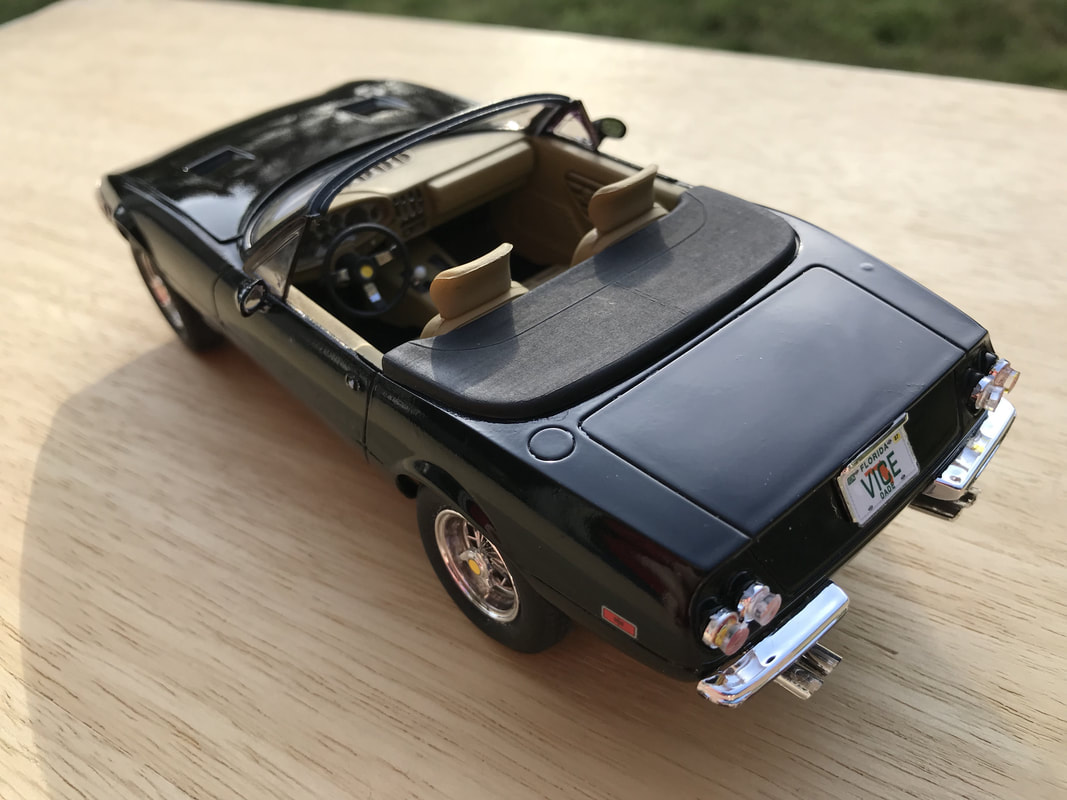

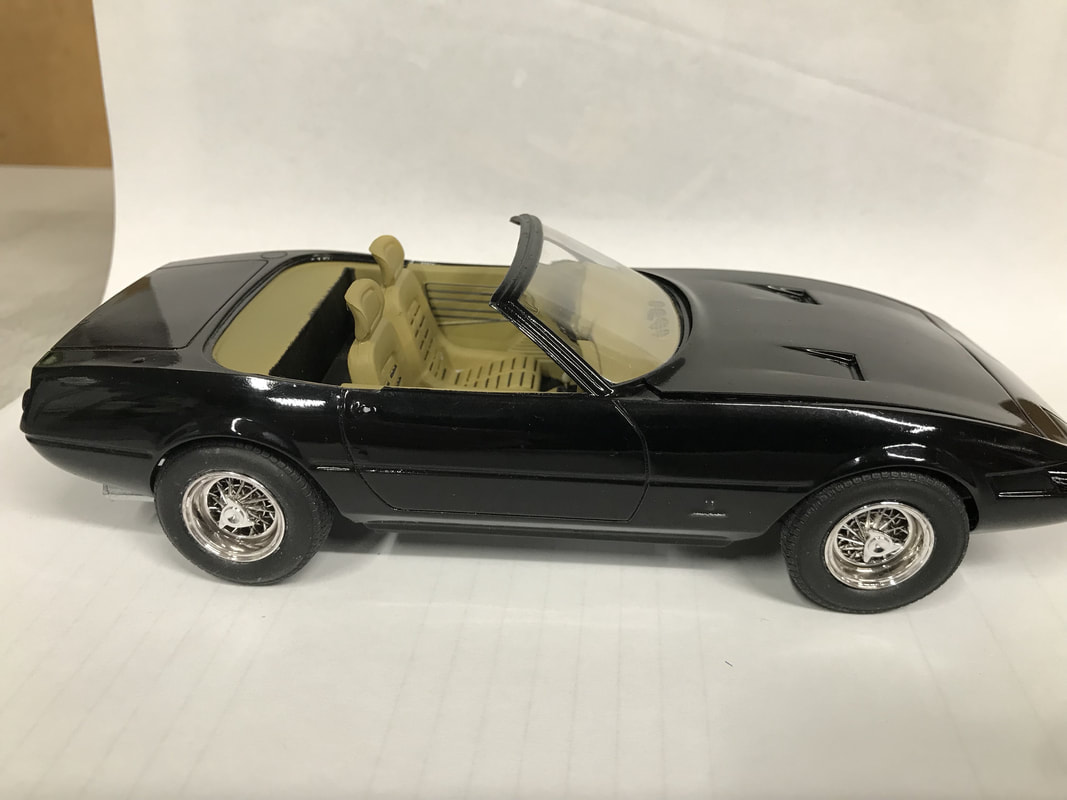
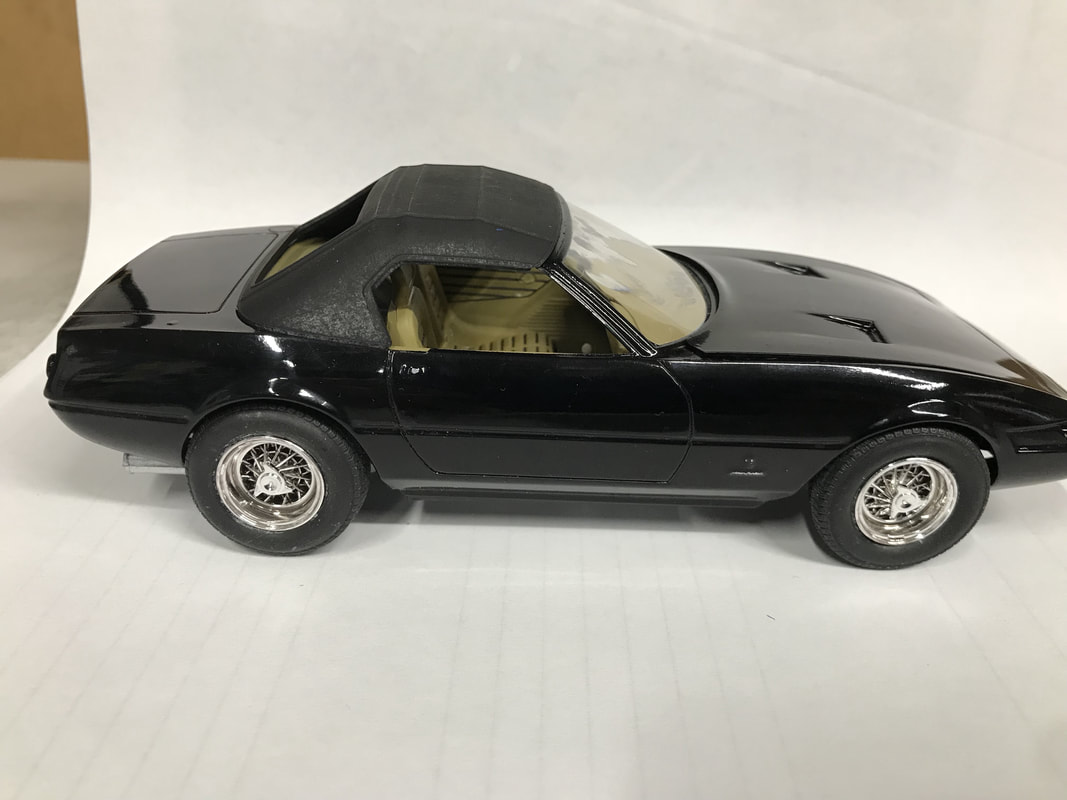
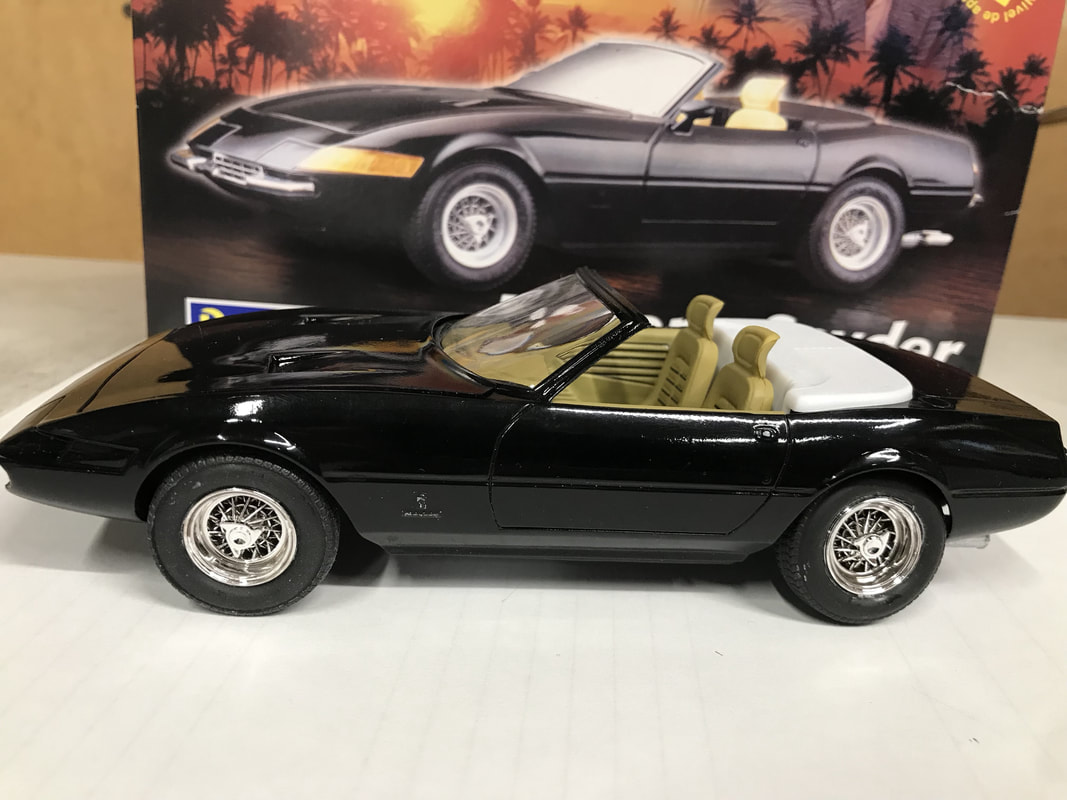
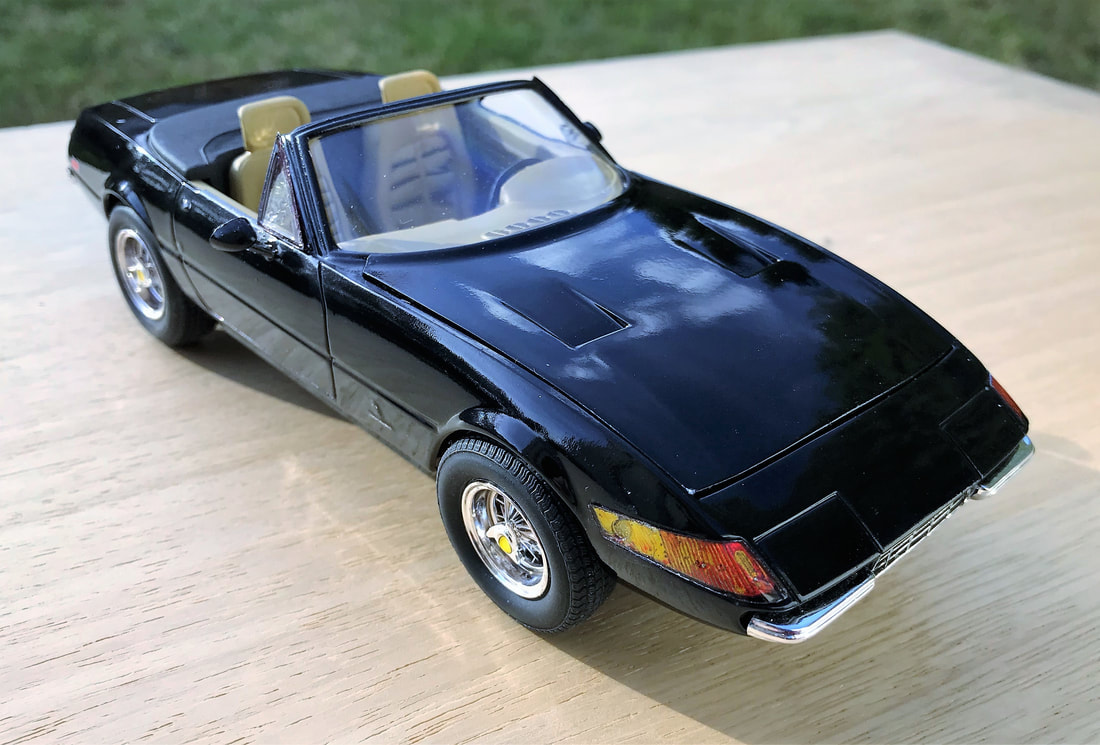
This is the 1/24 Revell/Monogram "Ferrari Daytona" from the Miami Vice show (waaay back in the 80's!). Just like the 1:1 car, this is really a clone - a Ferrariish body on a C3 Corvette chassis. If you've ever built any of the Monogram 1/24 C3 Corvettes, the Corvette America, etc., you'll know what to expect. This kit was given to me by my Brother-in-Law for Christmas (2017). The wire wheels are quite nice and have potential with other products. As of early March, 2018, here is where I stand.
I still need to polish and add the chrome/clear details. I'm leaning with displaying the car with the top down; although I'll probably paint it to match the interior.
Paint is Tamiya Spray Lacquer, with Testor's Clear. Interior is a mix of Testor's tan enamels, and the dark details are actually decals from the most recent issue of the kit. I tweaked the stance very slightly, and shaved down the pegs that hold the mufflers in an attempt to bring the assembly closer to the chassis.
I love these older Monogram kits (and AMT, etc.) as they are quick to build, detail is nice and captured with fewer parts, and they are generally accurate in shape.
Update - I completed the model in late March, 2018. After taking a few quick pictures outside, I realized I needed to clean some polish from the panel lines and something really funky happened with the taillights. I may need to fix that. Unfortunately, I botched the "correct" license decal. But overall, I'm really happy with the results. :)
- 1:24 Monogram Miami Vice Daytona Spyder 2737
- Tamiya lacquer (exterior)
- Testors enamels (interior)
- Testors Wet Look Clear Lacquer
Revell 1/24 Shelby Cobra 427
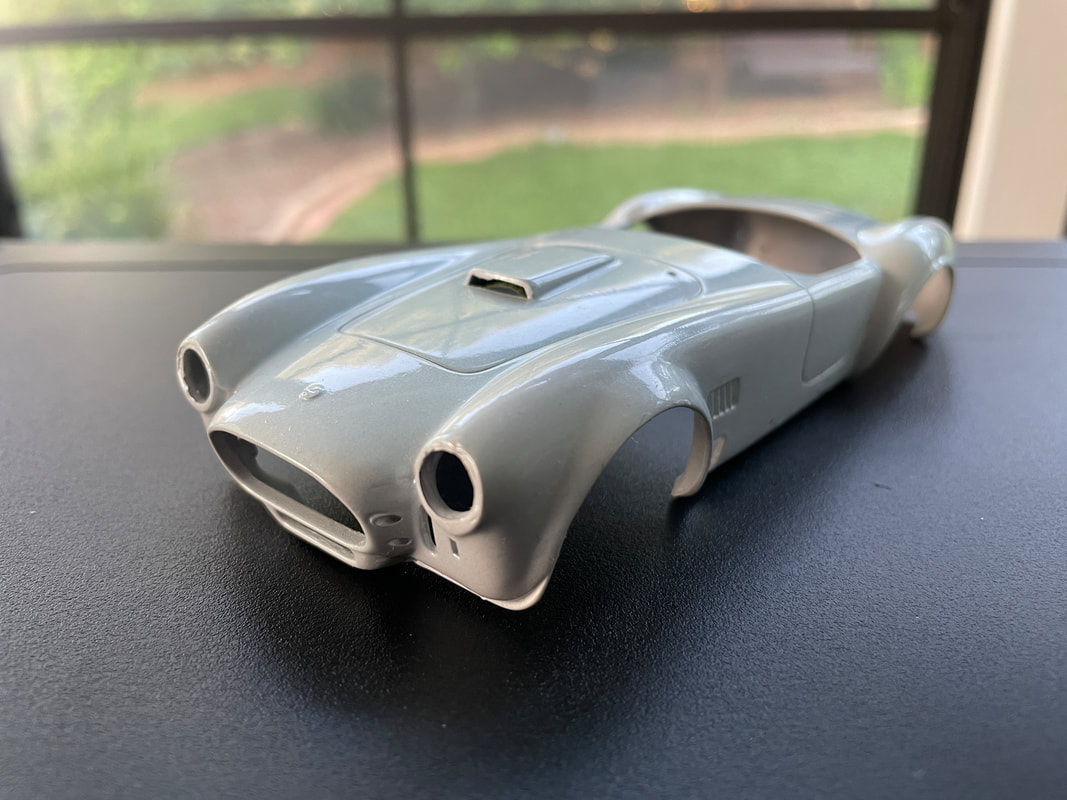
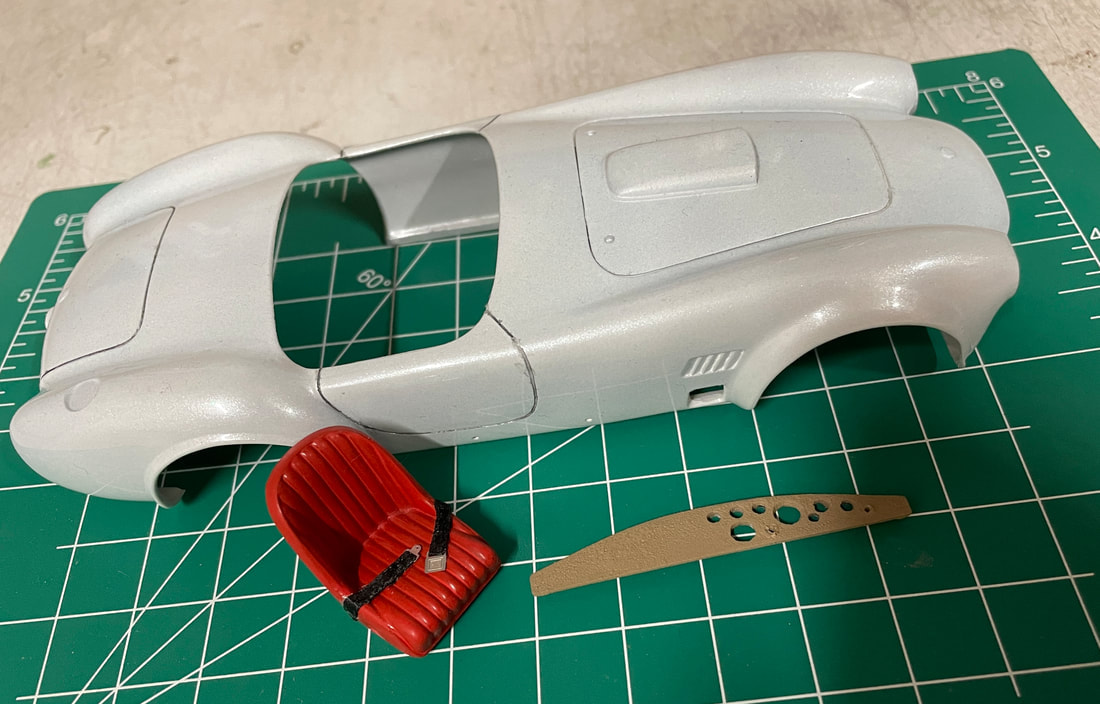
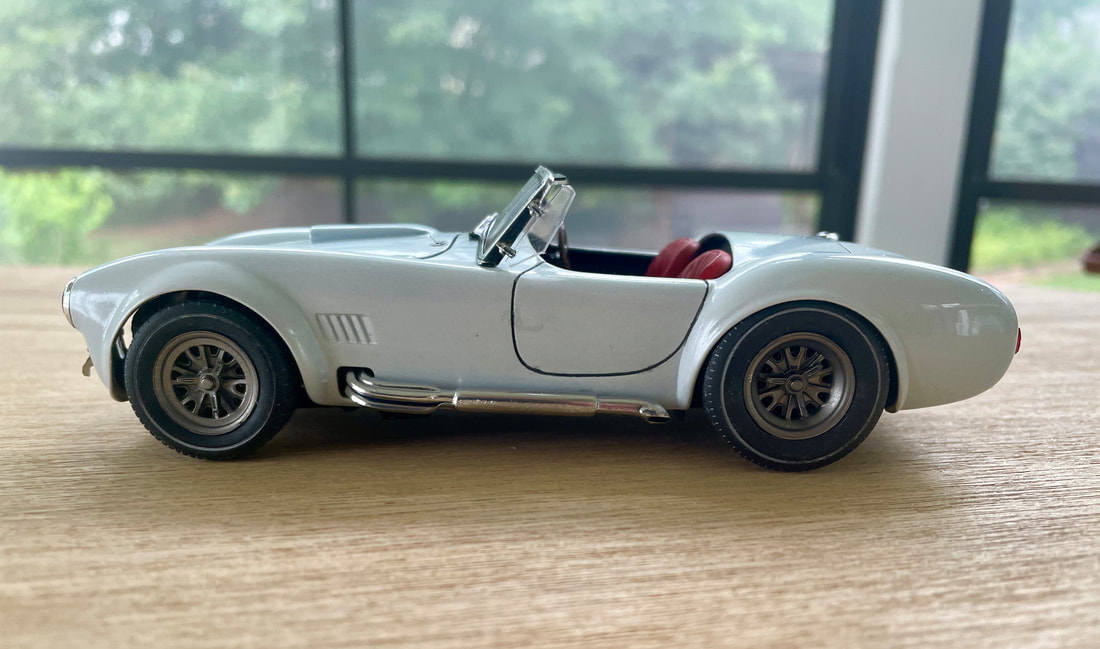
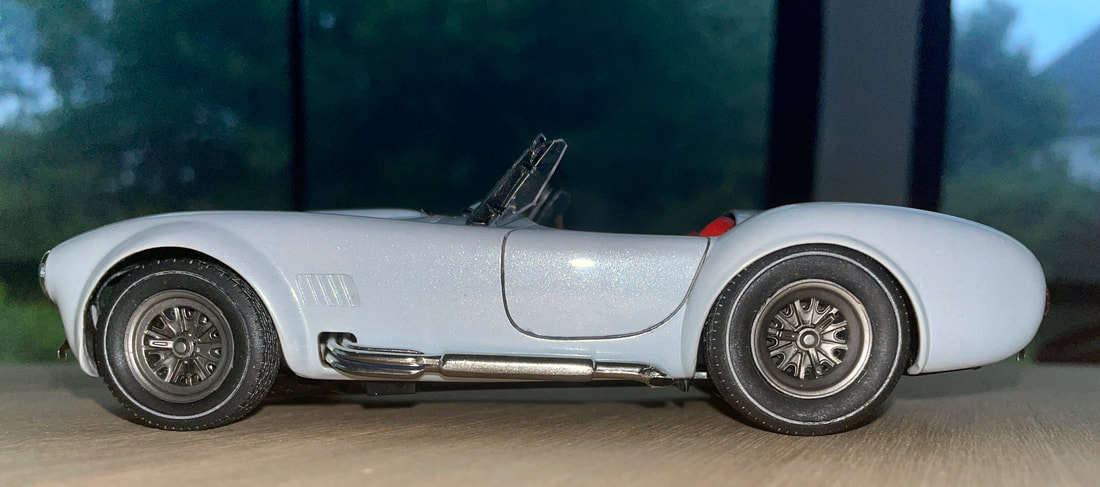
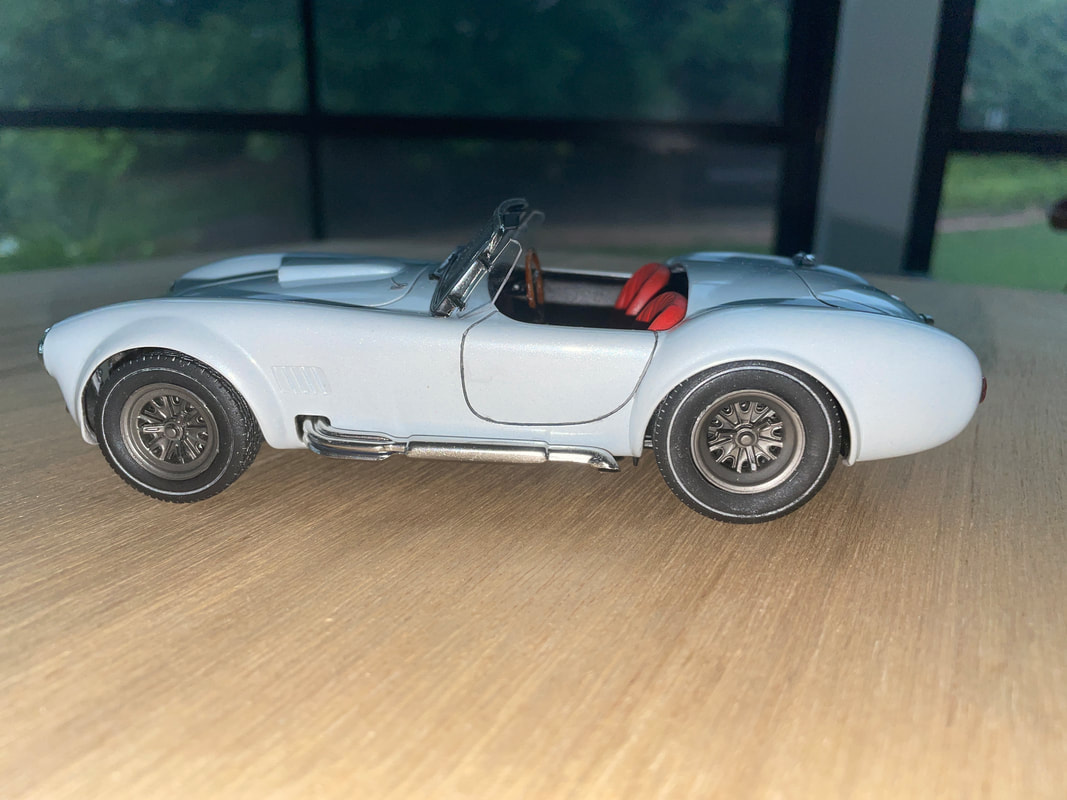
The kit is Revell's 2004 boxing (kit 85-2828), "Shelby Cobra 427 S/C "A" Production Champions"; however the kit was originally tooled in 1998 (Monogram kit 2764), and it is starting to show it's age. There was a fair about of flash (some of which I realized later I did not properly address). But, it's a fun kit, and it displays nicely.
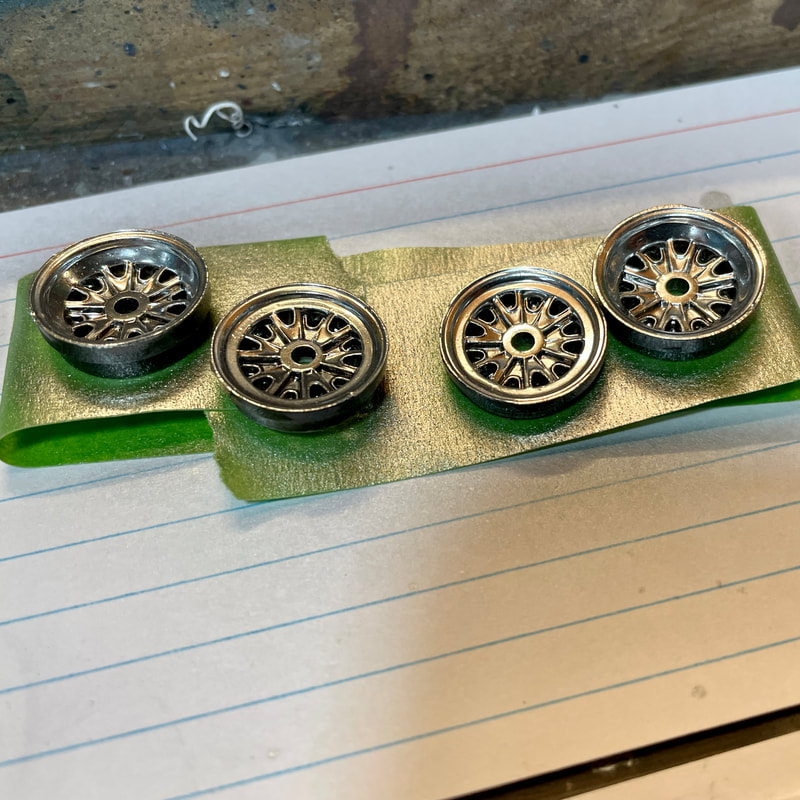
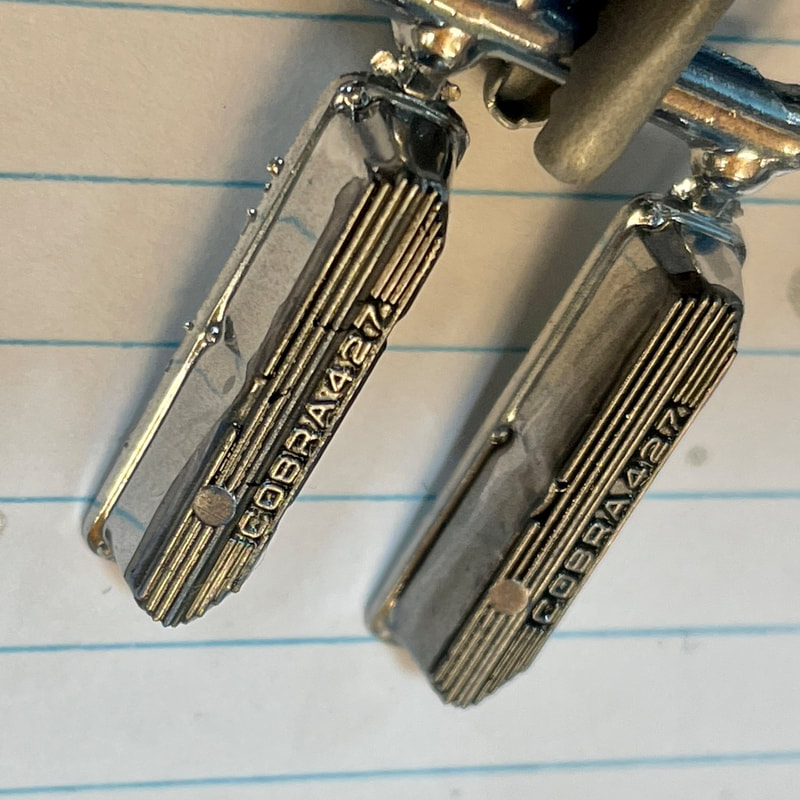
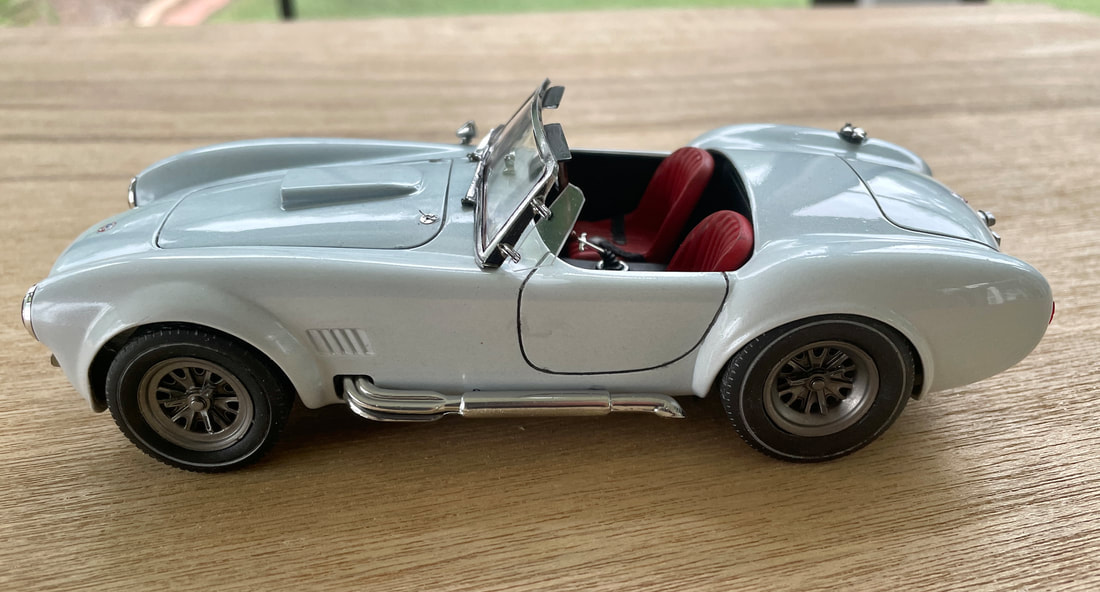
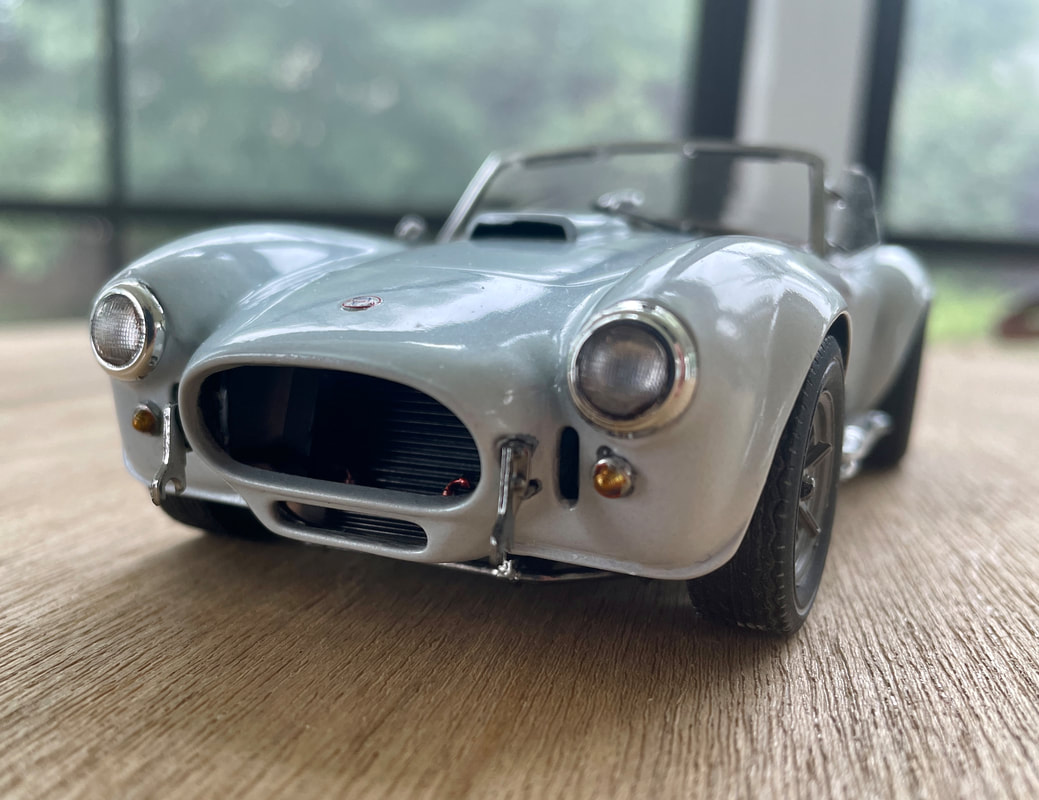
I added a small piece of trim to the lower front of the car using strip styrene. Most "chrome" was removed and I used Alclad II of various shades to recreate the chrome bits. I totally buggered up the hood hold-downs, so I used some aftermarket photoetch that I picked up on clearance probably 20 years ago to simulate (improper) hood pins. The windshield frame on this kit is a pain to install as there is very little contact area and the locating pins are poor at best. I removed the locating pins, striped the "chrome", and after shooting the frame with Tamiya Gloss Black followed by Alclad II chrome, I used canopy glue to attach the frame. I promptly ruined both "wing" windows, so I had to fashion new ones from clear plastic.
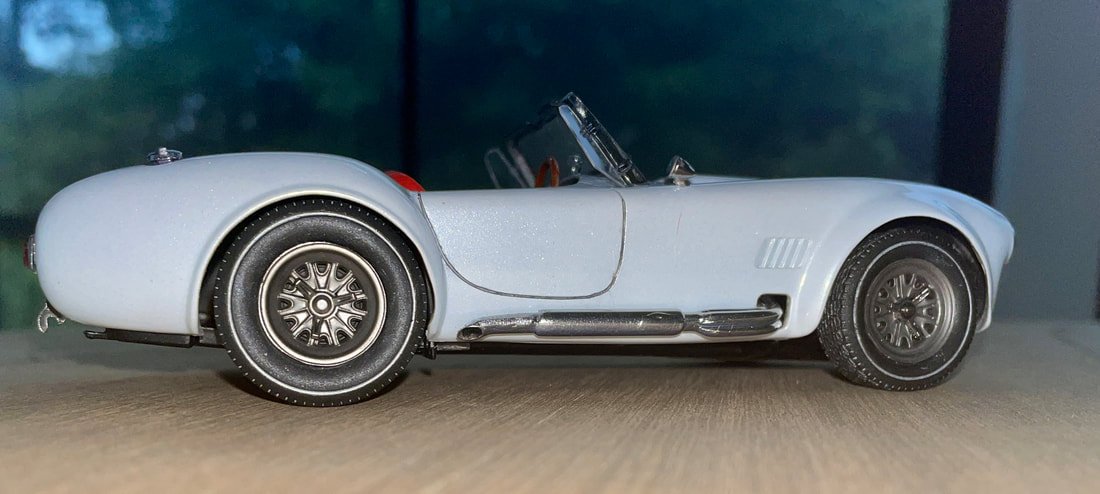
The tires were a happy accident and look similar to old Goodyear Bluestreaks. I normally shoot Testors Dullcote over tires to flatten the sheen and I accidently picked up Testors White Lightning - I removed the paint with an alcohol soaked q-tip and what do you know -- almost Bluestreaks. Well, very faint Bluestreaks.
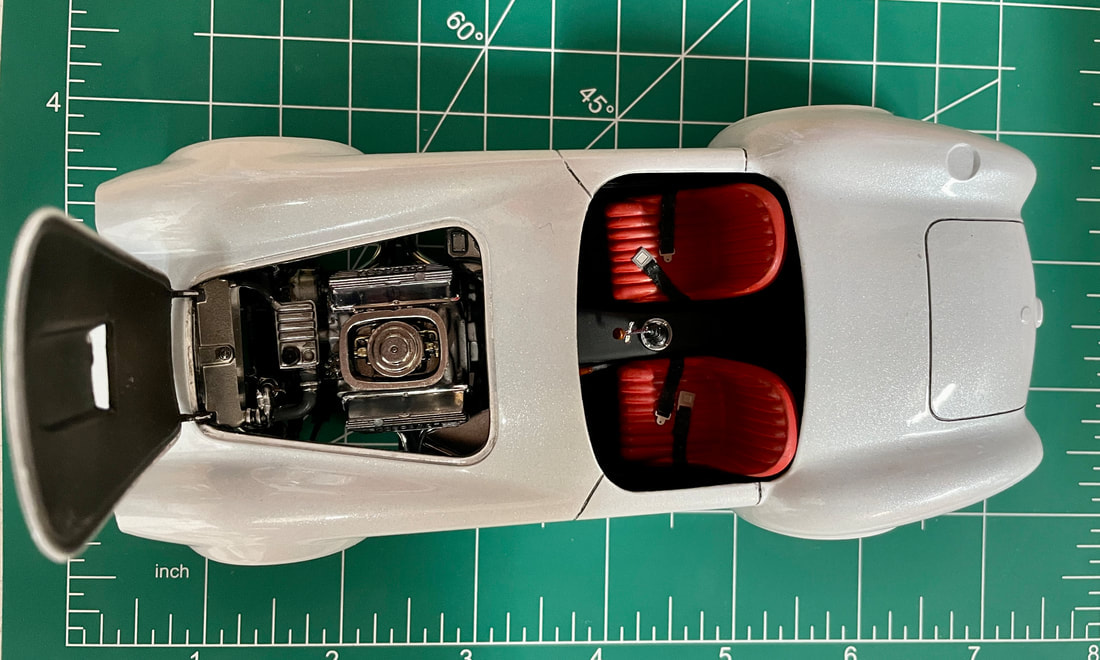
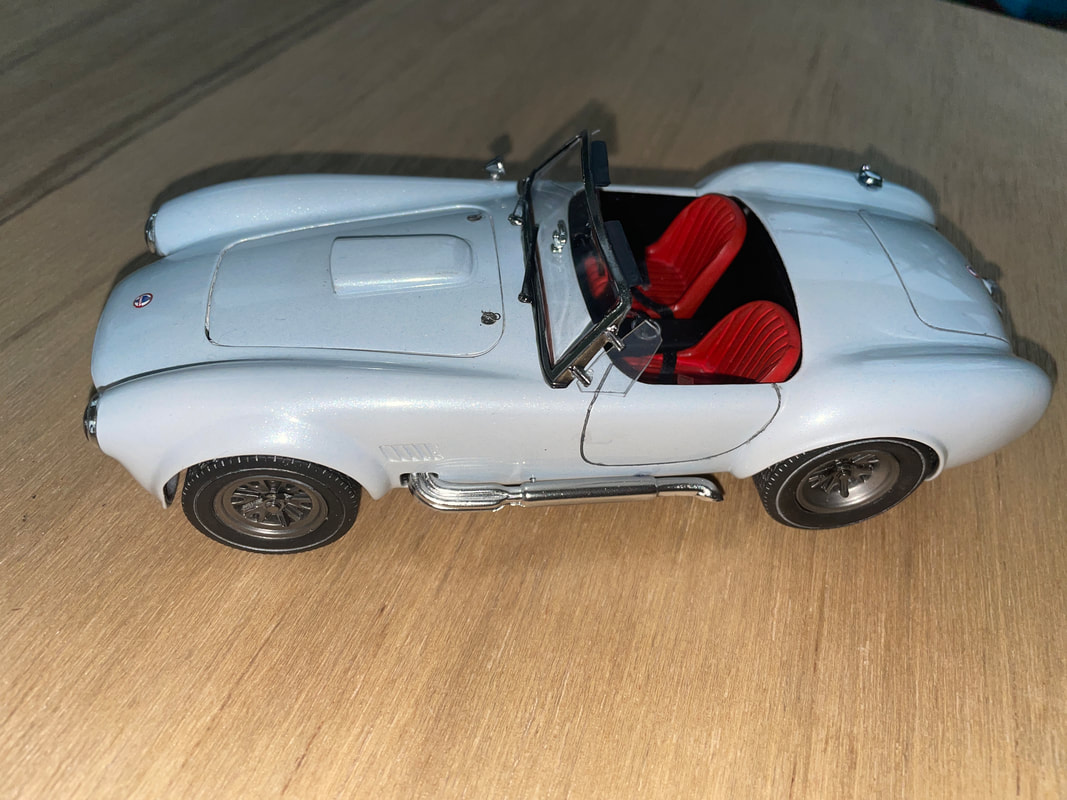
For grins, I (mostly) converted the car to right hand drive (RHD). Given that the Cobra's body and frame originated with the British AC Ace, RHD seemed reasonable. (In true short-cut fashion, I did not make necessary adjustments under the hood to account for the RHD parts). I flipped the dashboard over, drilled through the instruments, sandwiched instrument decals between a piece of sheet styrene and the now flipped dash and - voila! - RHD.
Paint is Tamiya Metallic White, followed by Tamiya Pearl decanted and mixed with a TINY bit of blue/green mica. I think I should have used just a tad more mica. It's subtle, but in the right light, there is a "not-quite-white-what-color-is-that?" hint to the paint. Who knows, maybe one day I'll master painting.
Yeah, I know, the seatbelts aren't exactly correct, but they'll do in this case.
I added a small piece of trim to the lower front of the car using strip styrene. Most "chrome" was removed and I used Alclad II of various shades to recreate the chrome bits. I totally buggered up the hood hold-downs, so I used some aftermarket photoetch that I picked up on clearance probably 20 years ago to simulate (improper) hood pins. The windshield frame on this kit is a pain to install as there is very little contact area and the locating pins are poor at best. I removed the locating pins, striped the "chrome", and after shooting the frame with Tamiya Gloss Black followed by Alclad II chrome, I used canopy glue to attach the frame. I promptly ruined both "wing" windows, so I had to fashion new ones from clear plastic.
The tires were a happy accident and look similar to old Goodyear Bluestreaks. I normally shoot Testors Dullcote over tires to flatten the sheen and I accidently picked up Testors White Lightning - I removed the paint with an alcohol soaked q-tip and what do you know -- almost Bluestreaks. Well, very faint Bluestreaks.
For grins, I (mostly) converted the car to right hand drive (RHD). Given that the Cobra's body and frame originated with the British AC Ace, RHD seemed reasonable. (In true short-cut fashion, I did not make necessary adjustments under the hood to account for the RHD parts). I flipped the dashboard over, drilled through the instruments, sandwiched instrument decals between a piece of sheet styrene and the now flipped dash and - voila! - RHD.
Paint is Tamiya Metallic White, followed by Tamiya Pearl decanted and mixed with a TINY bit of blue/green mica. I think I should have used just a tad more mica. It's subtle, but in the right light, there is a "not-quite-white-what-color-is-that?" hint to the paint. Who knows, maybe one day I'll master painting.
Yeah, I know, the seatbelts aren't exactly correct, but they'll do in this case.
Revell 1/25 SnapTite Max '57 Chevy Bel Air
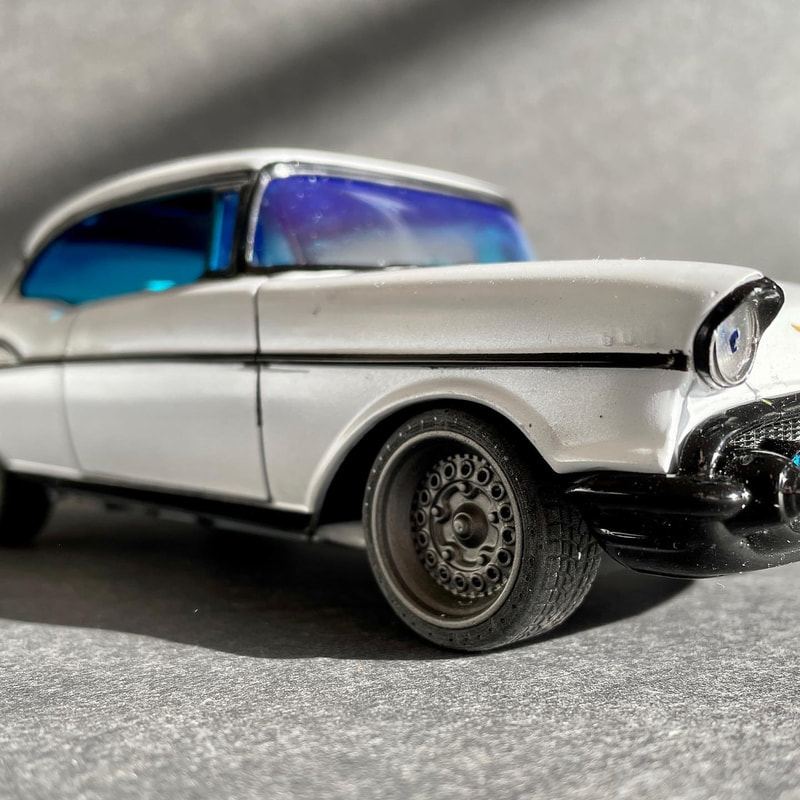
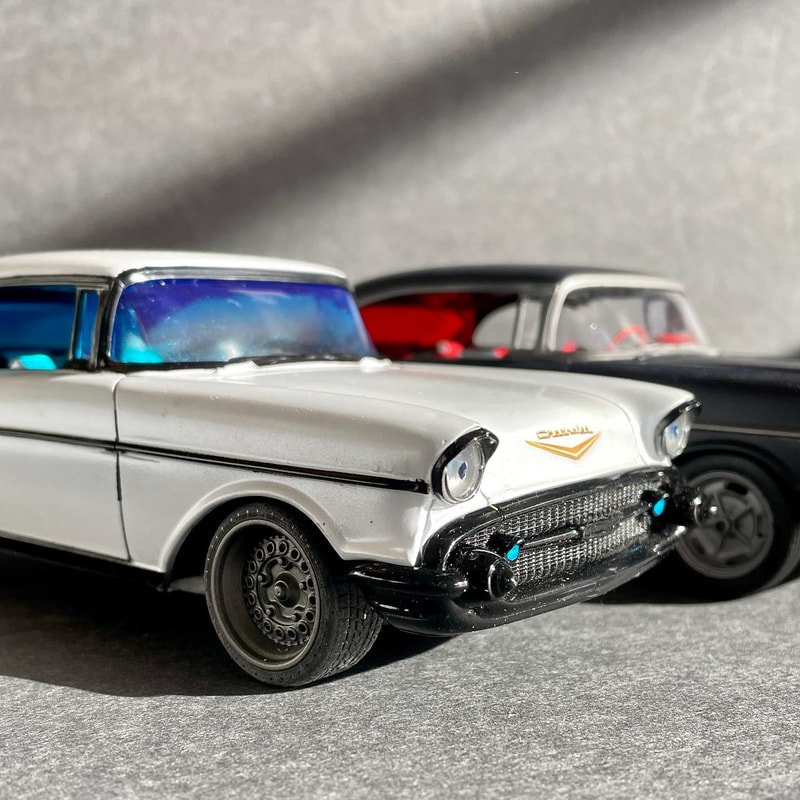
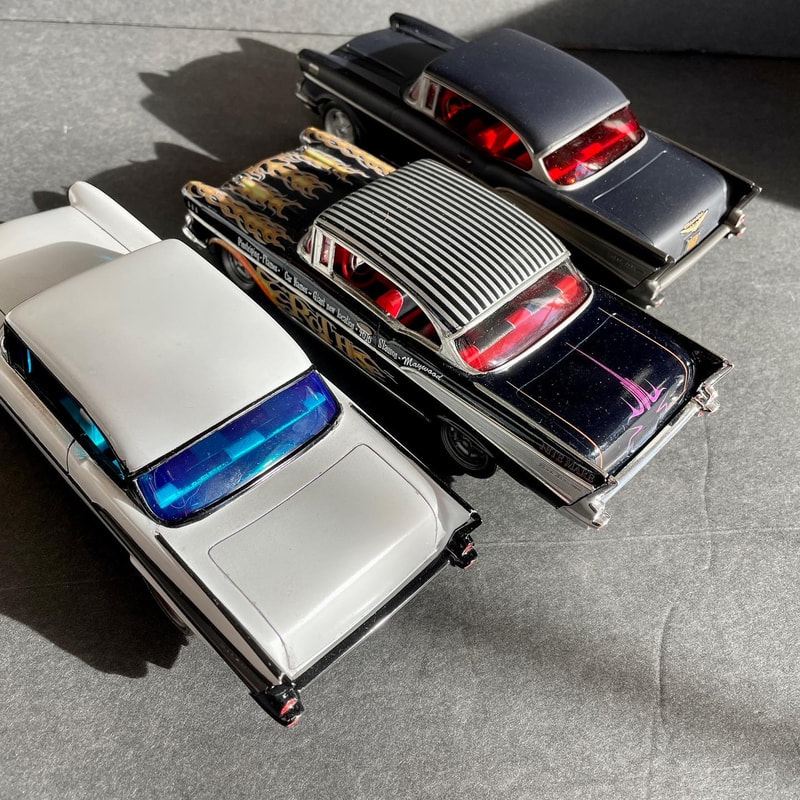
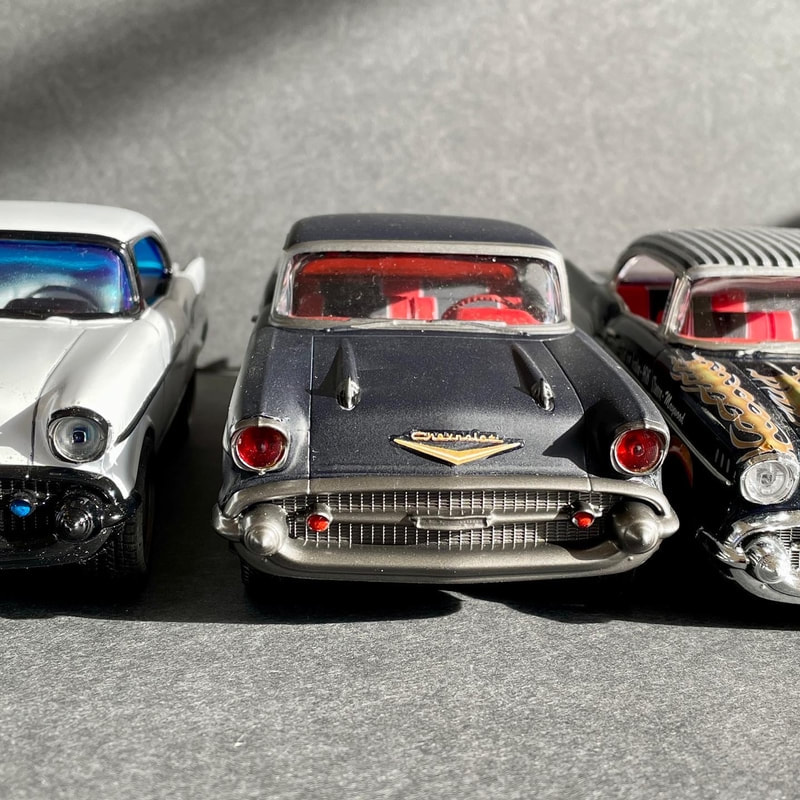
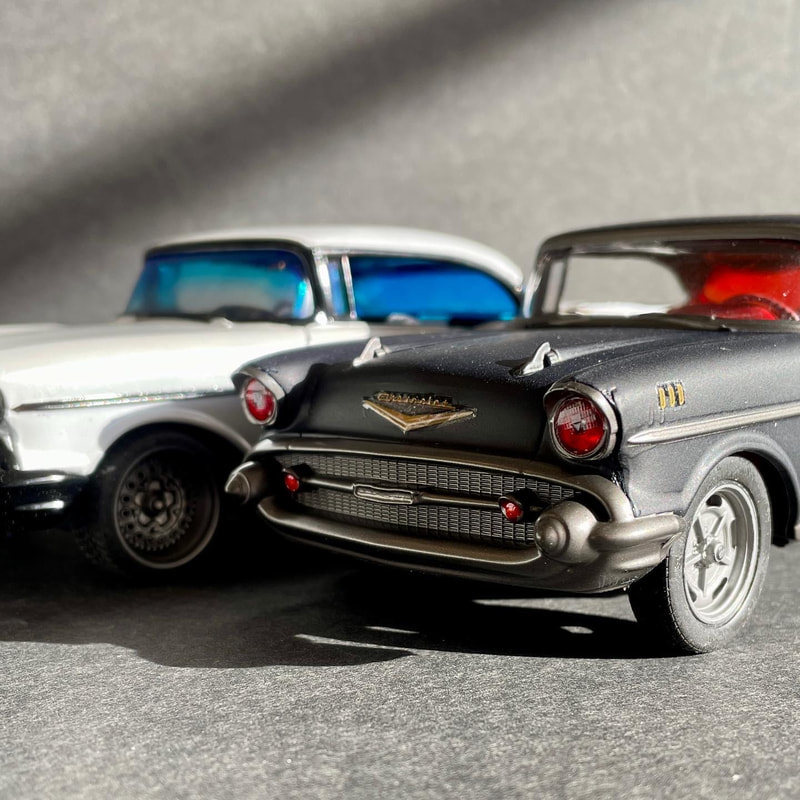
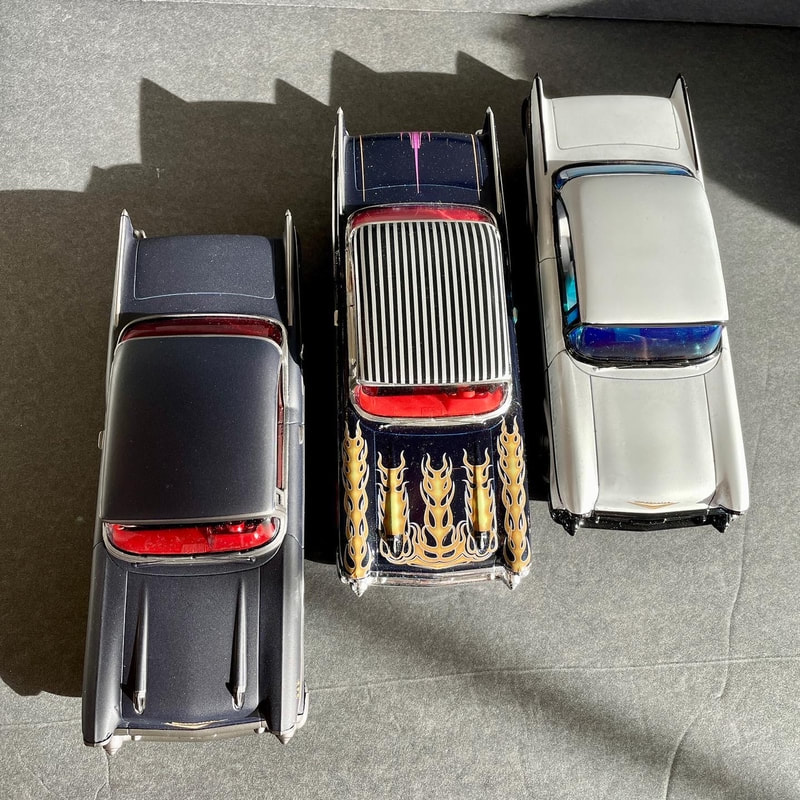
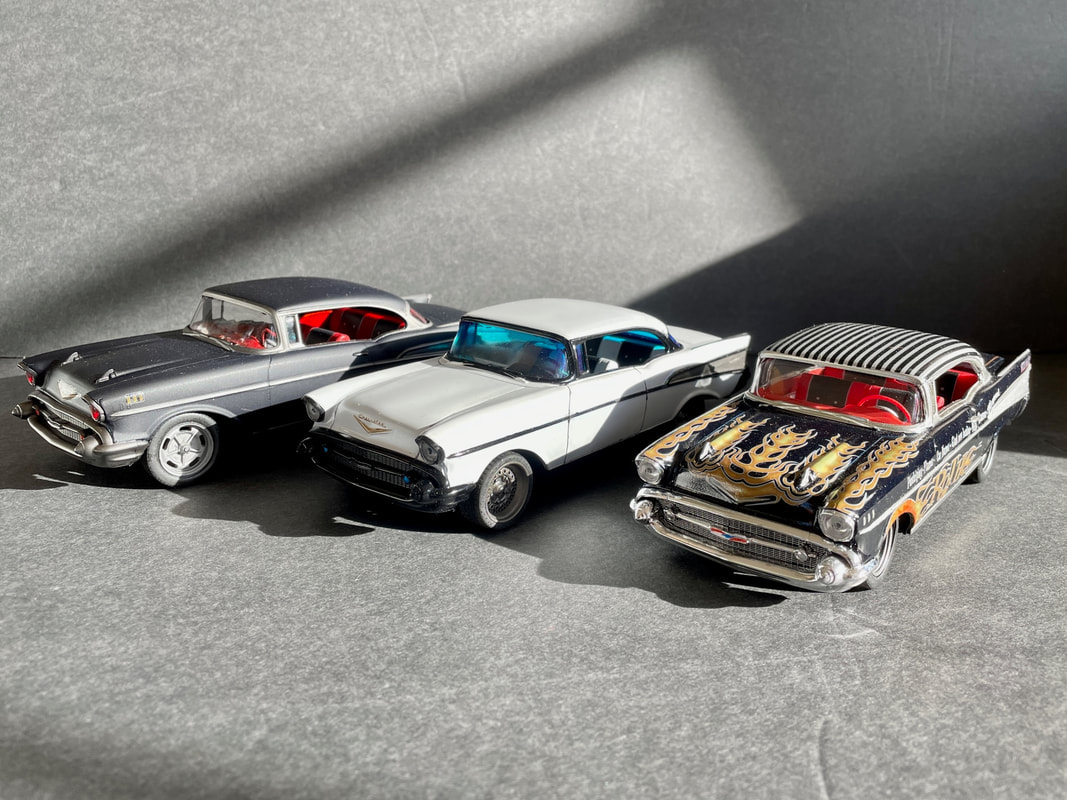
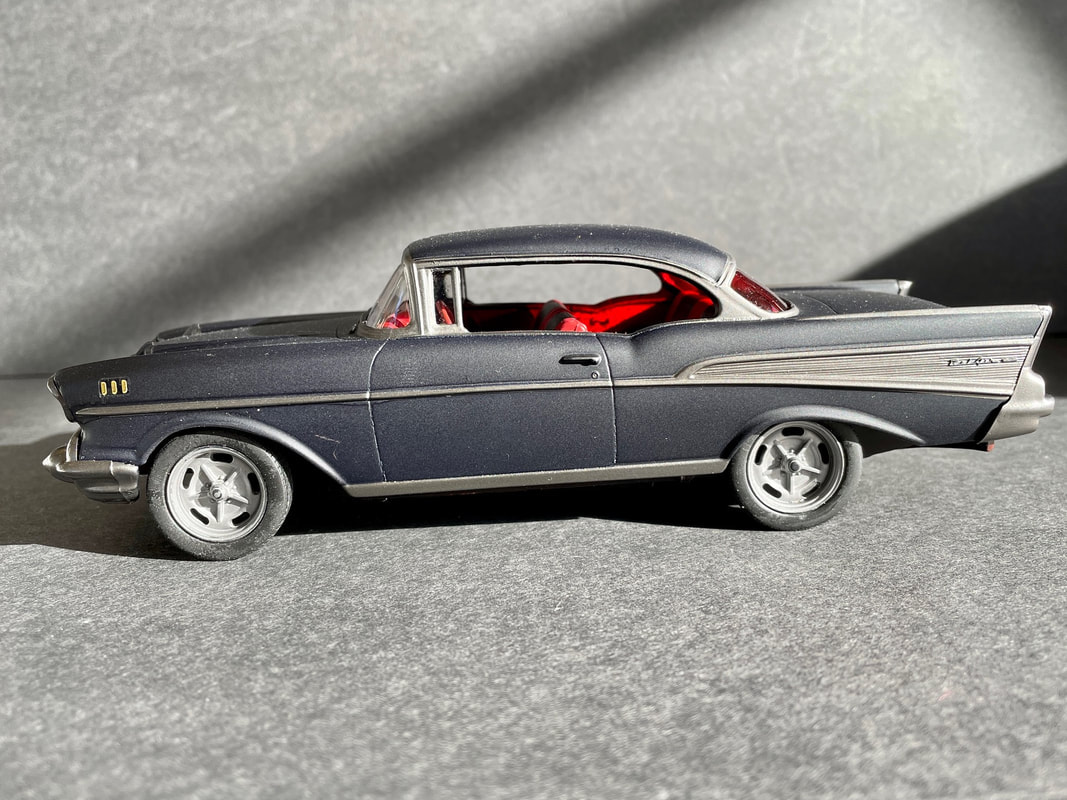
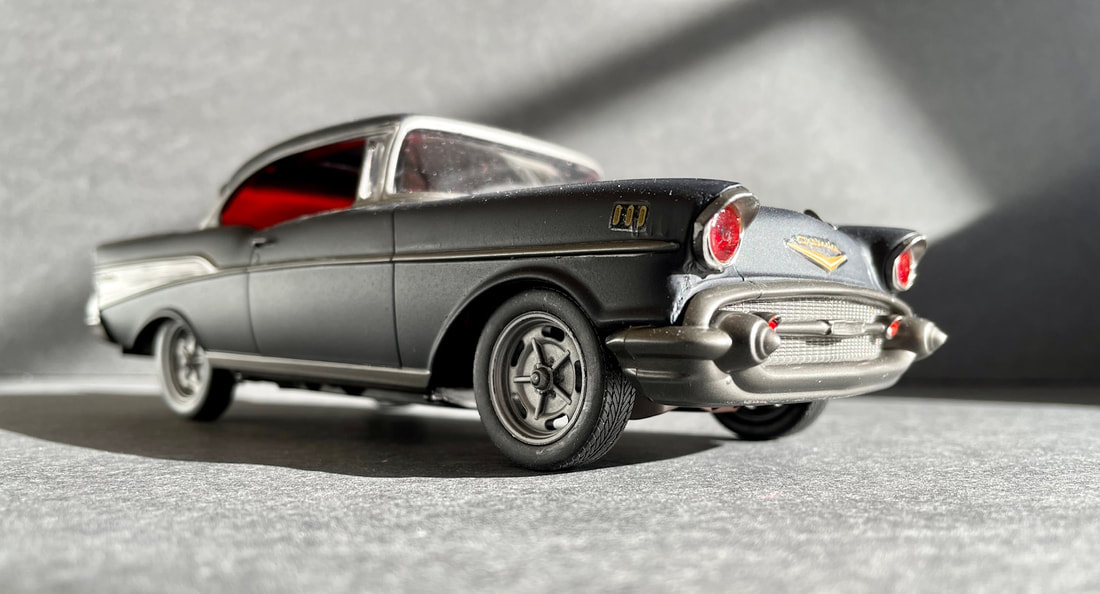
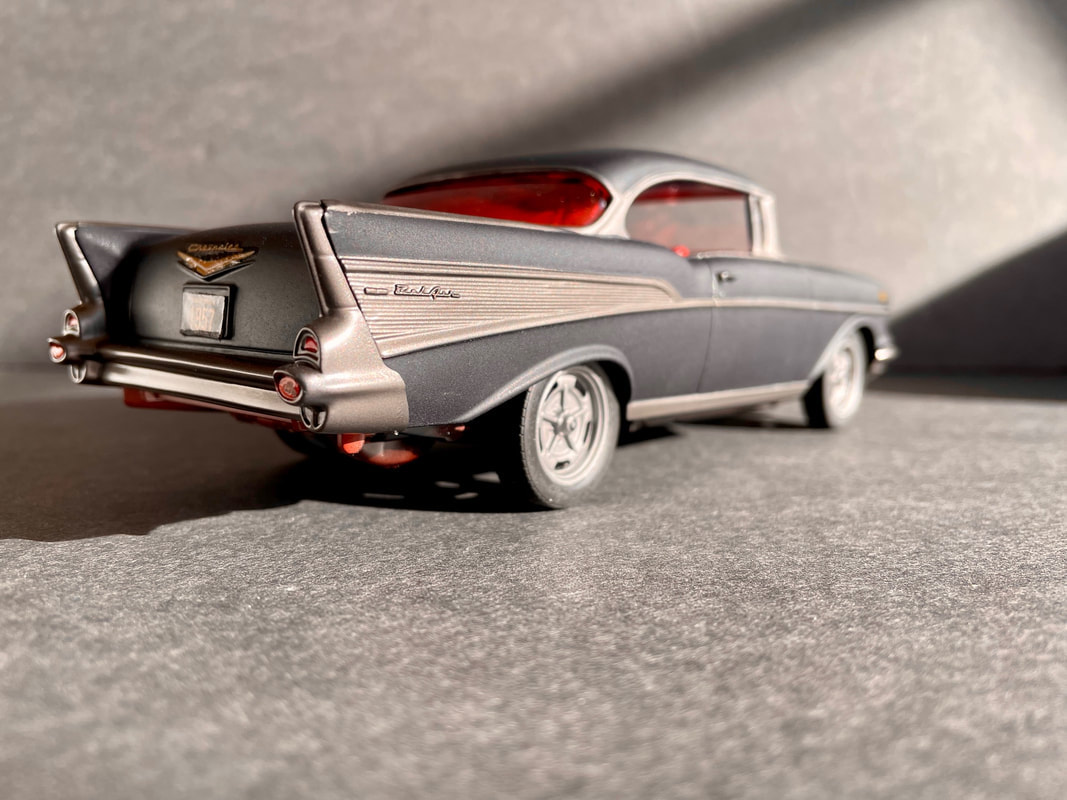
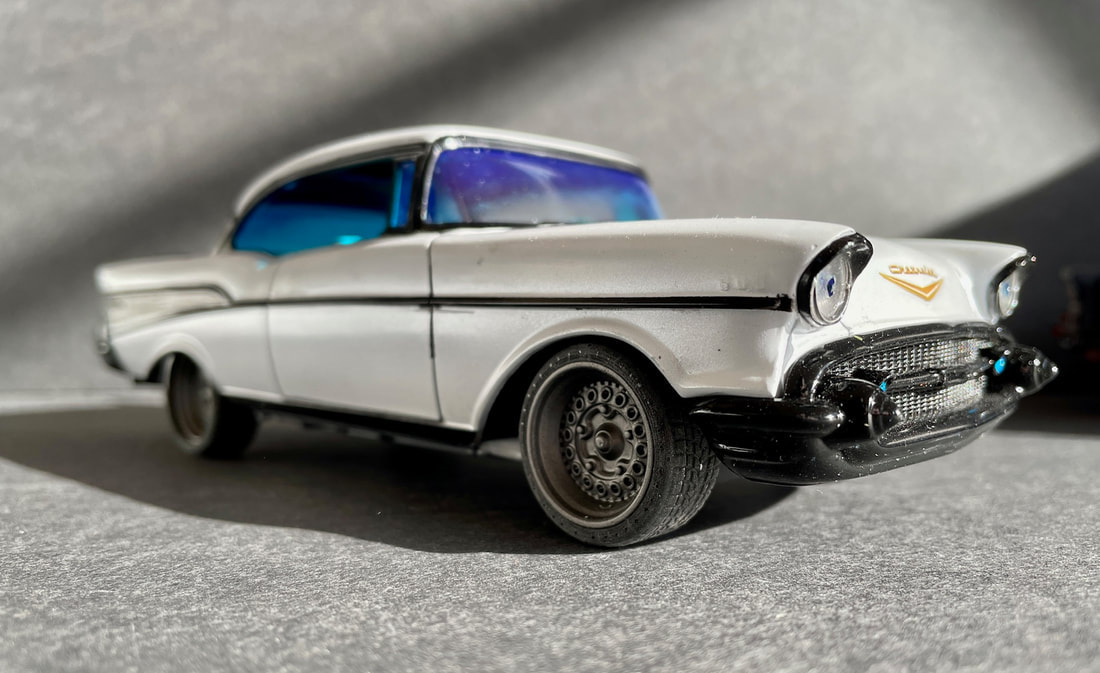
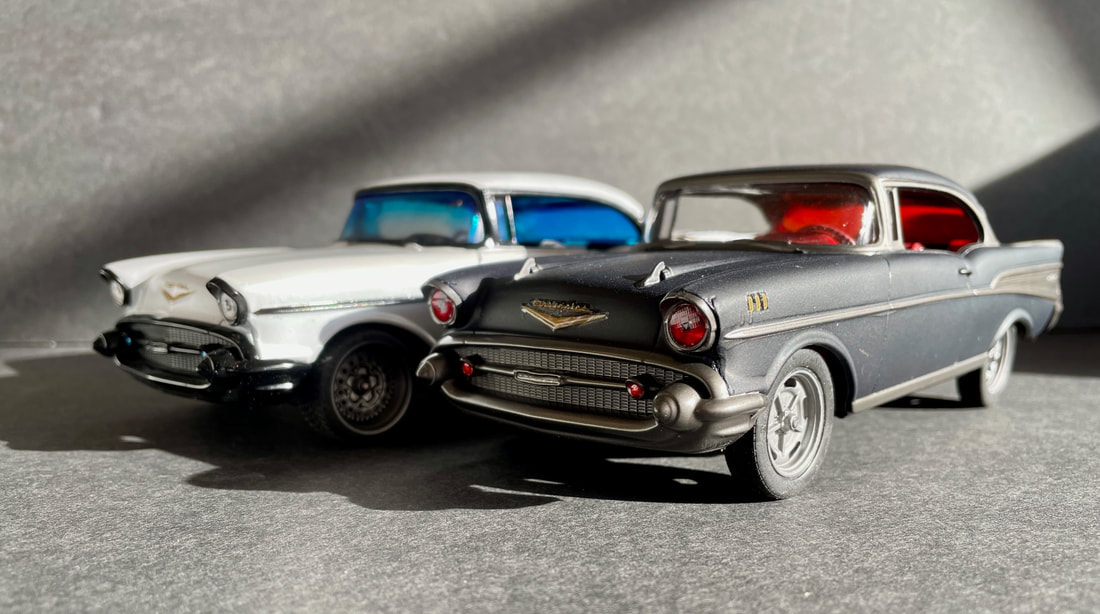
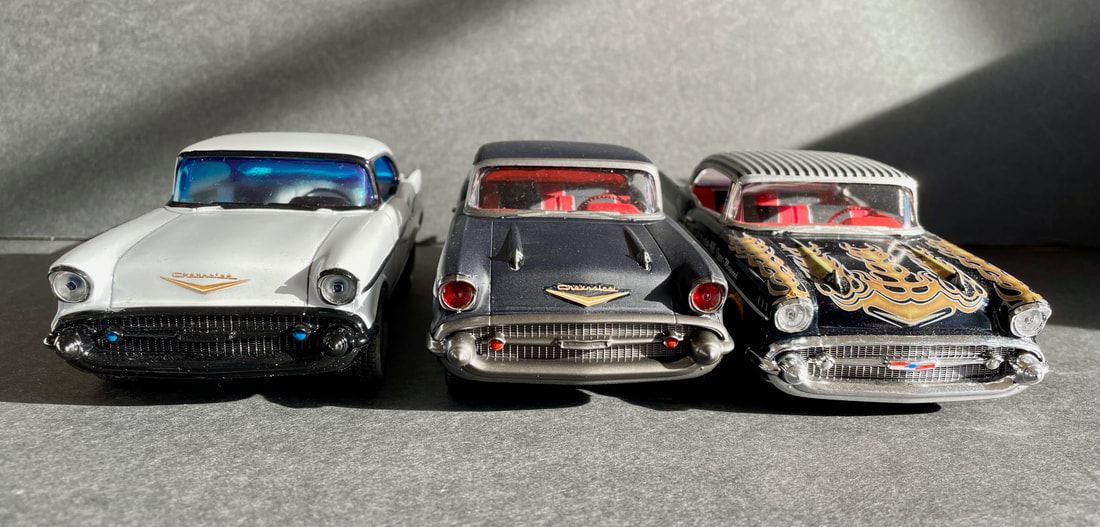
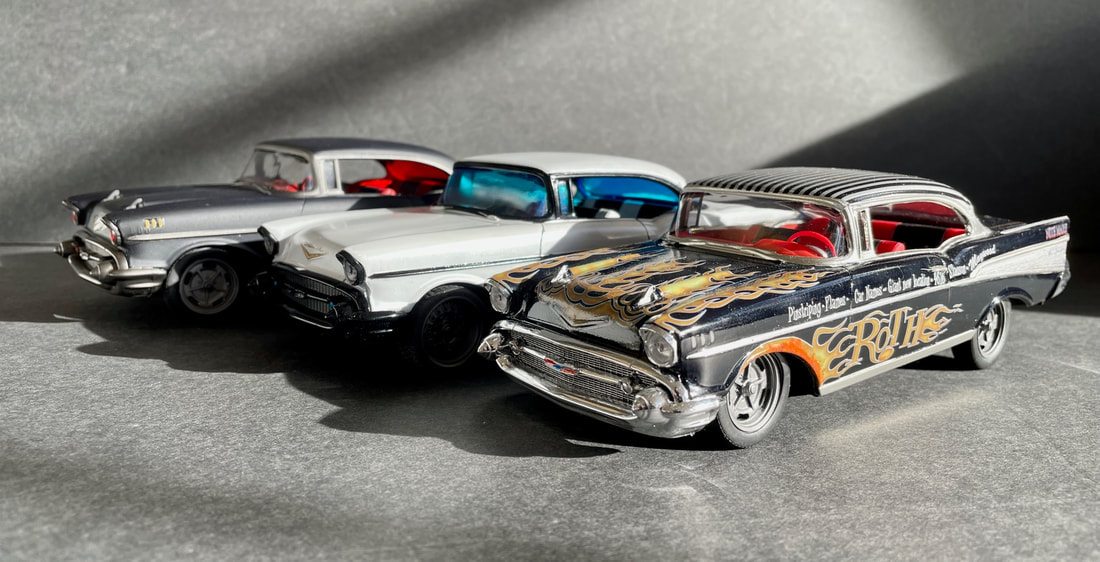
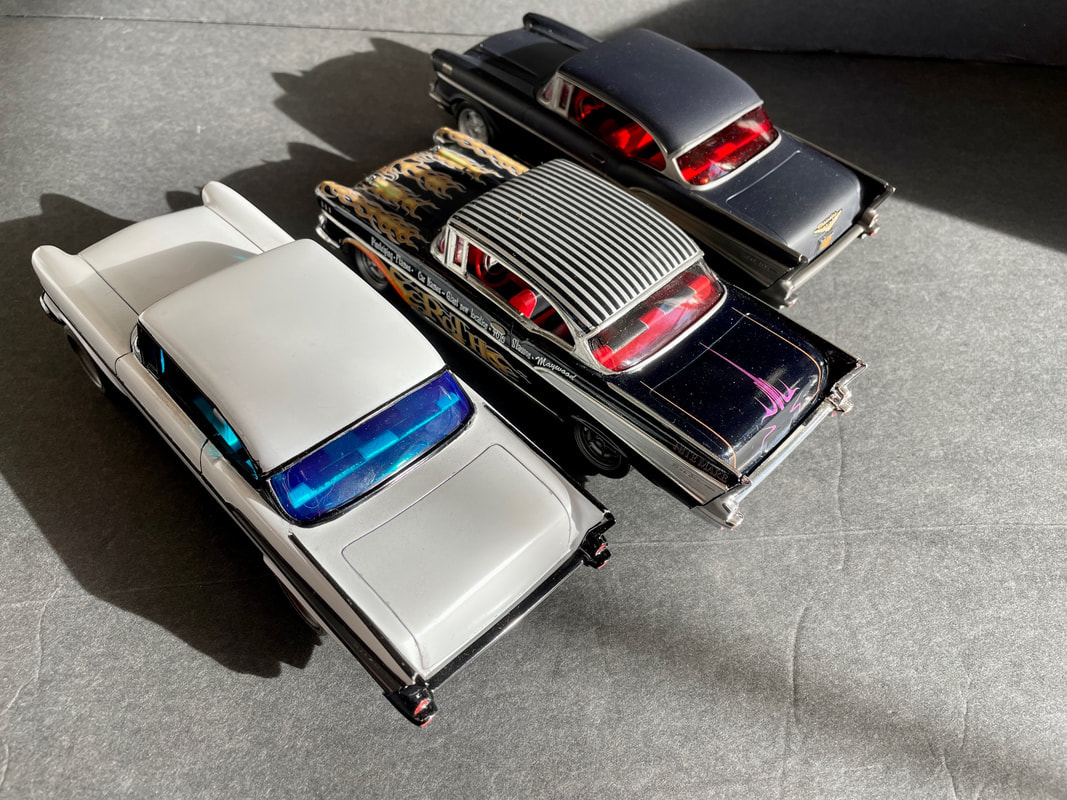

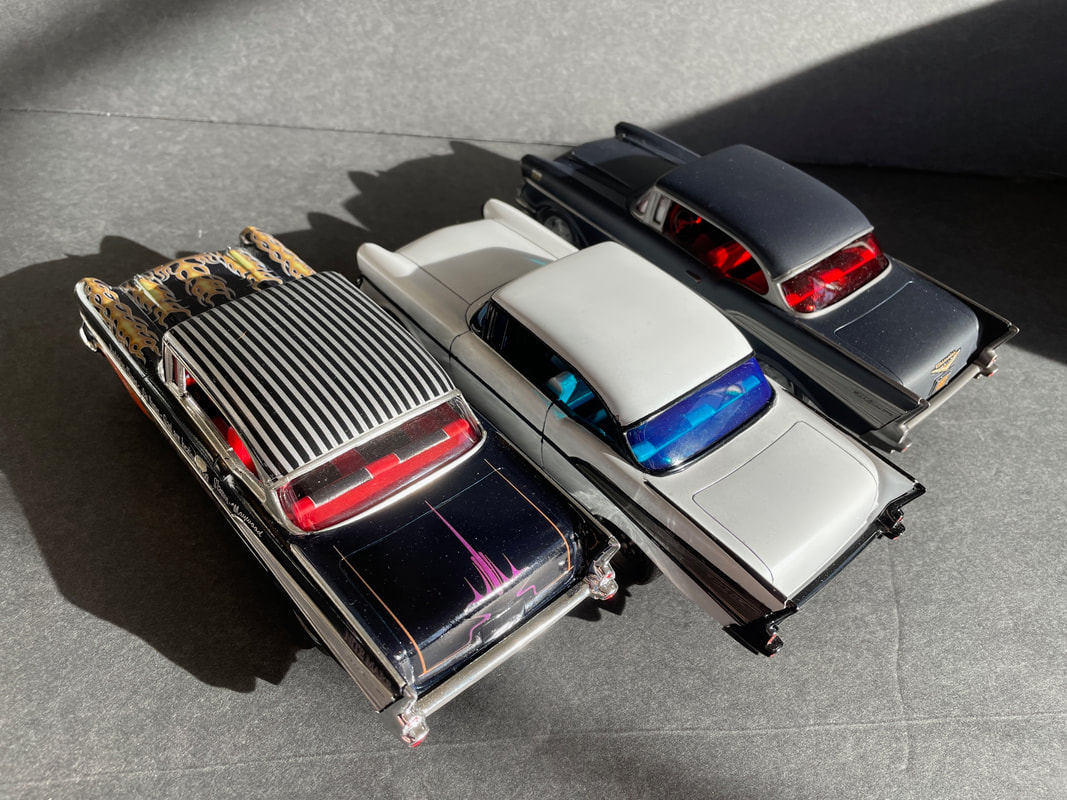
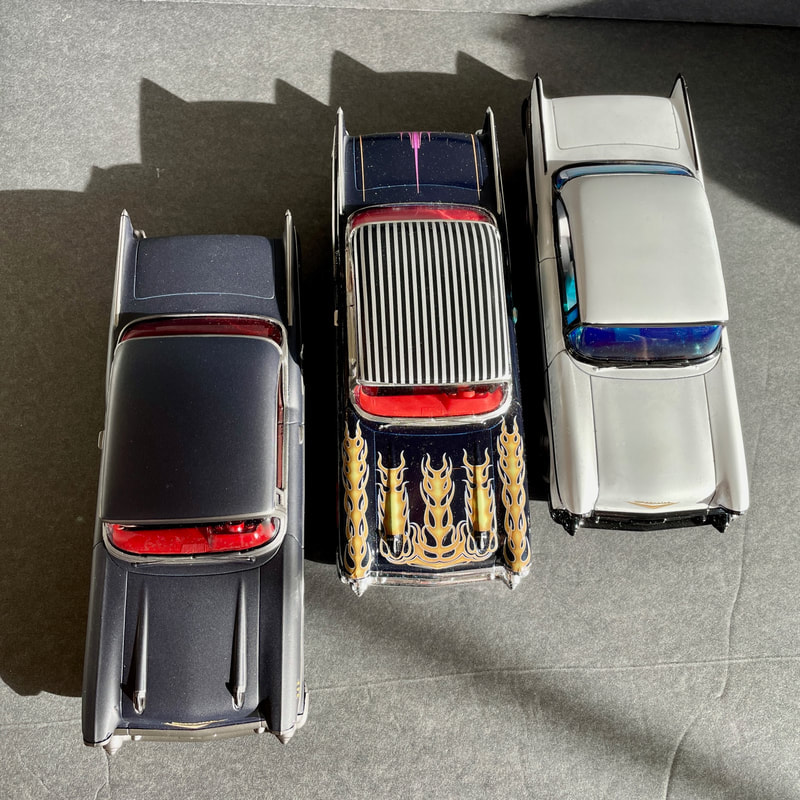
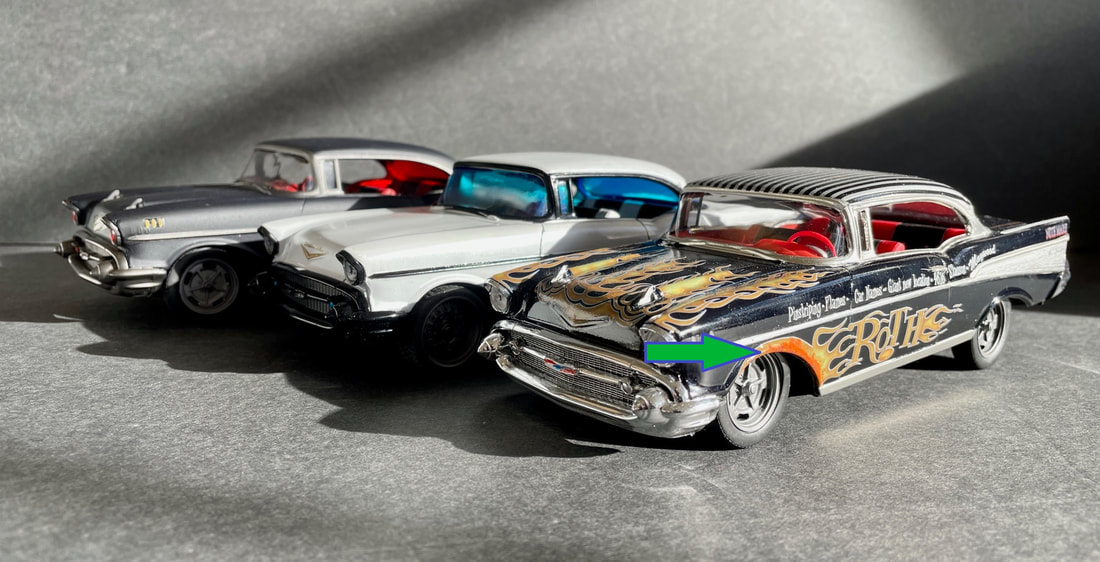
Our local model club (Misfit Modelers) had a club build off using the Revell SnapTite '57 Chevy. There was only one rule - bring the completed kit to the December 2021 meeting.
I built two copies of the kit for the build off. The white car was finished with Tamiya pearl white and I used some 3D printed wheels I found on eBay. The (very) dark blue car is Tamiya dark blue, over flat black and followed with a shot of Testors Dull Cote. The Roth tribute car was built previously from the same kit (I didn't enter it in the build off), using decals from the ancient Revell 1957 Chevrolet that was reissued in 2014. The decals fit "almost" perfectly, with some minor touchups needed near the front wheel well.
I built two copies of the kit for the build off. The white car was finished with Tamiya pearl white and I used some 3D printed wheels I found on eBay. The (very) dark blue car is Tamiya dark blue, over flat black and followed with a shot of Testors Dull Cote. The Roth tribute car was built previously from the same kit (I didn't enter it in the build off), using decals from the ancient Revell 1957 Chevrolet that was reissued in 2014. The decals fit "almost" perfectly, with some minor touchups needed near the front wheel well.
Salvinos JR 1986/87 Pontiac 2+2
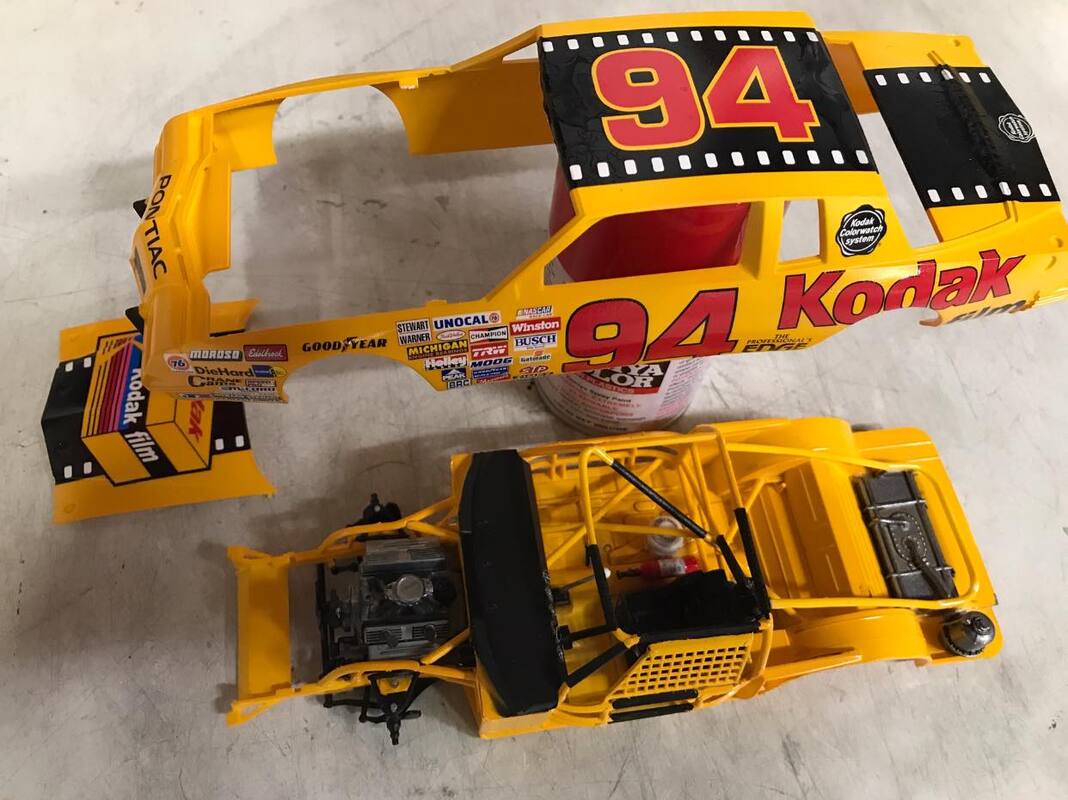
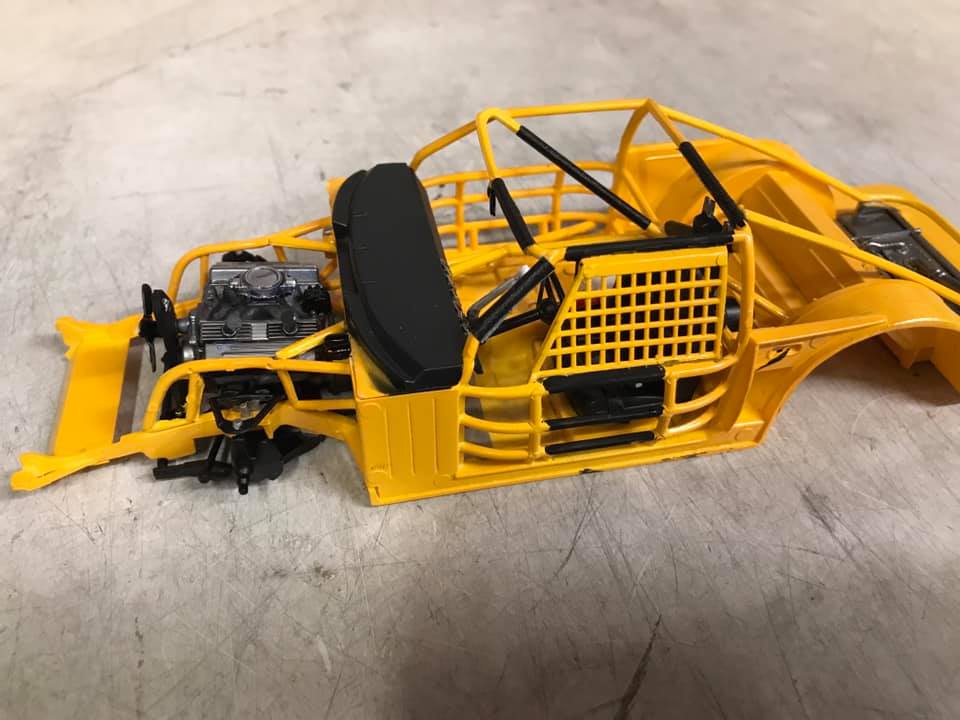
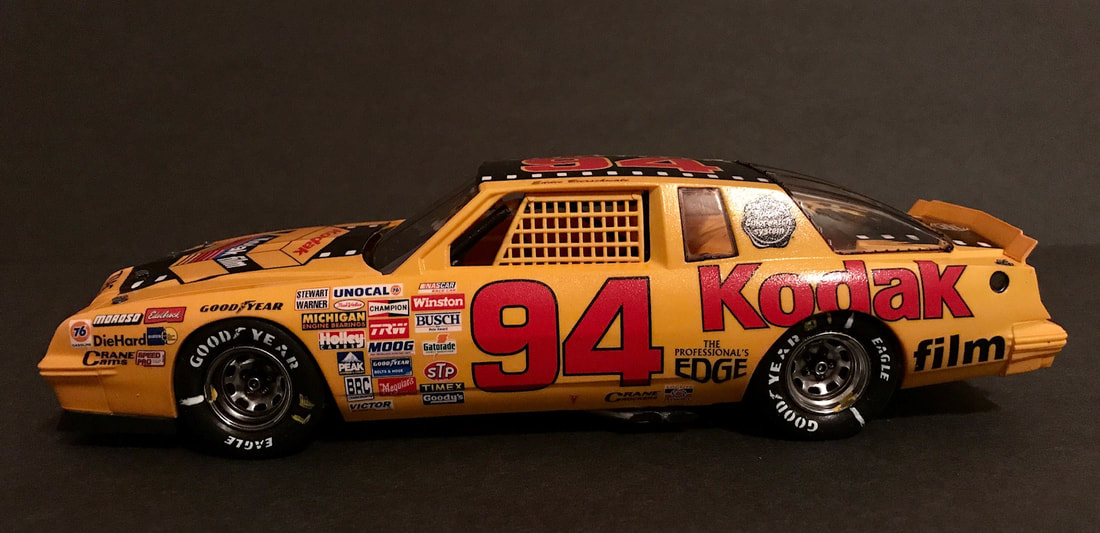

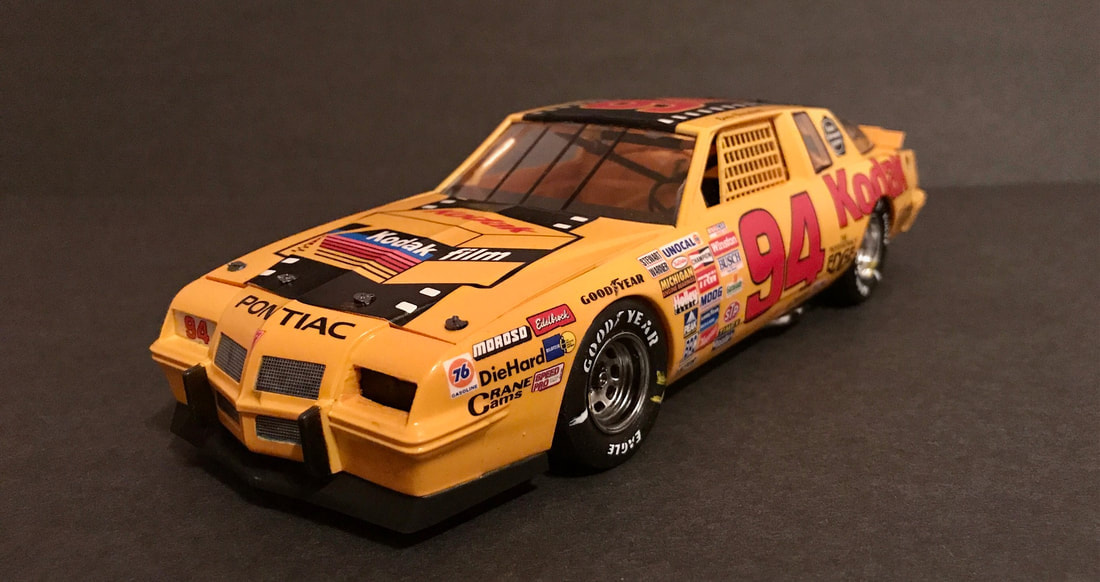
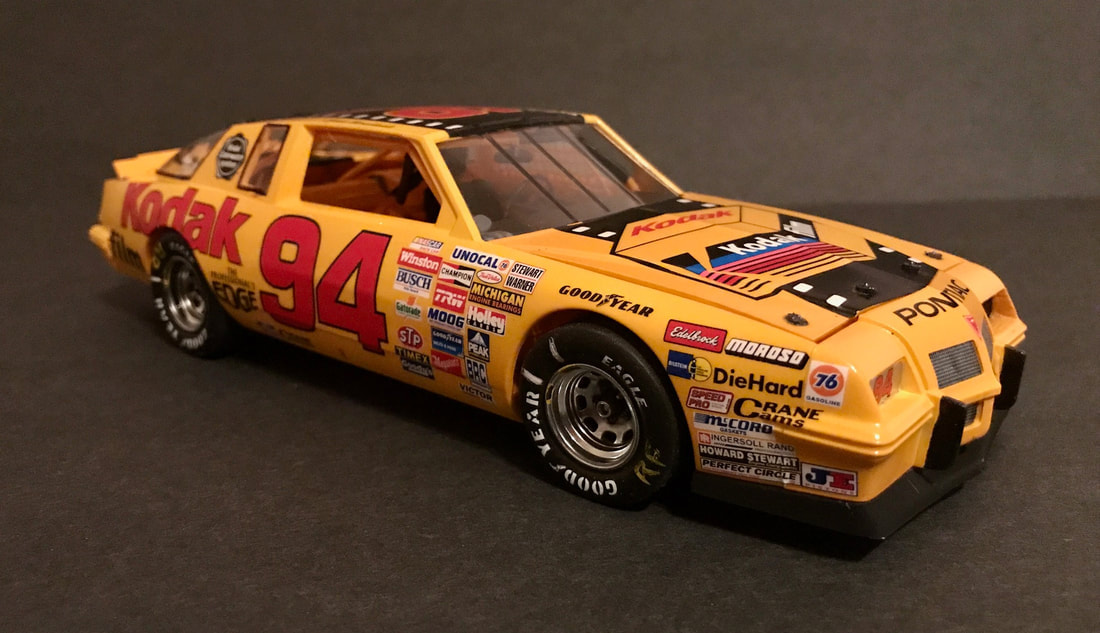
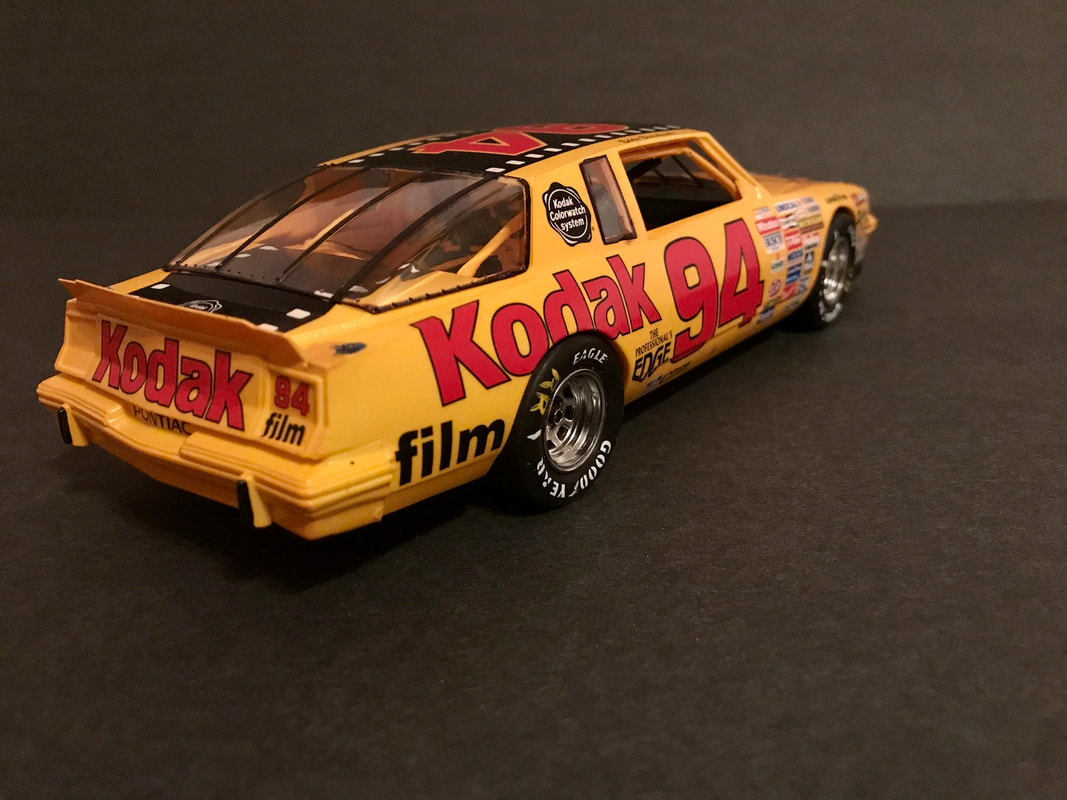
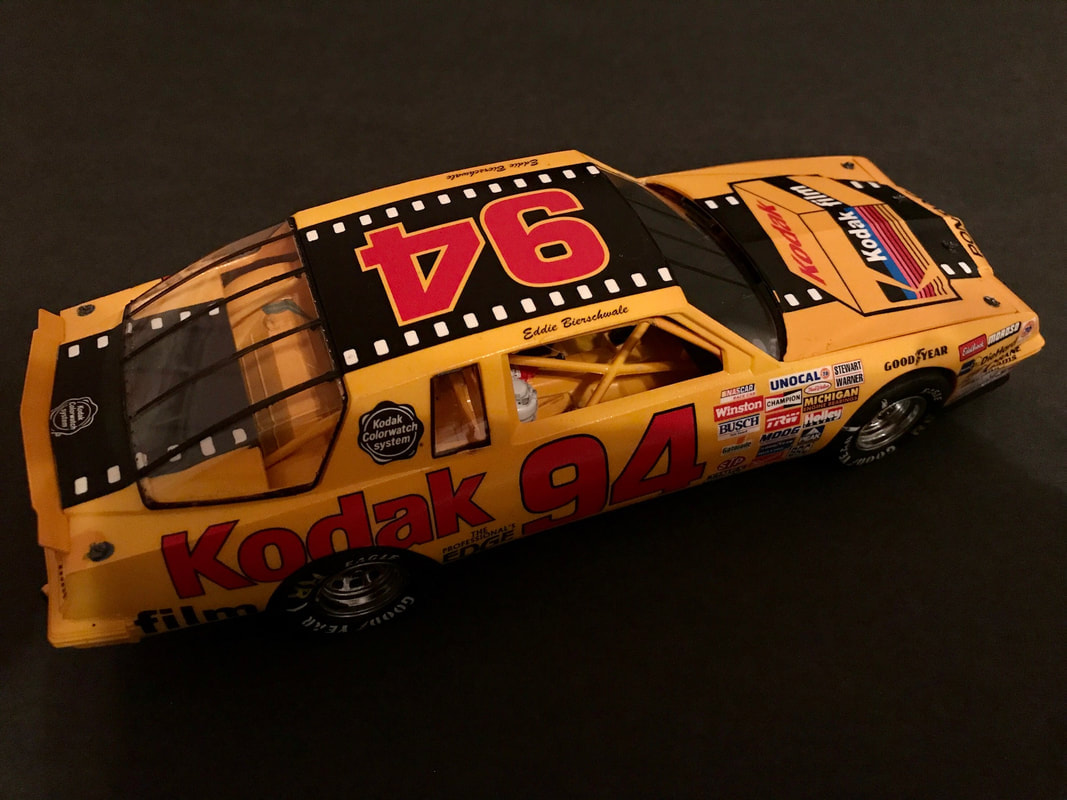
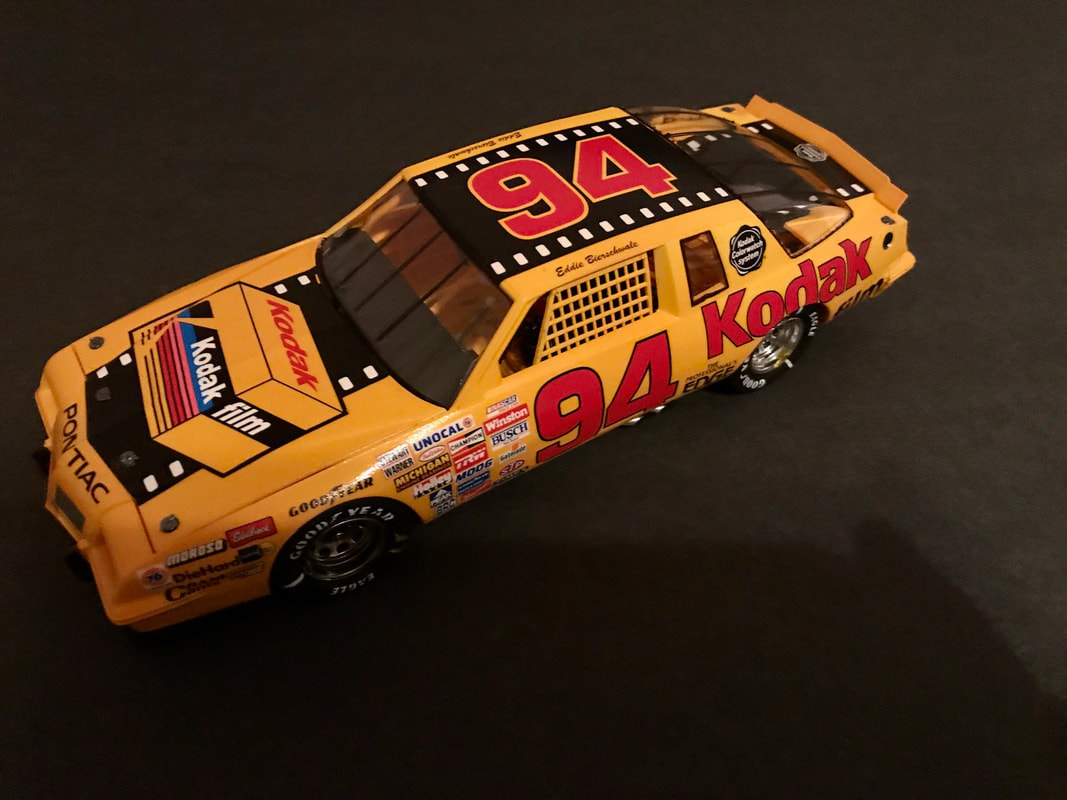
Here is my completed the Salvino's JR 1986-87 Pontiac Grand Prix 2+2. I picked up the kit from Mike's Decals, and chose the option of adding Powerslide decals for Eddie Bierschwale's #94 Kodak Films car.
Finished with Tamiya Camel Yellow inside and out. I added roll bar padding using black masking tape and made a seat harness using the same. Decals are Power Slide. I’m not super happy with how the build turned out, but any faults with the build are more my mistakes. I did like the idea of a Kodak sponsored Pontiac - two brands that are largely gone ...
Finished with Tamiya Camel Yellow inside and out. I added roll bar padding using black masking tape and made a seat harness using the same. Decals are Power Slide. I’m not super happy with how the build turned out, but any faults with the build are more my mistakes. I did like the idea of a Kodak sponsored Pontiac - two brands that are largely gone ...
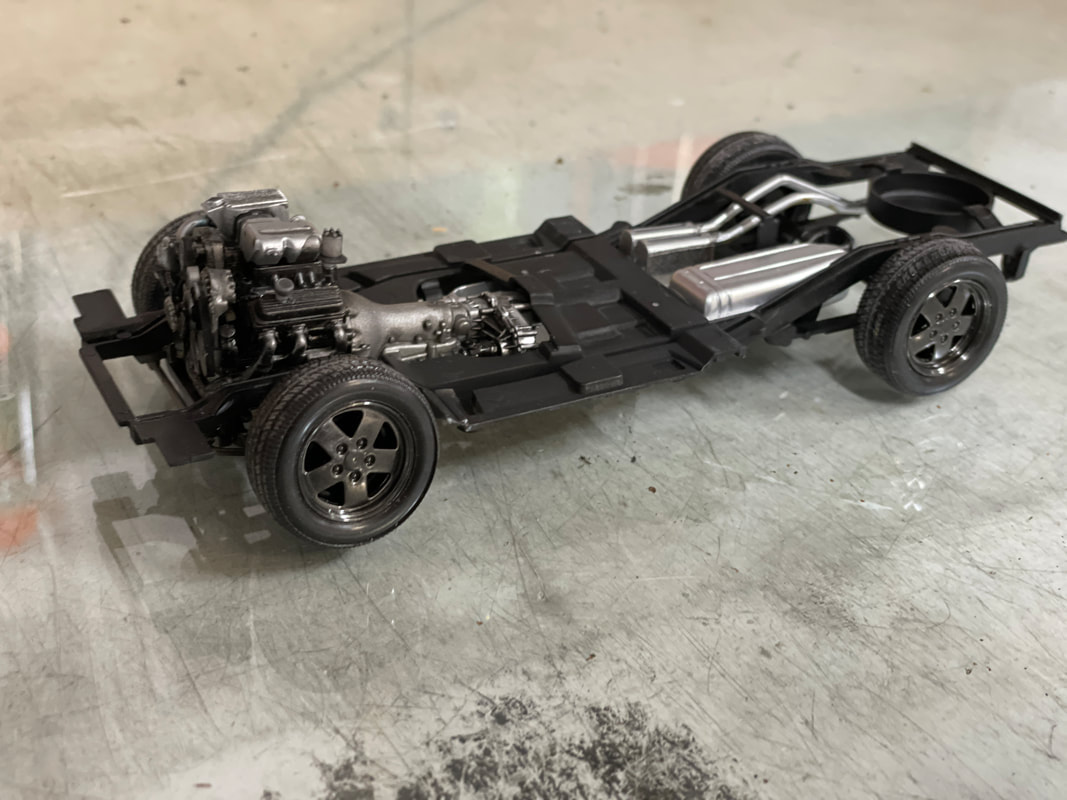
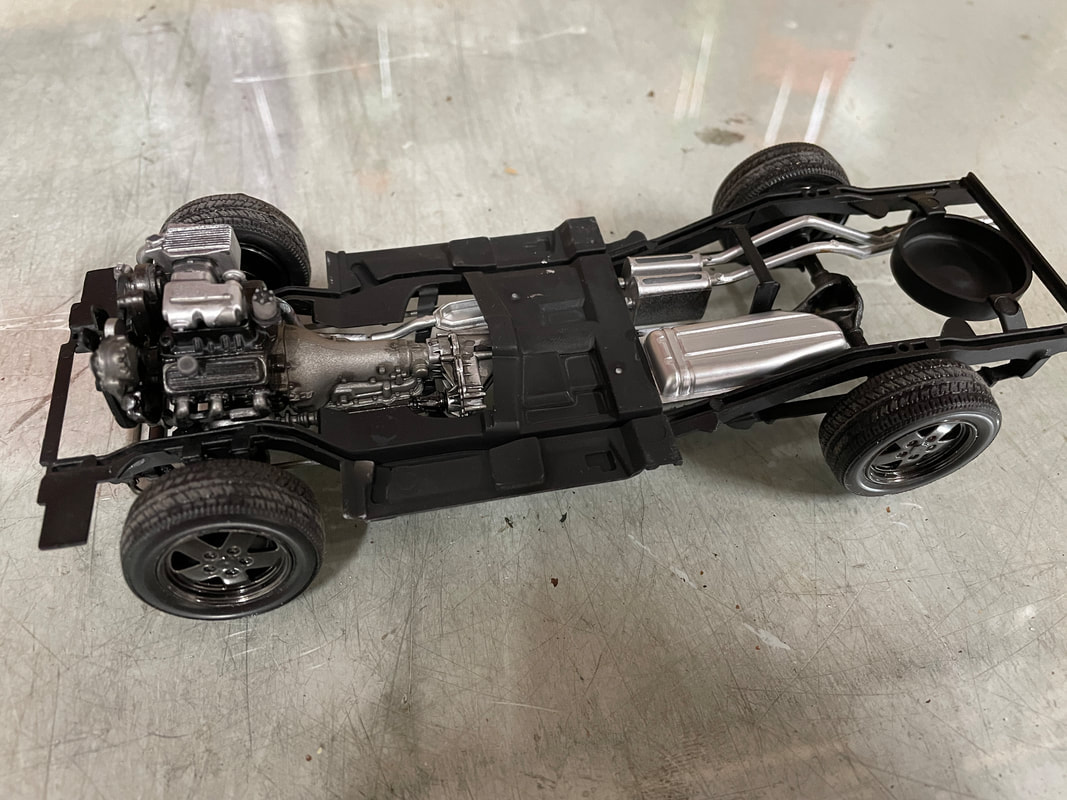
Revell 1/25 GMC Syclone

I've started to Frankenstein parts from the remains of an early issue of the Revell GMC Syclone, parts from the Monogram S-10 "Waverider" that I picked up somewhere, and a few bits of styrene to build something similar to the Marlboro Syclones that were used for what was planned, in 1992, as the "Marlboro Syclone” contest giveaway. To my knowledge, 10 of these were built from existing Syclones pulled from the assembly line and shipped to American Sunroof Corporation for the conversion work. For my build, I have no plans to add the Marlboro logos, but do plan to use the similar markings that were part of the 2010 issue of the Revell kit.
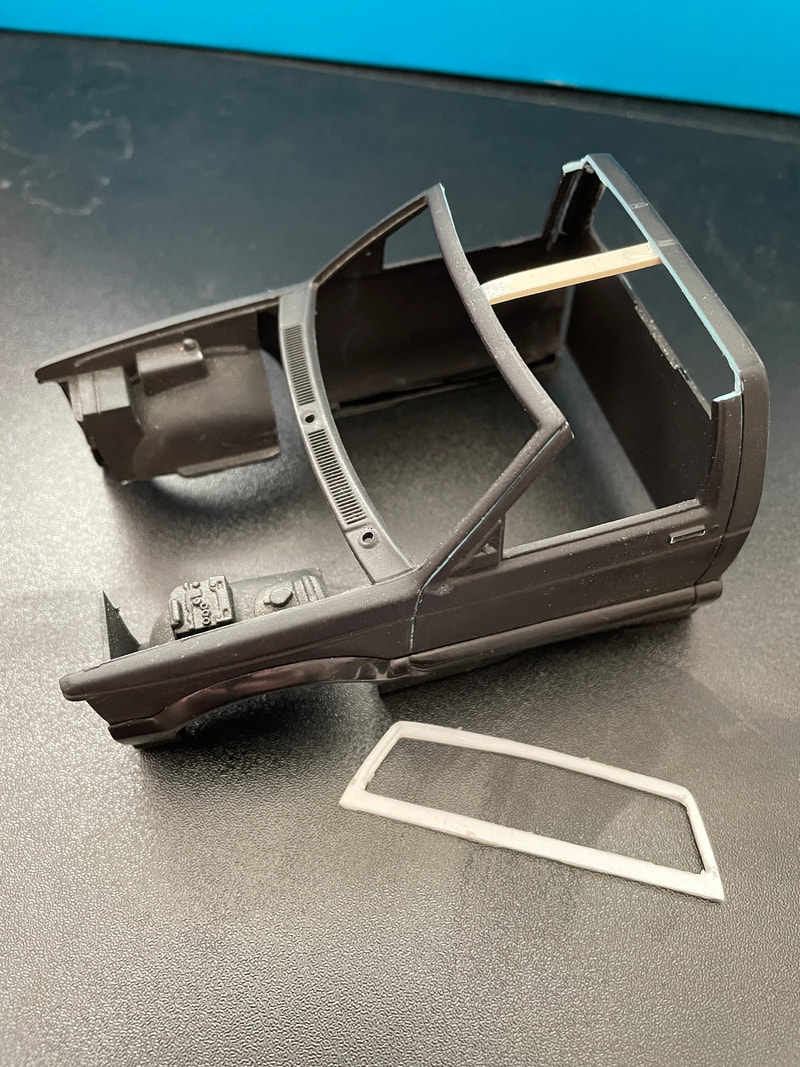
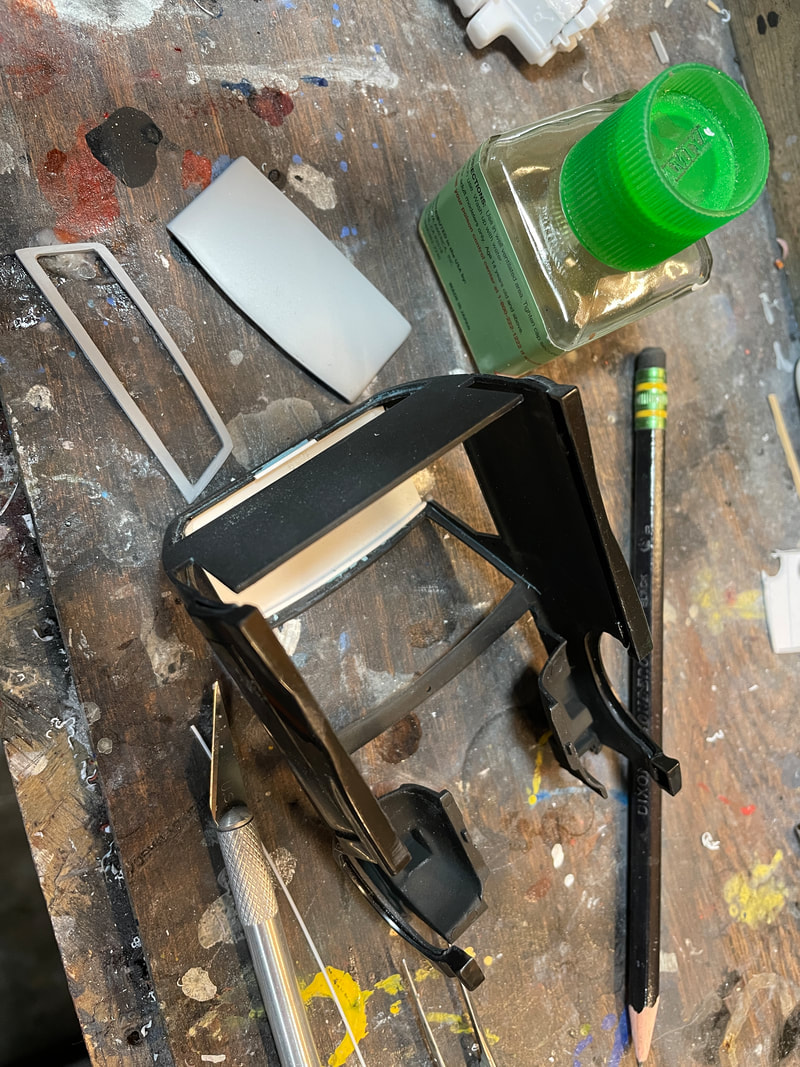
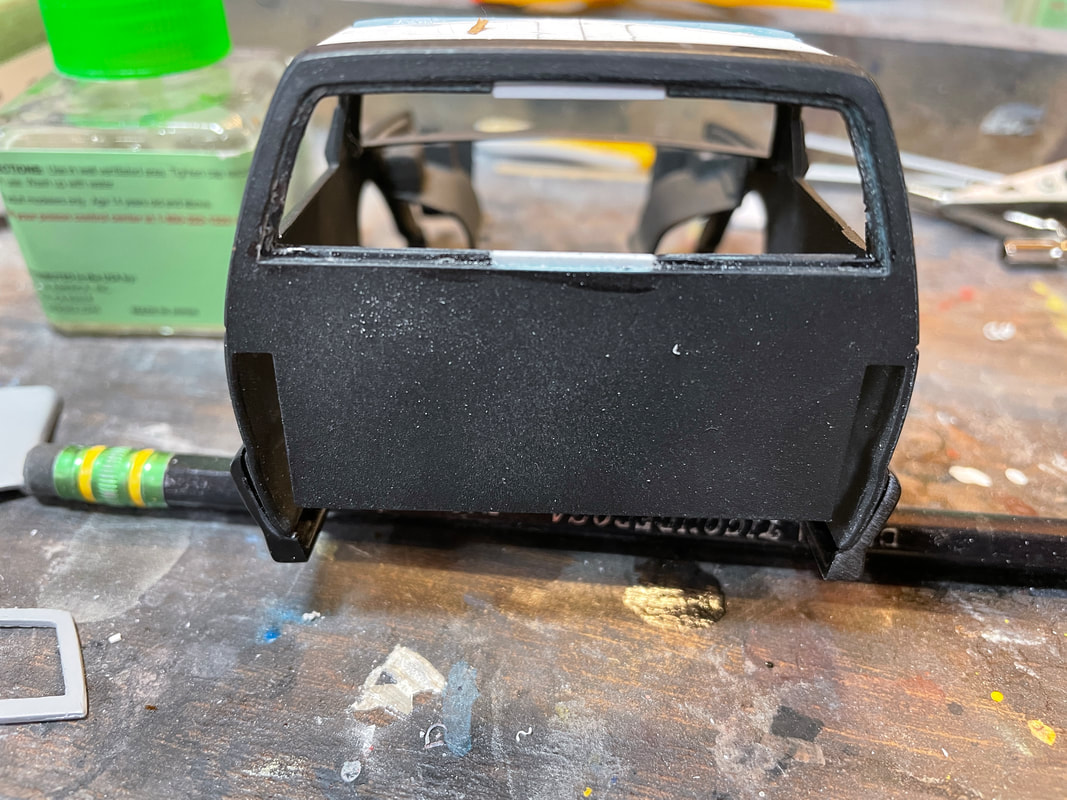
AMT 1/25 1957 Chevrolet Cameo Pickup
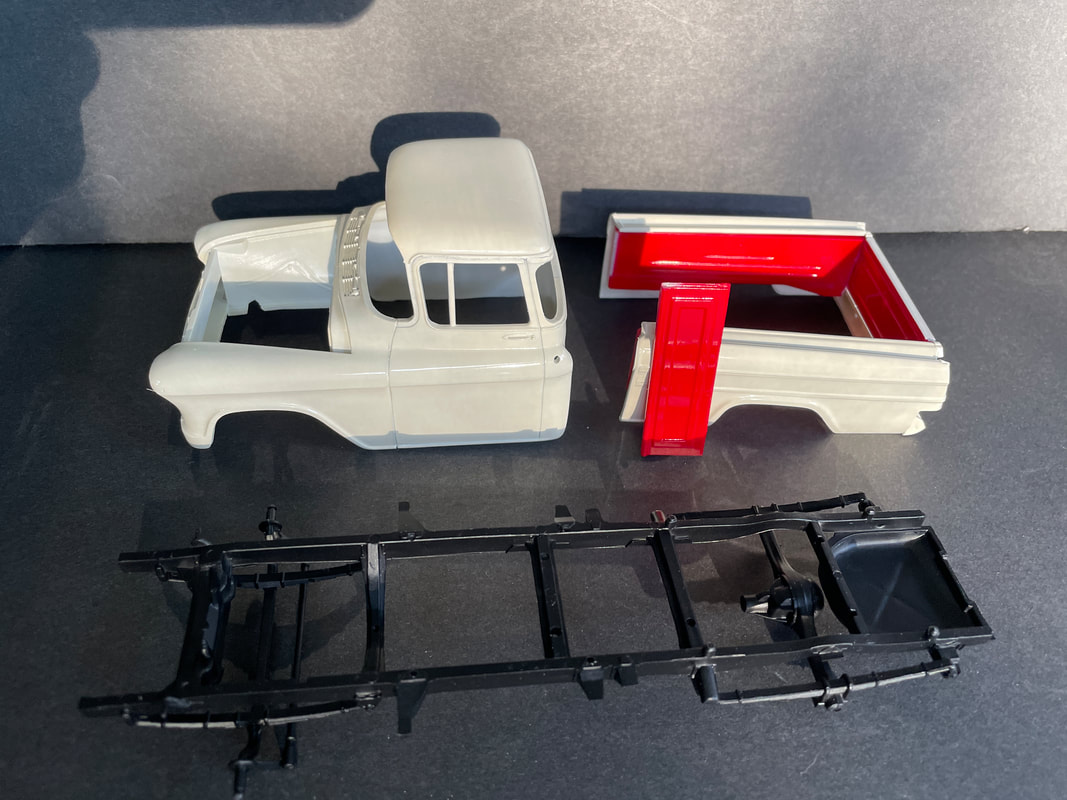
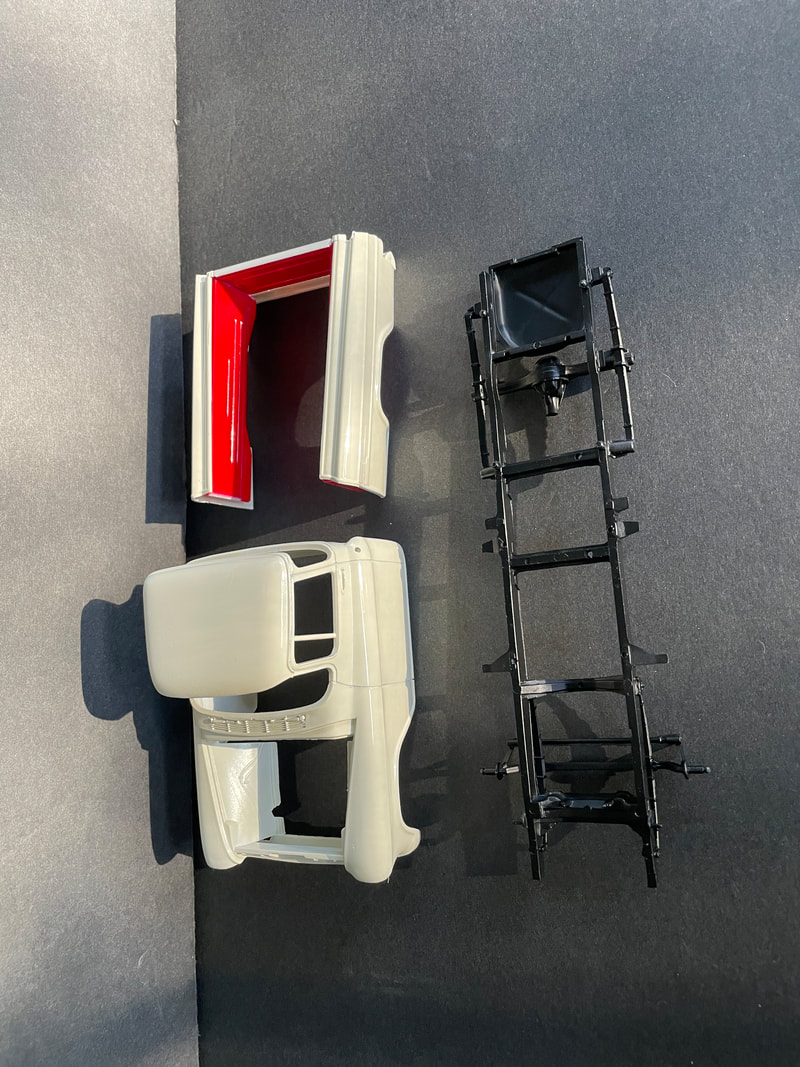
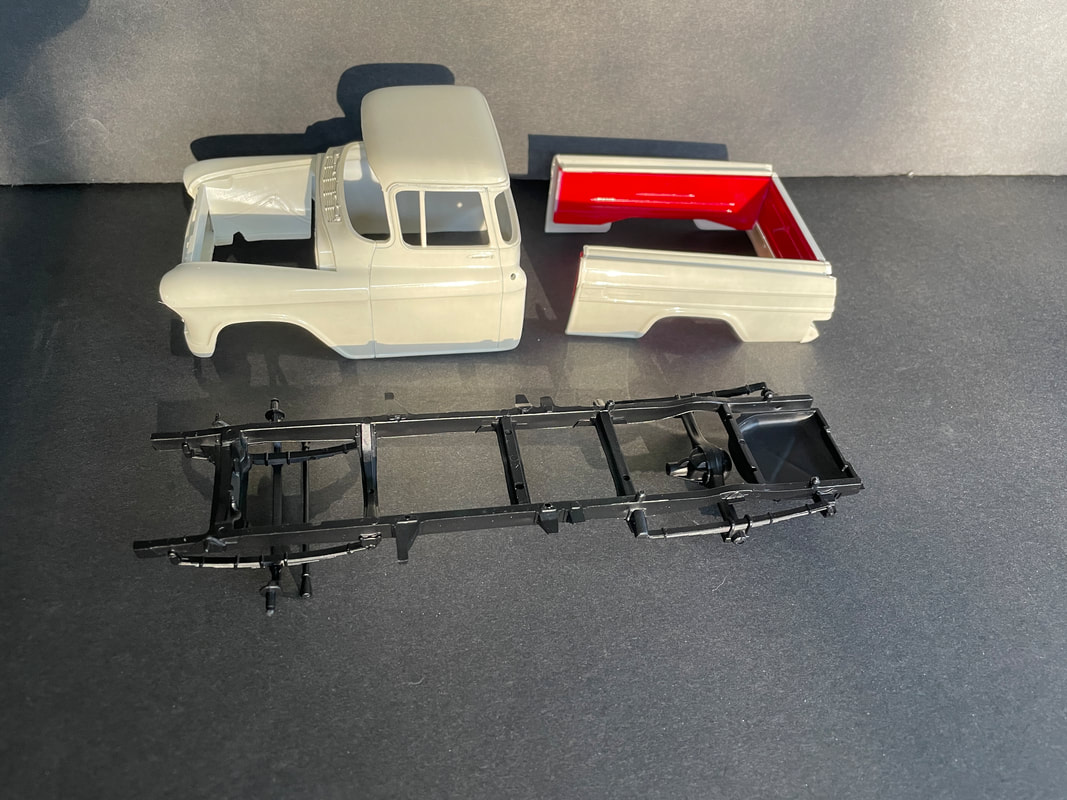
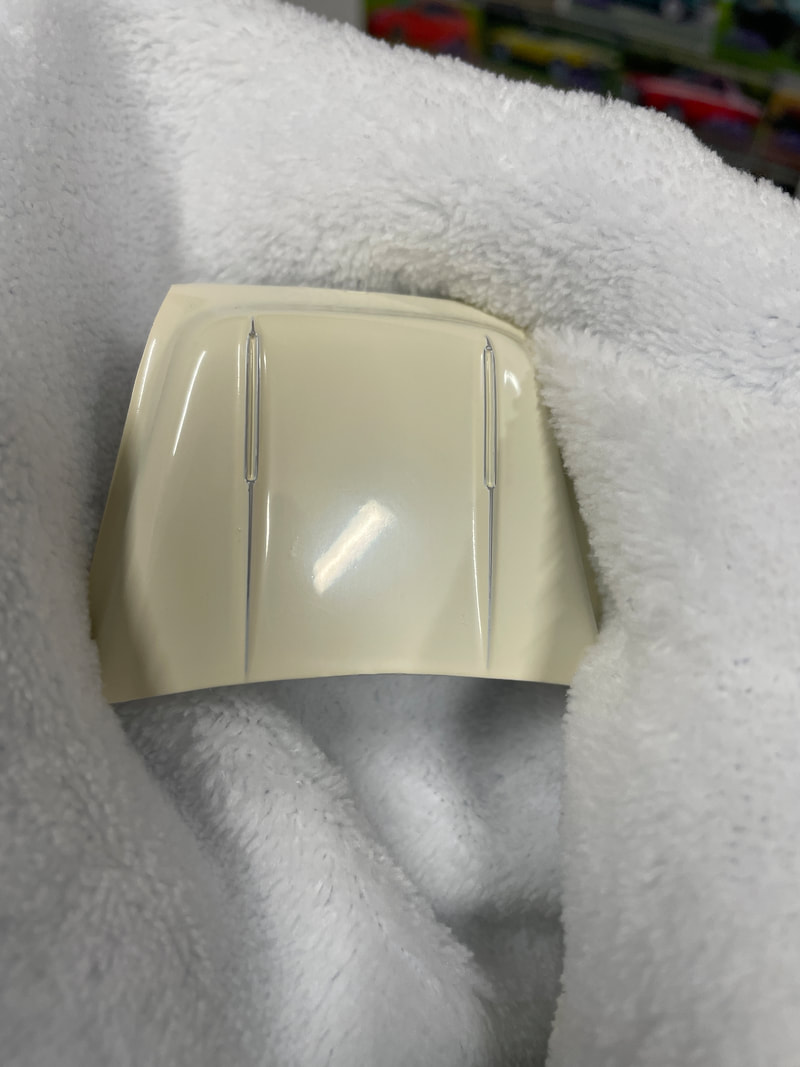
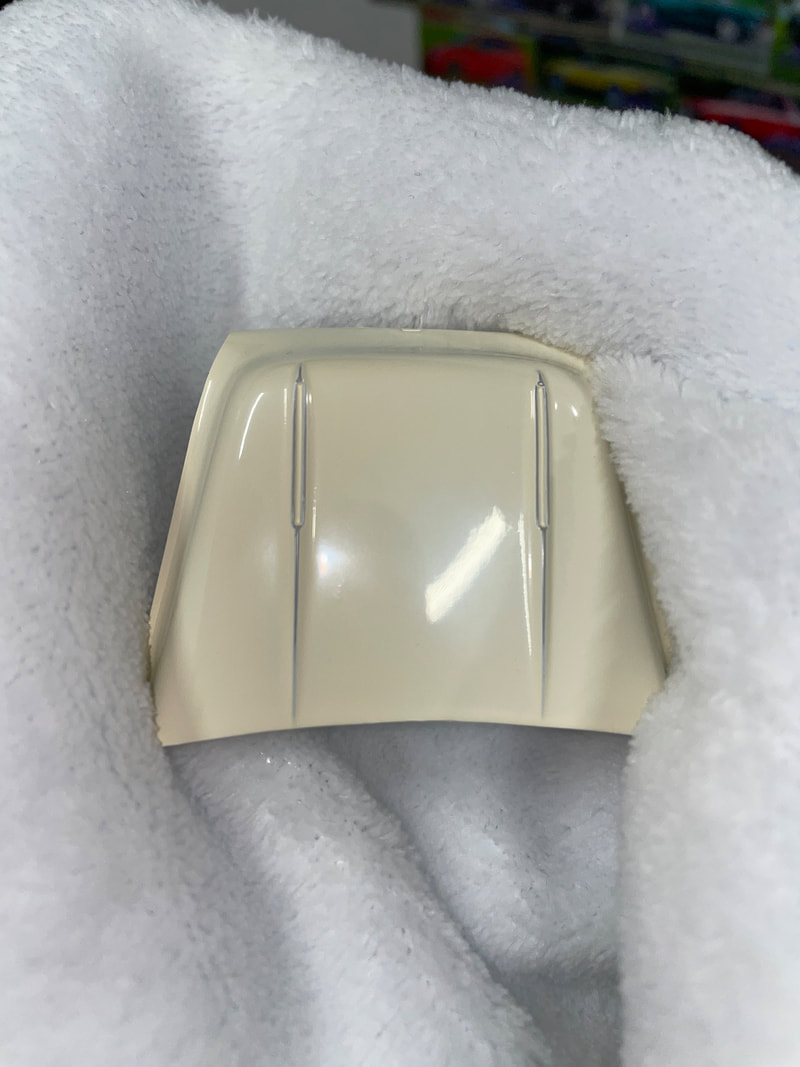
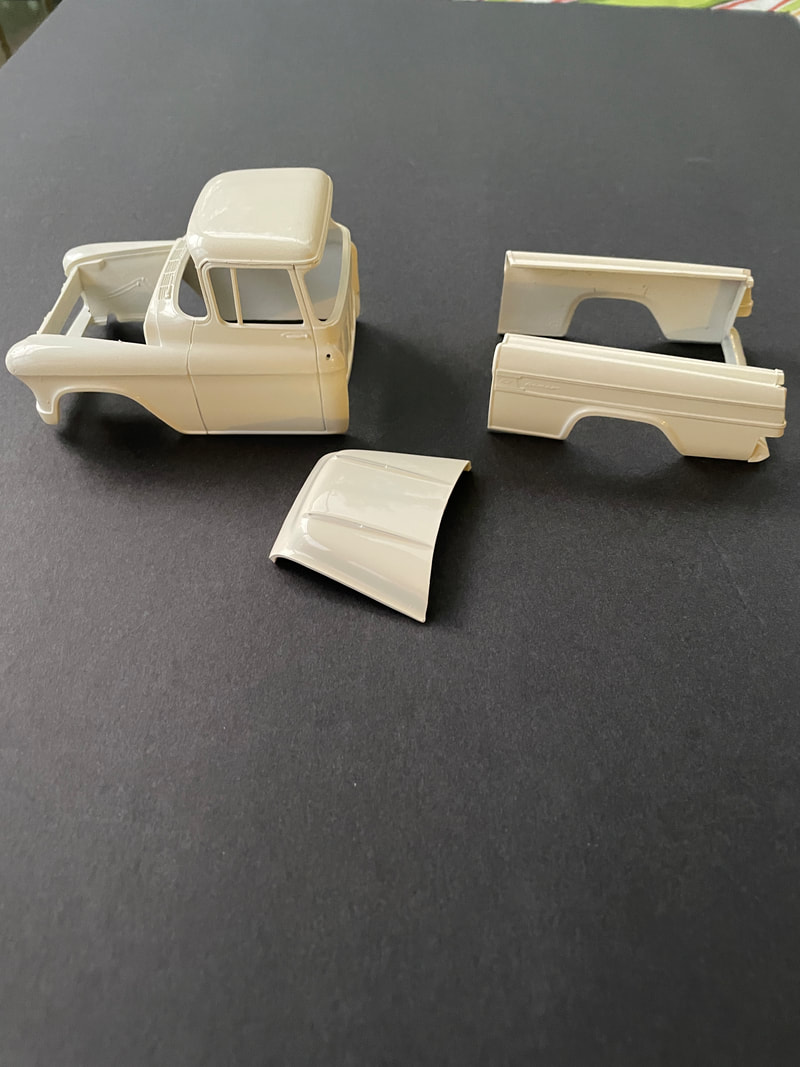
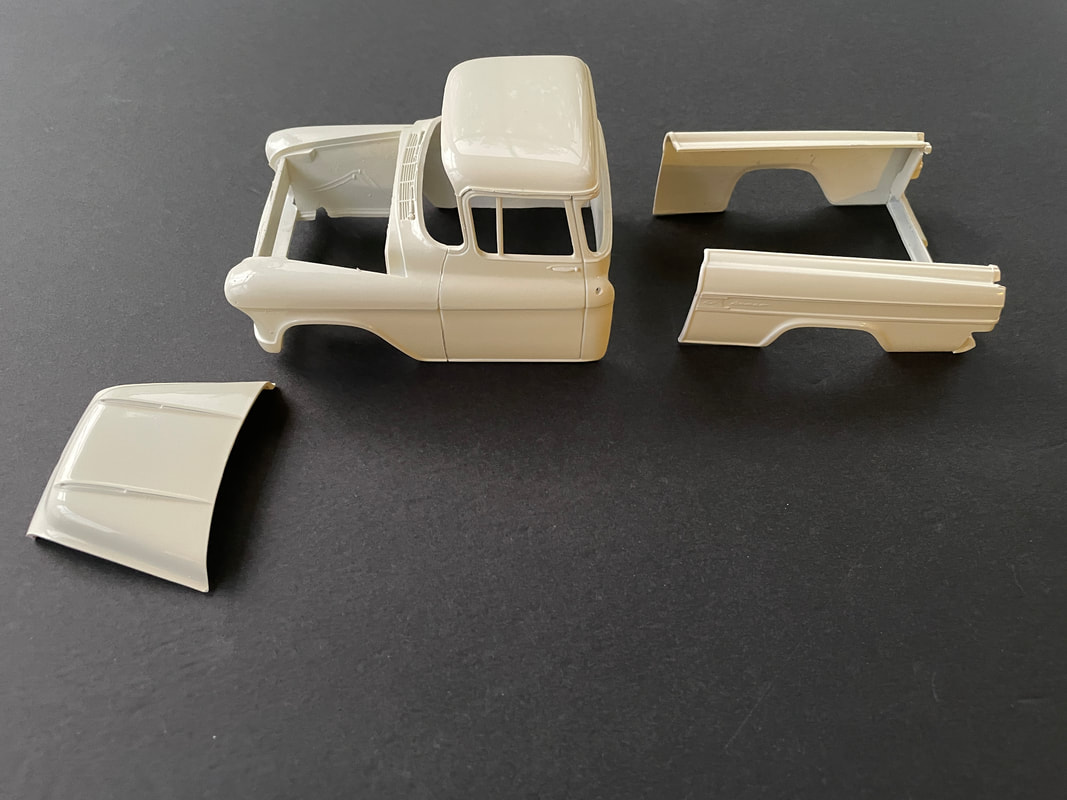

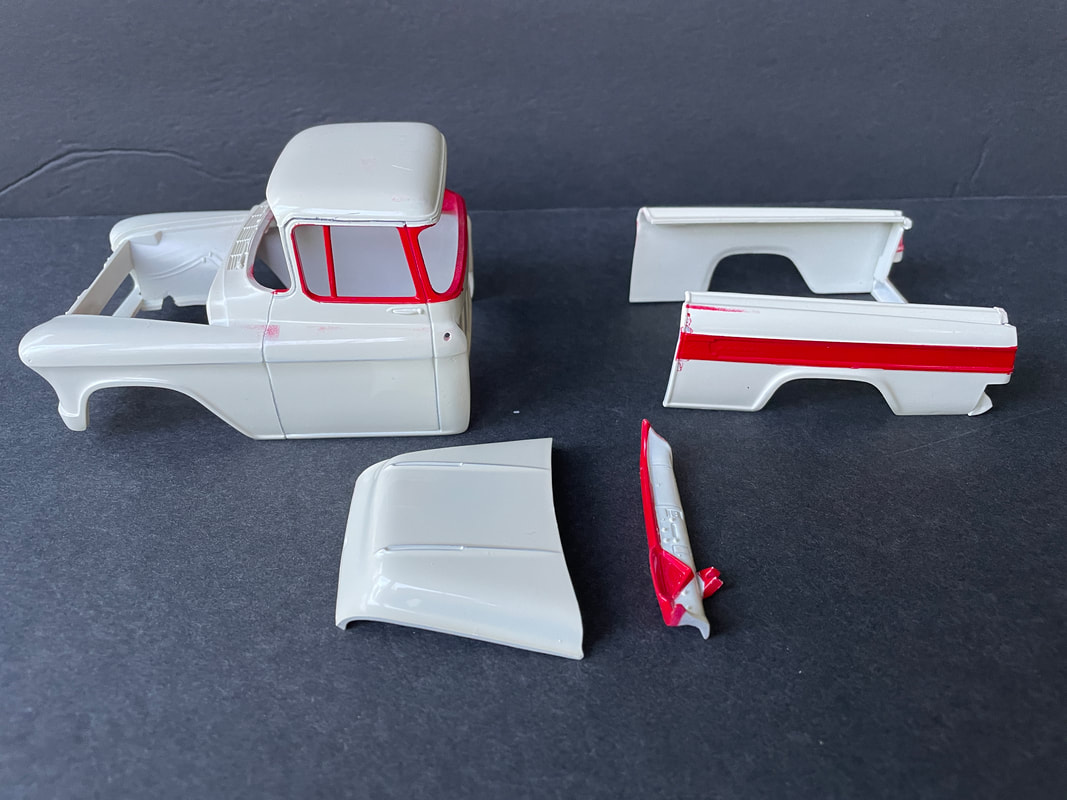
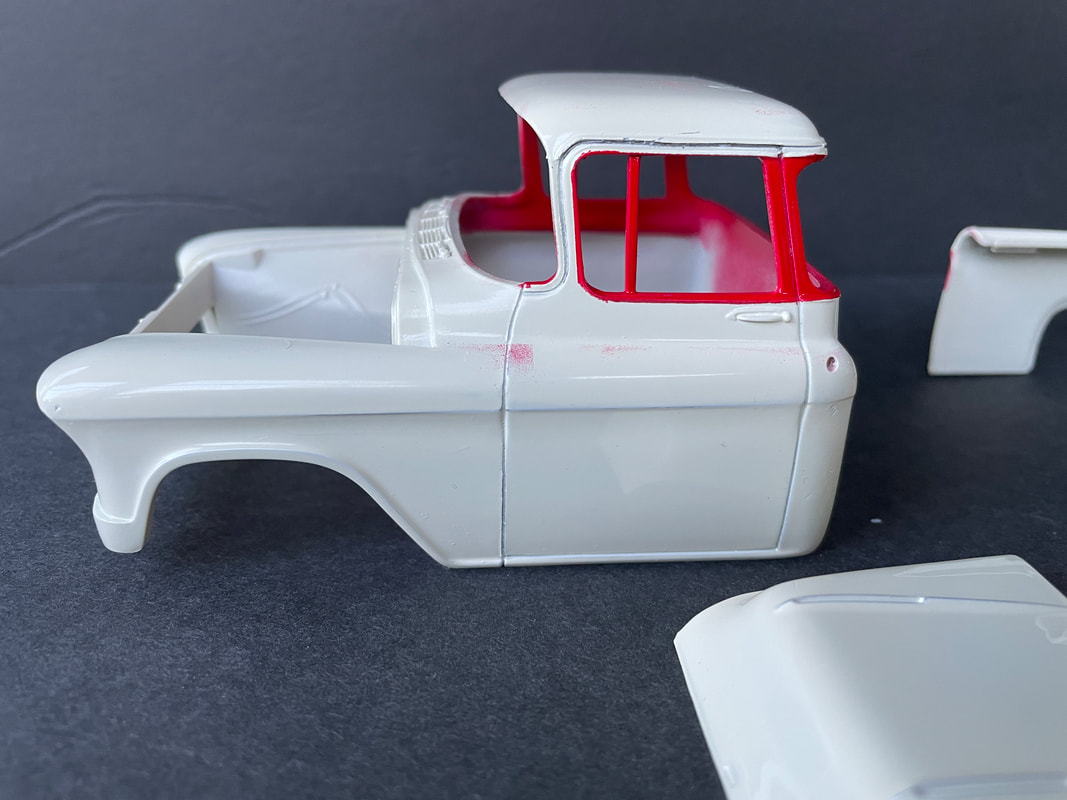
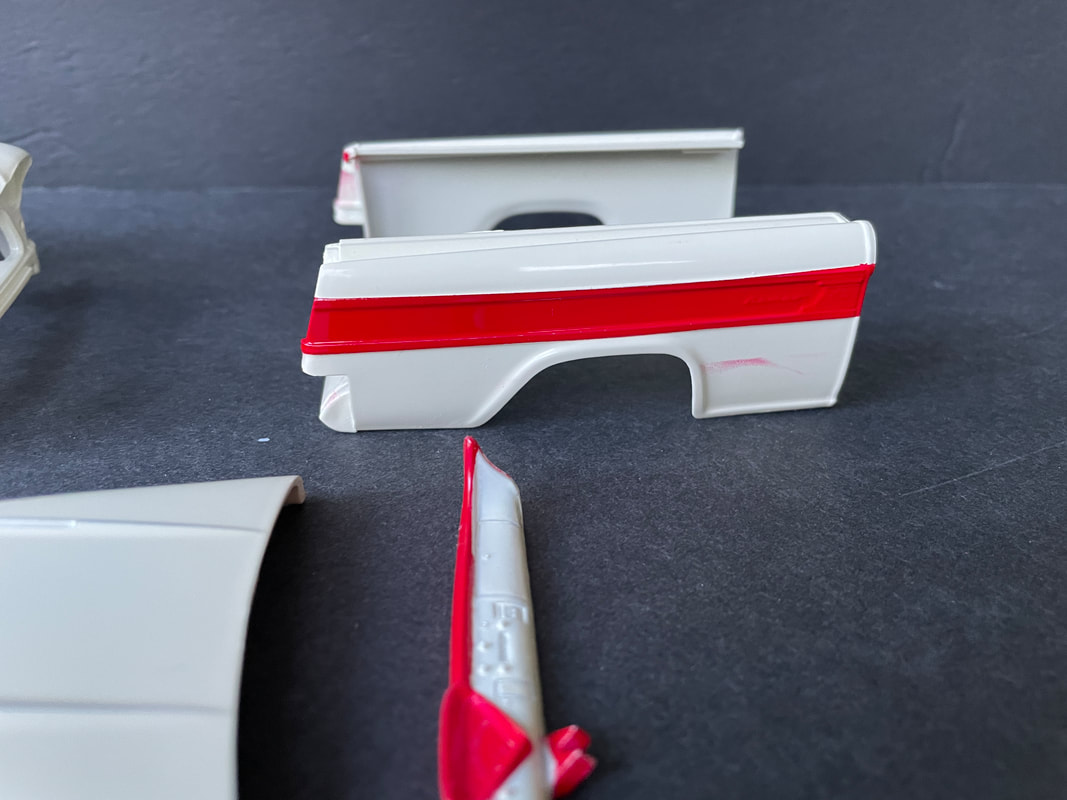
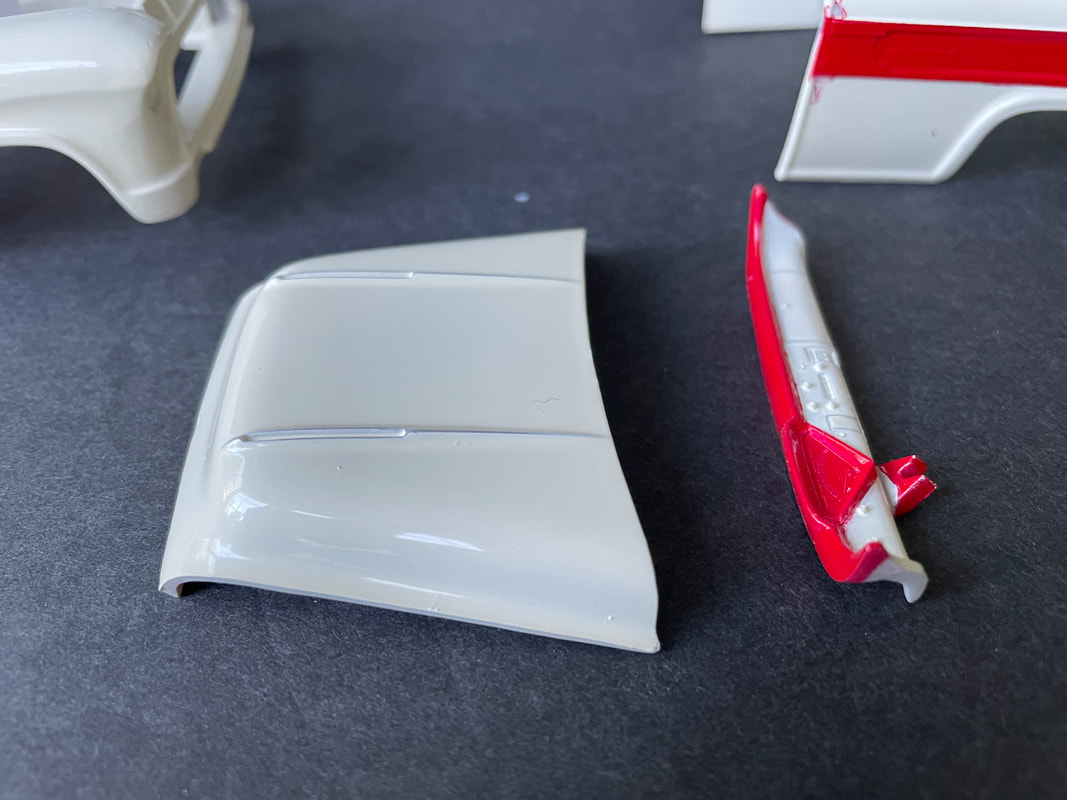
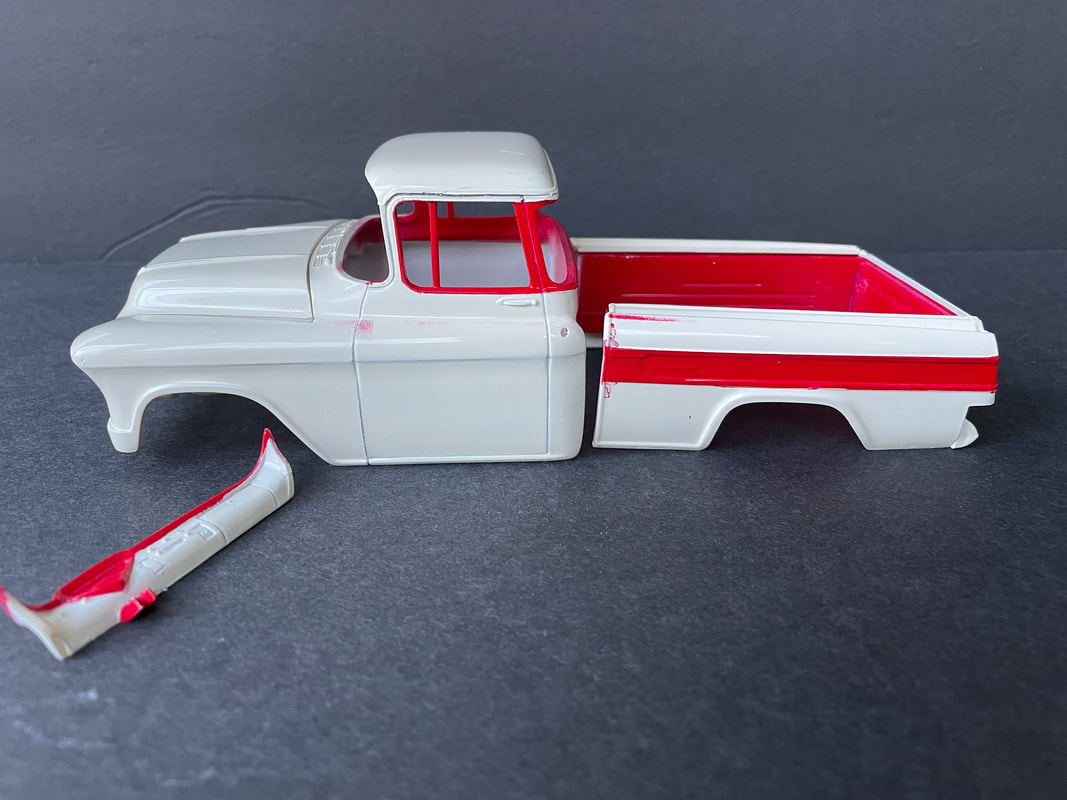
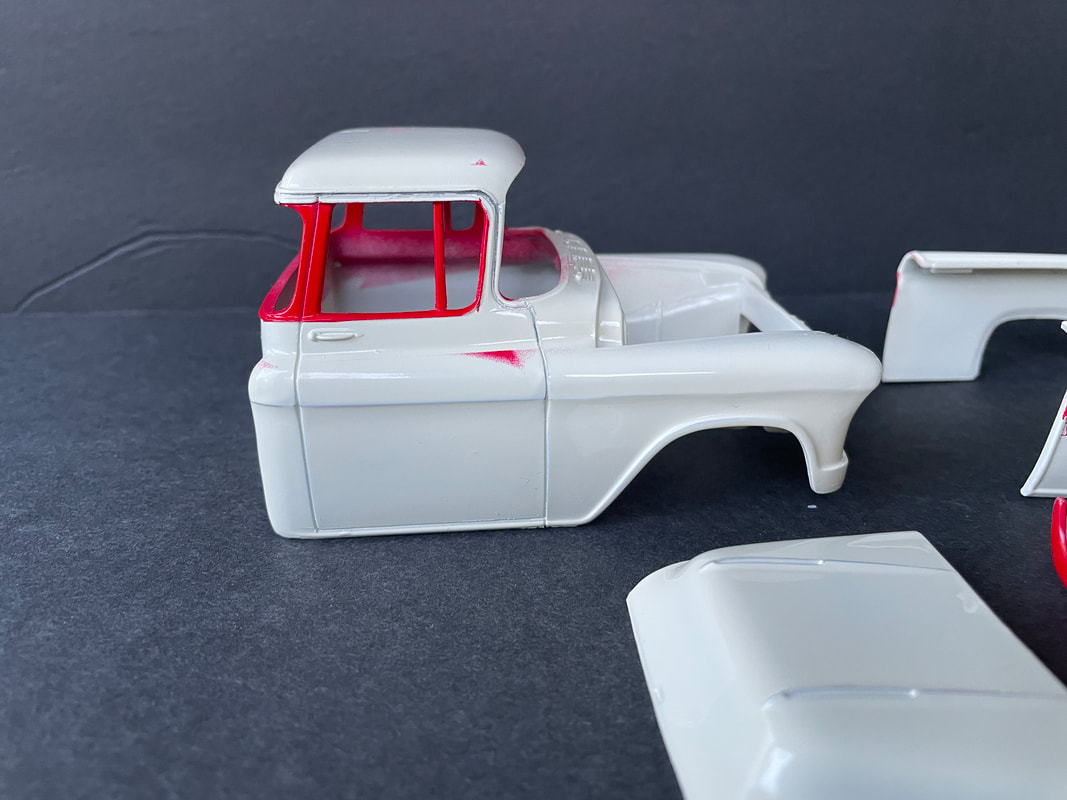
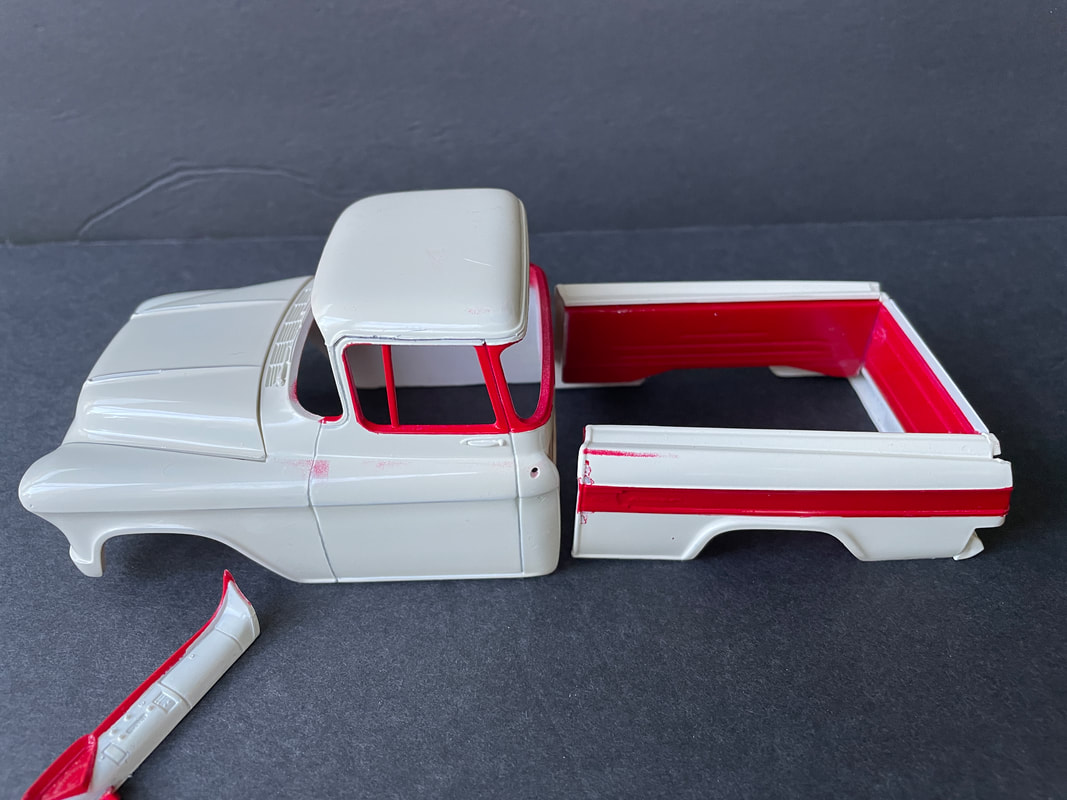
I didn't really mean to start another project before finishing the one (ok, several) on my workbench. But ... trying to ascertain the best approach to Chevrolet's Bombay Ivory led me to start painting the body on this kit. So, that meant I needed to start the frame, and well ...
